Popcorn Garland
This Post May Contain Affiliate Links. Please Read Our Disclosure Policy
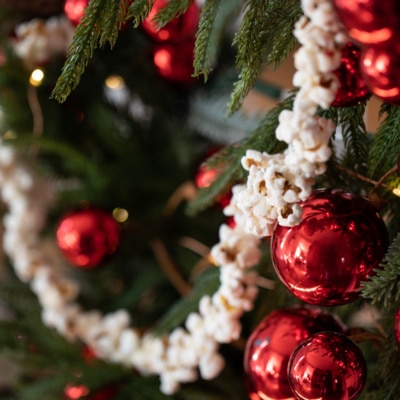
We are stirring up some Christmas nostalgia today. I’m teaching you how to make classic popcorn garland. This easy and inexpensive Christmas craft is a classic and beautiful way to decorate your tree and home for the holidays.
Yes, my friend, we’re making popcorn garland today!
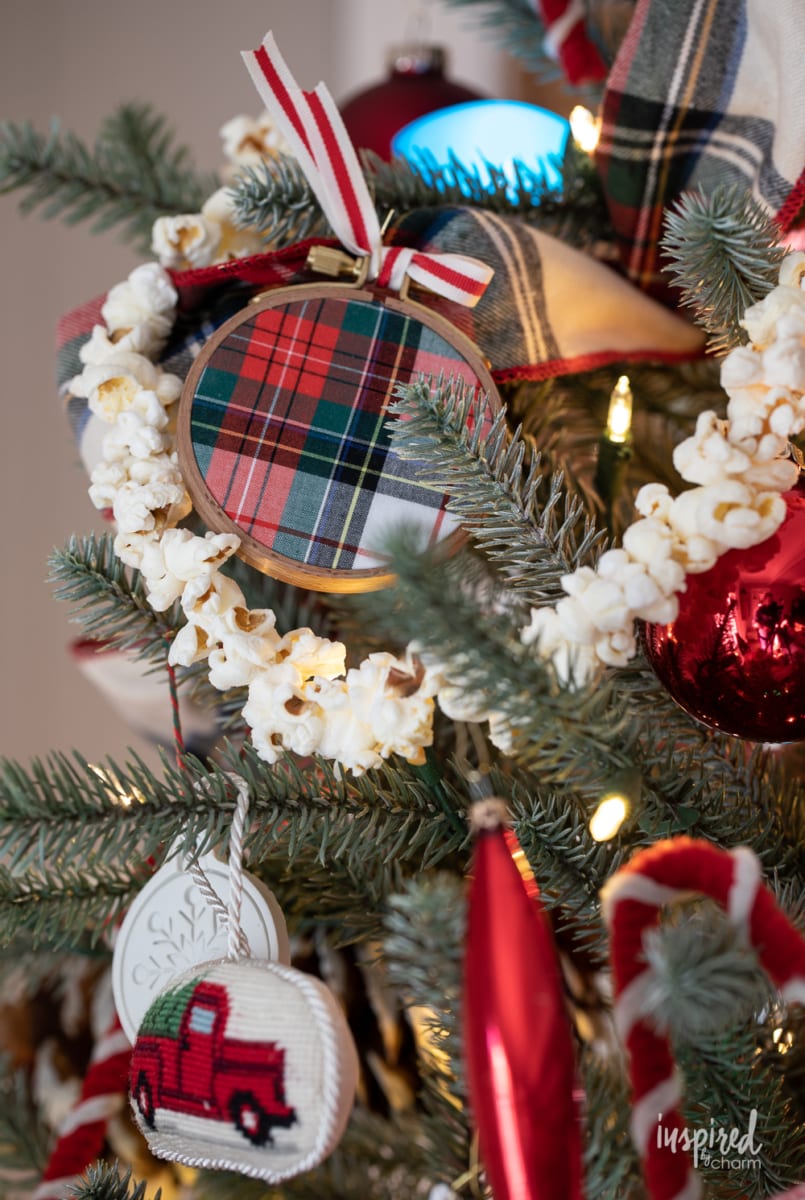
This project happened totally by accident. As part of the Christmas tree design planning for my family room, I wanted to focus on homemade ornaments. In fact, I have already shared a few of these with you such as my embroidery hoop ornaments and my clay Christmas ornaments.
During my brainstorming, I was also thinking about what garland I would use. Without a second thought, my mind went straight to the classic popcorn garland. Knowing that it would fit perfectly with my handmade holiday theme, I started making it immediately!
I made this garland a couple of weeks ago with my mom. Once we turned on a movie (you need to watch both Enola Holmes movies on Netflix if you haven’t – SO GOOD!), the two of us got to work! Within about four hours we had strung over 30 feet of popcorn garland that was ready for hanging.
Speaking of garlands, we also made a paper chain garland out of some leftover wallpaper. The results are STUNNING!
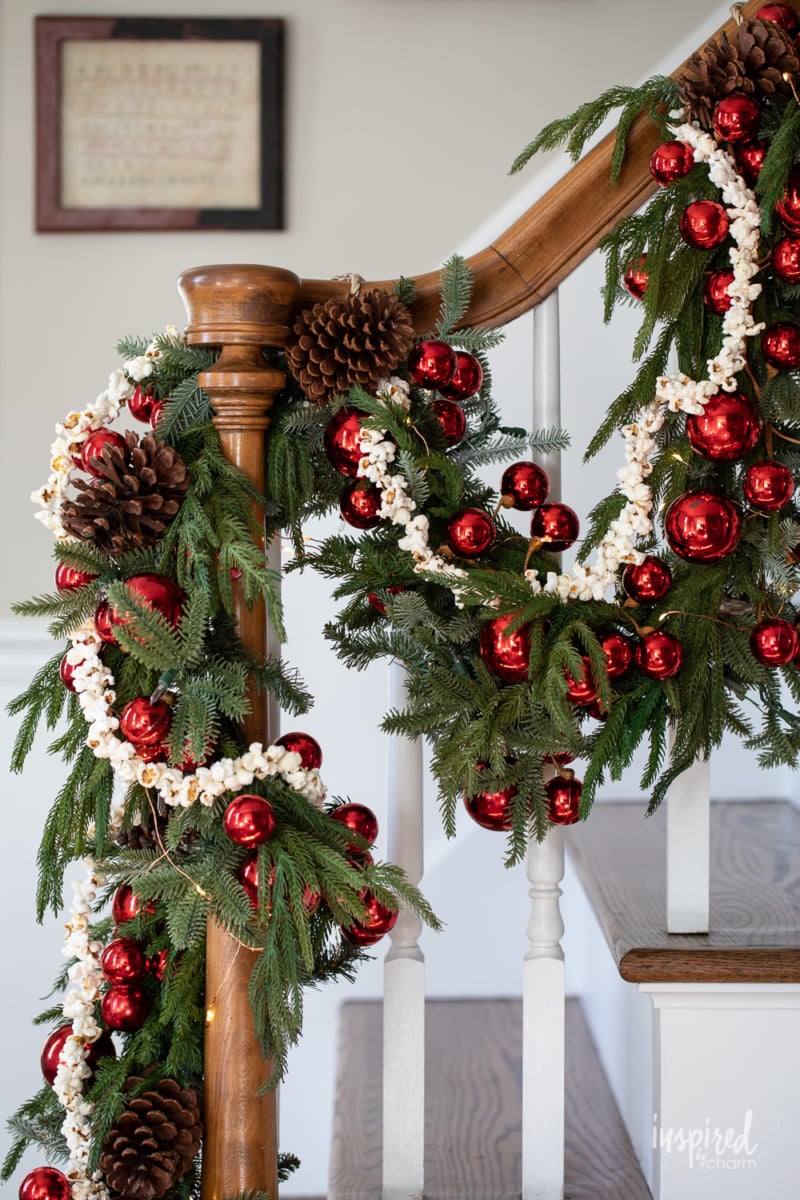
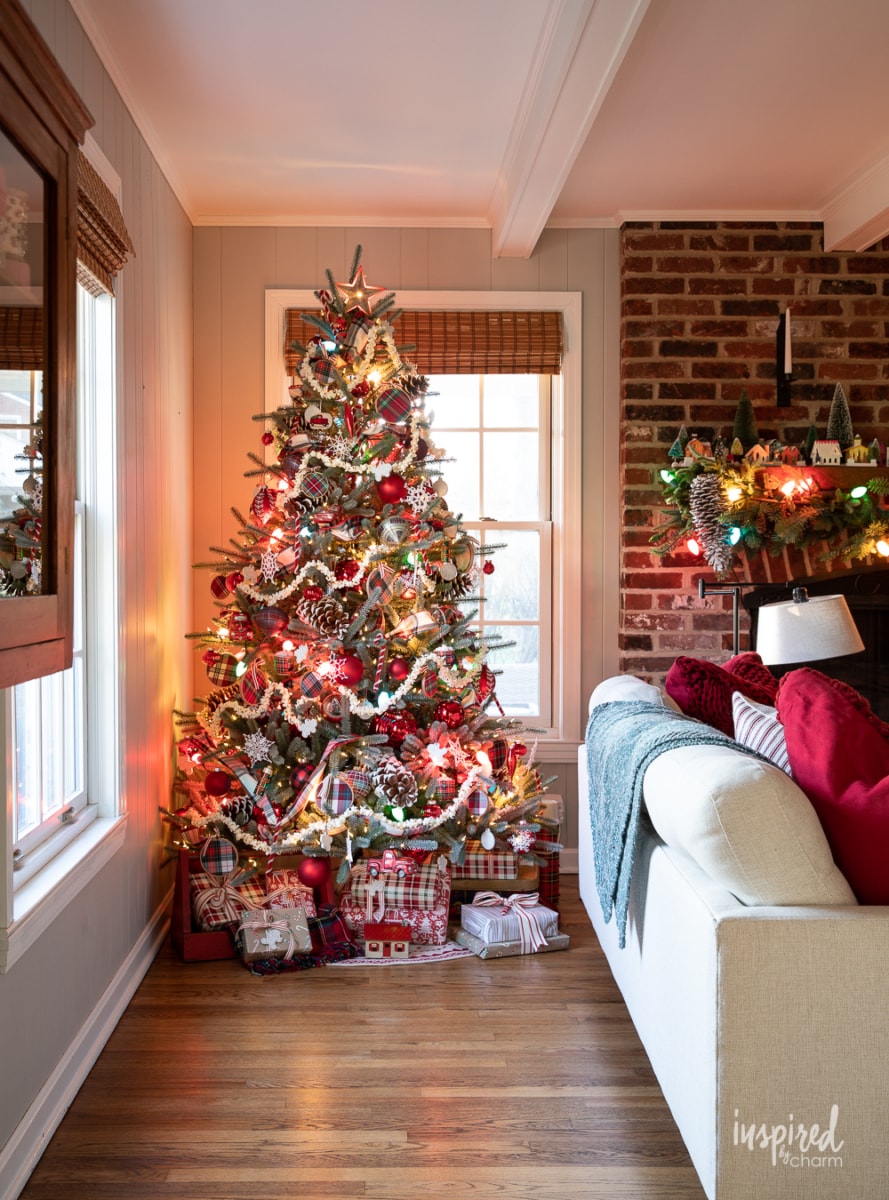
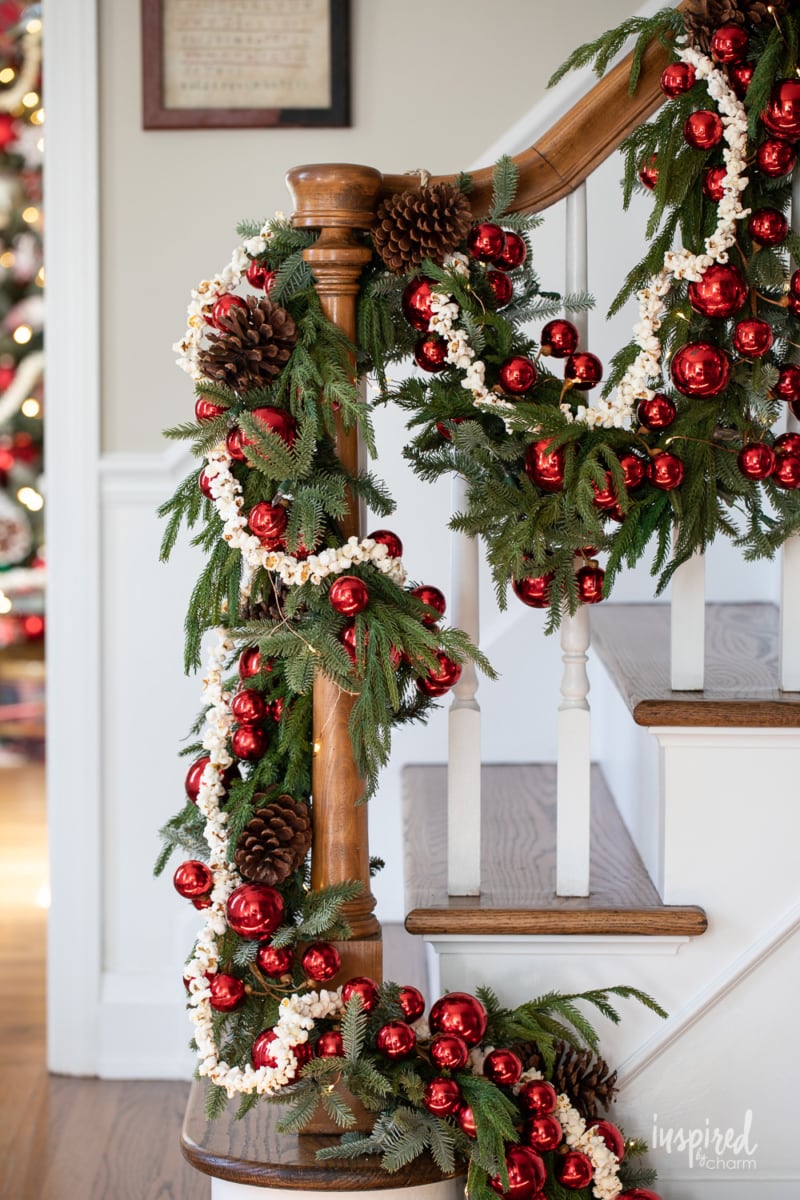
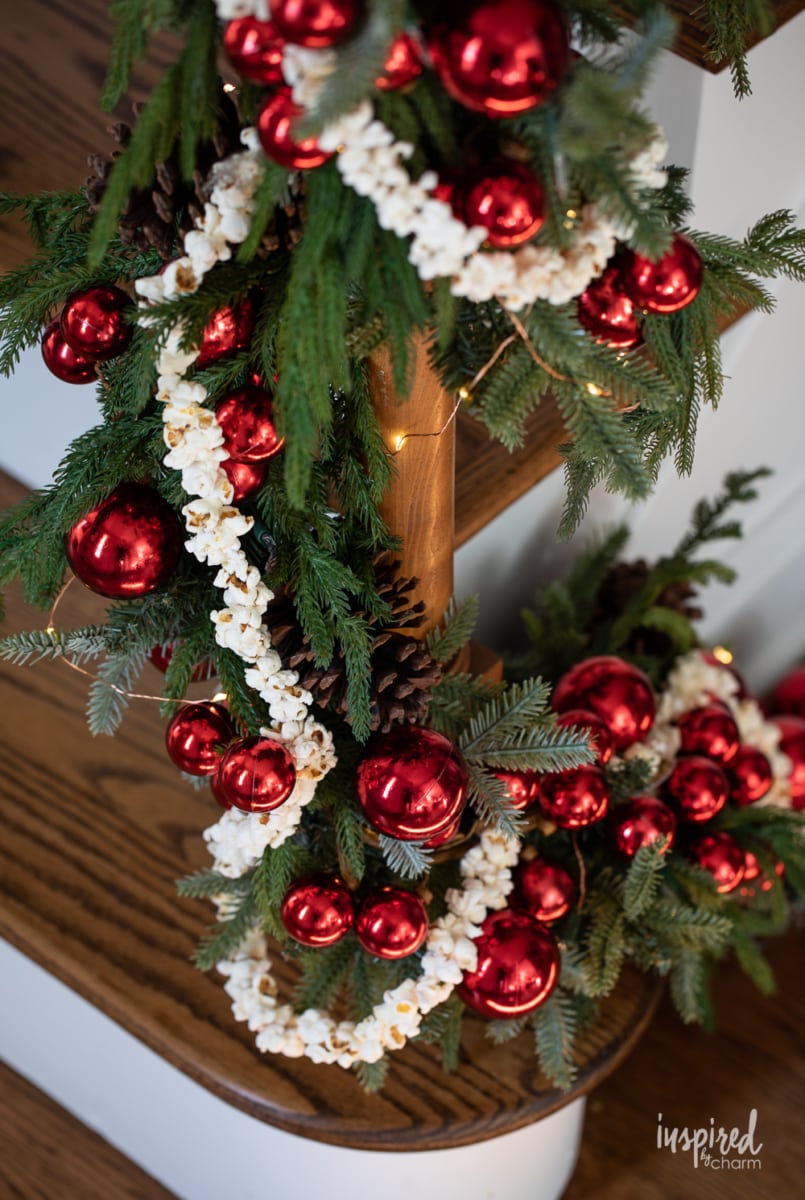
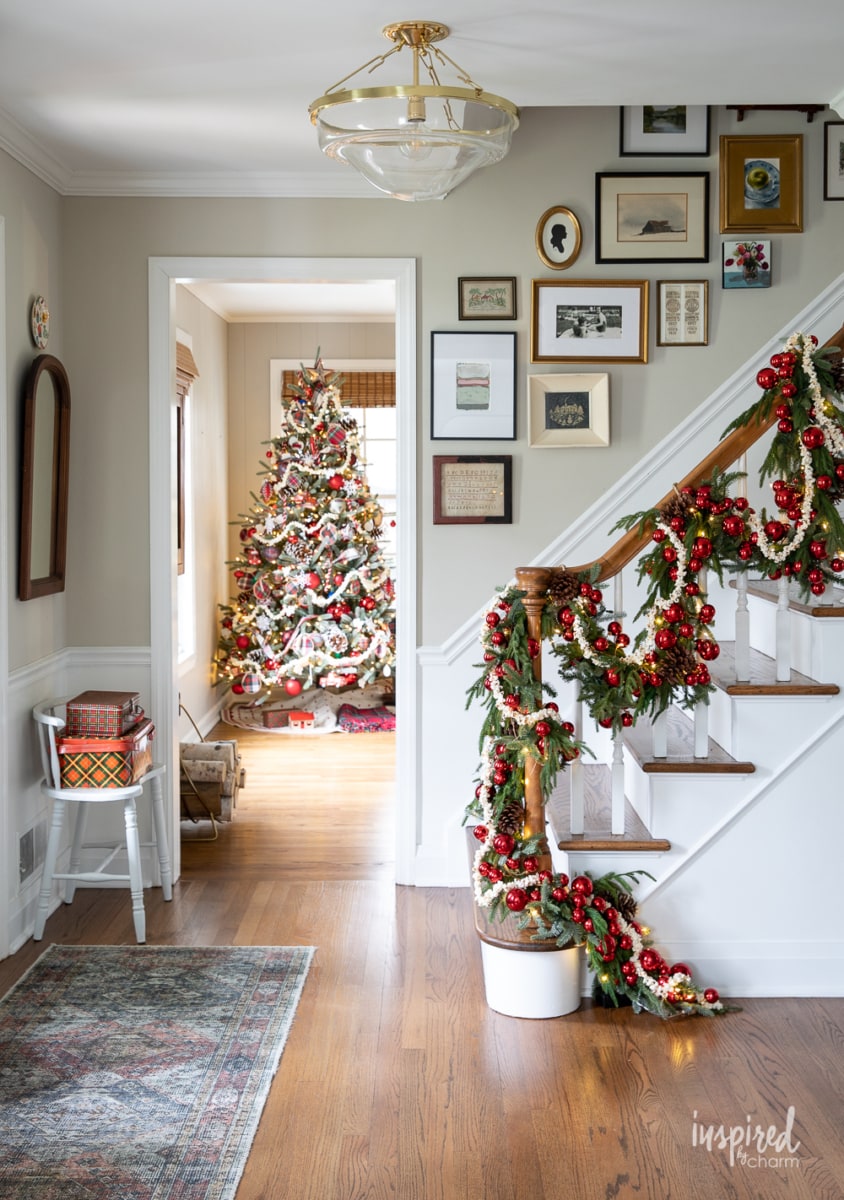
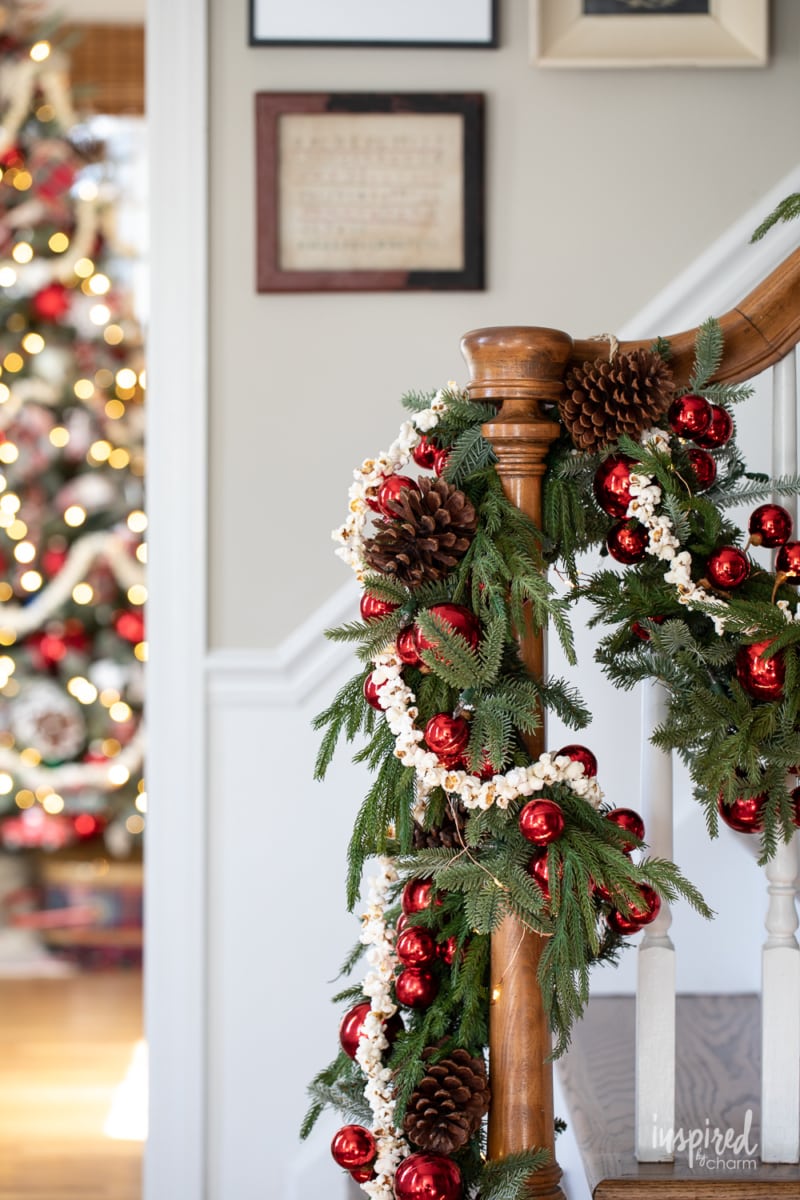
I couldn’t be more pleased with the results. In fact, I loved the garland so much that I decided to use it as part of my staircase garland as well. Can I just string it everywhere?
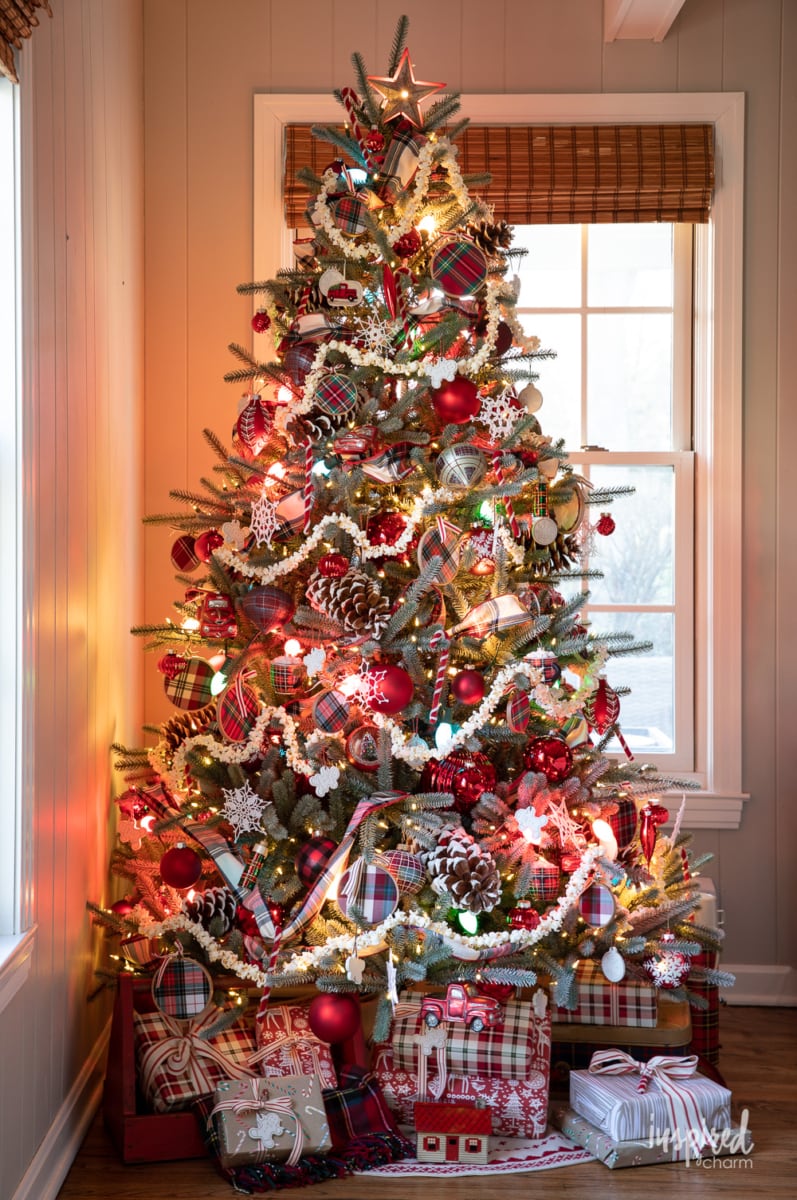
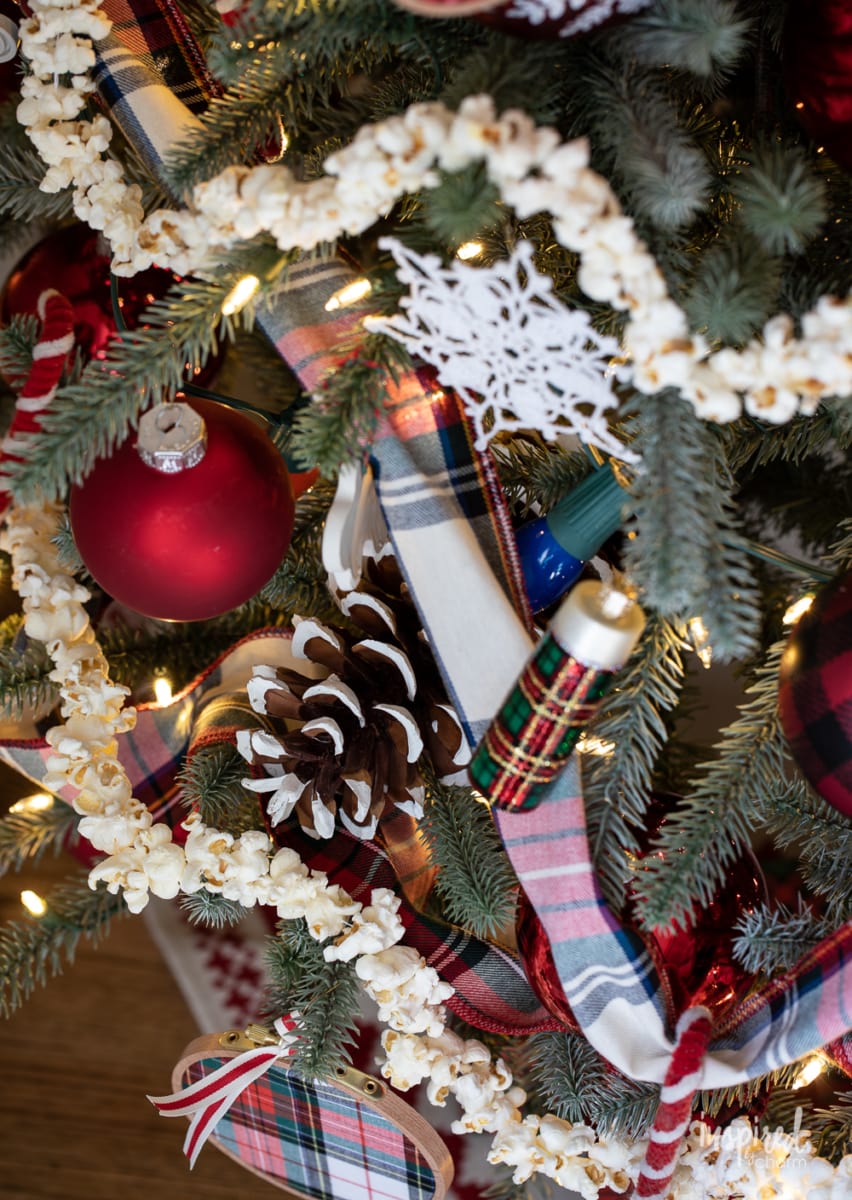
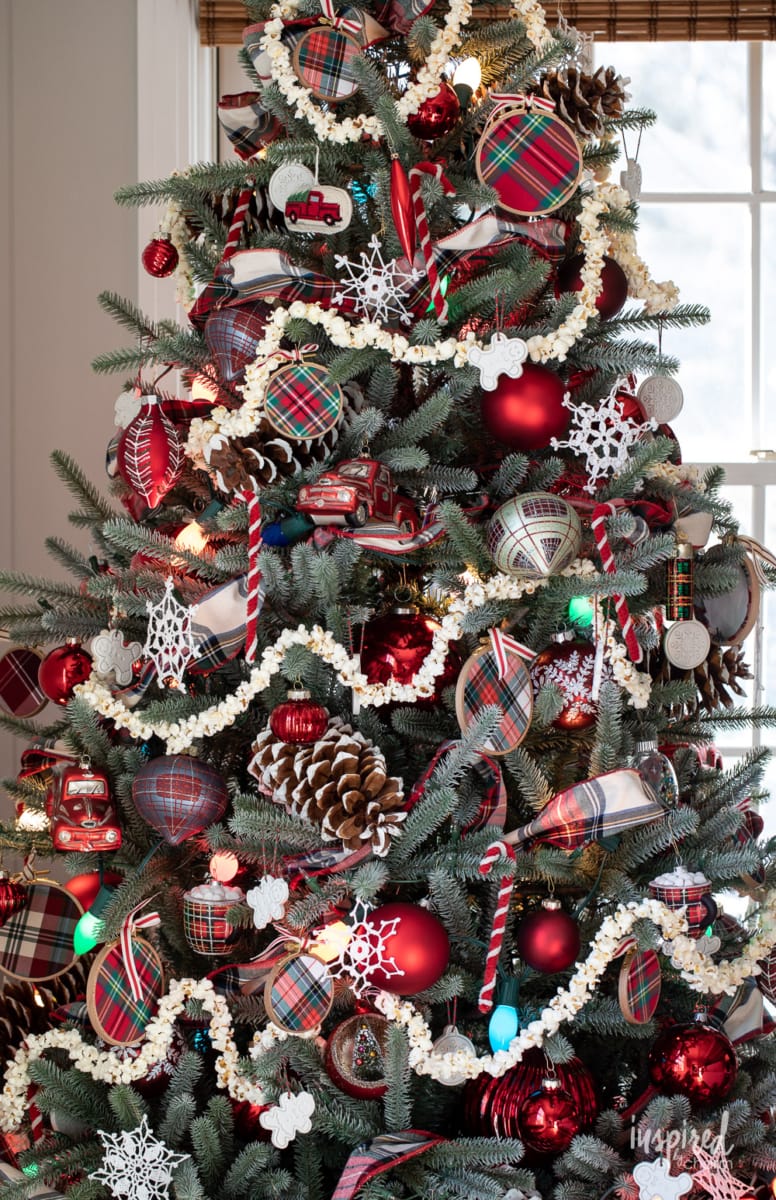
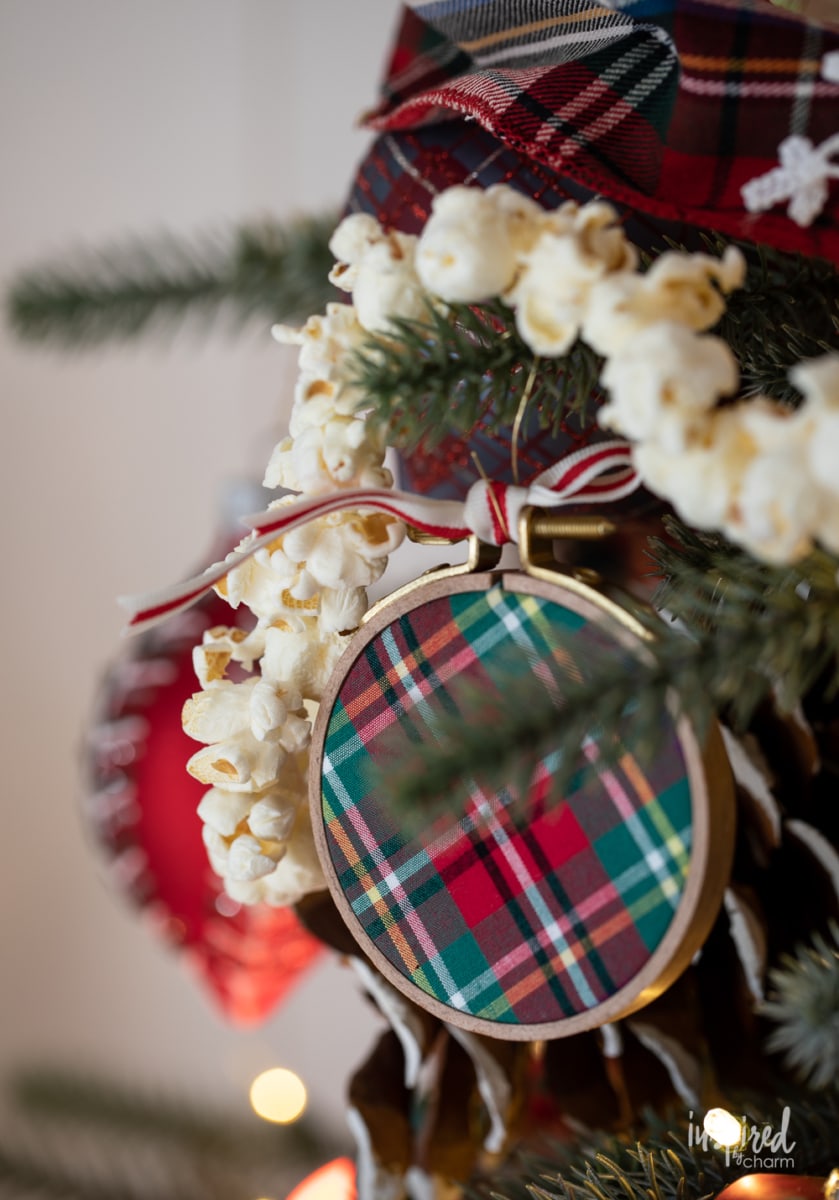
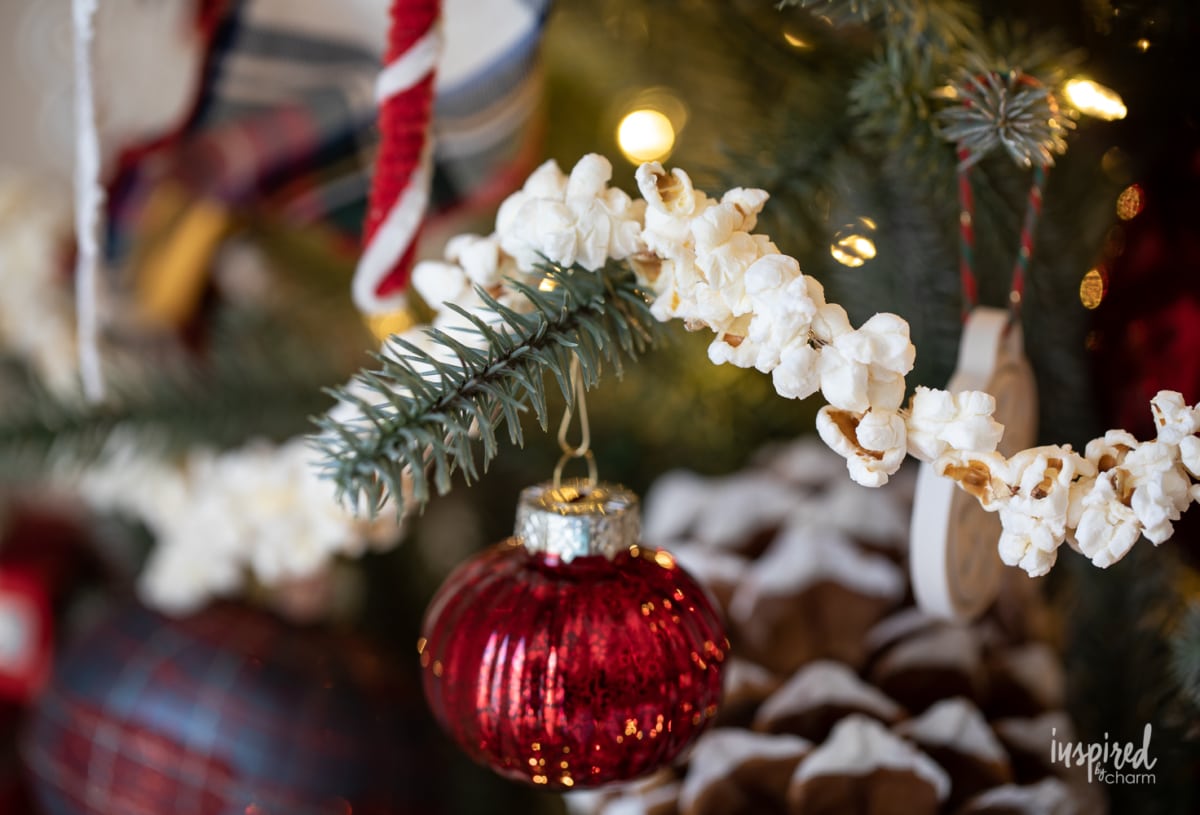
Be sure to take a closer look at my handmade holiday inspired Christmas tree which includes several handmade elements, It’s such a fun tree. I even decided to use those big vintage-inspired colored lights.
Love Christmas trees as much as me? Check out some of my favorite Christmas Tree decorating ideas.
Making popcorn garland is easier and quicker than you think. Working on it reminded me of how much I’m enjoying the process of creating a handmade holiday. I’d choose to string popcorn garland over scrolling on social media any day.
Why You’ll Love This Festive Project
- Forget spending big bucks on fancy Christmas decor. This DIY garland gives your tree and home that timeless holiday charm without burning a hole in your pocket.
- You don’t need to be a crafting expert to make this popcorn garland. With just a handful of ingredients and a string, you’re all set to deck the halls! Plus, there’s something undeniably heartwarming about going back to basics.
- Whether you’re crafting alone with a cup of cocoa or getting the whole family involved, stringing popcorn is a fantastic way to bond. Remember the old tales, create new stories, and let the laughter fill your home.
- Don’t just limit it to the tree! Drape your popcorn garland over doorways, along the fireplace, or even around your outdoor shrubs. It’s an adaptable decor piece that fits just about anywhere.
Are you ready to learn how to make a festive popcorn garland for Christmas? Let me walk you through the material list before we get crafting.
Materials
You only need a few things to put this popcorn garland together. Let me walk you through the list.
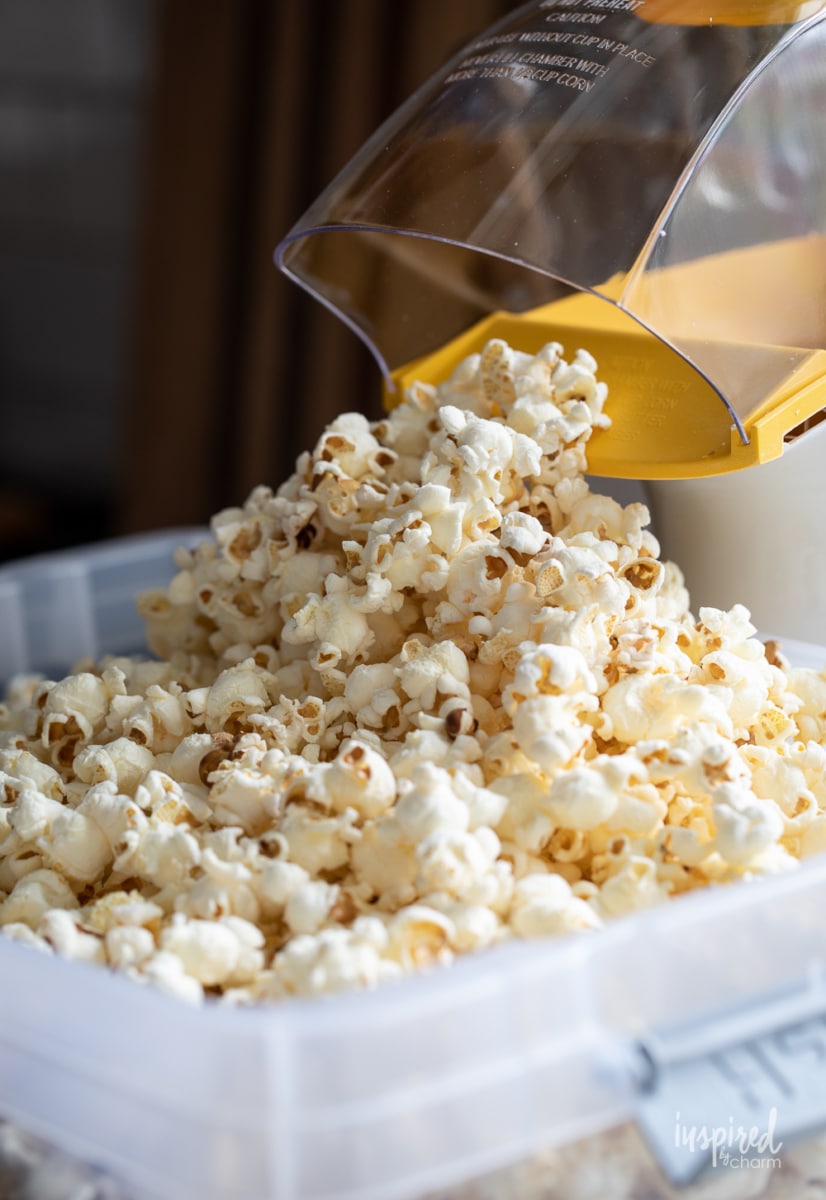
- popcorn kernels and popcorn air popper – This is important. For a popcorn garland, you want to use air-popped popcorn with no butter, no oil, and no flavorings. The easiest way to do this is to buy plain kernels and use an air popper. I initially tried the stovetop air pop method; I wouldn’t recommend it. It took way too long and didn’t yield as fluffy of popcorn as an air popper would.
- needle – You can find the needles I used HERE. I used size 18 (or the 2-inch needles linked here). You want a large needle but not too large.
- thread or fishing line – For my popcorn garland I used a heavy-duty white thread (something similar to an upholstery thread or an outdoor thread). Just remember, you’ll want something that’s heavy-duty. A thin fishing line would also work.
How to Make
You can follow along with my instructions here. I also share them, along with a materials list, in a printable card at the end of this post.
- Begin by popping your popcorn a day or two in advance. Pop according to your air popper directions. Allow your popcorn to sit in a container with no lid. Stale popcorn works best for this project.
- Next, thread your needle. You’ll want to double up your thread, so measure a piece twice as long as your final garland. It’s easier working with a smaller length such as four to five feet. If you’re making a five foot garland, you should measure out 10 feet of thread.
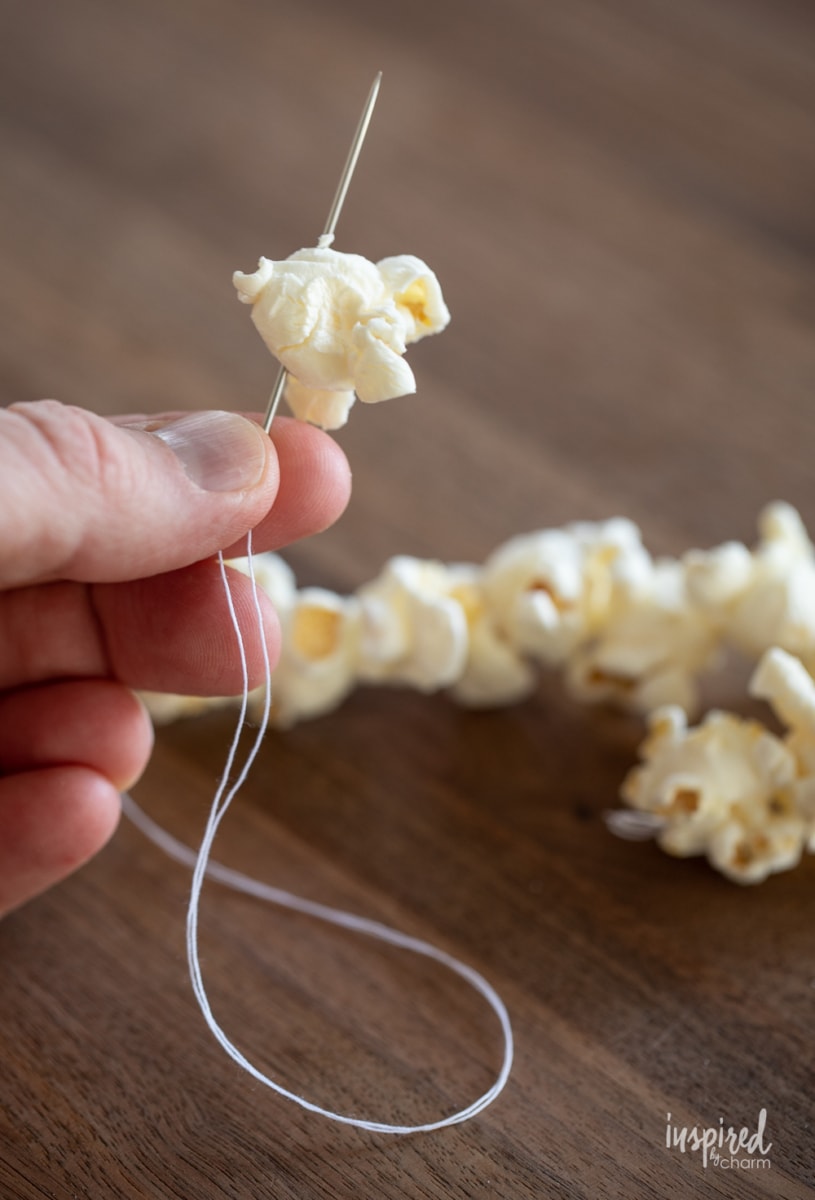
- Take your length of thread and pull it halfway through the needle so you will have two segments of the same length on each side. Tie a knot at the end.
- Start adding popcorn. Insert the needle near the center of the popcorn, press it through, and slide the popcorn to the end of your string. Continue this process until your string is full of popcorn.
- Tie a knot at the end of your string.
- Hang on your tree or garland and enjoy!
If you’ve never made a popcorn garland before, I can’t recommend it enough. The process is almost therapeutic and the results speak for themselves. Enjoy making your own decorations? Check out this post with all my favorite homemade Christmas decor ideas?
I love a vintage Christmas feel and this will certainly create that with little expense and minimal effort. Speaking of … on this tree I used my handmade embroidery hoop ornaments and handmade clay ornaments! I love them here.
💌 SAVE THIS POST / RECIPE!
Crafting Notes
- As you work, you’ll find the sweet spot for inserting your needle making the process go a bit quicker.
- Some popcorn will break during the process. I recommend working over a bowl or plastic container to cut down on the crumbs.
- Make the process enjoyable. Turn on Christmas music, make some hot cocoa / festive cocktail, or watch a movie and you’ll be done in no time.
How to Store
Once made, you can use your popcorn garland for years to come. Here are a few of my best tips for storage.
- Keep Dry: Ensure your garland is fully dry before storing to prevent staleness or mold.
- Use Plastic Tubs or Bags: Store in a plastic container or zip-seal bag, laying the garland in circles or loose zigzags. Add sheets of wax paper between layers to prevent sticking.
- Desiccant for Moisture: Toss in a few silica gel packets to absorb excess moisture.
- Label & Date: Label your container with the garland type and year for easy identification.
- Safe Spot: Store in a cool, dry place, away from pests, especially if using flavored popcorn or dried fruits.
Stored properly, your garland should last for several years of use.
Festive Variations
Want to add a little something extra to your popcorn garland? Here are a few suggestions to add a little color, whimsy, and sparkle.
- Colorful Popcorn: Try popping colored kernels, or lightly tinting plain popcorn with edible food sprays. Imagine a garland with shades of gold, silver, or even festive red and green!
- Mix with Dried Fruits: Add cranberries, dried orange slices, or apple rings in between the popcorn for a splash of color and a rustic feel. This not only looks beautiful but also smells amazing.
- Sparkling Popcorn: Lightly brush your popcorn with edible glitter or metallic food spray. This gives a beautiful shimmering effect, especially when the lights hit the garland.
- Herb-Infused: Tuck in sprigs of rosemary or dried lavender between the popcorn. Not only does it elevate the look, but it also gives your home a subtle aromatic touch.
- Beaded Elegance: Intersperse the popcorn with decorative beads or pearls. This will give your garland a touch of elegance and sophistication.
- Ribbon & Bows: Intertwine festive ribbons in your garland, or tie small bows in intervals. This adds a decorative touch and can be tailored to match your home’s holiday color scheme.
- Felted Accents: If you’re into crafting, add felted wool balls or shapes (like stars or hearts) in between your popcorn for a cozy, tactile appeal.
Remember, the beauty of a DIY project like this is its flexibility. Feel free to mix and match these ideas or come up with a signature style that represents you.
Frequently Asked Questions
Is making popcorn garland hard?
I don’t think so. The only thing I would caution you about is the sharp needle. I did jab myself a few times during the process. It wasn’t the worst thing, but it may be an issue if you’re working with small children.
Does it take a long time to make?
Surprisingly not. I thought it was going to take forever but while watching two Christmas movies (about four hours), my Mom and I had completed a length of more than 30 feet. It’s not as time-consuming as you might think.
How long does it last?
I can’t offer you an answer from experience, but when I shared that I was making a popcorn garland on Instagram, many of you said that you had done the same and that the popcorn garland lasted for years.
Does it require a coating or shellac?
I’ve seen where others have sprayed the garland with a clear coat, but I’m leaving mine natural and will wait to see what happens. I honestly don’t want to deal with the mess of spraying it, and too, if my cats decide to get inquisitive, I would hate for them to eat something toxic.
Can I use bagged popcorn?
I wouldn’t. As I mention below, for the best results you want air-popped popcorn with no butter, oil, or flavor. Most bagged popcorns have butter or oil.
More Handmade Christmas Decor You’ll Love
- DIY Clay Cookie Cutter Ornament
- Handmade Embroidery Hoop Ornaments
- Gingerbread Cookie Wreath
- Vintage Ornament Wall Decor Christmas Tree
- Handmade Clay Mushroom Ornaments
Did you make this popcorn garland? I’d love to hear all about it! Please stop back and leave a comment and a 5-star rating below.
Want more from Inspired by Charm? Join the IBC Mailing List for inspiration in your inbox! Follow along on Instagram and TikTok for daily updates and behind-the-scenes looks at my processes. There’s even more inspiration on Facebook and Pinterest!
How to Make a Popcorn Garland
Ingredients
- popcorn kernels
- popcorn air popper
- needle (I used a 14)
- thread or fishing line
- scissors
Instructions
- Begin by popping your popcorn a day or two in advance. Pop according to your air popper directions. Allow your popcorn to sit in a container with no lid. Stale popcorn works best for this project.
- Next, thread your needle. You’ll want to double up your thread, so measure a piece twice as long as your final garland. It’s easier working with a smaller length, about four to five feet. If you’re making a five foot garland, you should measure out 10 feet of thread.
- Take your thread and pull it halfway through the needle so you will have two segments of the same length on each side. Tie a knot at the end.
- Start adding popcorn. Insert the needle near the center of the popcorn, press it through, and slide the popcorn to the end of your string. Continue this process until your string is full of popcorn.
- Tie a knot at the end of your string.
Can you give an idea of volume of popcorn needed?
It would all depend on how much garland you want to make. Start by popping 1/4 cup of kernels and do some calculations from there.
xo Michael
Also, I think yellow popcorn generally pops up bigger than the white kernels.
I will have to do this for our tree this year! Love the look of it. Also, I agree that both Enola Holmes movies were great.
So many memories of stringing popcorn! Thanks for the reminder!!
These are so fun to make and look great on the tree. I like to put them outside after I’m done with tree, the birds and squirrels love them.
Love that idea!!
xo Michael