DIY Embroidery Hoop Christmas Ornaments
This Post May Contain Affiliate Links. Please Read Our Disclosure Policy
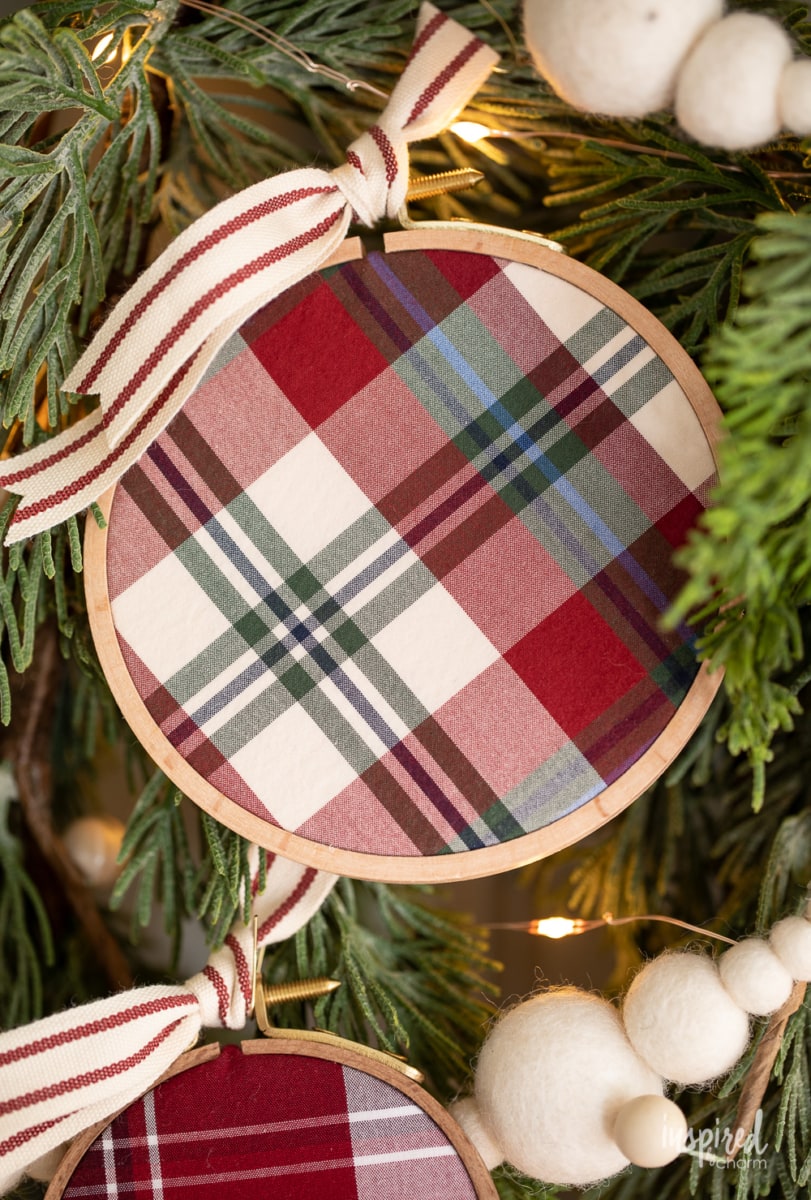
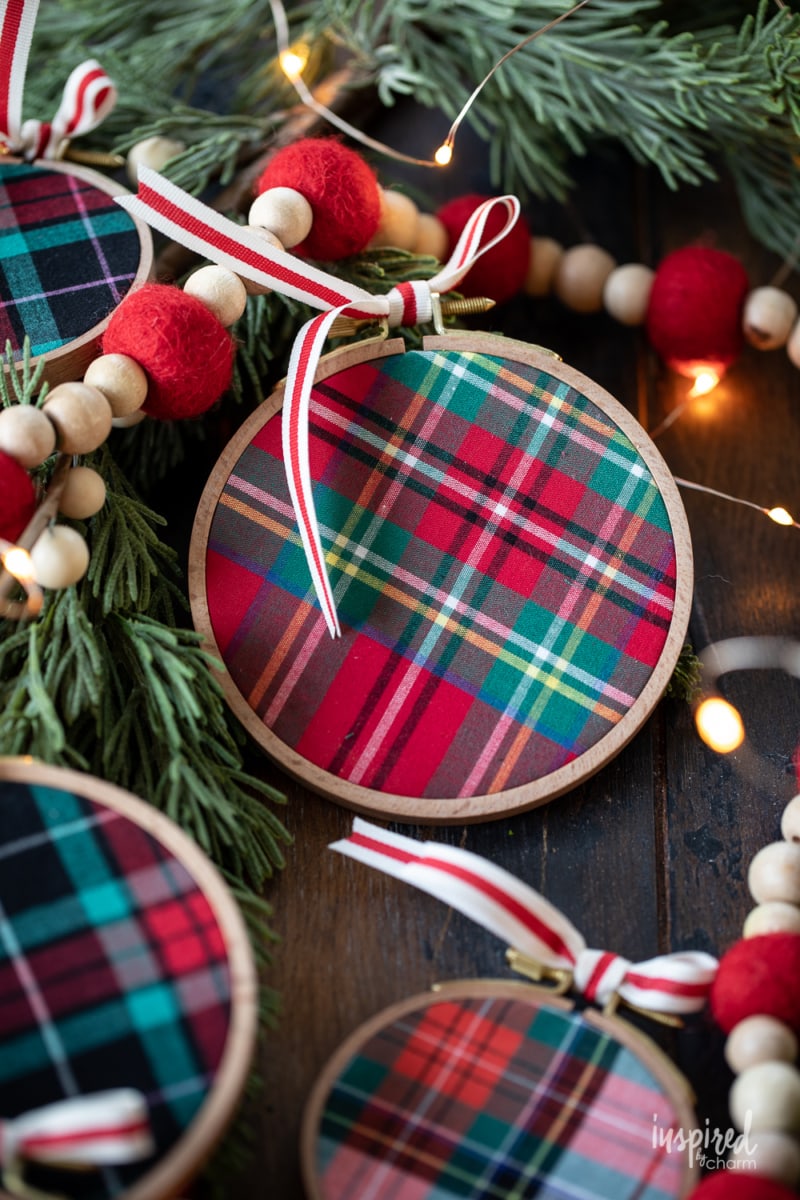
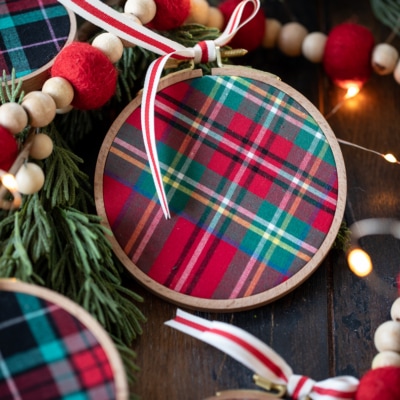
Use old plaid shirts and embroidery hoops to craft these DIY embroidery hoop Christmas ornaments. This is an easy and budget-friendly craft with stunning results to use in decorating your Christmas tree and home for the holidays.
DIY Christmas Ornament:
Yes, we are crafting today. I’m showing you how easy it is to make these beautiful and customizable embroidery hoop Christmas ornaments.
I also want to talk about my current Christmas plans in this post. To quickly summarize, I want to spend less, stress less, and use what I have. I typically spend way too much time and energy trying to reinvent my holiday decor every year.

To avoid risking Christmas burnout, I’m taking it easy on myself this year. (I’m even planning to revisit my list of 150+ Creative Christmas Ideas. There are so many fun projects, ideas, and recipes on there I want to try again!)
One way I’m doing this is to slow down a bit and take time to craft a little more, to enjoy the season. I love handmade elements during Christmas, so I thought I would craft a few myself to decorate my home rather than running out to buy new items. I’m excited to have several projects to share with you including a few DIY Christmas ornaments including these ones made from embroidery hoops!
In this post, I’m also joined by my Seasons of Home blogger friends. We are sharing budget-friendly and foraged Christmas decor ideas. I’ll link everyone at the end of this post.
From Embroidery Hoops to Ornaments:
The concept for this idea isn’t anything new. In fact, I vaguely remember my mom having embroidery hoop Christmas decorations when I was a kid. I wanted to give this craft my own spin, so here’s what I came up with.
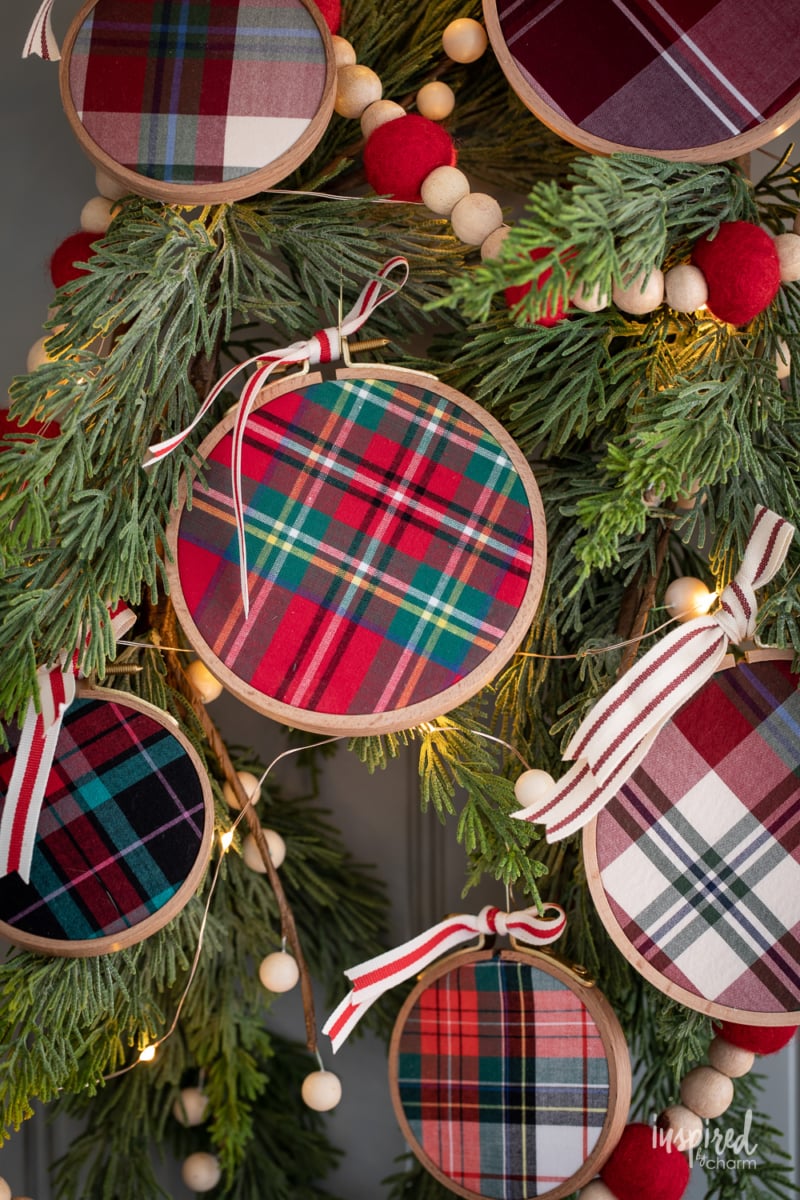
- For my embroidery hoops, I opted for this more luxe variety. They have a brass screw at the top and the wood is beech. However, you can easily do this project with more inexpensive embroidery hoops like THESE (3-inch) and THESE (4-inch).
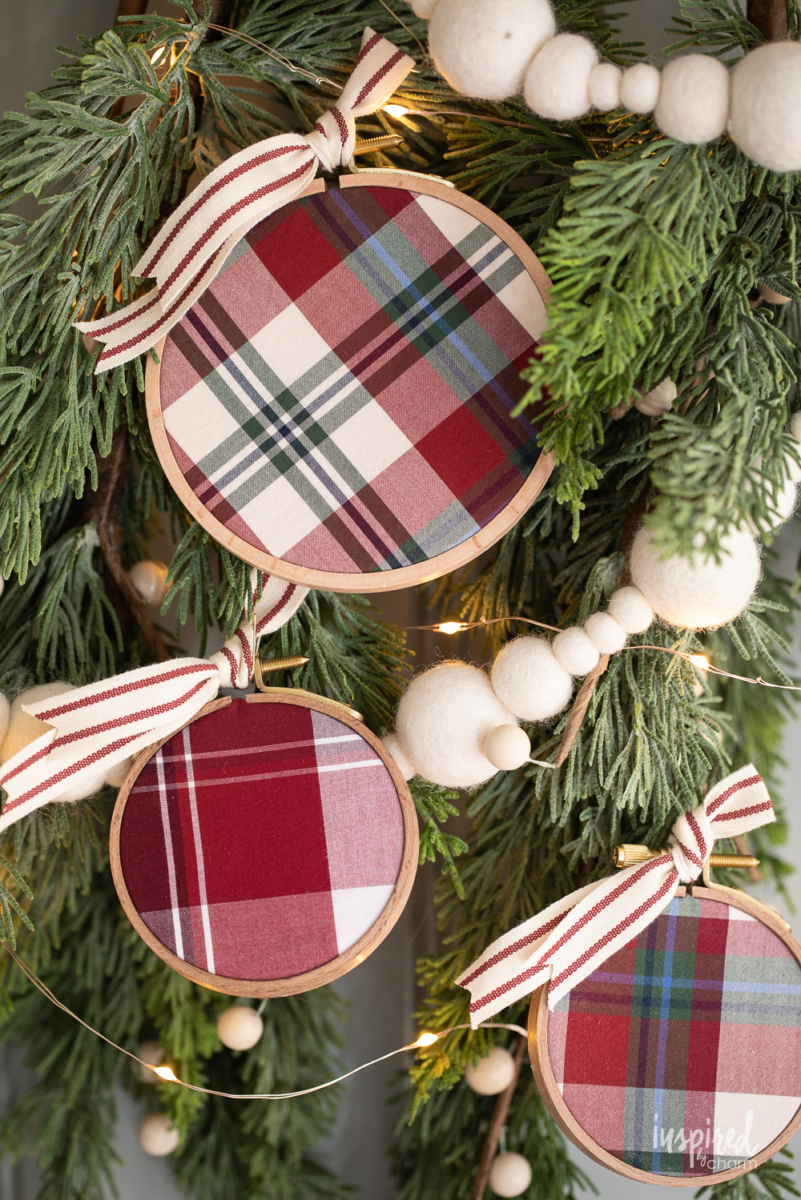
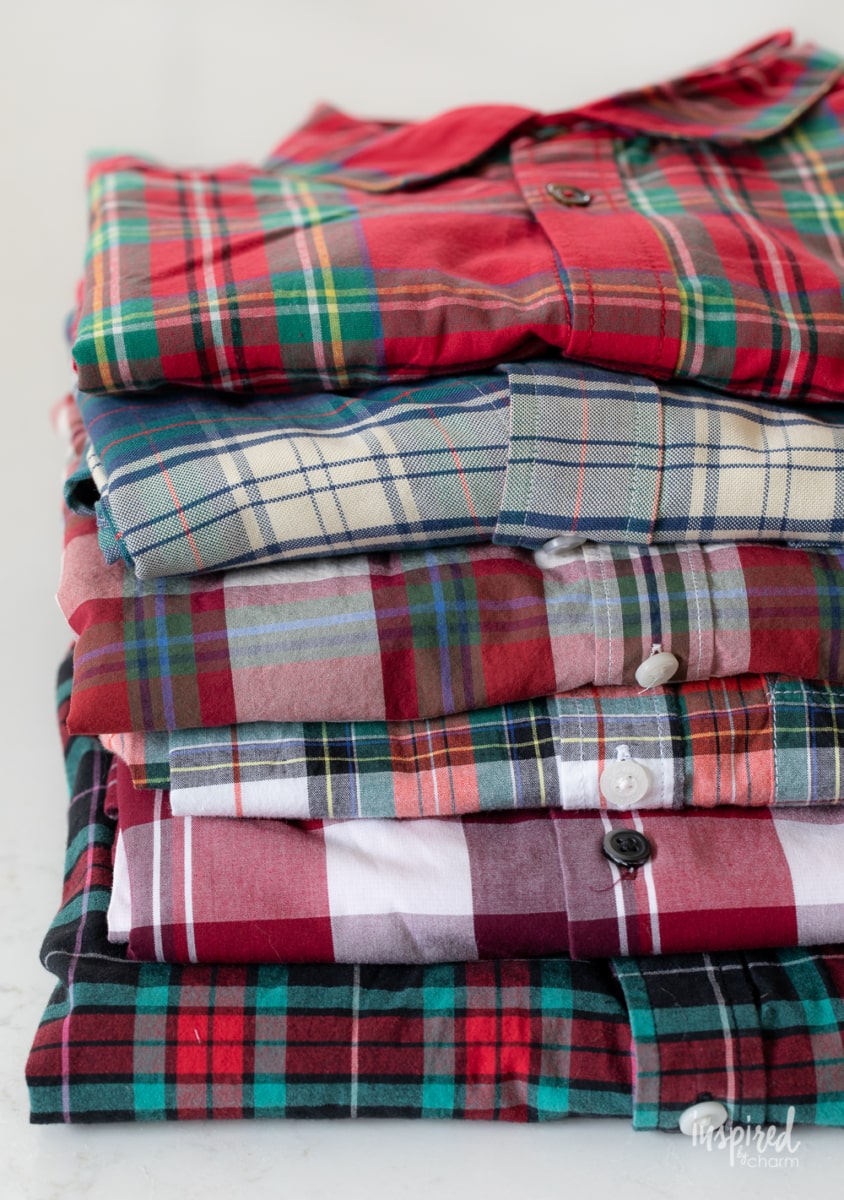
- For my fabric, I’m using some old and thrift plaid shirts. I was cleaning out my closet and found a few that no longer fit (thanks Christmas cookies) and I also picked up a few at the thrift store.
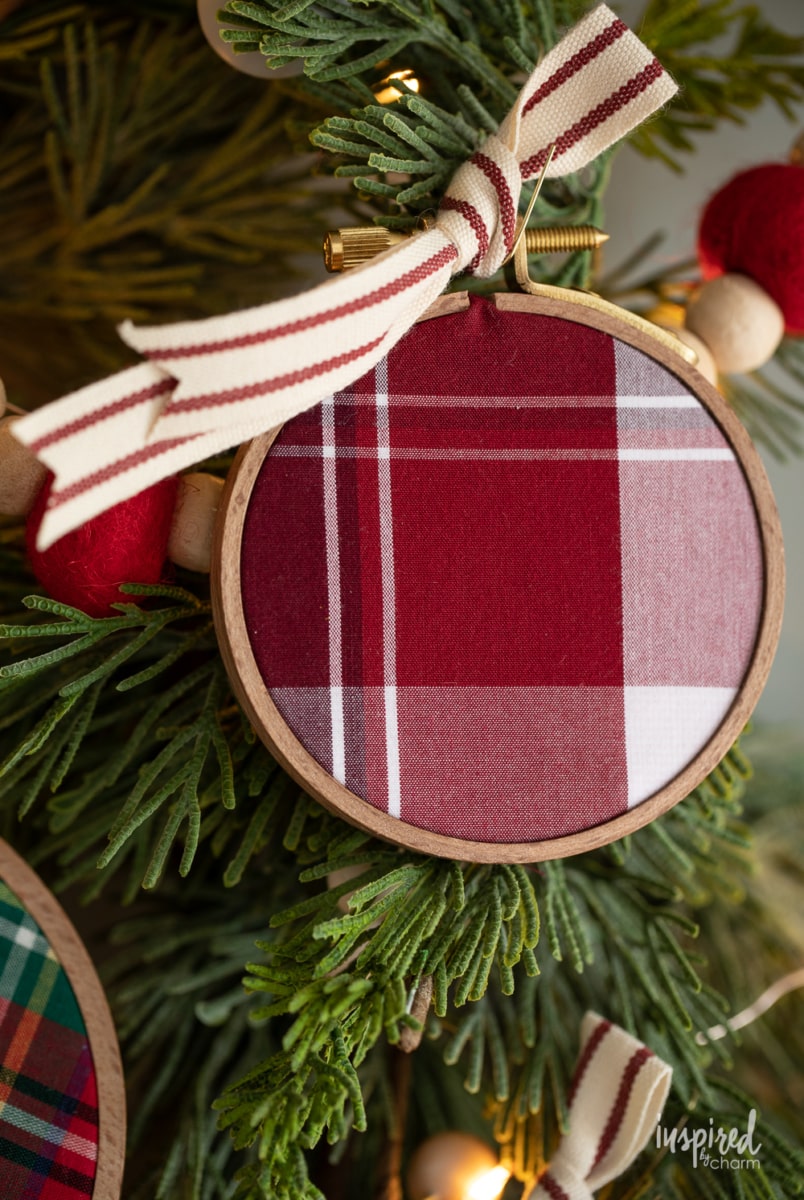
- The hoop ornaments are finished off with a ribbon. I wanted to keep these ornaments simple and let the fabric and hoops shine, so the only additional touch was a ribbon for hanging.
That’s it!
Pretty easy, right? I’m lovin’ them.

They were also really easy to make. There are no advanced technical skills required. I think this would be a fun craft to do with a group of friends. Gather together with your supplies, some tasty appetizers, a festive cocktail or homemade hot cocoa and spend the night crafting!
Now, I haven’t put up my Christmas tree yet, but when I do, I will absolutely show you how these embroidery hoop Christmas decorations look on my tree. The best way to know about and see everything when it happens is to follow me on Instagram at @inspiredbycharm. I will update this post as well and share the fully decorated tree in a separate post. Sound good?
In the meantime, if you’re looking for some Christmas tree decor ideas, I have plenty to share with you. You can check out 20+ of my favorite Christmas tree designs HERE.
Now, you’re probably wondering how to make these ornaments. Let me walk you through the supply list and then we’ll get into the step-by-step tutorial.
Materials:
Here’s what you’ll need. Everything is linked for your convenience.
- old or thrift plaid shirts – Raid your closet or visit the thrift store.
- embroidery hoops (3″ and 4″) – You can find the ones I used HERE.
- sharp scissors – Use what you have, but I like THESE.
- 1/4″ ribbon – Jo-Ann has a great selection. I used THIS and THIS.
- tacky glue (or hot glue) – THIS tacky glue is a must-have for any crafter.
Optional Items:
- blackout fabric – I bought mine HERE.
- thick paper or cardboard
- felt
- iron
How to Assemble: With your supplies at hand, we’re ready to assemble. In addition to the steps below, I’ve also provided a printable how-to card at the end of this post.
- Begin by prepping your shirts. I like to cut out all the usable pieces of fabric by removing the seams. Save things like buttons, cuffs, and collars for another project. (If needed, iron the fabric.)
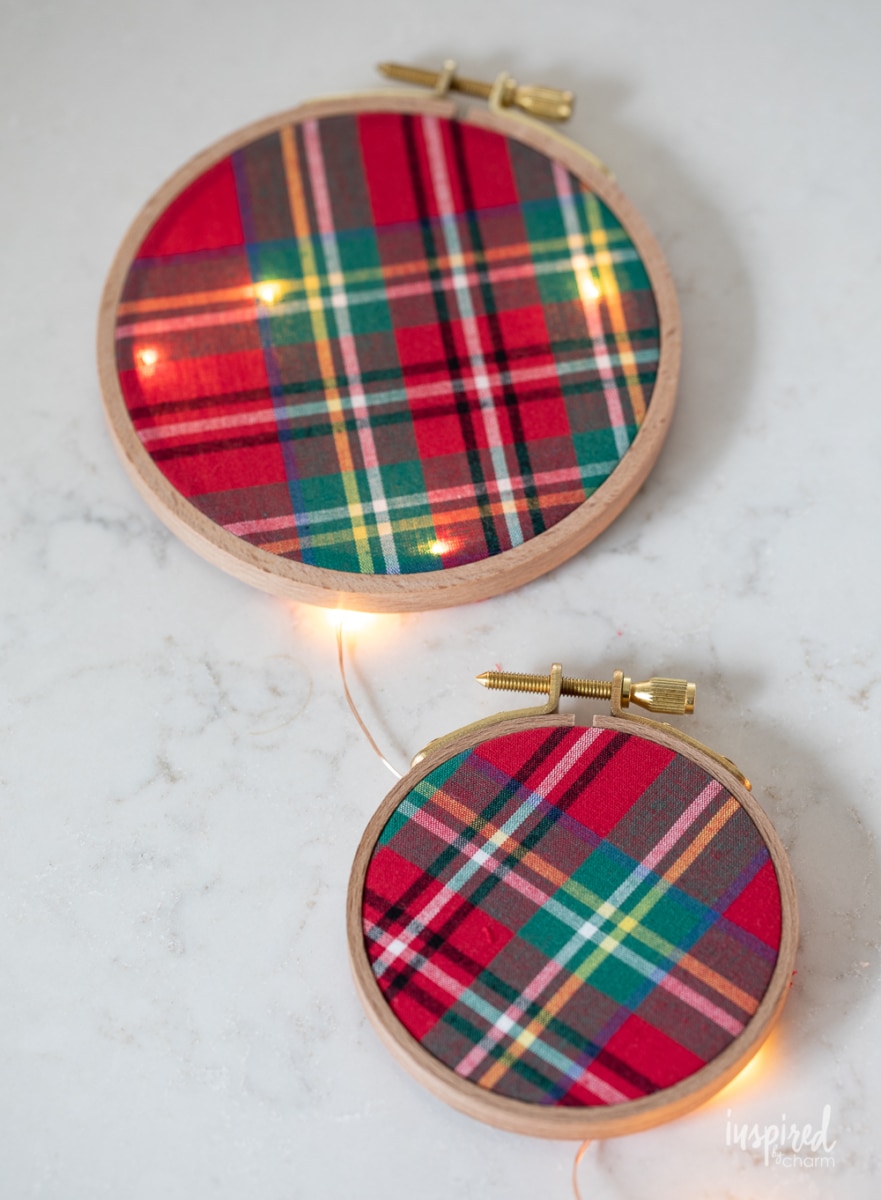
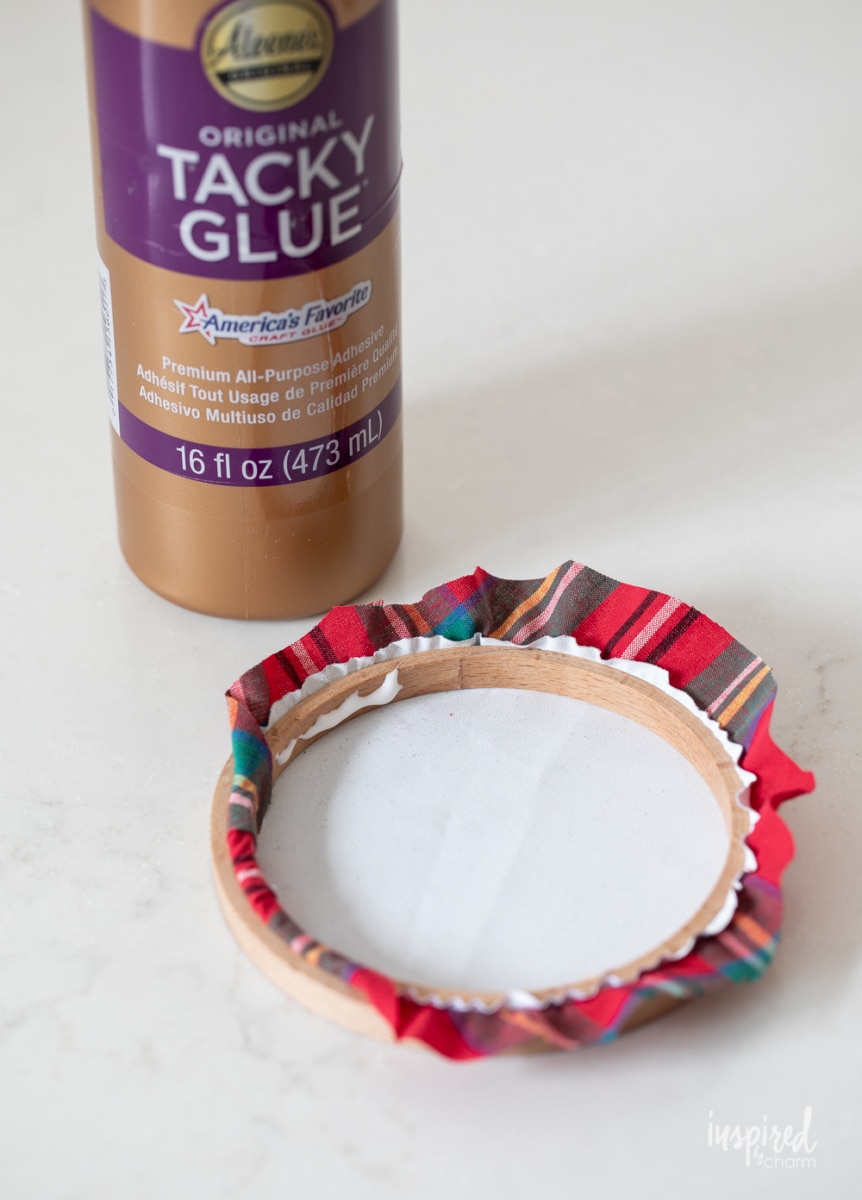
- Optional step: Because I didn’t want the lights from my tree to show through my embroidery hoop ornaments, I layered a piece of blackout fabric that I had on hand behind my shirt fabric.
- See the photo below. The top ornament doesn’t have the blackout fabric, but the bottom one does. This step is totally optional. (Later in the directions I will show you another way to do this without using a second layer of fabric.)
💌 SAVE THIS POST / RECIPE!
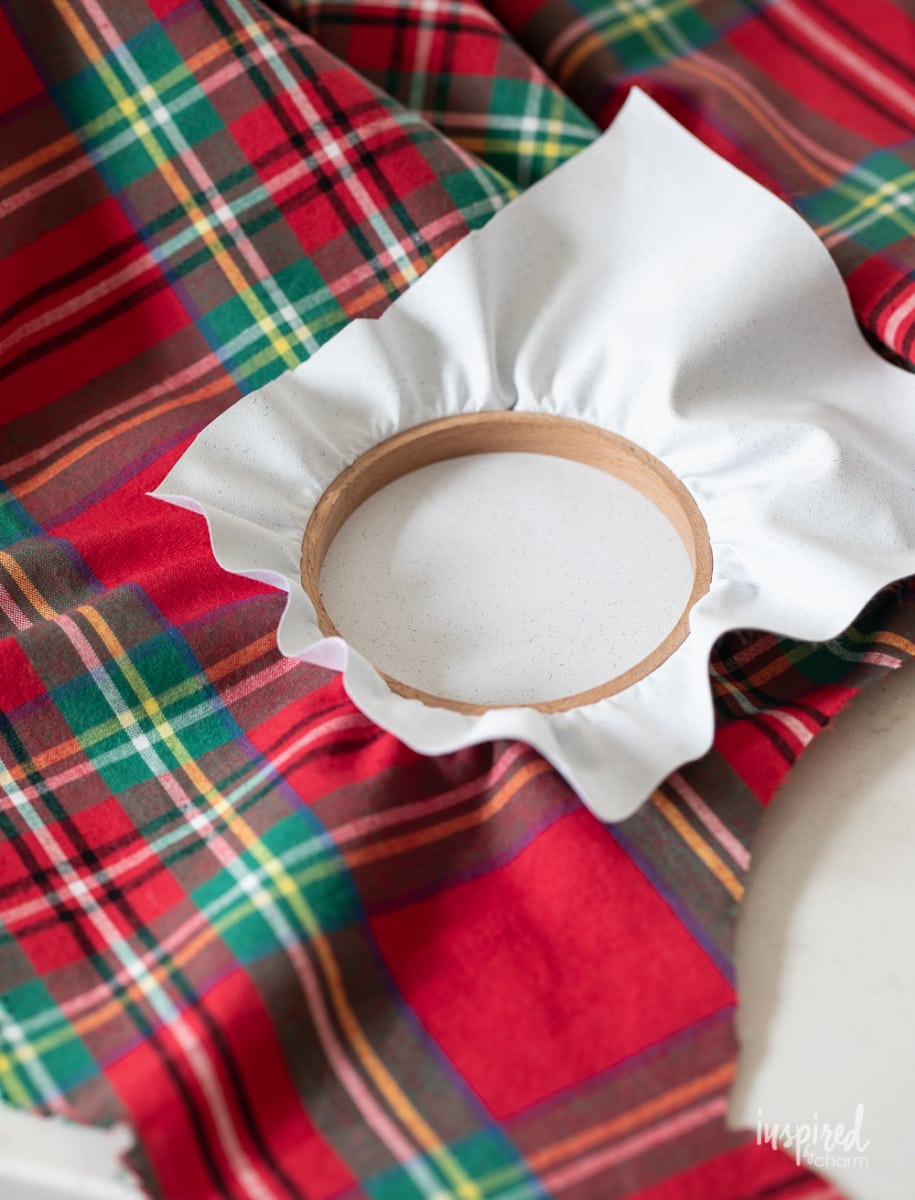
- Open up your embroidery hoop. Set the solid ring under your fabric and then take the ring with the screw and place it on top. After that, press the top ring over the fabric and the bottom ring.
- Begin to tighten the screw, adjusting as needed, to make sure the fabric is spread taut.
- Completely tighten the screw. (Because the embroidery hoops I linked above have a Phillips head, I tightened them with a screwdriver.)
- Flip your embroidery hoop over to the opposite side. If you used two layers of fabric, you need to trim the first layer (in this case my blackout fabric) as flush as you can to the ring. Trim your shirt fabric layer leaving about 1/2-inch excess all the way around.
- Now add a bead of glue to the inside back of the embroidery hoop. Using your fingers, fold over the excess fabric and press it into the glue to secure it.
- This step will not only finish off the back of your ornament but will also help secure the fabric to the inner ring just in case the two rings become separated.
- At this point, your back may still look slightly unfinished. This doesn’t bother me; however, if you’d like, you could place a piece of coordinating fabric or felt inside the ring to cover your blackout fabric.
- Alternatively, if you didn’t use any blackout material but want to make your fabric less see-through, you could cut a thick piece of paper or cardboard and place it inside the ring.
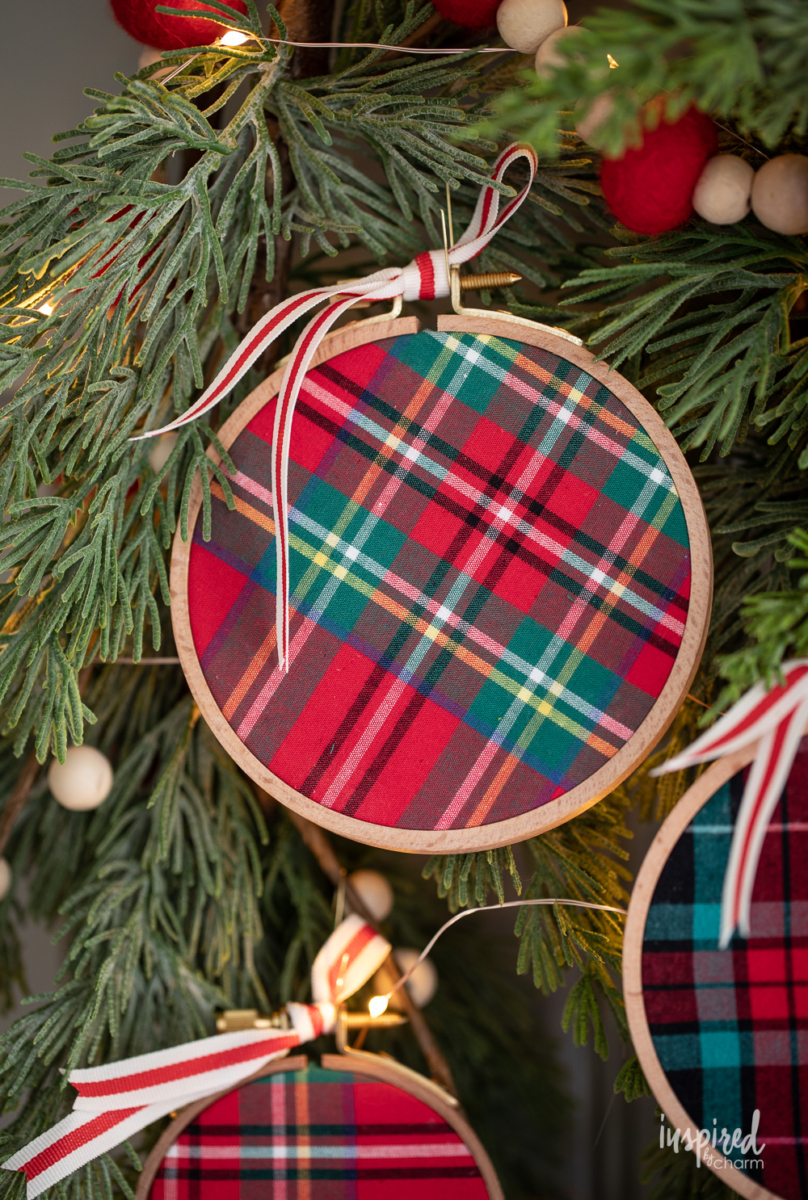
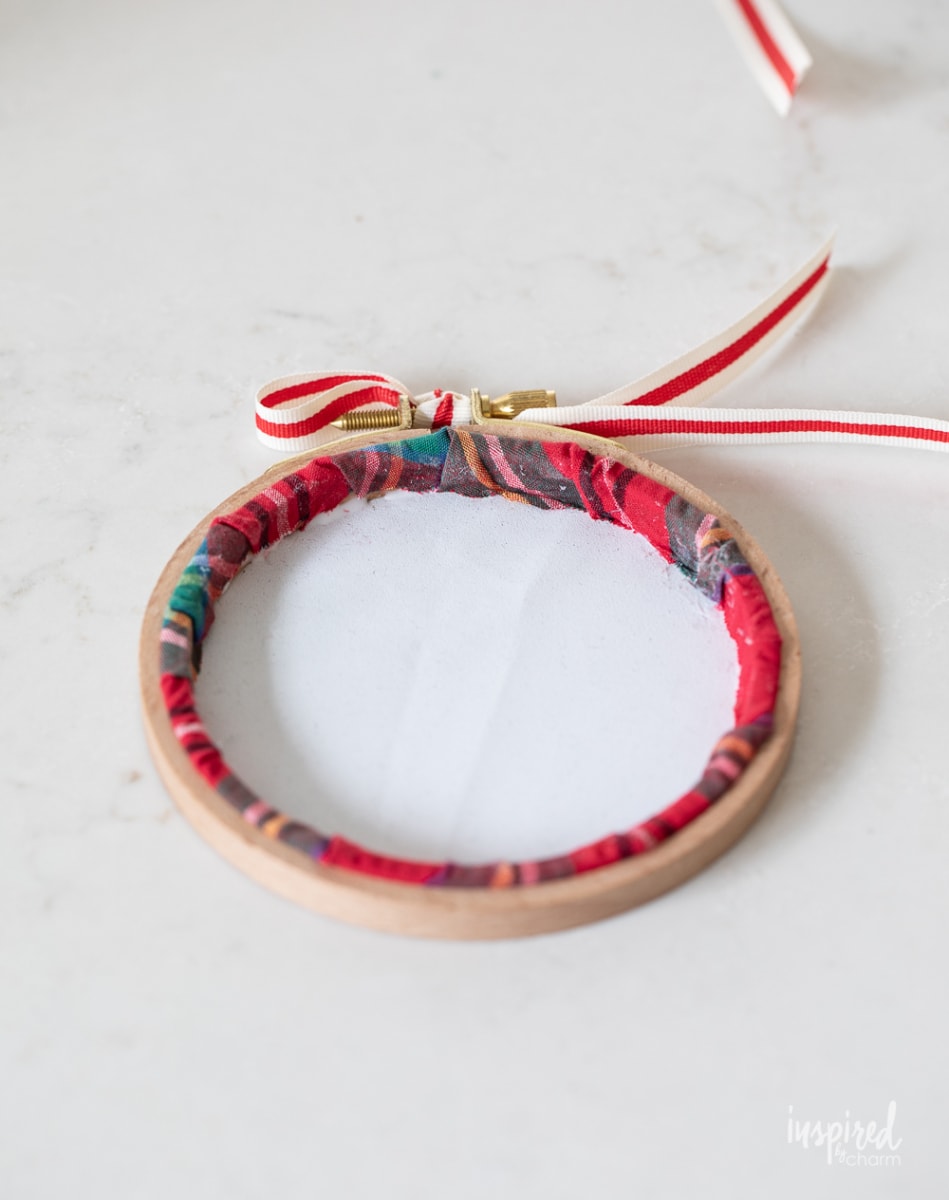
- To finish things off, cut a piece of ribbon and attach it to the screw of your embroidery hoop.
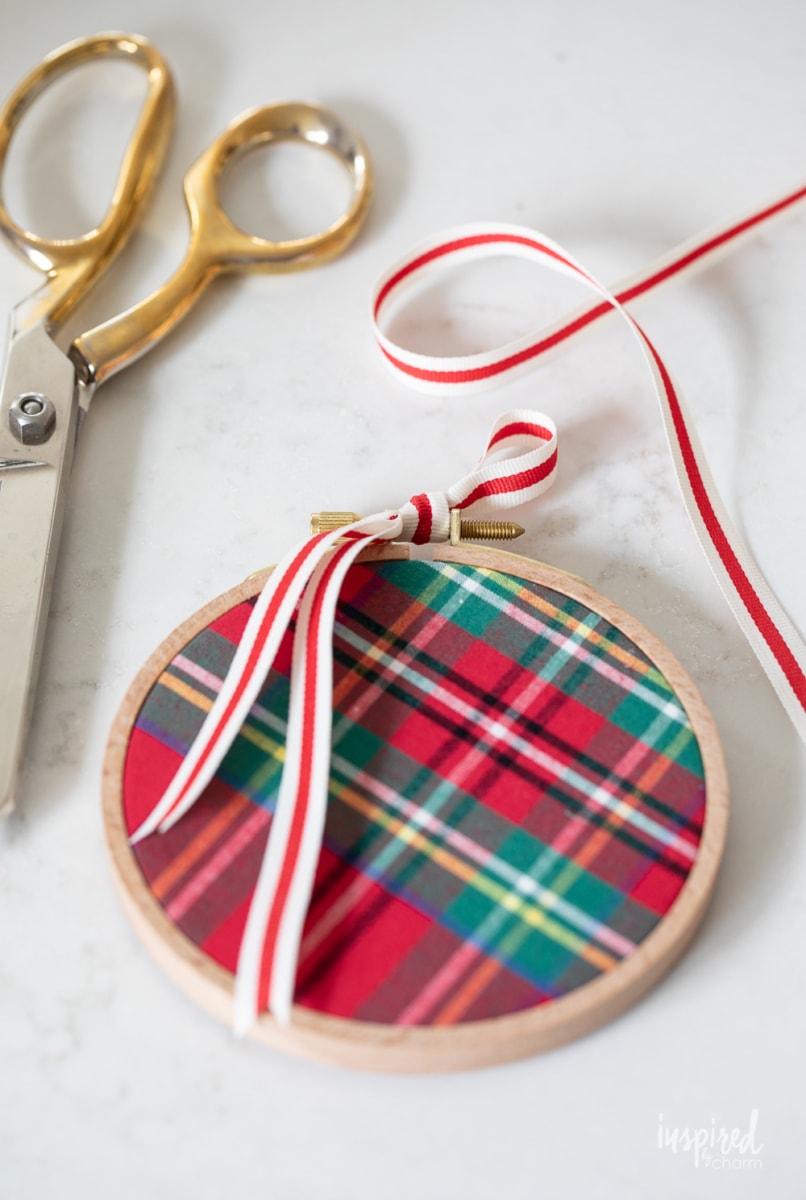
- To achieve the look I did, fold your ribbon length (about 8-inches) in half. Thread the fold of the ribbon through the front of the hole under the screw, then tie a simple knot. Trim your ribbon tails to your desired length.
- I will be using an ornament hook to hang mine, so I left my loop fairly small. If you want to use the ribbon to hang the ornament, you’ll need a larger loop and thus more ribbon.
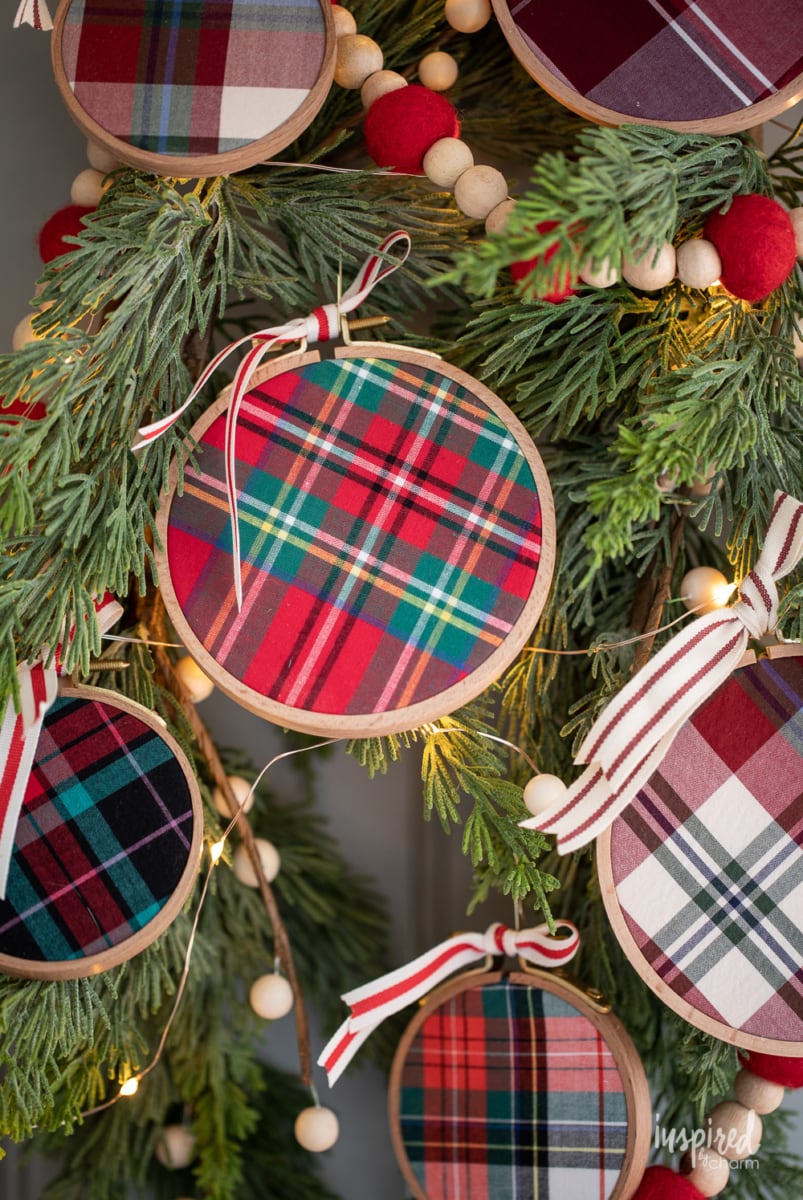
And with that, your embroidery hoop ornaments are ready to hang!
Variations:
When I was creating these Christmas ornaments I stuck with a theme and esthetic that fit me. However, feel free to get creative and make them your own. Some ideas to consider include:
- Use a material other than plaid shirts. Try a sweater, blanket, tea towel, vintage fabric, lace doily, etc.
- Add more color by painting your embroidery hoop before assembling it.
- Don’t want to use it on your tree? Add the ornament to a gift as a present topper.
- Try a different size. Go big and bold with larger hoop sizes.
- Get sentimental. Use a piece of clothing or fabric from a family member that may have passed away.
Proudly Hang Your Christmas Ornament:
And with that, your DIY embroidery hoop Christmas ornament is ready to trim the tree or deck your halls!
I hope you enjoyed this festive Christmas craft and are excited for more to come!
Seasons of Home Budget-Friendly Christmas
In the meantime, be sure to check out these wonderful, budget-friendly, and foraged Christmas ideas from my blogger friends.
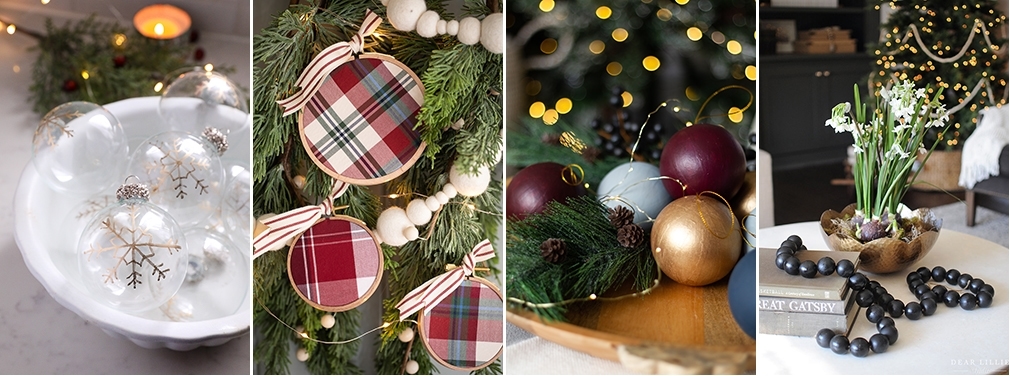
Elegant DIY Gold Snowflake Ornaments by Ella Claire & Co. | DIY Embroidery Hoop Christmas Ornaments by Inspired by Charm | Hand Painted Ornaments With Custom Colors by Zevy Joy | DIY Wooden Bead Garland and Homemade Christmas Decor by Dear Lillie
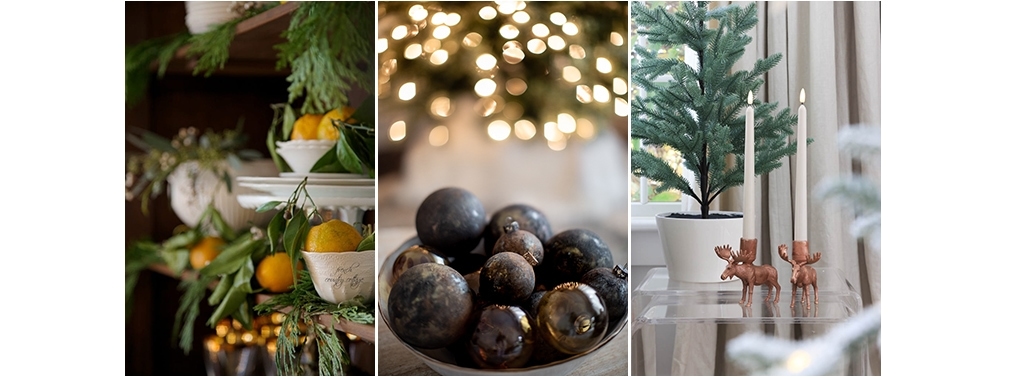
Foraged Christmas Decor by French Country Cottage | Faux Iron Ornaments by Craftberry Bush | Terrain Holiday Knock Off by City Farmhouse |
Love this holiday DIY and want more?
Join the IBC Mailing List to get all of my recipes, projects, and ideas sent straight to your inbox! I hope you’ll also join me on social media (Instagram, Facebook, Pinterest, and Twitter) for daily updates and behind-the-scenes looks at my work and adventures.
Have you tried this recipe? Follow me on Instagram, then share YOUR dish with #myIBC and tag @inspiredbycharm. It’s fun to see how folks are using recipes from IBC.
Embroidery Hoop Christmas Ornaments
Ingredients
- old / thrift plaid shirts
- embroidery hoops 3" and 4"
- sharp scissors
- 1/4" ribbon
- tacky glue or hot glue
- Optional: blackout fabric, thick paper or cardboard, felt, iron
Instructions
- Cut out all the usable pieces of fabric from your shirts by removing the seams.
- Open up your embroidery hoop. Set the solid ring under your fabric. Then take the ring with the screw and place it on top.
- Optional step: Put a piece of blackout fabric down first to make your ornament less transparent to the light.
- Press the top ring over the fabric and the bottom ring.
- Begin to tighten the screw making sure the fabric is spread taut. Completely tighten the screw.
- Flip your embroidery hoop over to the opposite side. If you used two layers of fabric, you’ll want to start by trimming the first layer (in this case the blackout fabric) as flush as you can to the ring.
- Then trim your shirt fabric layer leaving about 1/2-inch excess all the way around.
- Add a bead of glue to the inside back of the embroidery hoop.
- Using your fingers, fold over the excess fabric and press it into the glue to secure it.
- Cut a piece of ribbon and attach it with a knot to the screw of your embroidery hoop.
- And with that, your embroidery hoop ornaments are ready to hang!
You didn’t say what size wreath you used. What size was it?
Thanks for the embroidery hoop ornaments and the helpful ideas. I am embroidering and will use the hoops. Also, I appreciate the list of supplies, especially the beech hoops with brass fasteners. Merry Christmas!
So glad you found it helpful!
xo Michael
Or if you are Scottish, use your family Clan tartan as family gifts! Great idea, Michael!
Loved these & I decided to personalize mine. They turned out great! Thanks for the inspiration, Michael! You’re such a talent! Happy Holidays!
What a creative idea!!! I went to Goodwill today and found several plaid shirts. I am getting ready to order the embroidery hoops. How many did you use on your tree? My tree is nine feet tall so trying to figure out how many I might need. Thanks in advance for your help. LOVE your blog!!!
I would suggest using cutouts from Christmas cards received in previous years as the backing. Use the hoop to trace the circle centering the design on the card. Glue the card circle down after turning under the excess fabric. You could also use coordinating craft paper alone or let the kids apply Christmas stickers. Using the card or craft paper would also eliminate the need for the blackout fabric.
What a wonderful way to add some color and nostalgia! I’m thinking of using scraps of fabric from memorable projects or scraps of favorite old clothing/bedding. Love this and can’t wait to add to my tree! ♥️🎄💚
These are so adorable. They will be hanging on our X-mad tree this year. Thanks for sharing.
I was so happy to read that you’re going to diy and use what you have this year. These ornaments are perfect for a more homespun thoughtful season. I always feel inadequate at Christmas when I see so many IG accounts spending hundreds of dollars on all new trees, decor, greens and flowers. I can’t wait to see how you use your beautiful existing decor this year. Thank you for sharing an idea that is attainable and pretty. Here’s to a stress free, debt free meaningful holiday season🎄
This is the cutest idea! 😍🎄
Thank you so much!!
xo Michael