DIY Vintage Christmas Ornament Wreath
This Post May Contain Affiliate Links. Please Read Our Disclosure Policy
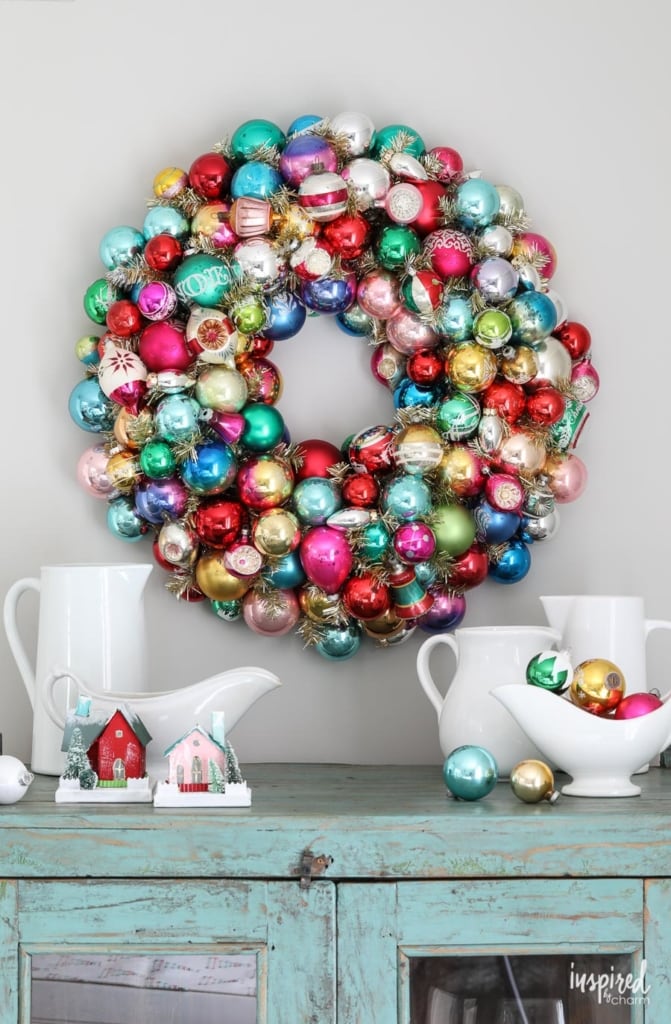
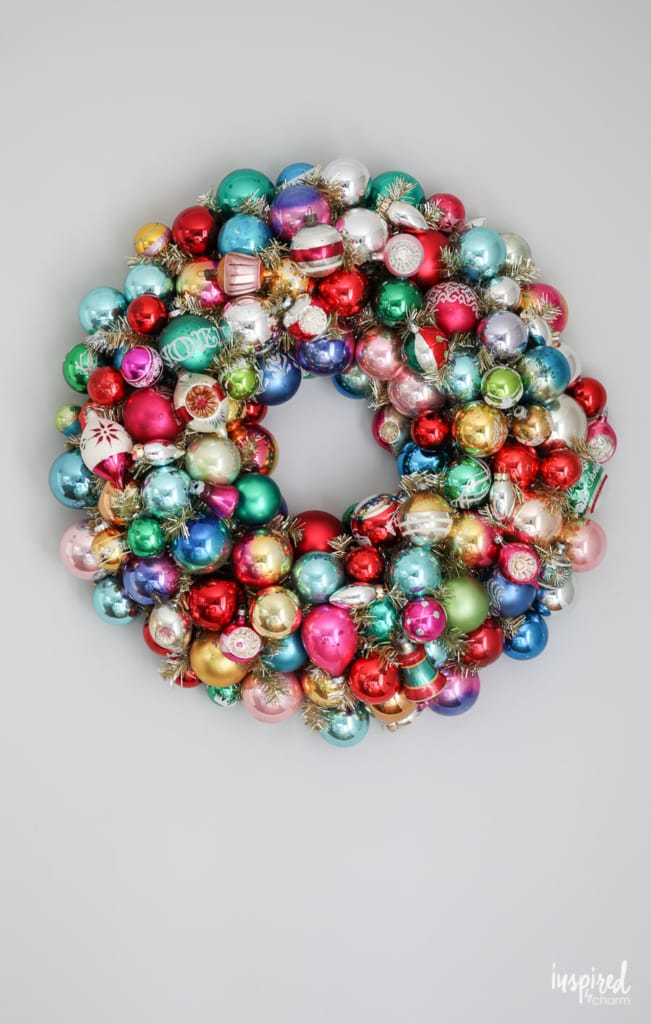
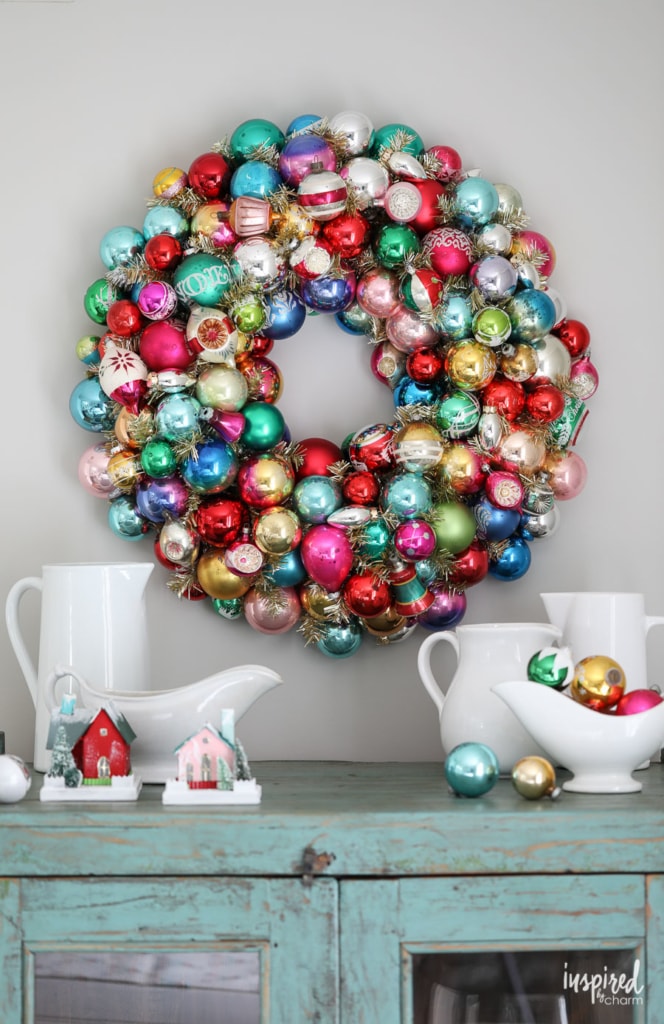
Transform your Christmas decor with this DIY Ornament Wreath! Whether you have cherished vintage ornaments or shiny new baubles, this wreath will be the centerpiece of your festive decorations.
I’m so thrilled to be sharing this DIY Vintage Christmas Ornament Wreath with you today.
Can you sense the holiday spirit already wrapping us in its warm, twinkling embrace? As the holidays inch closer, I find there’s nothing quite like adding a personal touch to our festive decor. And that’s why I’m so excited about this ornament wreath! Whether you’re using cherished vintage ornaments or just unwrapping brand-new shiny baubles, you are going to love this festive DIY project.
As I’ve mentioned a few times here on the blog, I have a mild obsession with glass Christmas ornaments. I’ve been collecting them for years. If I remember correctly, it all started with my rainbow Christmas tree. It’s been an obsession since then and I finally decided to put them to use.
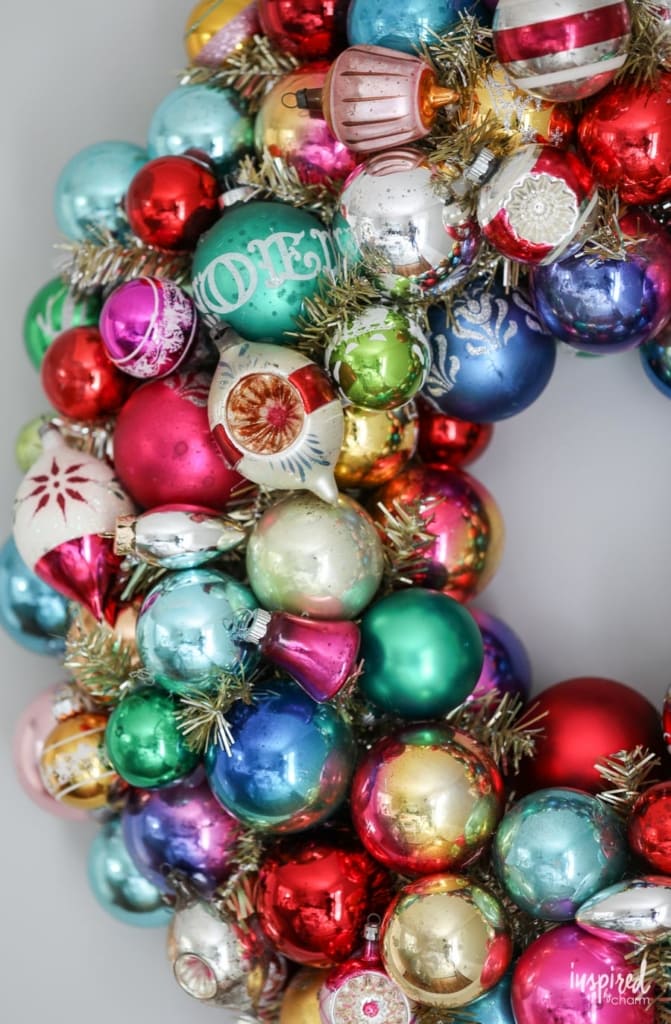
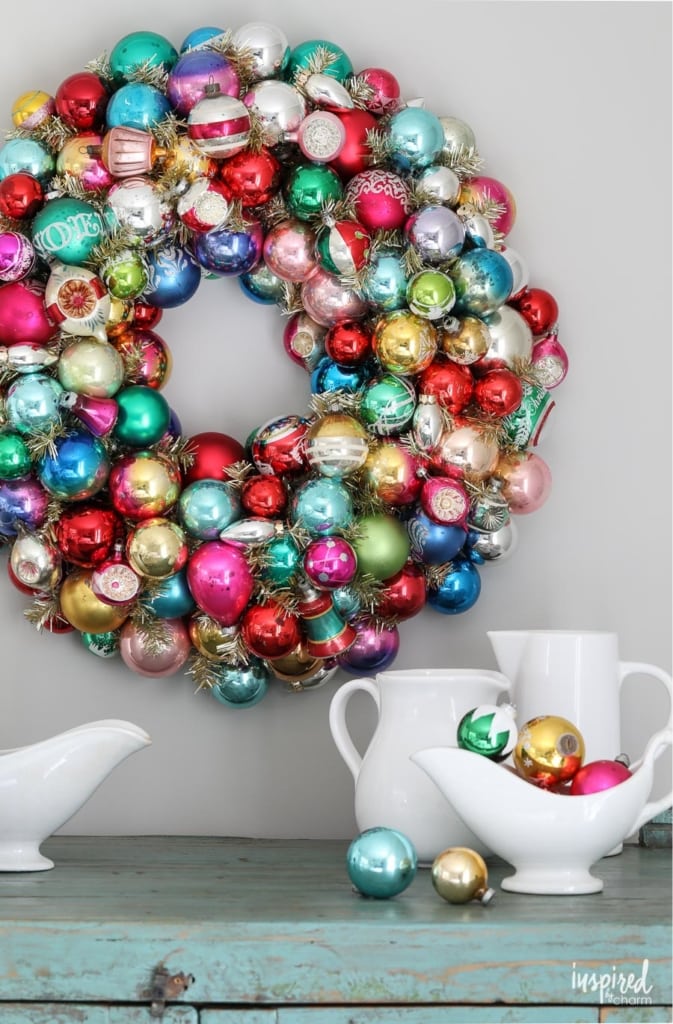
I made my using my collection of vintage glass Christmas ornaments. I love vintage christmas decor! You can use whatever collection of ornaments or color of ornaments YOU love. You can do all one color, only gold and silvers, classic red and green, etc. I’m here to teach you how to do it, you can use whatever colors or style works best for you.
Looking for more homemade wreaths? You’ll love these: Gingerbread Cookie Wreath, Marshmallow Wreath, Rainbow Ornament Wreath, Star Anise Wreaths, and Cookie Cutter Wreath.

Why You’ll Love This Project
- Vintage Christmas ornaments hold a special place in our hearts. Whether they’ve been passed down through generations or you’ve scored some beauties from thrift shops, they all tell a story. This wreath is your canvas to showcase those tales.
- Crafting shouldn’t be rocket science, right? This DIY wreath is all about simplicity, holiday cheer, and letting your personality sparkle. If DIY isn’t your usual jam, don’t fret! My guide will lead you through, ensuring you come out with a wreath you’re proud of.
- Here’s the beauty of it – whether you’re into the charming vibe of vintage ornaments or the gleam of new ones, this project is your blank slate. Mix and match, go with a theme, or let chaos reign! Your wreath, your rules.
- Brace yourself for a barrage of “oohs” and “aahs”! This wreath isn’t just a decoration; it’s a conversation piece. Get ready to chat about crafty weekends, ornament stories, and all things holiday when guests drop by.
Enjoy making your own holiday decor? Check out this collection of my best handmade holiday Christmas decor ideas.
Materials
Before we get started. Here’s what you’ll need to craft and ornament wreath.
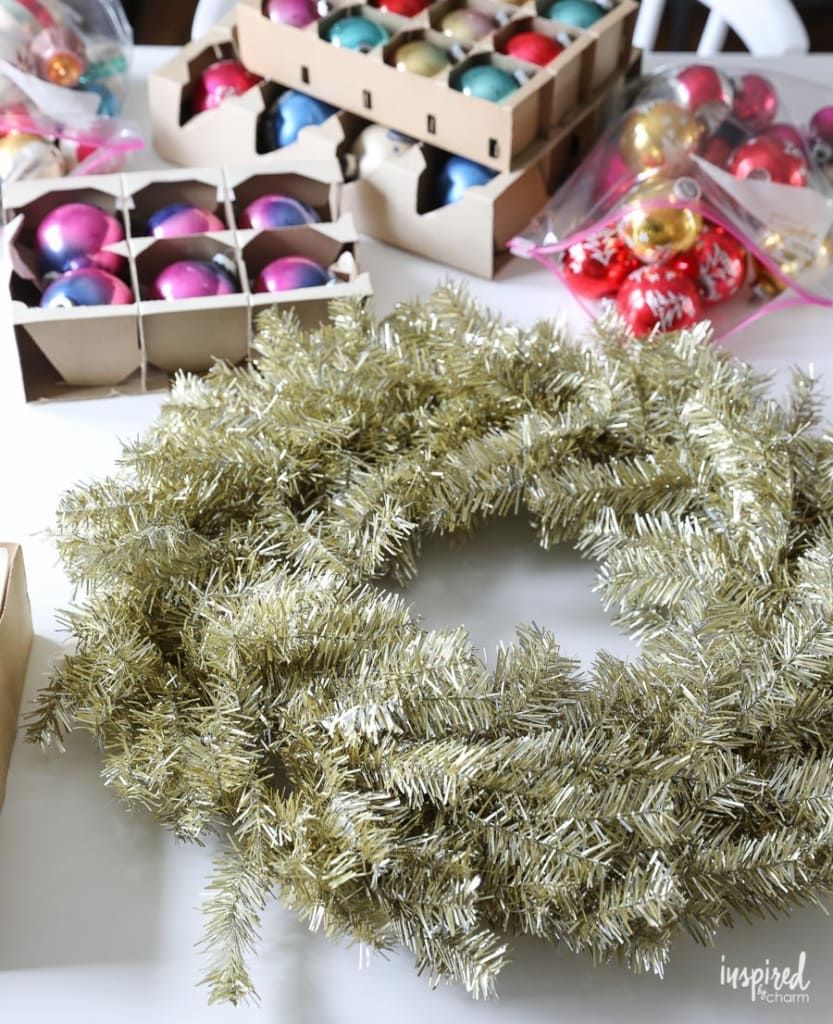
- ornaments – I used my personal stash of vintage glass ornaments in an array of colors. This project will work with new glass ornaments and shatterproof ornaments. Use what you have and love. There are about 150 ornaments on my wreath. To get a full look, you will need ornaments in various sizes.
- tinsel wreath – This is the base of the project, so it’s important. I chose this tinsel one because that felt vintage to me, but a green wreath with faux pine-like needles would work well, too. Having a wreath made from the right material is important because you’ll be hot gluing the ornaments to it. Hot glue does not hold glass on glass. A wreath like this one will give your ornaments something to adhere to.
- hot glue gun and glue sticks – A basic glue gun an glue sticks will do the trick here.
Surprisingly enough, crafting an ornament wreath is fairly straightforward. However, after making one myself I do have a few tips to offer that will make the process even easier.
Let’s get started, shall we?

How to Make
Okay, with supplies in hand, we’re ready to craft this ornament wreath. I’ll walk you through the steps below. For your convenience, I’ve also provided a supply list and detailed instructions in the printable project card below.
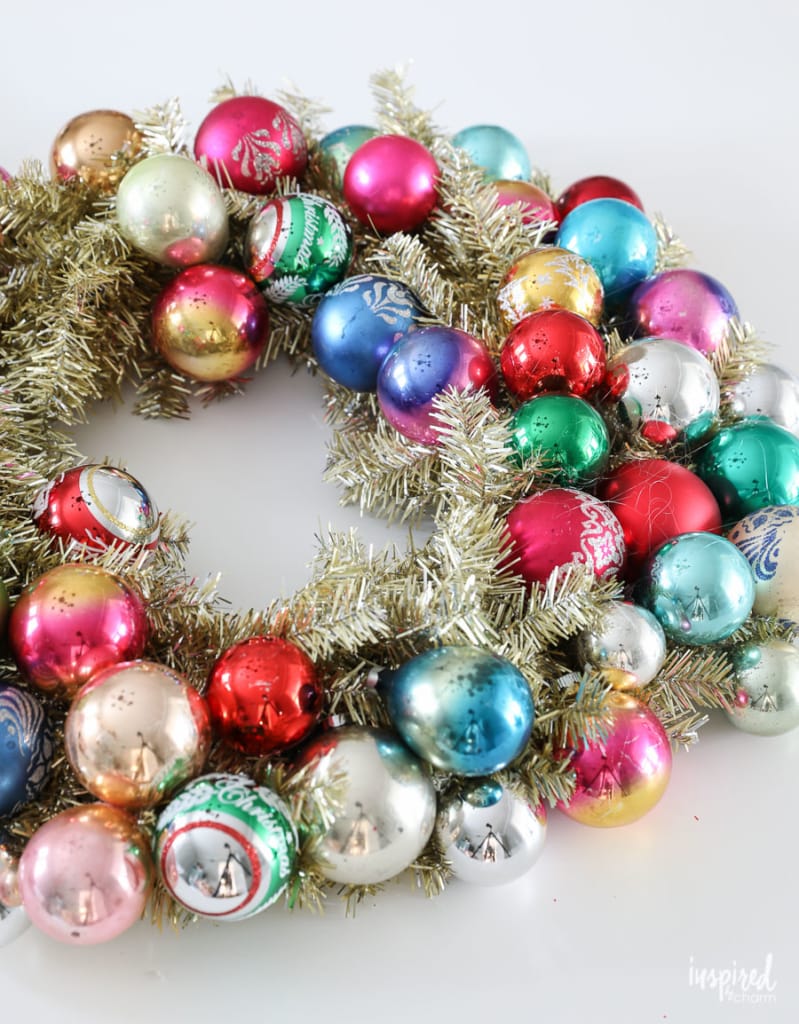
- Begin by cutting off 10-15% of the pine needles from your tinsel wreath; set them to the side. Then, using a glue gun, start attaching the ornaments, one by one, to the wreath.
- For the majority of the ornaments, I put the hot glue near the tops (hangers) because I didn’t want those to show. With the hot glue on the ornament, gently press it on the wreath. Ensure that the hot glue on the ornament is coming in contact with the tinsel/pine needles This will provide the hold you need.

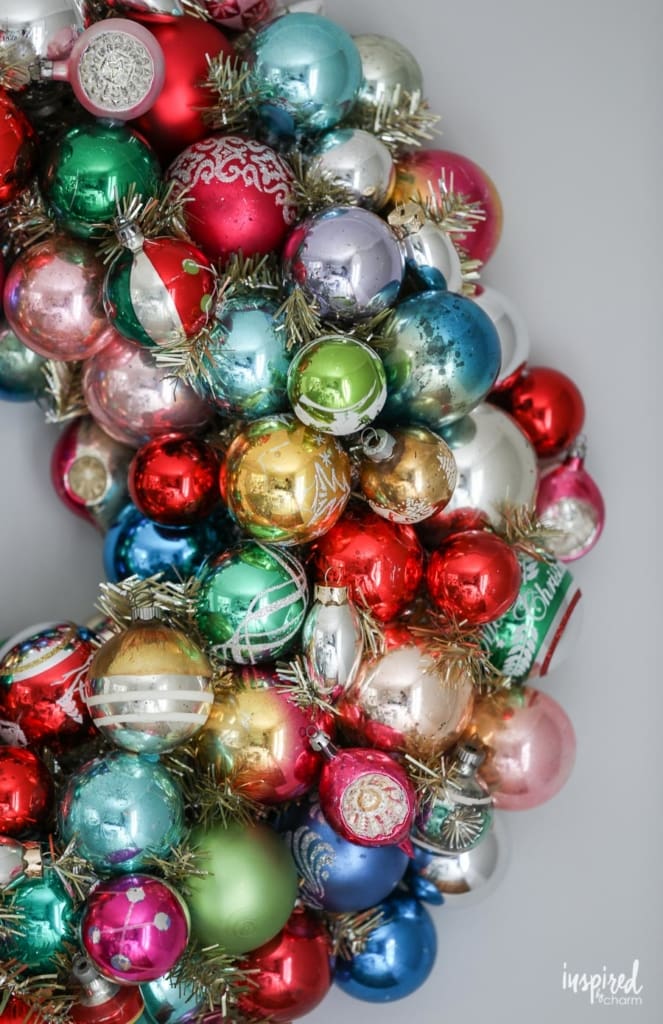
- I started by gluing ornaments in a small section and then worked out from there. Attach the larger ornaments first and then fill in with smaller ones. Save your special ornaments and glue them on when most of the other ornaments are in place.
- Once you start covering the wreath, it will be harder to find areas where you can attach the ornaments to the tinsel/pine needles. This is when you’ll use the pine needles that you cut off at the beginning. As needed, tuck them between the ornaments and use hot glue to secure.
- I also found it helpful to flip the wreath over and add hot glue in various places on the back of the wreath to ensure everything was well secured. However, as you work, be conscious of where you are adding the hot glue so that it’s not visible on the front of your wreath.
- Once the wreath is covered, double check to make sure everything is well glued. (If you are using glass ornaments, be aware that you will probably break a few along the way. It’s almost inevitable.) If there are any areas where things aren’t securely attached, add hot glue to a piece of your reserved tinsel/pine needles and place it between the two ornaments. This will create a stronger bond.

- Finally, look the wreath over carefully and trim off any hot glue strands or tinsel/pine needles that might be sticking out. Then, attach a piece of floral wire to the back of the wreath. Put the wire around the metal frame of the wreath for a firm hold.
- Sit back and admire your handiwork!
💌 SAVE THIS POST / RECIPE!
That, my friends, is the step-by-step process I followed to make a Christmas wreath out of ornaments.
The whole project took about 2 hours, and overall, things went swimmingly. The only exceptions were a few ornament casualties and one nasty hot glue burn.
Frequently Asked Questions
What type of base should I use for the wreath?
Foam or wire wreath forms work wonders for this project. If you’re going for a plush, full look, a foam base might be your best bet. For a more rustic, airy vibe, wire forms are perfect.
How do I secure the ornaments so they don’t fall off?
Good quality hot glue is the MVP here. Make sure you secure each ornament well, especially if you’re placing your wreath on a frequently used door. For extra security, you can also use floral wire.
Can I use broken or chipped ornaments?
Yes, you can! In fact, it adds a unique charm. Just position them in a way where the flaws aren’t immediately visible, or even better, embrace the imperfections as part of the wreath’s story.
How do I store the wreath after the holidays?
Store your wreath in a cool, dry place. Do not store in a hot attic as the glue will melt. (I know from experiences.) Consider wrapping it in bubble wrap or placing it in a cushioned box to protect the ornaments from any damage.
Any tips on choosing a color theme?
It’s all about what vibes with you! Classic reds and greens, icy blues and silvers, or even a rainbow explosion – there’s no wrong choice. If you’re using vintage ornaments, let their colors guide your palette.
I don’t have enough ornaments. Any suggestions?
Absolutely! Consider incorporating other elements like ribbons, pinecones, faux berries, or even Christmas lights. It’s all about creativity and making the wreath uniquely yours.
More DIY Holiday Decor You’ll Love
- Handmade Clay Mushroom Ornament
- DIY Popcorn Garland
- Paper Chain Christmas Garland
- Embroidery Hoop Ornaments
- Bottle Brush Christmas Tree Stirrers
Now you should have all the tools and steps you need to craft your own ornament wreath. Whether it’s reminiscing about old memories or creating brand new ones, this festive season is all about making every moment count. Let’s make it shimmer and shine, one ornament at a time!
If you try this festive project and enjoy it, please leave a comment and a 5-star rating below.
Want more from Inspired by Charm? Join the IBC Mailing List for inspiration in your inbox! Follow along on Instagram and TikTok for daily updates and behind-the-scenes looks at my processes. There’s even more inspiration on Facebook and Pinterest!
You’re featured in the Pioneer woman newsletter/website and she linked us here lol Been a huge fan of yours for forever! Thought you’d wanna know.
https://www.thepioneerwoman.com/home-lifestyle/crafts-diy/g34240450/vintage-christmas-decorations/
How do you store this wreath after Christmas? Has anyone had any issues?
I store it on a piece of cardboard, then wrapped in a garbage bag. Store in a natural temperature area avoid heat (attic) or cold (garage).
xo Michael
I just found your blog and love this wreath – and OMG the rainbow tree came from YOU! I found it on Pinterest and copied it in my front room this year, and it gets soooo many compliments. Now I know who to credit!
I LOVE it!!!!! I had some random vintage ornies I got at an estate sale that I wasn’t going to use on my tree and figured I’d sell them but I’m going to give this a shot! I’m thinking I will spray paint a green wreath to get the silvered effect-what do you think?
Love the wreath! It reminds me of a tabletop tree my grandma always put up. I’m planning to make a wreath of my own. Thanks for the great idea!
I love how you’ve chosen to use an evergreen (faux?) as the base of your ornament wreath. It is more festive and warm to have the foliage showing through in places. I have lots of vintage ornaments so I’ll get a wreath after Christmas at a discounted price and be ready to use it next year. Great idea! Thanks for sharing. It is really beautiful!
Beautiful wreath. I need to collect about a hundred more ornaments tome one – ugh. Your eye for detail is amazing. Keep on posting.
Michael, there’s a comment on this post that lists an inappropriate link–the comment from ZACHARYOMIMI, I thought you’d want to know.
The wreath is awesome btw.
Thank you! It’s been deleted.
xo Michael
i think it’s beautiful, you can make me one anytime ☺️☺️ and thank you for the great tips!🥰
Great idea for using those vintage glass ornaments, I’m thinking a single color(maybe smaller) wreath would be cute too. Thanks for the inspiration.
Pat
You make it seem so easy to do even I could try it. Thank you for instilling some confidence into me.
Love your use of multi colored ornaments. This wreath along with your rainbow tree are classy and beautiful. Love your work.
This wreath is GORGEOUS!!!! WOW! You are amazing!
Gorgeous! I need to make one. Love the fullness. Lavender essential oil is great for burns. Even just the auria cacia that you find at a natural grocers. And fresh cut aloe
Oh! Good to know! Thanks, Susan!
xo Michael
love, love, love!
I’m loving all your Christmas posts so far! It’s fun to see how your new home is coming together for the holidays!
So pretty! Those ornaments remind me of my grandmothers’ trees.
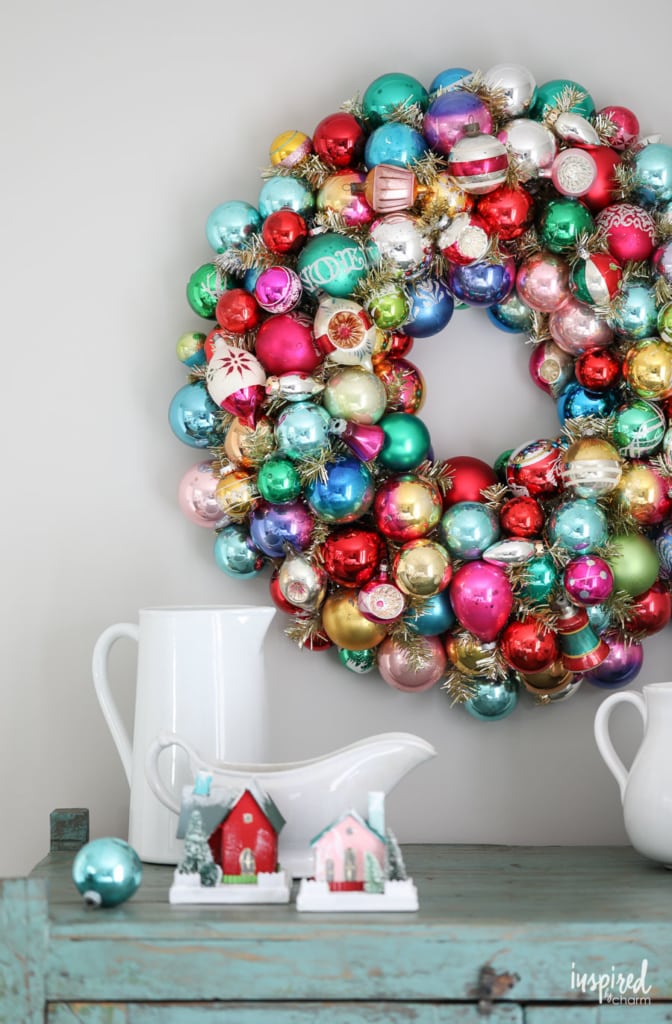
Love it!!! Where are the little houses in the picture from?
I found them at a craft market a few years ago.
xo Michael
Once again Michael, you nailed (glued) it! Beautiful!
That is stunning!