DIY Clay Mushroom Ornaments
This Post May Contain Affiliate Links. Please Read Our Disclosure Policy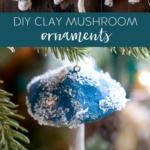
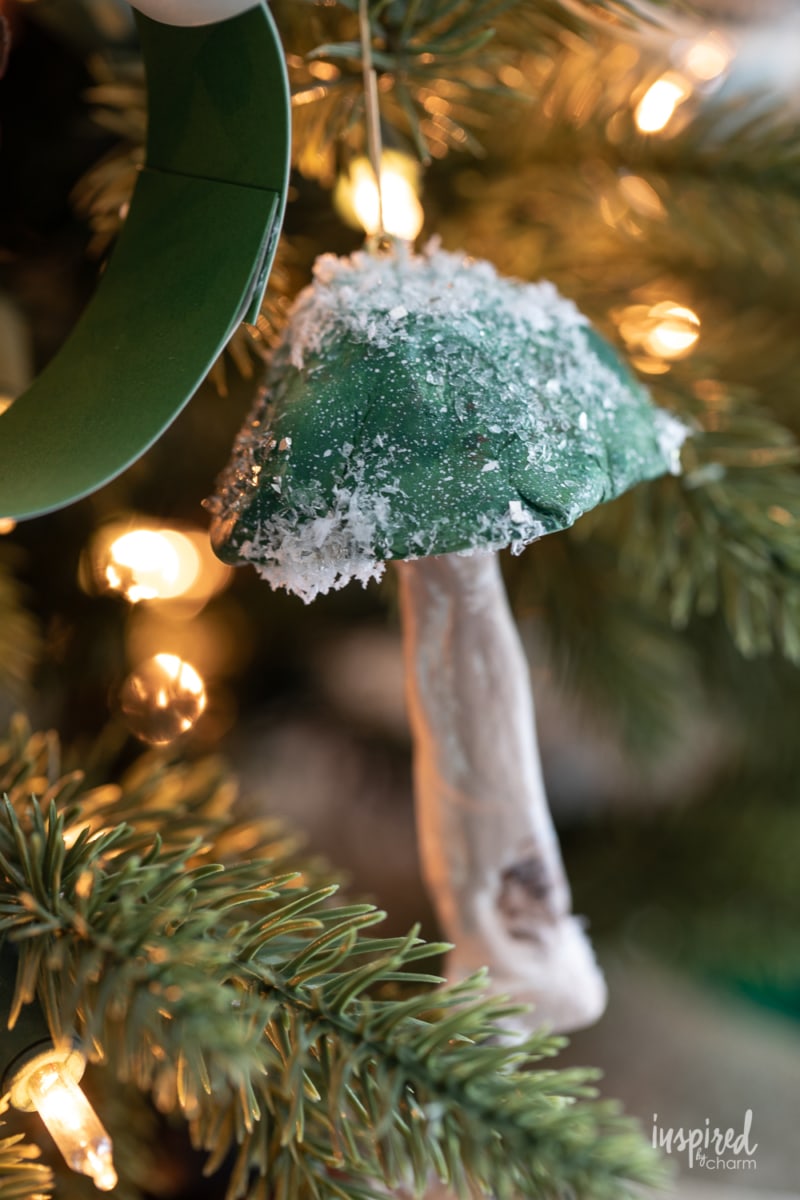
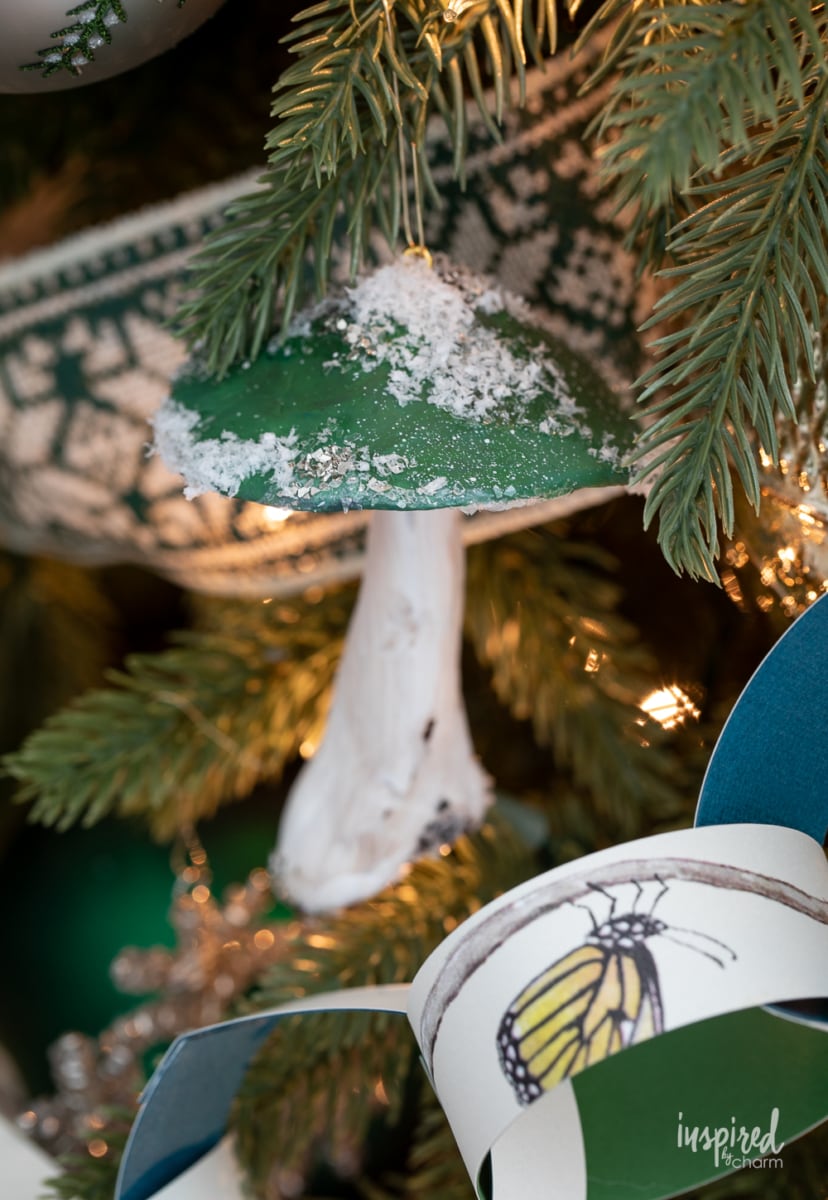
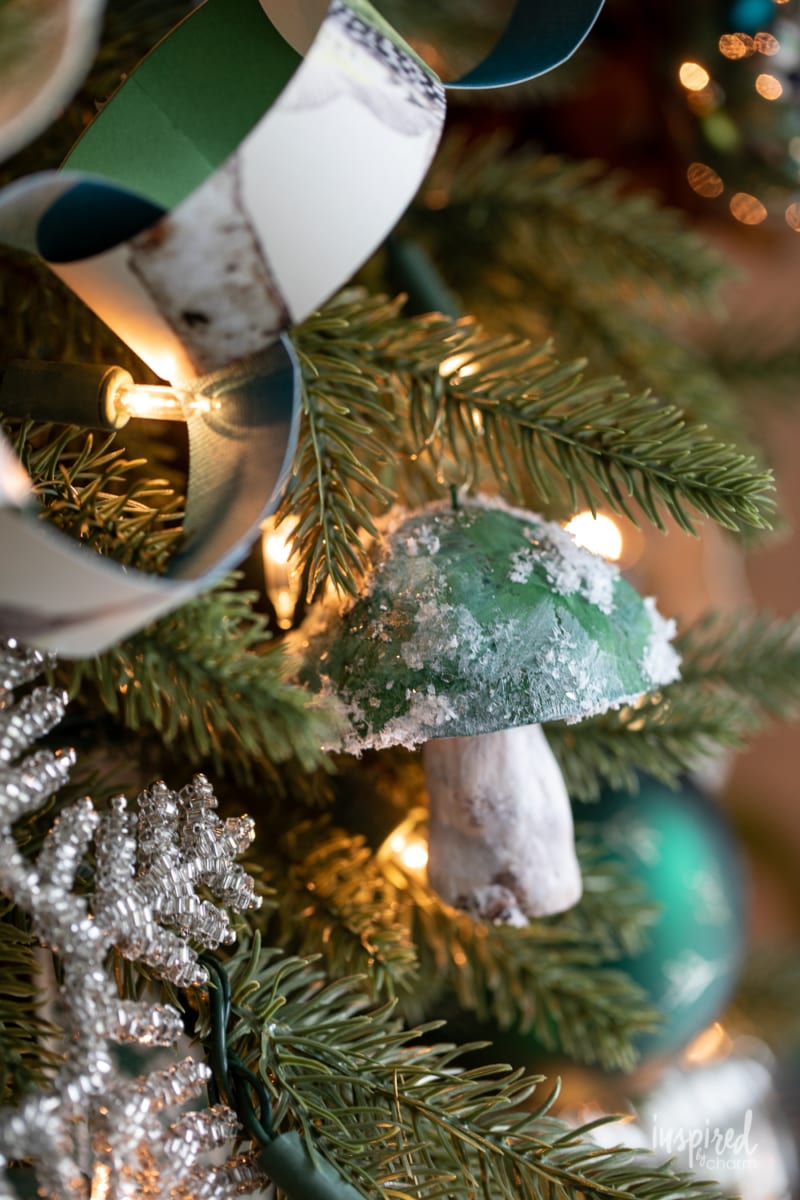
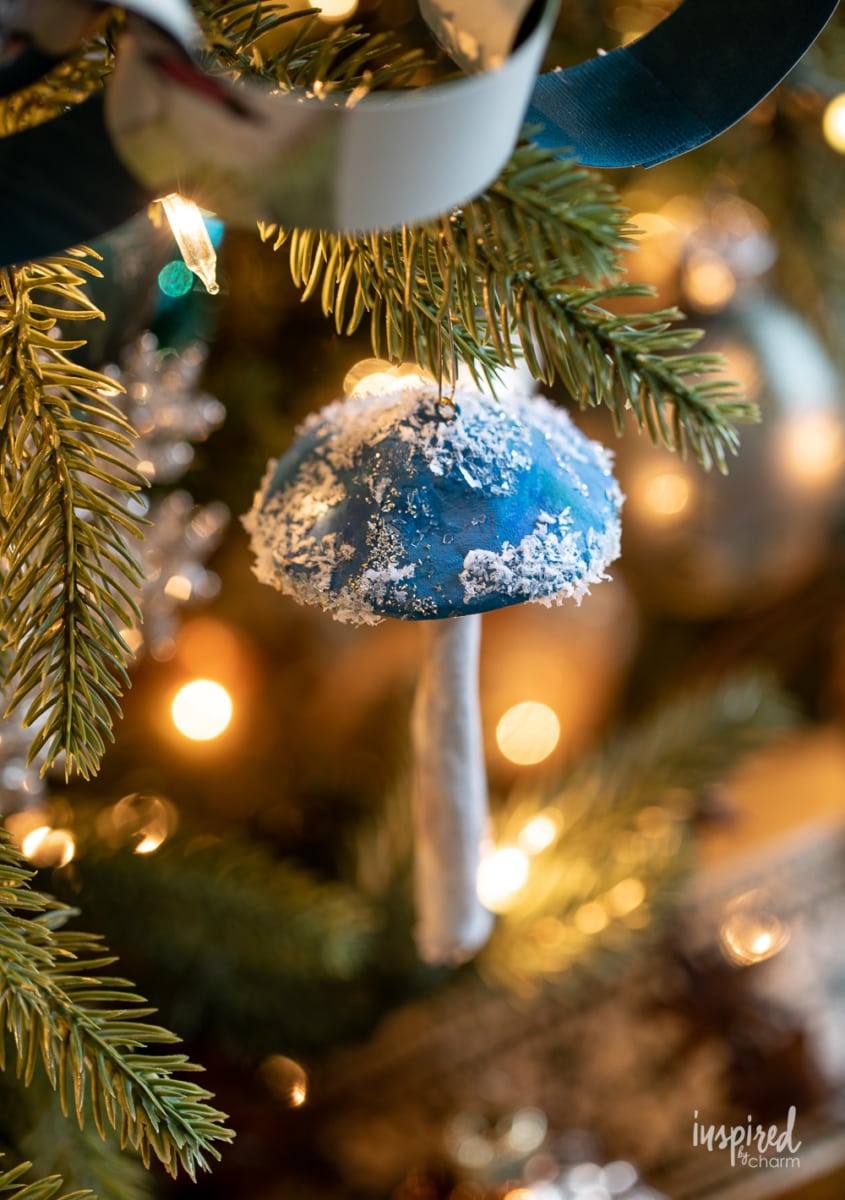
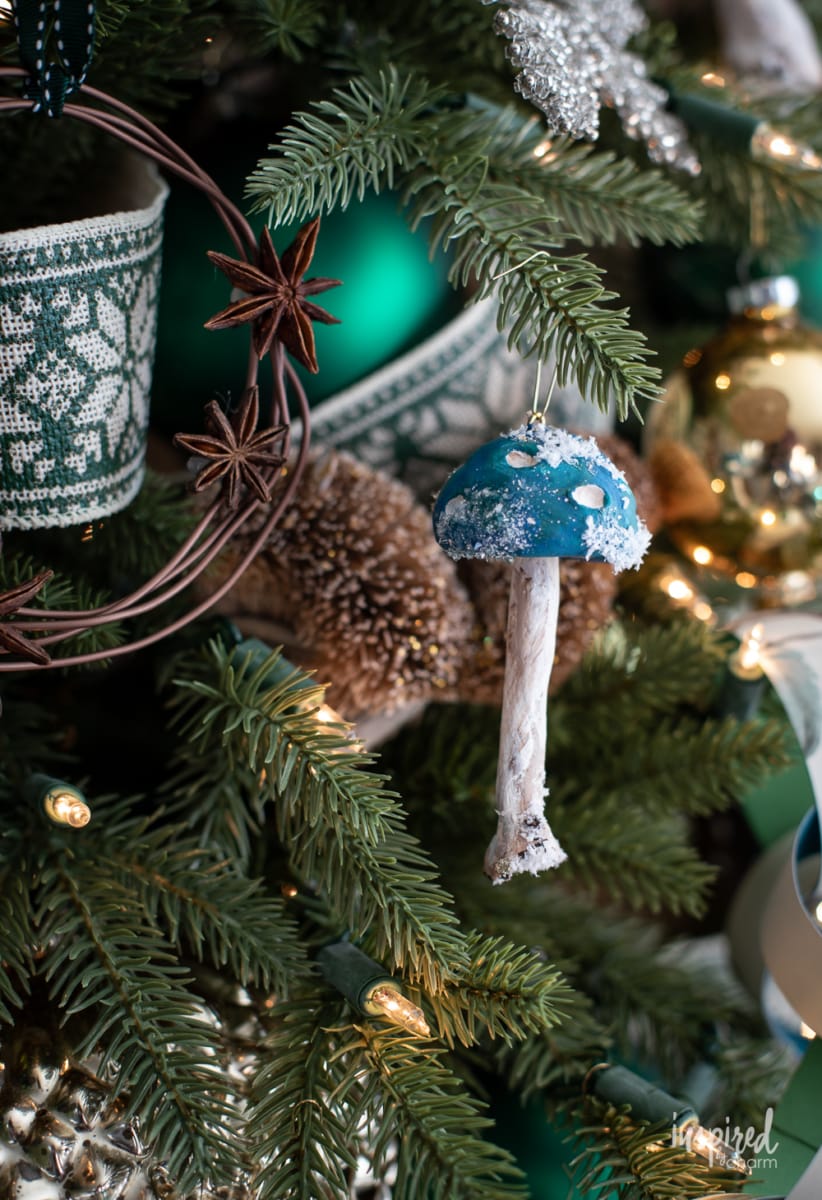
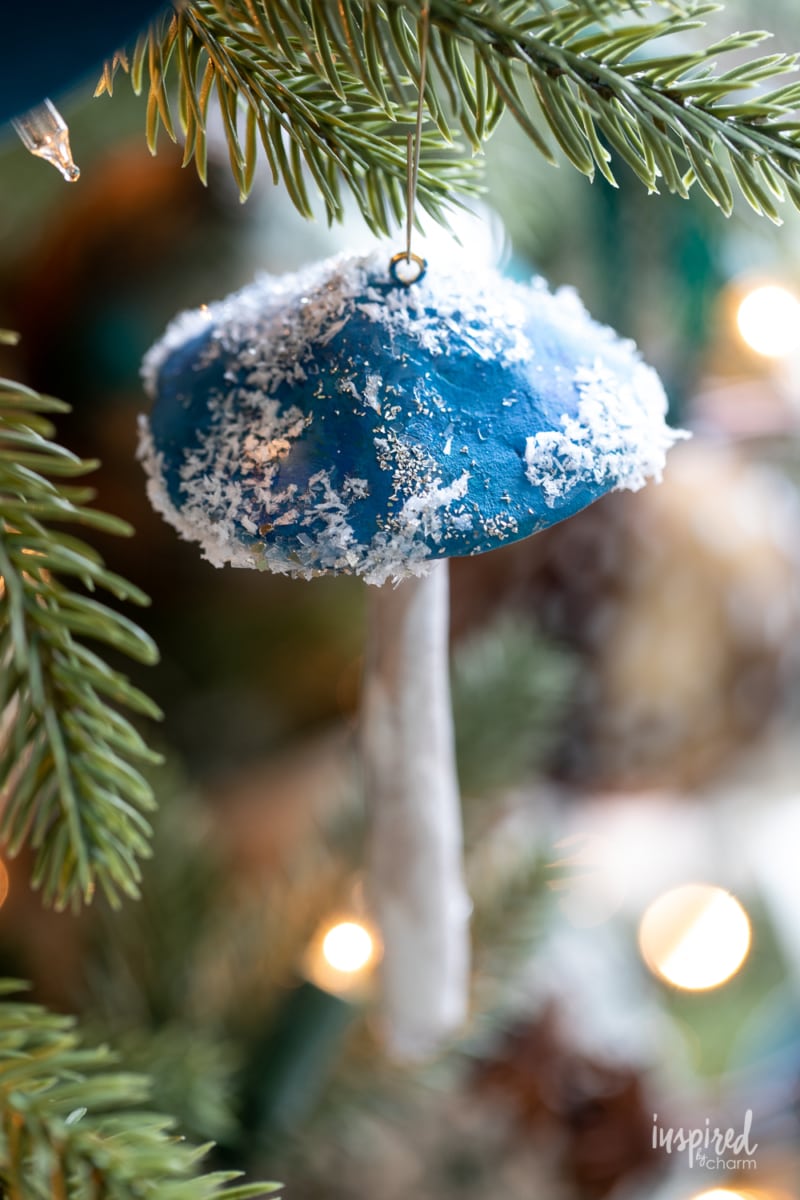
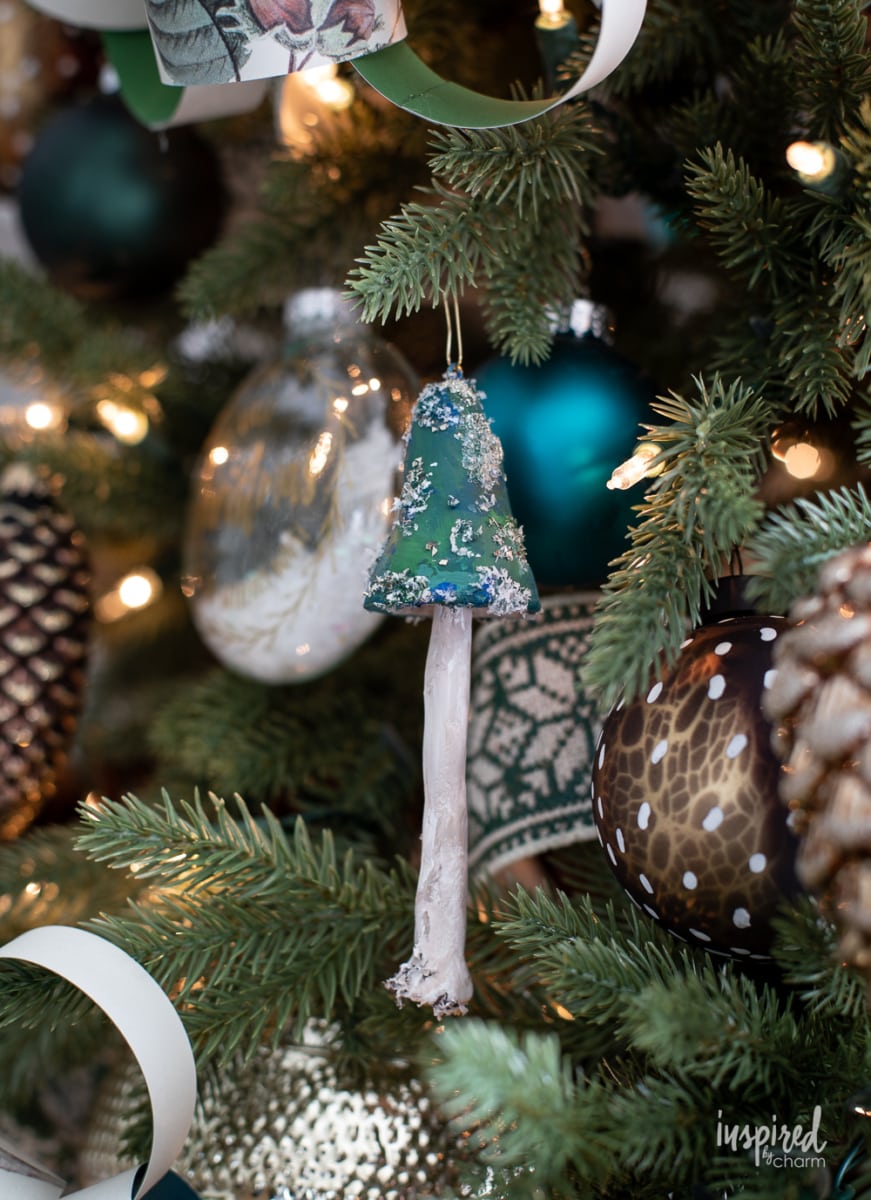
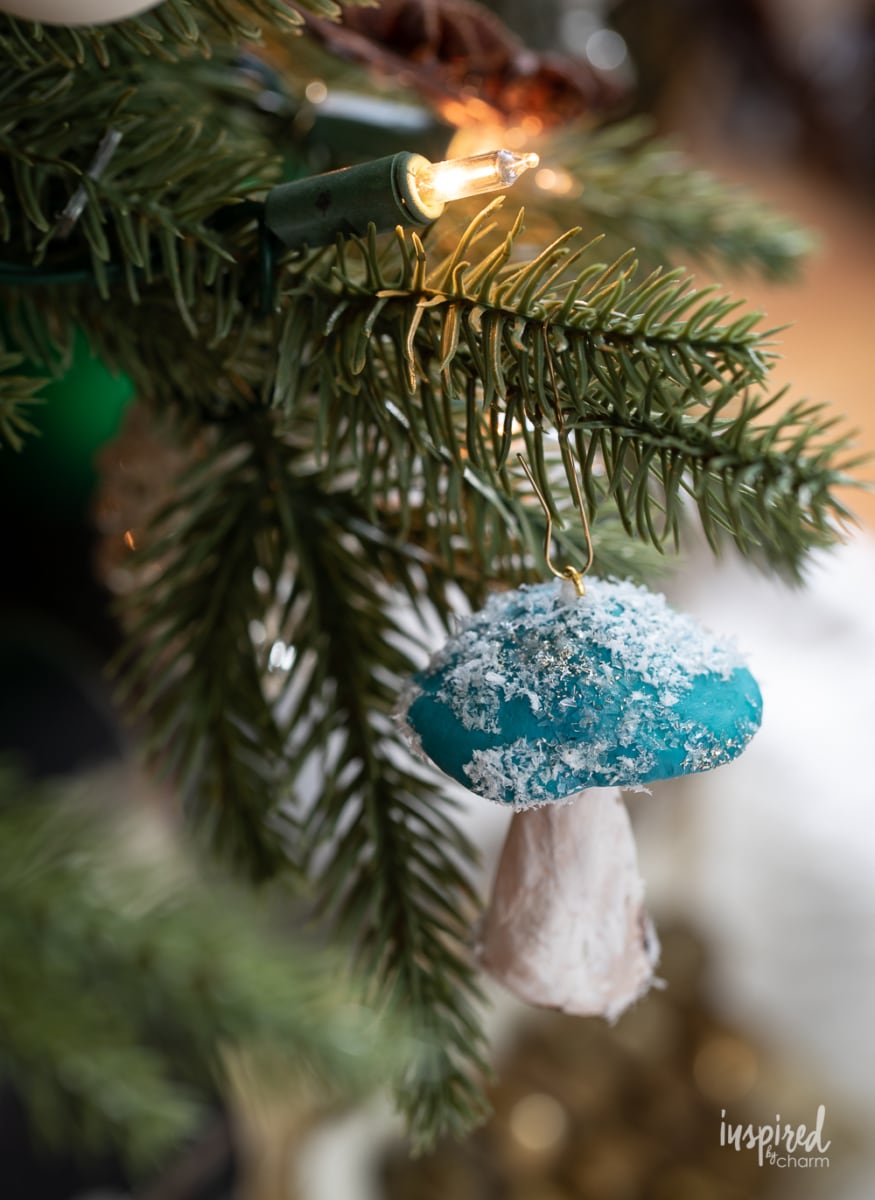
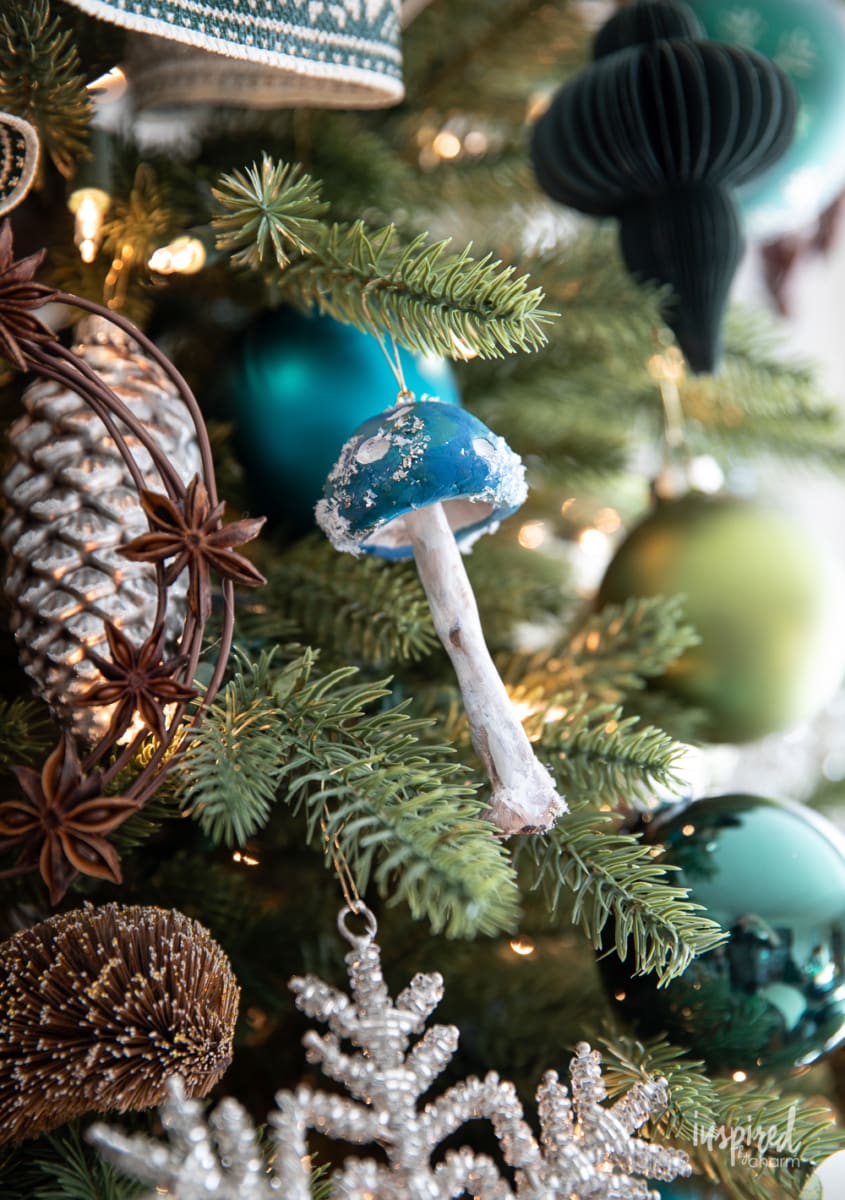
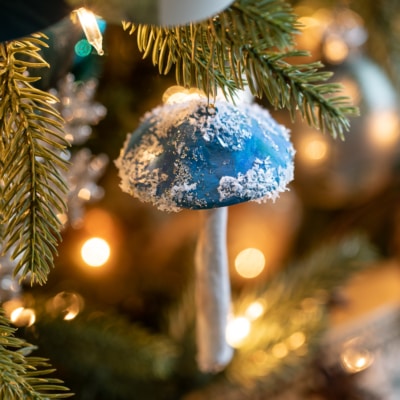
Transform air dry clay, paint, and glitter into these festive DIY clay mushroom ornaments. Mushrooms have become a popular Christmas tree ornament. Now you can make your own to trim your tree in a unique and personal way.
Mushroom Ornaments for Christmas
You might know that I have a thing for mushrooms at Christmas. I’ve decorated my tree with them, I’ve turned them into cookies, and next week I’ll be making meringue mushrooms to decorate a yule log.
In this post, I’m teaching you how to make your own mushroom ornaments from clay. This might be my new favorite DIY.
I’m using these ornaments on my living room Christmas tree along with my DIY paper chain that I made from leftover wallpaper and my DIY rustic anise wreaths. I’ll be sharing the full tree soon. Stay tuned!
Why I love this project:
I have been wanting to make these mushrooms for a couple of years. Since I’m focusing on a handmade holiday this Christmas, I knew this was the time to get to work and make it happen. I’m loving the results. Here’s why:
- These mushroom ornaments are easy to make.
- Their imperfect look makes this a project that anyone can tackle.
- You can customize the color, shape, and size to match your decor.
- They add a touch of whimsy, sparkle, and color to your holiday decor.
- They double as a sweet gift idea or present topper.
While mushroom ornaments are quite trendy at the moment, they have been used in Christmas decorating for quite some time.
Looking for more handmade Christmas decor? Try these:
- DIY Clay Cookie Cutter Ornament
- Handmade Embroidery Hoop Ornaments
- Hand Strung Popcorn Garland
- Gingerbread Cookie Wreath
- Vintage Ornament Wall Decor Christmas Tree
What is the Meaning of a Mushroom Ornament?
Mushroom ornaments mean good fortune or good luck. Finding a mushroom in the woods is always a special thing (just like finding a dollar bill somewhere).
Not only are mushrooms fun and whimsical, but hanging a mushroom ornament on your Christmas tree shows honor to nature and hope for a good future in the new year.
Why Mushrooms at Christmas?
Well, not only are some mushrooms found at the base of pine trees but it’s said that mushrooms are a favorite food of reindeer.
I bet you didn’t expect to get a history lesson with today’s DIY! You learn something new every day.
Ready to make some mushroom ornaments for your Christmas tree? Let me walk you through the materials and tutorial.
Materials
Here’s what you’ll need:
- air dry clay – I used THIS clay from Das. It’s very easy to work with.
- small eye hooks – You can find the ones I used HERE. I opted for gold, but you can use whatever color you’d like.
- circle cookie cutters – You might not need THESE, but I found them helpful in getting a nice circular shape.
- hot glue gun and glue sticks – Any will do. I used THIS hot glue gun and THESE hot glue sticks.
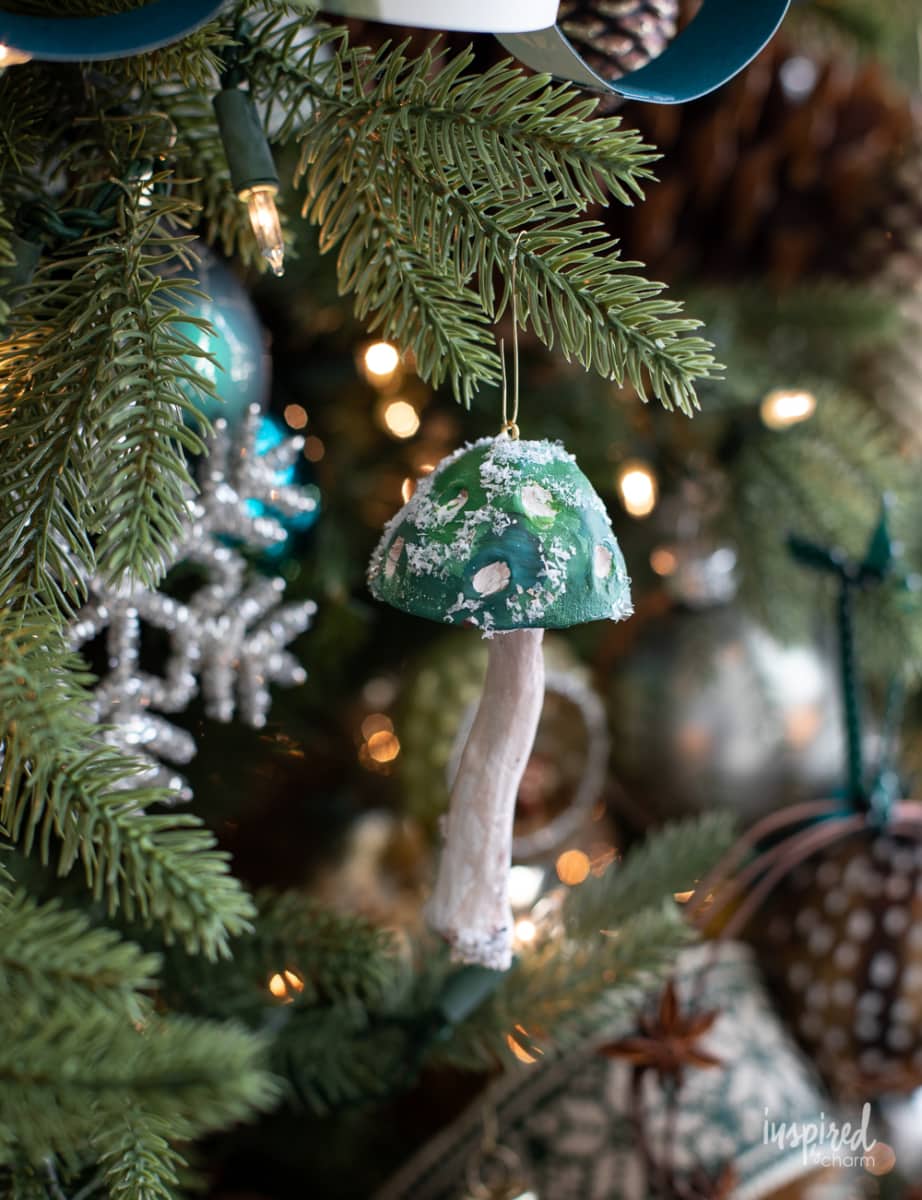
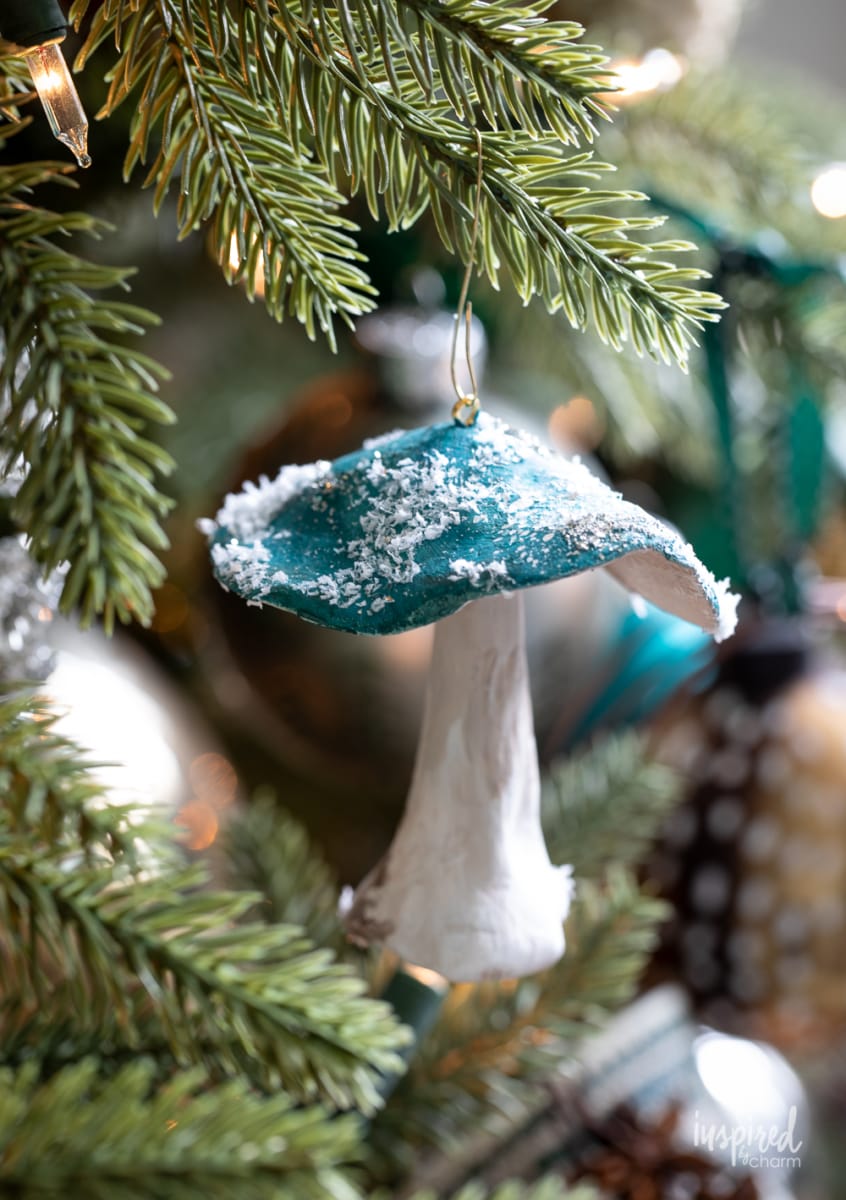
- acrylic paint – You can use whatever colors you’d like. I went for shades of green, blue, and teal to match my tree.
- tacky glue – Aleene’s is the best!
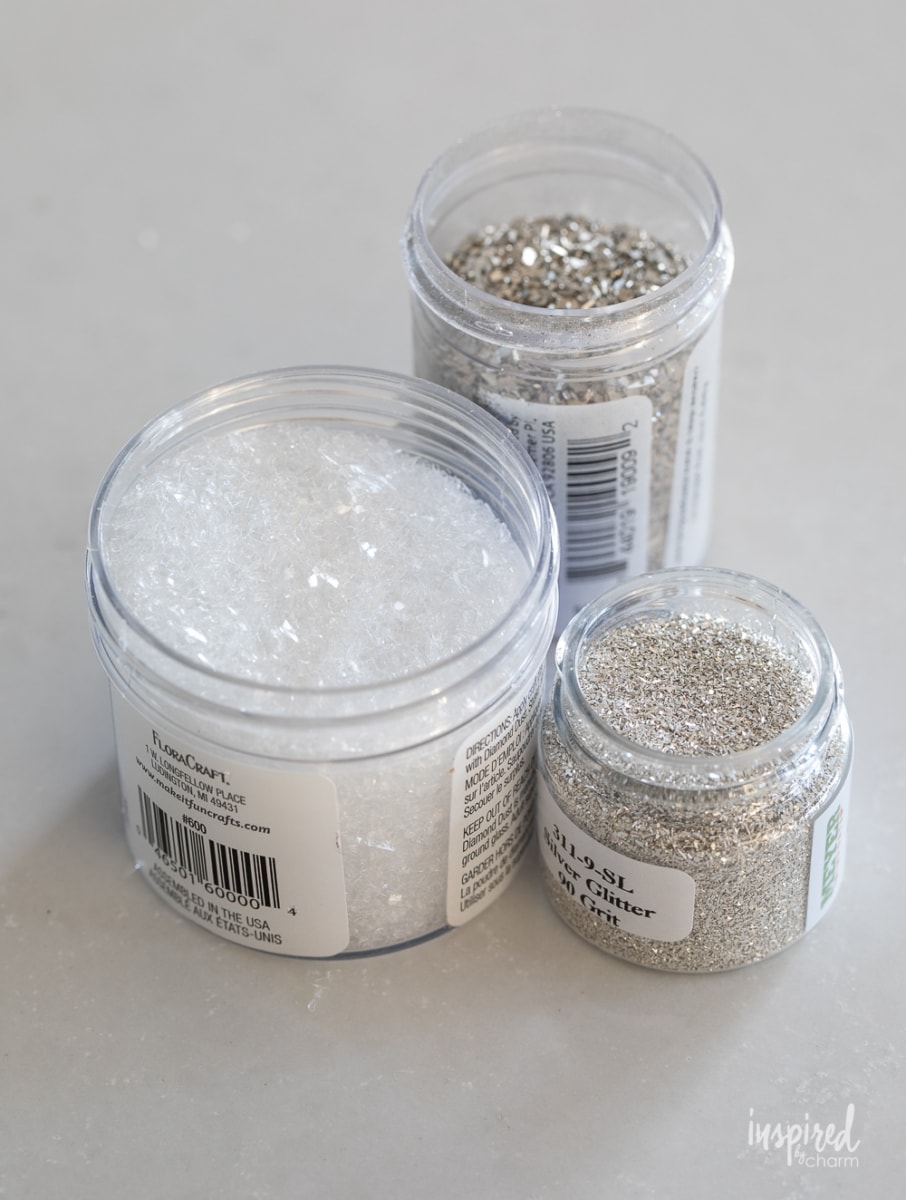
- German glass glitter – The sparkle of German glass glitter is unbeatable and my personal favorite. I used THIS and THIS.
- clear glitter – I love the frosted sparkle look THIS glitter added. It’s clear, so you can see your paint color through it.
- fake snow – A bit of fake snow adds texture and frostiness. I used THIS.
- ornament hooks – THESE are my personal favorite. I use them to hang all of my ornaments.
With that, we are ready to start crafting!
How to Make Mushroom Ornaments:
Below, I’m going to give you a detailed process of how I made these ornaments along with some of my tips and tricks. I’ve also provided a more condensed version of the procedure as a printable card at the end of this post.
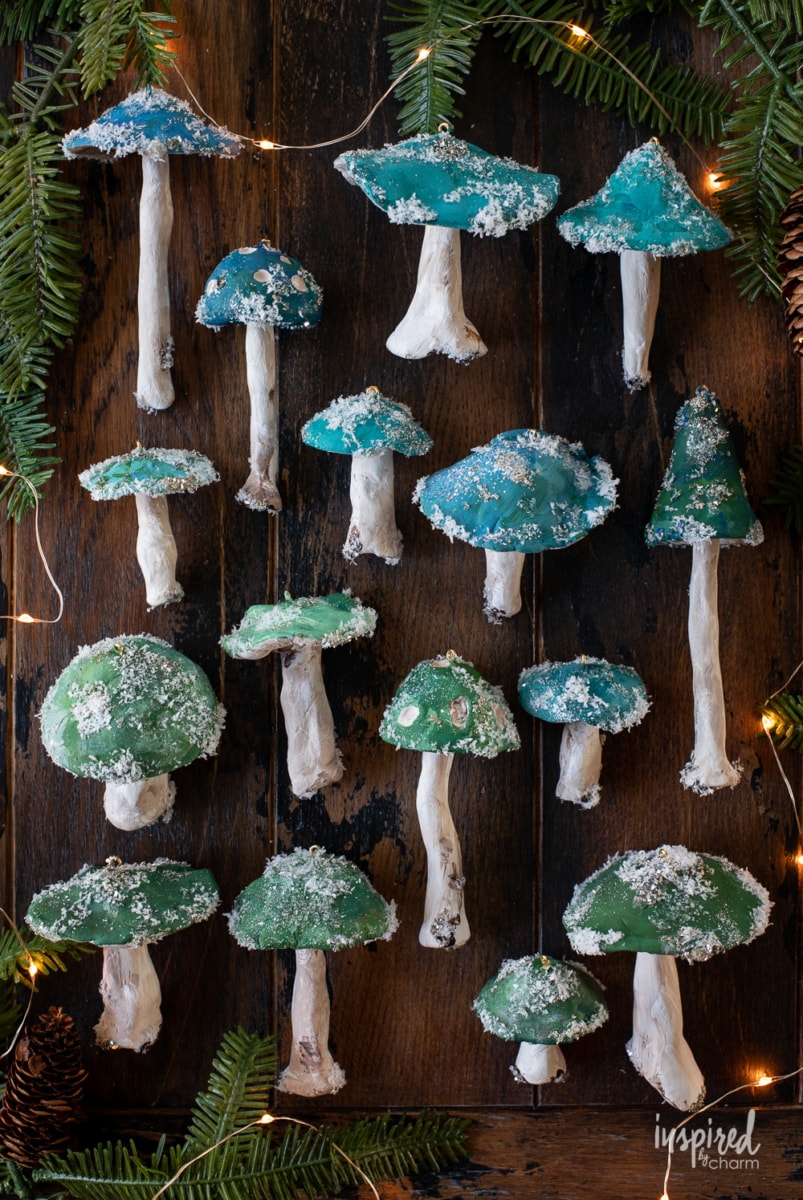
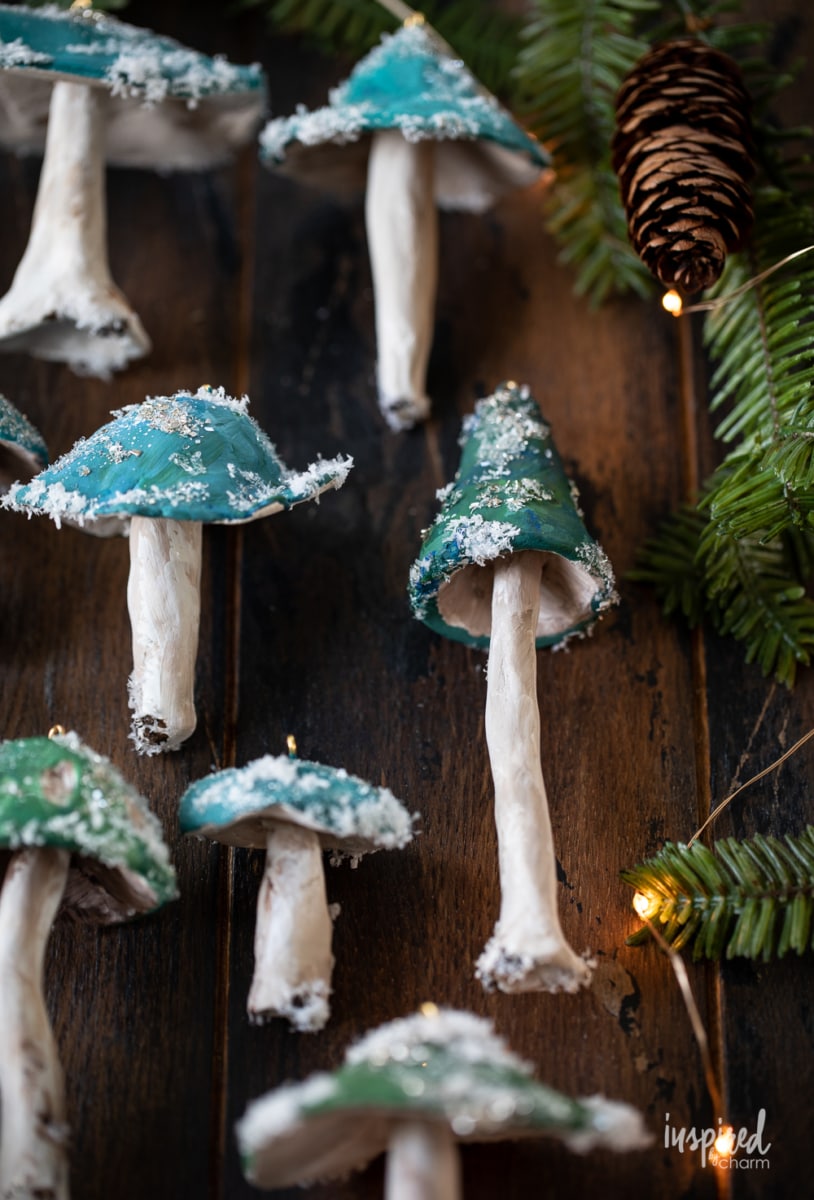
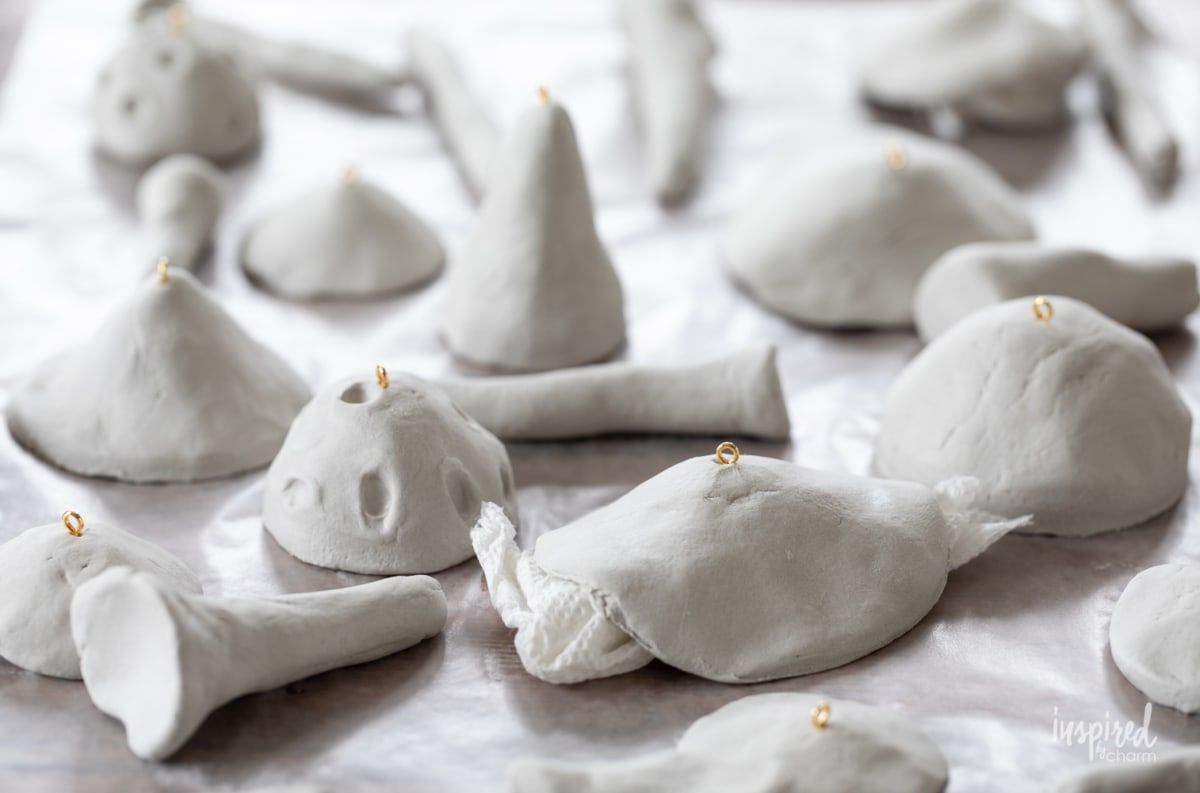
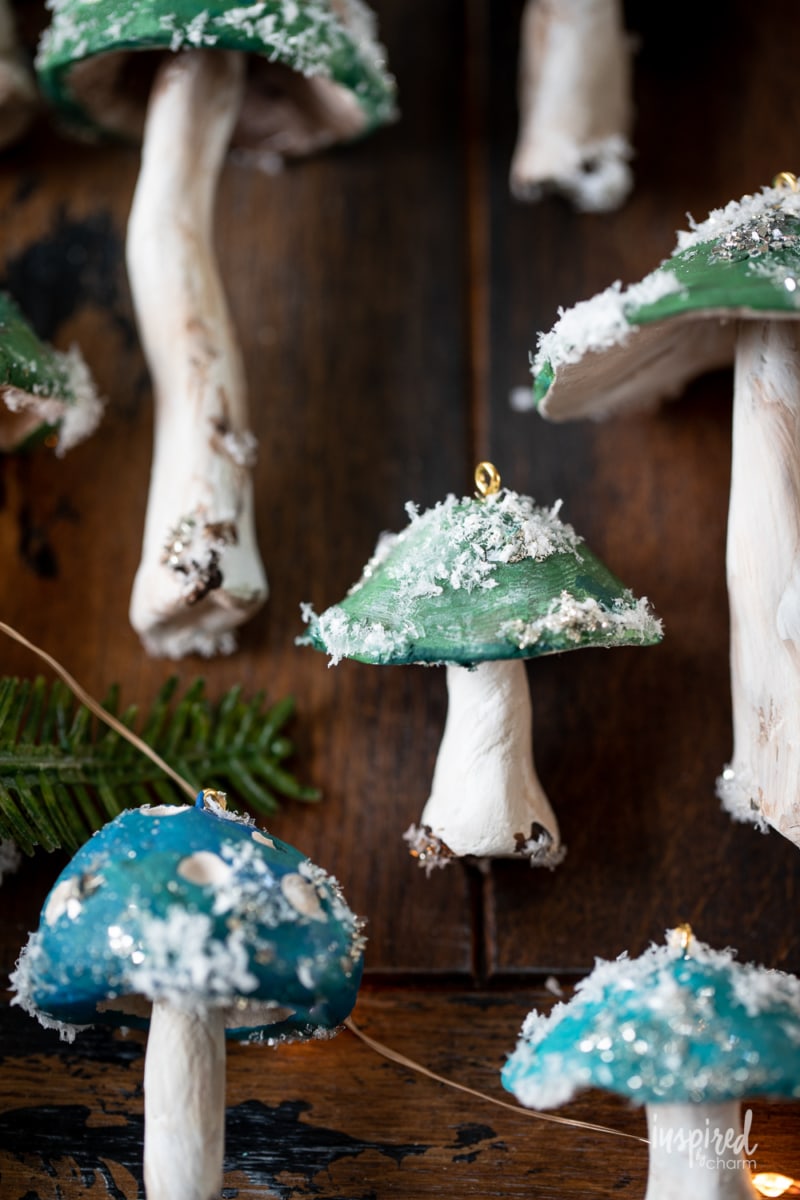
- Begin by gathering mushroom inspiration. You can use my mushroom ornaments as a reference, google pictures of mushrooms and/or mushroom ornaments, or just use your imagination. Find the shapes you like best.
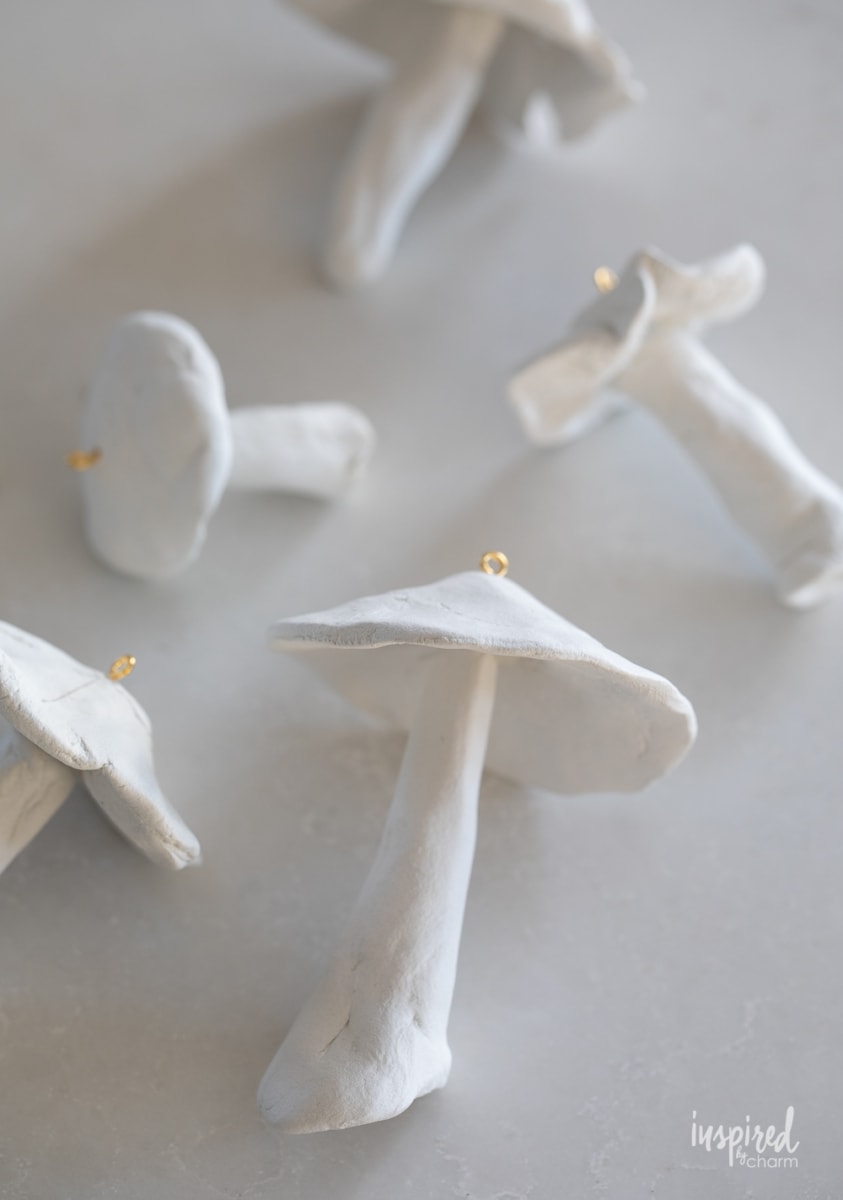
- Use your hands to mold the clay into mushroom caps and stems.
Cap: Form the shape organically or use a circle cookie cutter to get a round shape. I found it helpful to roll some clay into a ball first and then form the cap from the ball. When forming, be sure to leave a large indent (like a real mushroom) on the underside of the cap. The caps can be rounded, pointy, flat, big, small, rough, or smooth.
Stem: Use both of your hands to roll a piece of clay into a snake shape. From there make the shape a bit more organic and stemlike. Stems that are a bit thicker at the bottom look great, but your stems can get narrow too. Keep them a bit imperfect to look more natural. Recreate your favorite shapes from the reference(s) you’re using.
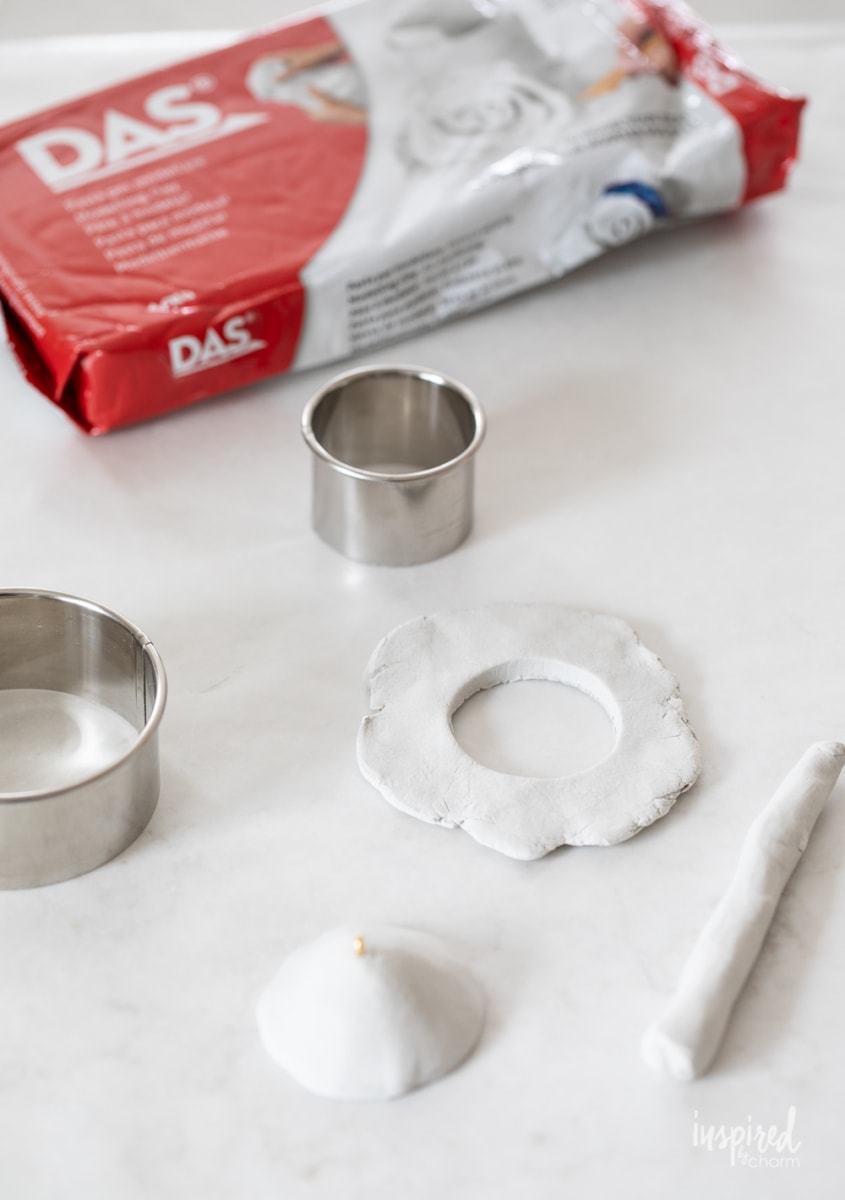
- When forming your shapes, you can use a bit of water to smooth out your clay as you work.
- Once finished, place an eye hook into the top center of your cap.
- Set your shaped pieces on a piece of wax or parchment paper and allow them to dry completely. For thicker pieces, this can take a few days.
- Once fully dry, use hot glue to attach the stem to the cap.
- Paint your clay mushroom.
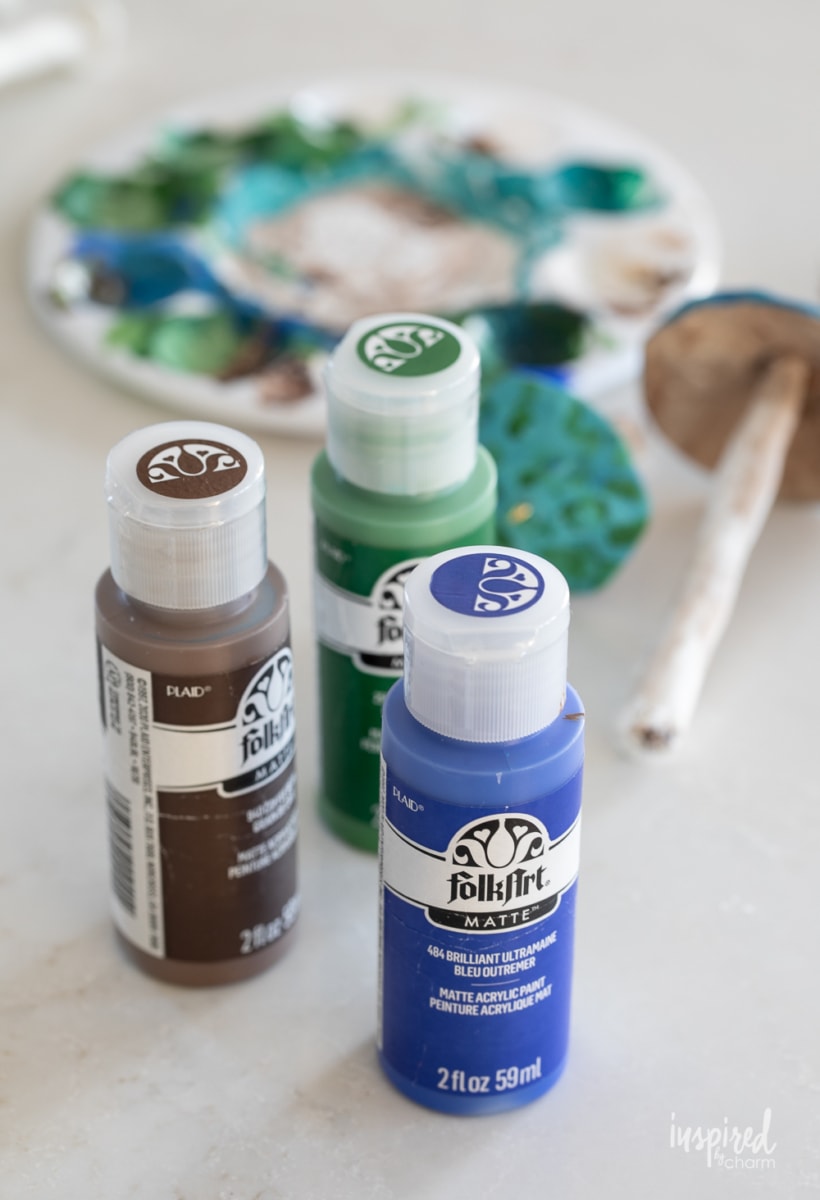
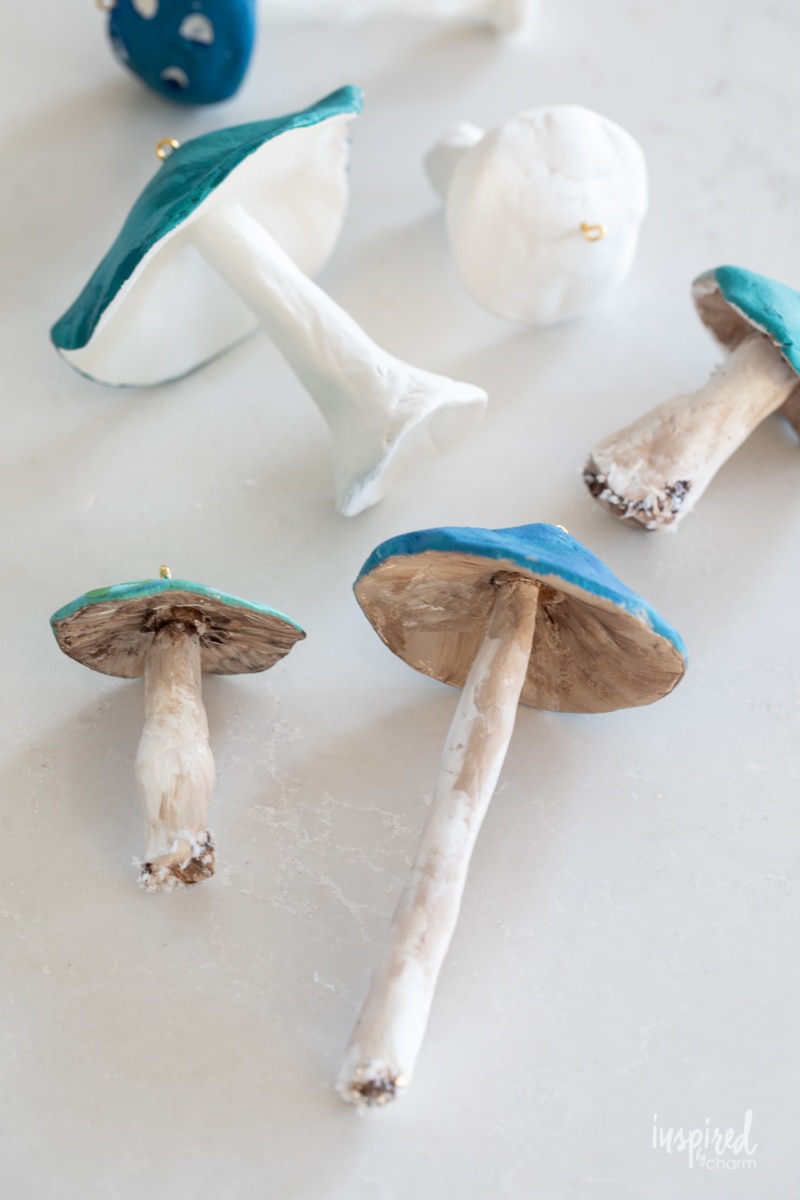
- I used a color palette of blue, green, white, and brown. For a more natural look, I recommend mixing your colors together a bit. I didn’t use any color directly out of the bottle. I added a bit of brown to all of my colors, a bit of green to the blue, a bit of blue to the green, etc. This will also help to make your mushrooms work together as a set. Add layers of colors and keep it a bit imperfect for a natural look.
- Allow to dry.
- Use tacky glue to add fake snow and glitter to your mushroom caps. Again, do this in layers. Keep it imperfect and a bit messy.
- I also addedd a bit of snow and some glitter near the base of the stem. Once it was added, I went back in and applied a bit more brown paint to make it look like a mix of snow and dirt.
- Allow the glue to dry completely.
- Use an ornament hook to hang the mushroom on your tree.
And that’s it!
You’ve now added a bit of personality, cheer, and good fortune to your Christmas tree. How fun is that!?
Final Tip:
In a way, these mushroom ornaments are like mini artworks. I did my best to try and explain my process and I hope that it is helpful.
With that being said, I encourage you to try your own method(s) until you create something you love. (Don’t worry if you fail at it once or twice.) It took me several attempts to end up with my ornaments. Remember to have fun with it! That’s what a handmade holiday is all about!
Happy Christmas Crafting!
I hope you’ll give these mushroom ornaments a try. If you have any questions about my process or instructions, please let me know in the comments section below. I’ll do my best to answer and clarify.
Happy sculpting!
Enjoy this Christmas DIY? Want More?
Join the IBC Mailing List to get all of my recipes, projects, and ideas sent straight to your inbox! I hope you’ll also follow along on Instagram and TikTok for daily updates and behind-the-scenes looks at my process. There’s even more inspiration on Facebook and Pinterest!
Have you tried this recipe? Follow me on Instagram, then share YOUR dish with #myIBC and tag @inspiredbycharm. It’s fun to see how folks are using recipes from IBC.
DIY Clay Mushroom Ornaments
Ingredients
Instructions
- Use your hands to mold the clay into mushroom caps and stems.
- Cap: Form the shape organically or use a circle cookie cutter to get a round shape. When forming, be sure to leave an indent on the underside of the cap.
- Once finished, place an eye hook into the top center of your cap.
- Stem: Use both of your hands to roll a piece of clay into a snake shape. From there make the shape a bit more organic and stemlike.
- Use water to smooth out your clay as you work.
- Set your shaped pieces on a piece of wax or parchment paper and allow them to dry completely. For thicker pieces, this can take a few days.
- Once fully dry, use hot glue to attach the stem to the cap.
- Paint your clay mushroom. I recommend a color for the cap and white and brown for the stem.
- Allow to dry.
- Use tacky glue to add fake snow and glitter to your mushroom caps and at the base of the stem. Keep it imperfect and a bit messy.
- Allow the glue to dry completely.
- Use an ornament hook to hang the mushroom on your tree.
Enjoyed this post very much! I love using a personal inspiration for my Christmas tree. This year it is similar to yours. I am using our Oregon family vacation as inspiration. I used blues and copper and these DIY mushrooms are exactly what I was looking for but hadn’t found the right ones. I will be making these with my daughter who loves mushroom motif.
Just a quick question. Do you think forming the stem along with the cap would work?
This is just what I’ve been looking for! I can’t wait to give this a go. Thank you for inspiring me
Love these! They are so realistic. I can’t wait to try these for next year’s Christmas woodland theme. I’m always finding inspiration in your posts. Thanks again Michael.
I love these and have collected quite a few mushroom ornaments over the last few years. I definitely want to give this a try!
THANK YOU SO MUCH!!! This would make a great addition to our tree of handmade ornaments.