DIY Feather Wreath for Fall
This Post May Contain Affiliate Links. Please Read Our Disclosure Policy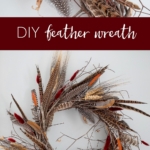
Learn how to make this DIY Feather Wreath for fall. Feathers and other natural elements add style, pattern, and color to a rustic wreath. If you’re looking for a new and unique wreath to decorate your home for the autumn season, this is it!
With a new season nipping at our heels, I had a little itch to do some crafting. I have a small vase in my kitchen filled with feathers that I have received when ordering bouquets from one of my favorite local flower farmers. I love how they look and thought it would be interesting to put them all together into a wreath … a feather wreath! So that’s exactly what I did.
Well … almost. Because I love my little collection of feathers so much, I decided to purchase some new feathers instead to put together this fall-inspired DIY feather wreath.
Why You’ll Love This Project
- There’s something enchanting about incorporating elements from nature into your decor. Feathers, with their organic charm, add a touch of elegance and grace to any space.
- Why settle for generic store-bought decorations when you can have a one-of-a-kind feather wreath adorning your front door or hanging proudly on your wall? This wreath is an elegant statement piece that elevates your fall decor.
- While traditionally used as a wreath, this project offers versatility in its display. You can hang it on your front door to welcome guests, use it as a captivating centerpiece for your dining table, or even lay it flat as an autumn-themed decorative piece. The possibilities are endless!
- Crafting your very own feather wreath allows you to unleash your creativity and customize a unique piece that suits your style and preferences. With a variety of feather types, colors, and textures available, you have the freedom to mix and match, creating a wreath that complements your home’s aesthetic effortlessly.
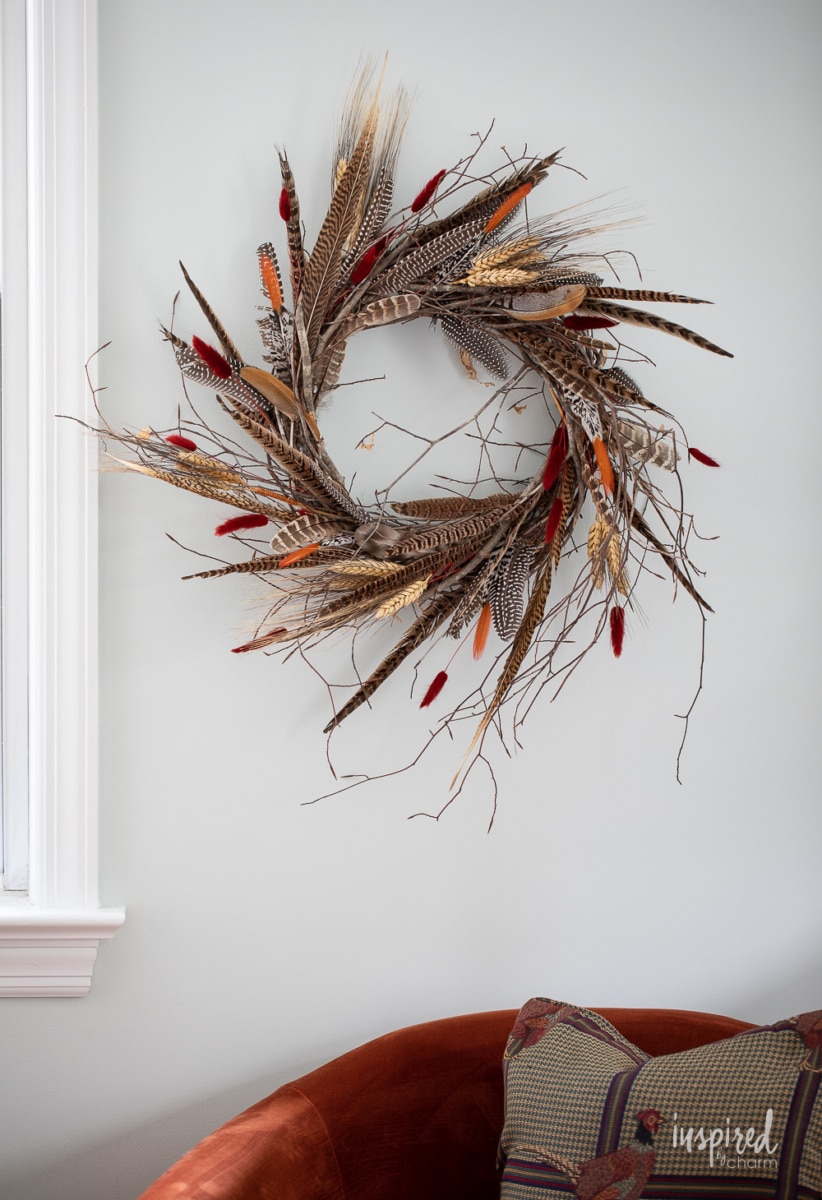

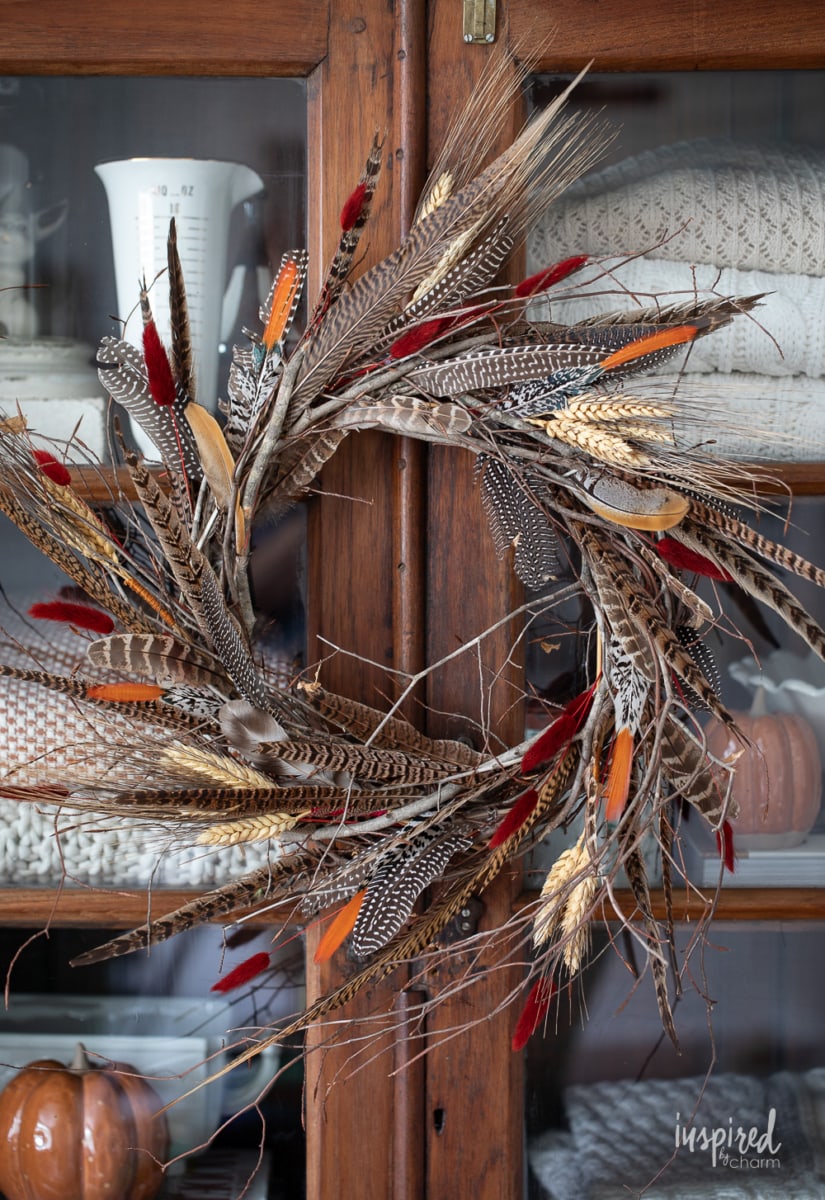
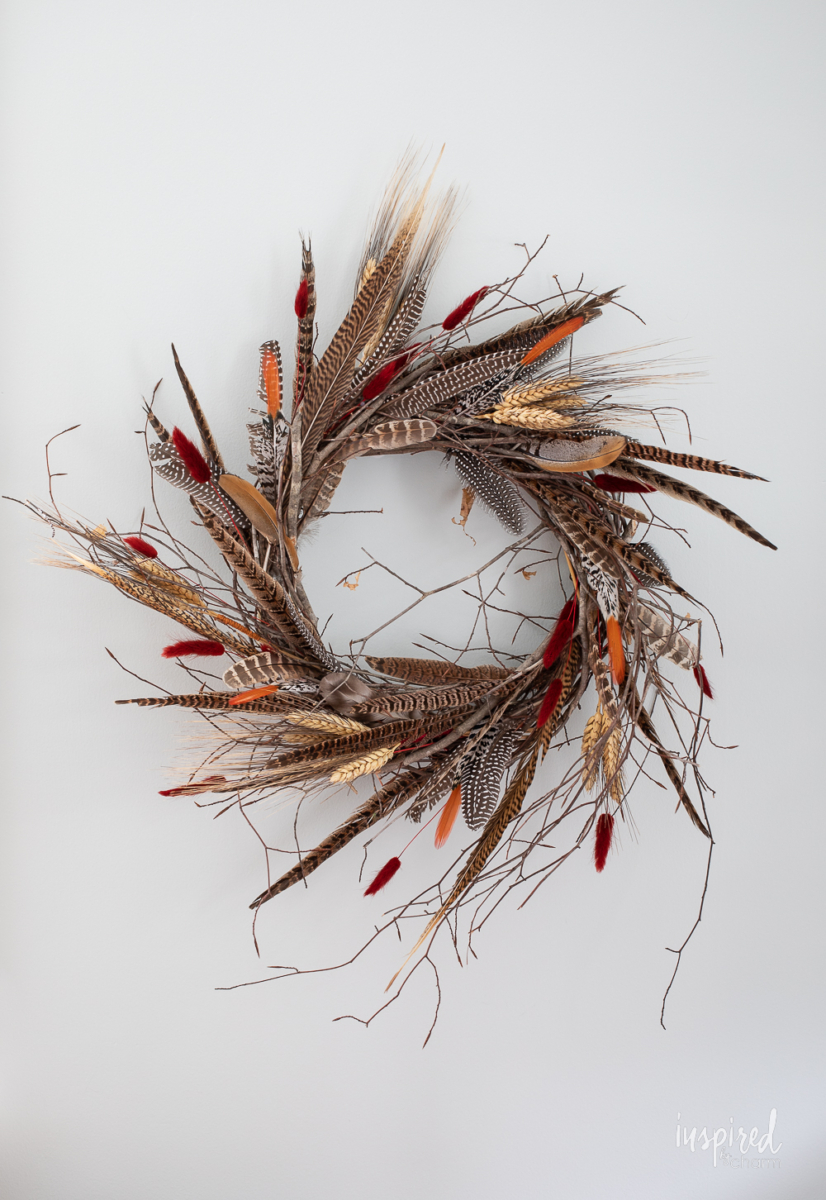
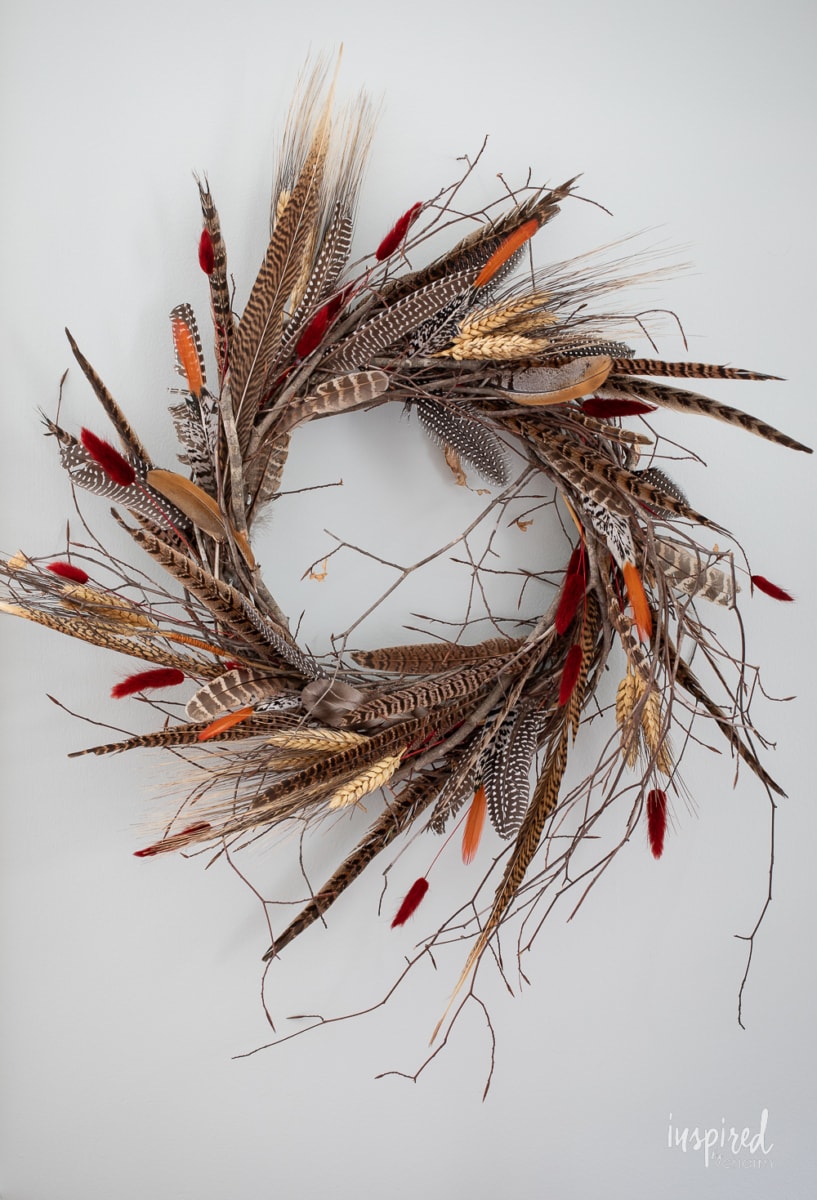
Isn’t it beautiful!? I couldn’t be more excited with the end result. It’s natural, colorful, interesting, and perfect for fall.
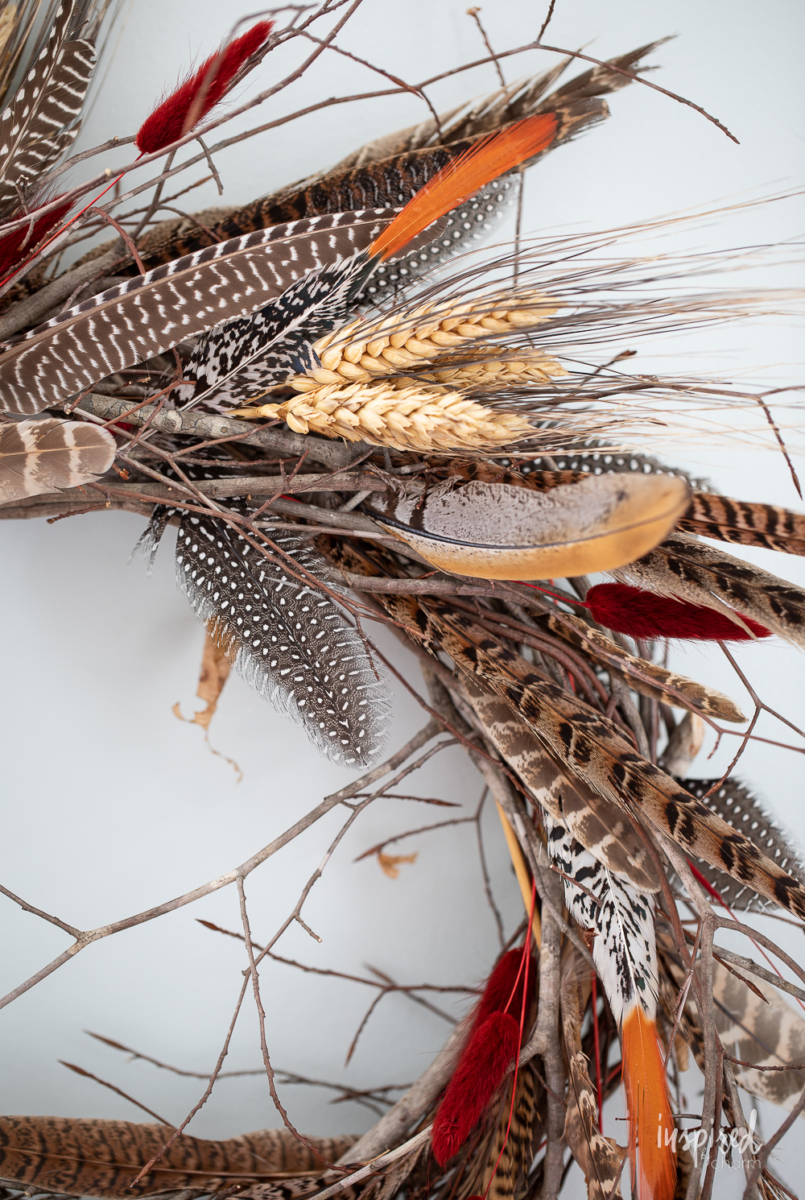
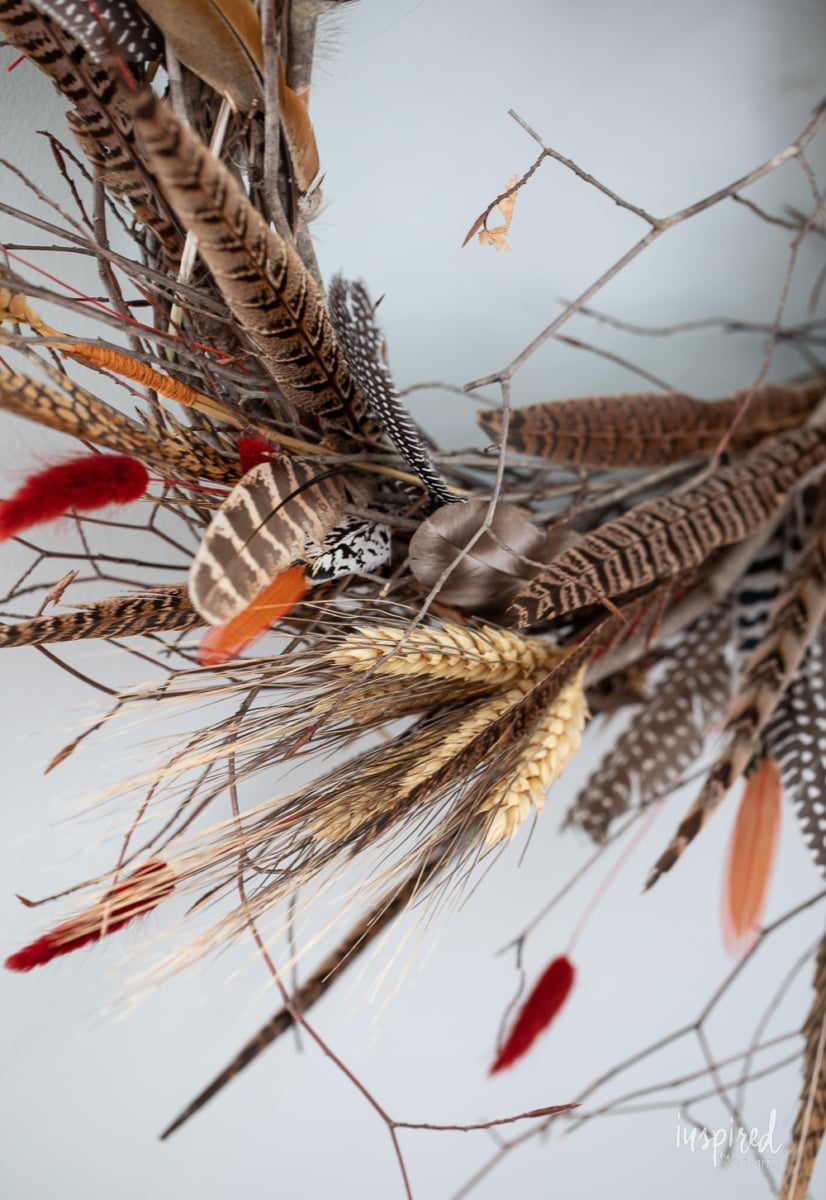
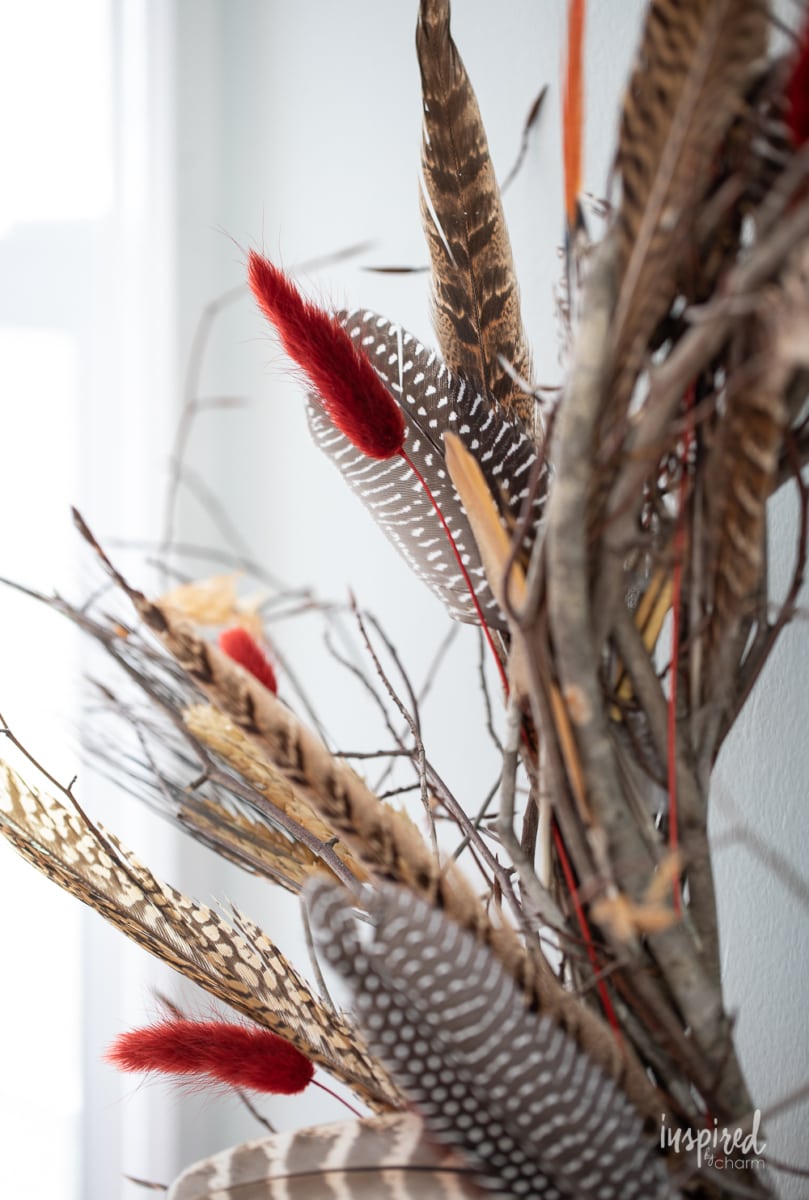
You’ll notice that besides using feathers, I added in a few other elements. As I was putting together this wreath, I felt it needed a punch of color. Thankfully I had these rust-colored bunny tails on hand along with some of my DIY color-wrapped wheat. I decided to try both of these in the wreath and LOVED how they looked. They added a pop of color and a little whimsy too. Perfection!
Where to Hang
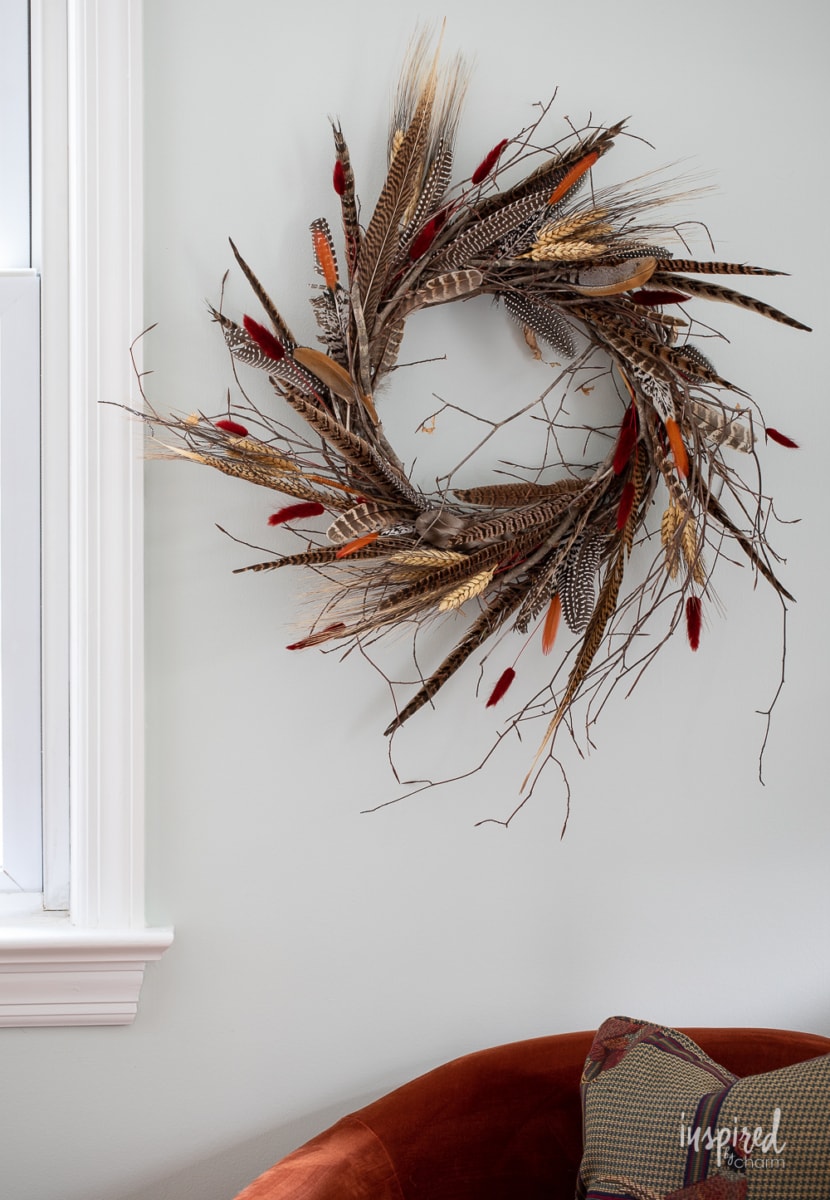
As you can see from the photos, I tried hanging this wreath in a couple of different places in my home. First, I hung it in my office. I loved the rust color against my mint walls. Such a pretty color combination.
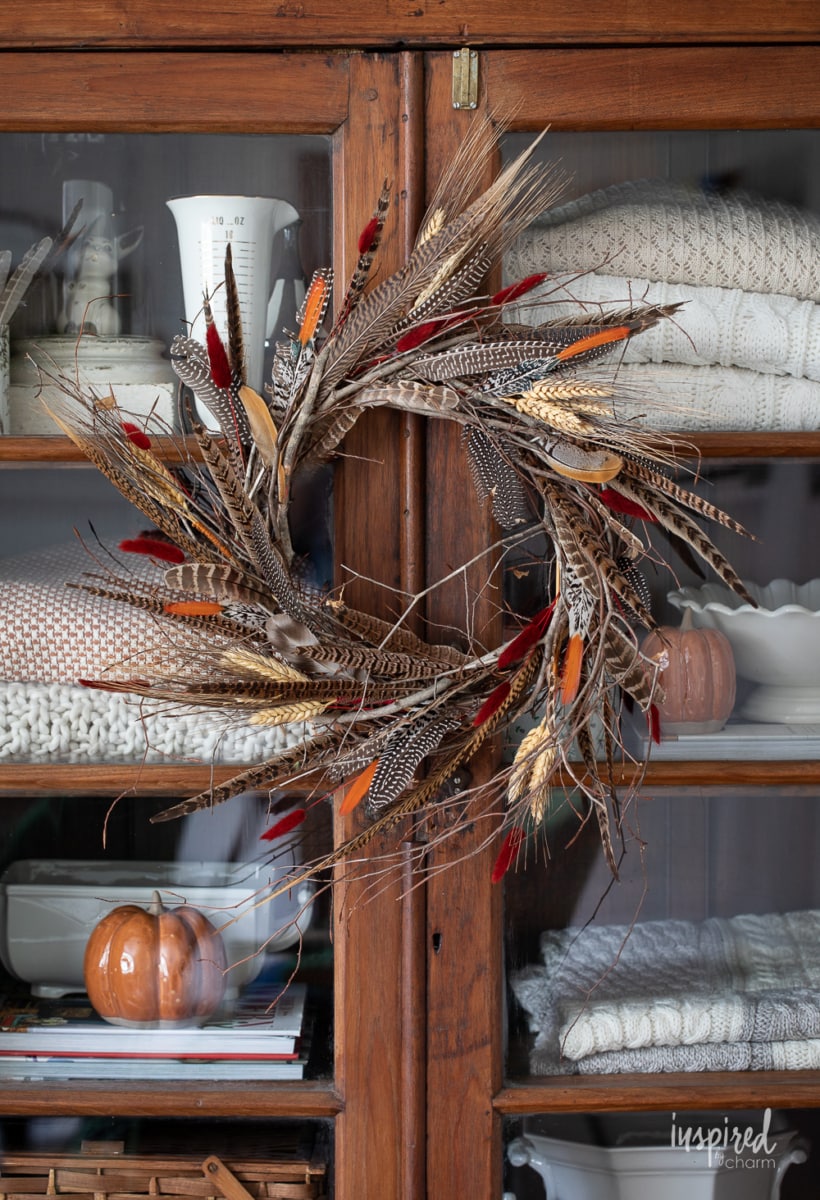
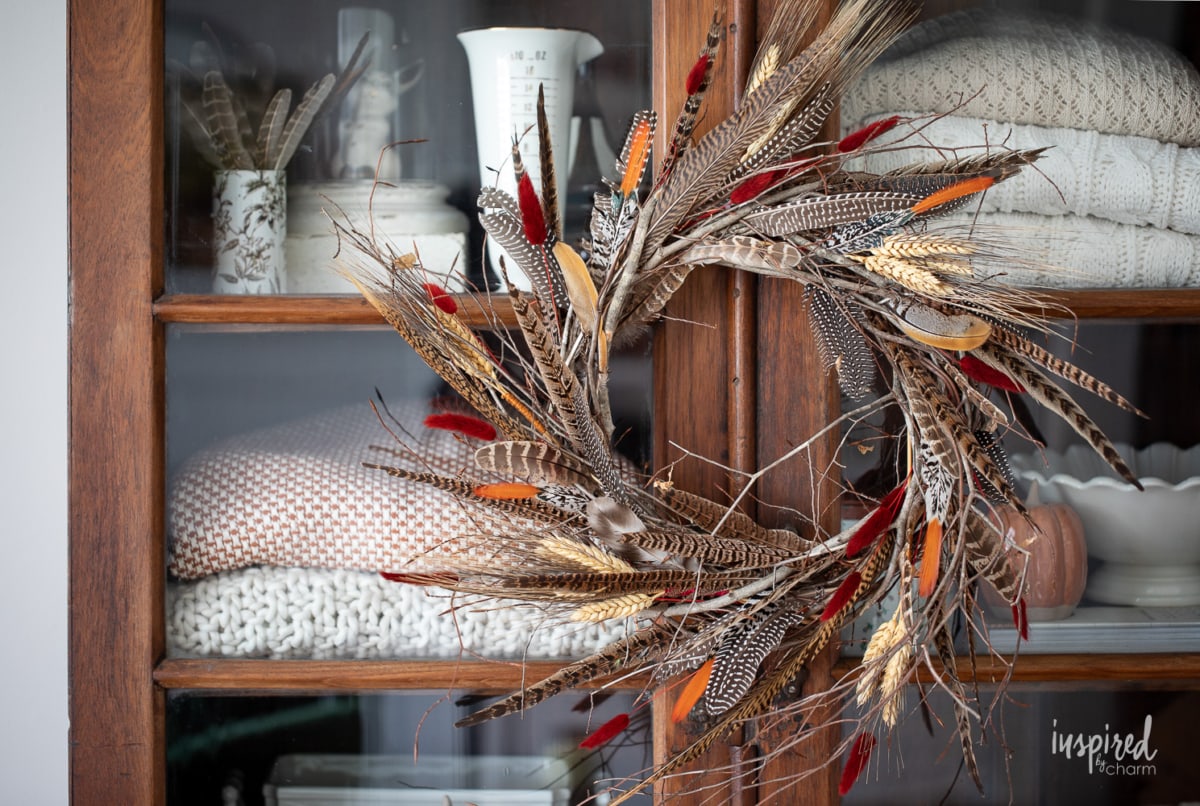
I also tried hanging it on the vintage cabinet in my living room. I love wreaths hung here. It looked really pretty, but the colors just weren’t right for this room.
I ended up finding the perfect spot above the TV in my family room. (This is where my vintage ornament wreath hangs for Christmas.) It added the perfect amount of color, texture, and interest. I couldn’t be more pleased!


If you want to make one of these DIY feather wreaths for fall, let me walk you through the supply list and instructions.
Supplies Needed
You only need a few things to assemble this wreath. I’ve gone ahead and linked everything I could for you below.
- 14″ wreath form – The place I ordered my wreath is currently out of stock, but I’ve provided a few similar options below:
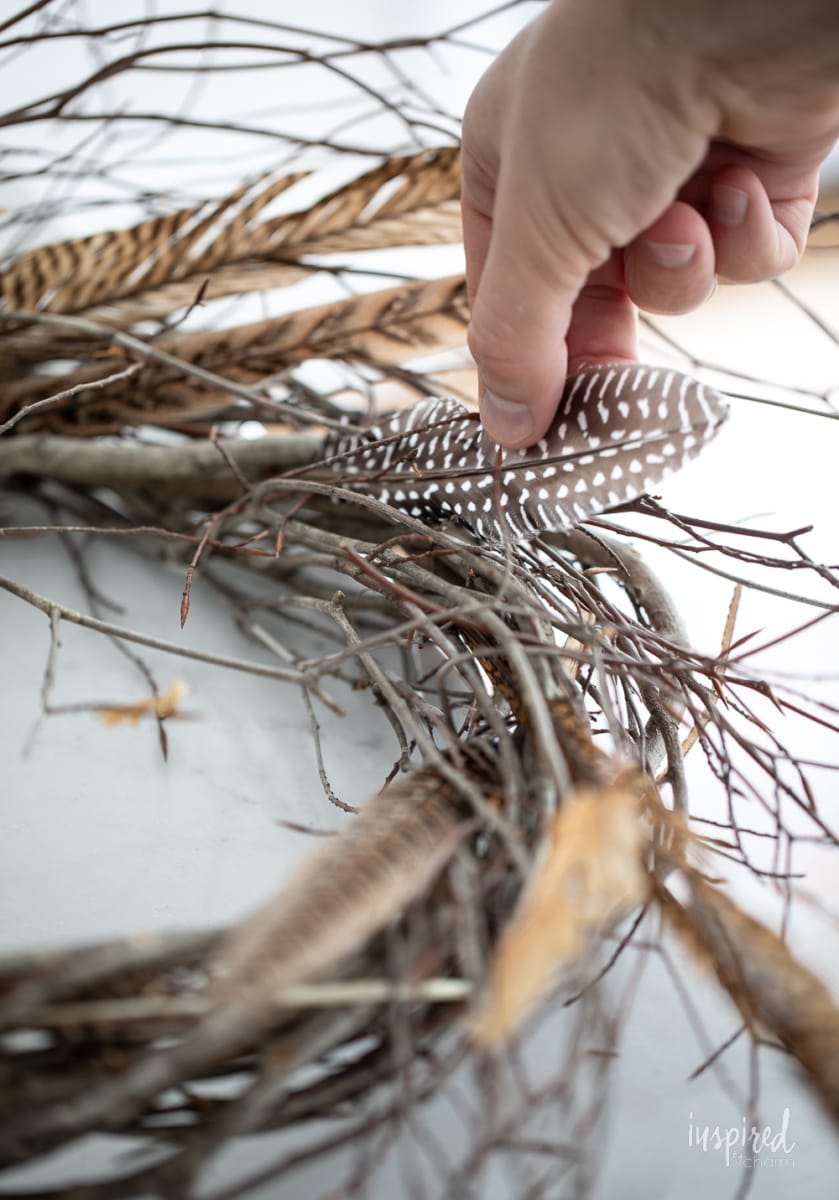
A standard grapevine wreath would work here, but I’d recommend something a bit more rustic with branches sticking out. It creates a little more interest and movement. You could also add additional twigs from your yard to create this look with a standard grapevine wreath.

💌 SAVE THIS POST / RECIPE!
- feathers – You can use whatever you’d like. If ordering online, pay attention to the length. (I made the mistake of ordering some short/small feathers that were unusable.) Here is a list of feathers (including links) that I’ve used and recommend:
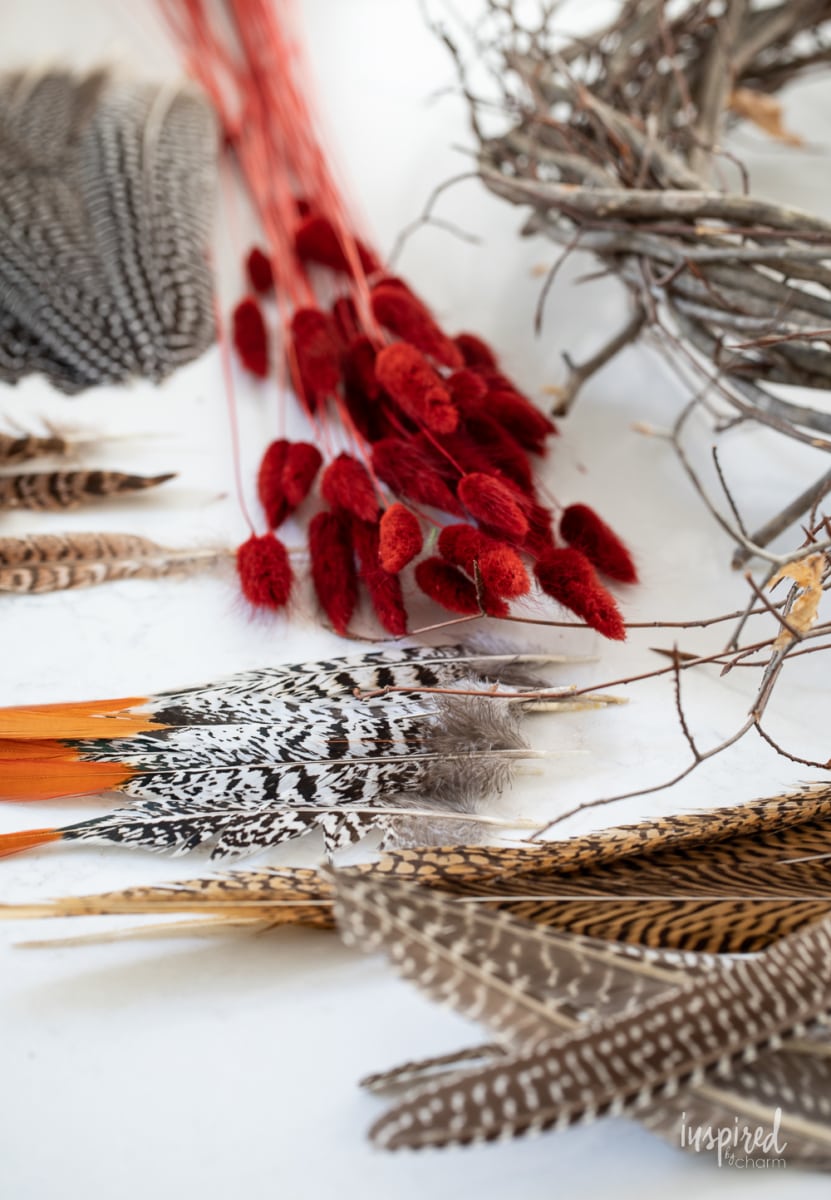
- dried natural elements – I added in some burnt red bunny tails and dried wheat bundles for a little color and texture. The bunny tails were something I had on hand, but you can find similar ones here (orange) and here (pink). The wheat was little bundles I made with embroidery floss a few years ago. Learn how to make my colored wrapped wheat.
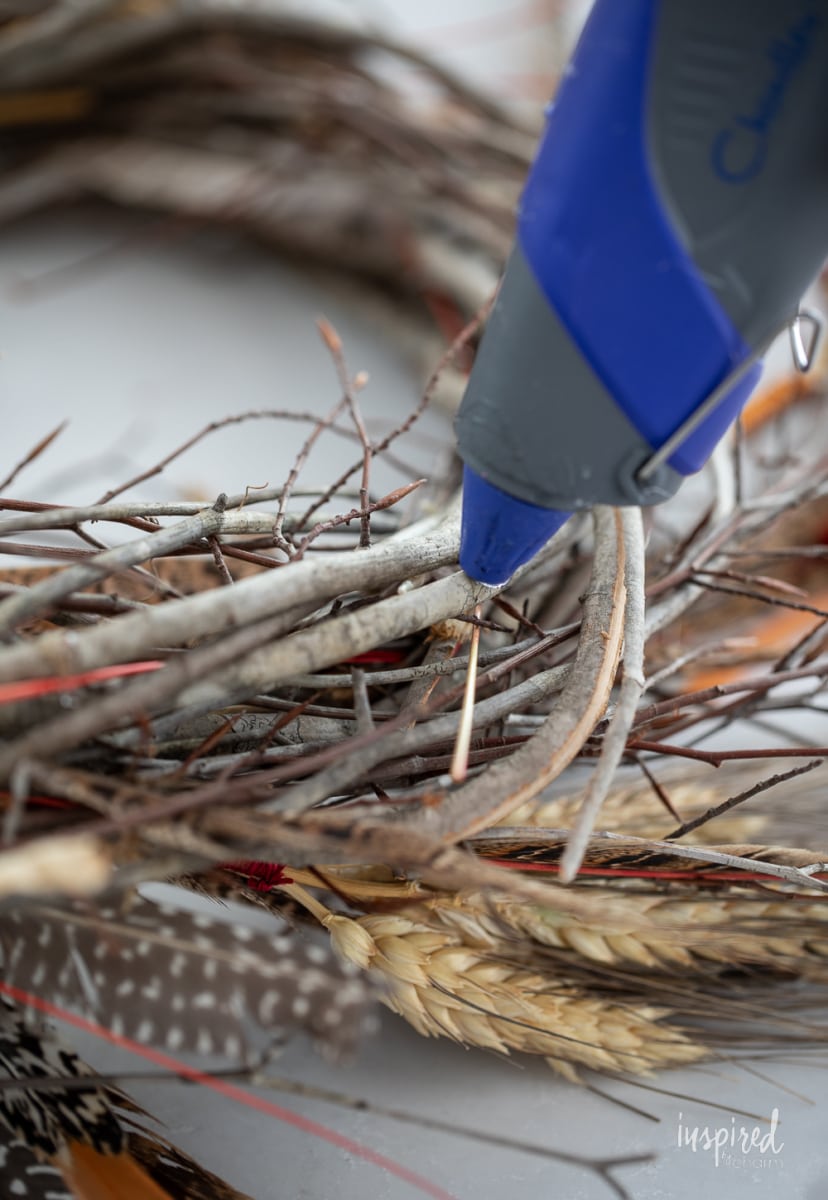
- hot glue gun – I was able to secure most of my feathers simply by tucking them into the wreath. However, with a few of the feathers and the bunny tails, I used hot glue to keep them more securely in place.
- wire or pipe cleaner – Adding a piece of wire or pipe cleaner to the back of your wreath will allow you to hang it easily.
That’s all you need! You’re now ready to assemble everything. Let me walk you through the steps.
How to Assemble
I’ll walk you through the process here. I’ve also provided a printable how-to instruction card at the end of this post.
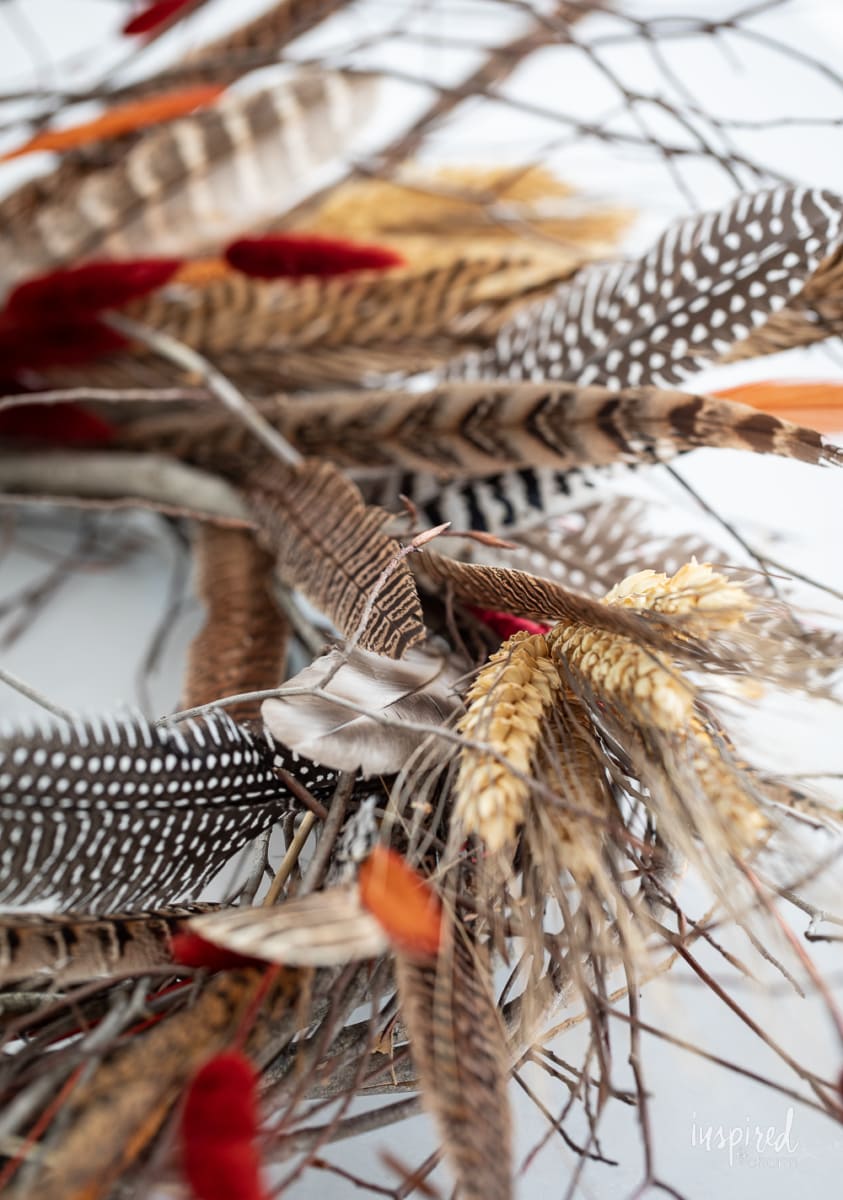
- Begin by tucking feathers into your wreath form. Work around the wreath so that the feathers are going outward in the same direction and not crisscrossing one another. (Similar to the look of a saw blade.)
- Tuck in other natural elements like dried flowers, bunny tails, plumes, seed pods, wheat, etc.
- Flip the wreath over and add a little hot glue to any elements that feel loose or unsure.
- Create a loop using wire or pipe cleaners. Secure the loop to the back of your wreath near the top.
- Hang and enjoy!
It’s that simple and the results speak for themselves.
Project Variations
One of the best aspects of the DIY Feather Wreath project is its versatility. This craft offers a wonderful canvas for your imagination, allowing you to experiment with different materials, colors, and styles to create a wreath that reflects your personal taste and the unique ambiance you desire. Here are some creative variations and ideas to inspire you:
- Autumn Color Palette: While the traditional fall colors of orange, red, and yellow are stunning, don’t be afraid to explore other color schemes. Consider muted tones like deep burgundy, rich plum, or earthy greens to evoke a cozy and sophisticated autumn atmosphere.
- Mixed Textures: To add visual interest and depth to your wreath, mix various types of feathers with different textures. Combine soft, fluffy feathers with sleek and slender ones for a dynamic and captivating look.
- Incorporate Natural Elements: Enhance the rustic charm of your feather wreath by incorporating other natural elements. Consider adding dried twigs, pinecones, small acorns, or even mini pumpkins to infuse an organic touch.
- Seasonal Embellishments: While feathers exude a fall vibe, you can further customize your wreath to suit different seasons. For winter, add some faux snow or white feathers for a frosty appearance. In spring, incorporate silk flowers and pastel-colored feathers for a fresh and lively feel.
- Personalized Accents: Make your feather wreath truly one-of-a-kind by adding personalized accents. Consider attaching wooden initials, small wooden signs with autumn-themed quotes, or even miniature photo frames featuring cherished memories.
- Glitter and Metallics: For a touch of glamour and elegance, consider incorporating glittered or metallic-coated feathers into your wreath. These shimmering accents will catch the light and add a touch of enchantment to your decor.
- Monochromatic Elegance: For a chic and sophisticated look, stick to a monochromatic color scheme. Choose feathers in varying shades of the same color to create a wreath with a harmonious and refined appearance.
- Seasonal Themes: Tailor your feather wreath to match specific fall themes, such as Halloween or Thanksgiving. Integrate spooky elements like miniature skeletons or cute Thanksgiving figurines to make your wreath truly stand out.
Remember, the beauty of crafting your own feather wreath lies in the endless possibilities to express your creativity and style. Feel free to mix and match these ideas or come up with your own unique concepts.
I hope that this little DIY project has inspired you to create a fall feather wreath of your own. This project definitely scratched my crafting itch and now I have a beautiful and natural element when decorating my space for the season.
Happy Crafting!
More DIY Projects You’ll Love
- Colored Wrapped Wheat
- Vintage-Inspired Halloween Treat Bags
- Trick or Treat Yo’Self Banner
- Fall Colorblock Cork Table Decor
- Halloween Paint Can Bucket and Luminary
If you give this project a try, I would LOVE to see the results. Share them on Instagram and tag me at @inspiredbycharm. I can’t wait to see them! You can also leave a comment and a 5-star rating below.
Want more from Inspired by Charm? Join the IBC Mailing List for inspiration in your inbox! Follow along on Instagram and TikTok for daily updates and behind-the-scenes looks at my processes. There’s even more inspiration on Facebook and Pinterest!
DIY Feather Wreath
Ingredients
- 14 ” wreath form I found mine HERE.
- feathers in various lengths and patterns
- other natural dried elements bunny tails, plumes, wheat, etc.
- hot glue gun and glue sticks
- wire or pipe cleaners
Instructions
- Begin by tucking feathers into your wreath form. Work around the wreath so that the feathers are going outward in the same direction and not crisscrossing one another. (Similar to the look of a saw blade.)
- As you work, tuck in other natural elements like dried flowers, plumes, seed pods, wheat, etc.
- When everything is in place, flip the wreath over and add a little hot glue to any elements that feel loose or not well secured.
- Create a loop using wire or pipe cleaners. Attach the loop to the back of your wreath near the top.
My sister and I will be in Maine in September and she always wants me to bring a craft. We are both going to love making these. Thanks for the great idea.
Thank you for this inspiration. I’ve had a bag of pheasant feathers for a few years, this is a perfect project for them!
YES!! Love that idea Mary!
xo Michael
I love this wreath! It would go nicely with my husband’s wild turkey and pheasant prints. However, it seems as though your source will not have any of those wreaths in stock anytime soon. I want to make one anyway. You suggested using a rustic grapevine wreath with branches. I have been unable to find one anywhere close to the one in your pictures. To what kind of branches do you refer? Or they added or just a part of the grapevine wreath itself? I would certainly appreciate your help.
Thanx, Sharon
This wreath is breathtaking. I got to make this to hang on my front door for the holidays. It’s gorgeous. You outdid yourself here.
Thank you so much!!
xo Michael
What a fun craft with a gorgeous end result! I’m a want-to-be crafter and I’m going to try this as my first project. Thank you for sharing!
Love love love this!
Wow Michael ! I’ve looked at your blog for several years now. I’ve made your recipes that were always a hit and I can’t wait to make this wreath. Thank you for all your hard work so people like me can copy with 3 teenagers I don’t have time to think outside the box most days. 🙂 I was wanting to make a wreath with my sister. Do you think the feathers you ordered would be enough for 2 wreaths ? It appears so in the picture, but just wanted to make sure. Thank you.
Hmmm. I would think especially if you’re adding some “extras” into it. My Mom and I both made a wreath together, but I had a few extra feathers on hand.
xo Michael
This is beautiful and I love where it landed. You have such an eye for color, the bunny tail and wheat add just the right touch. Need to give this project a try.
Thank you so much!!
xo Michael
The feather wreath is such a great change from the usual fall wreaths I have seen this year. I was thinking of making a new one for my covered front porch and this will be perfect. Also plan on making the pumpkin tortellini this weekend. Thanks so much for your ideas and recipes 😊.