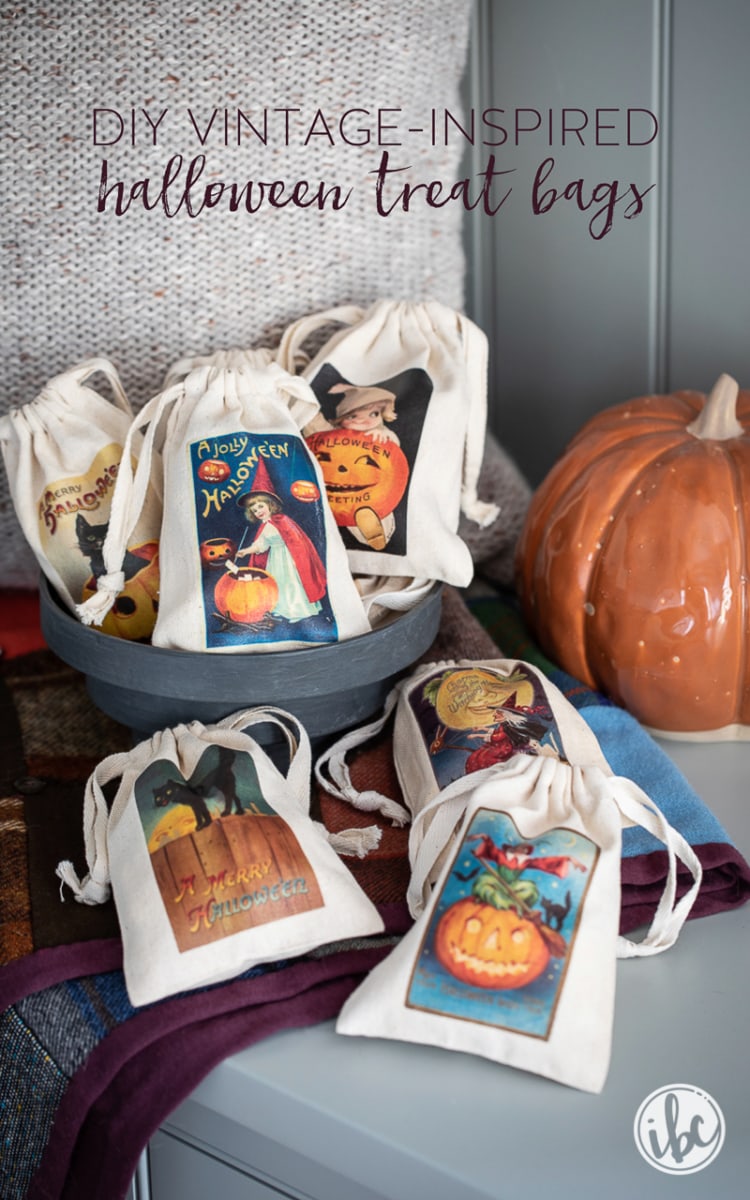
Vintage-Inspired Halloween Treat Bags
This Post May Contain Affiliate Links. Please Read Our Disclosure Policy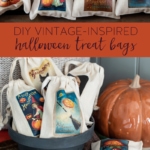
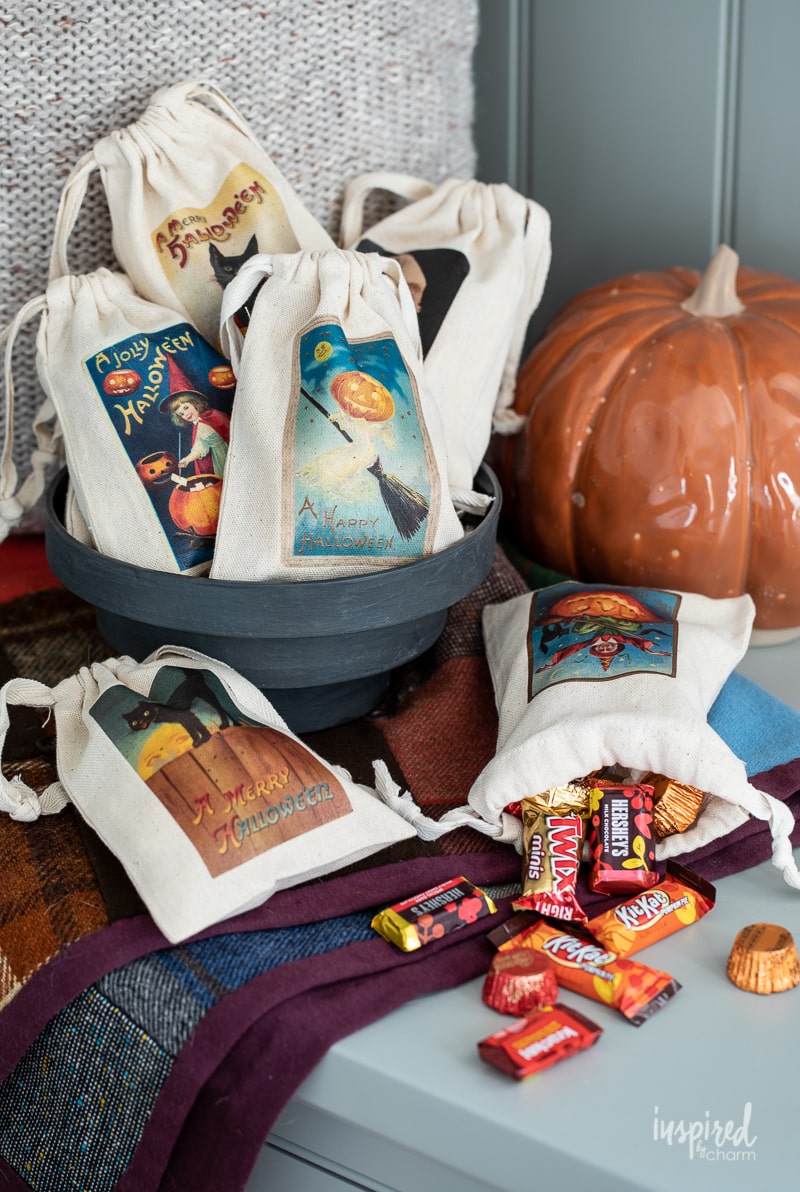
Create your own spooky-chic Halloween treat bags with this easy DIY project. These vintage-inspired designs are perfect for adding a touch of nostalgic charm to your Halloween festivities. Whether you’re handing out candy or giving thoughtful gifts, these customizable cotton bags are a fun and creative way to celebrate the season. Follow this step-by-step guide to make your own!
Halloween is creeping up fast, and there’s no better way to treat your favorite ghosts and goblins than with these Vintage-Inspired Halloween Treat Bags. Inspired by my love for antiquing and a touch of spooky nostalgia, these DIY bags are the perfect blend of crafty fun and Halloween charm.
The holidays seem to bring out the crafter in me. To start things off, I made a couple of wreaths out of finds from my yard. Then I (re)created a fun chalkboard drawing for my family room. Next, I crafted a Jack-O’-Lantern garland. (Jack-O’-Lantern Garland coming soon!) My latest project: Vintage-Inspired Halloween Treat Bags.
The idea for these Halloween treat bags came about during a recent antiquing adventure. In one of the shops, I saw vintage paper treat bags with a cute Halloween graphic on them. They reminded me of the DIY Christmas Cookie Bags I made a couple of years ago. That’s when I decided to put the two ideas together to create these Halloween Treat Bags!
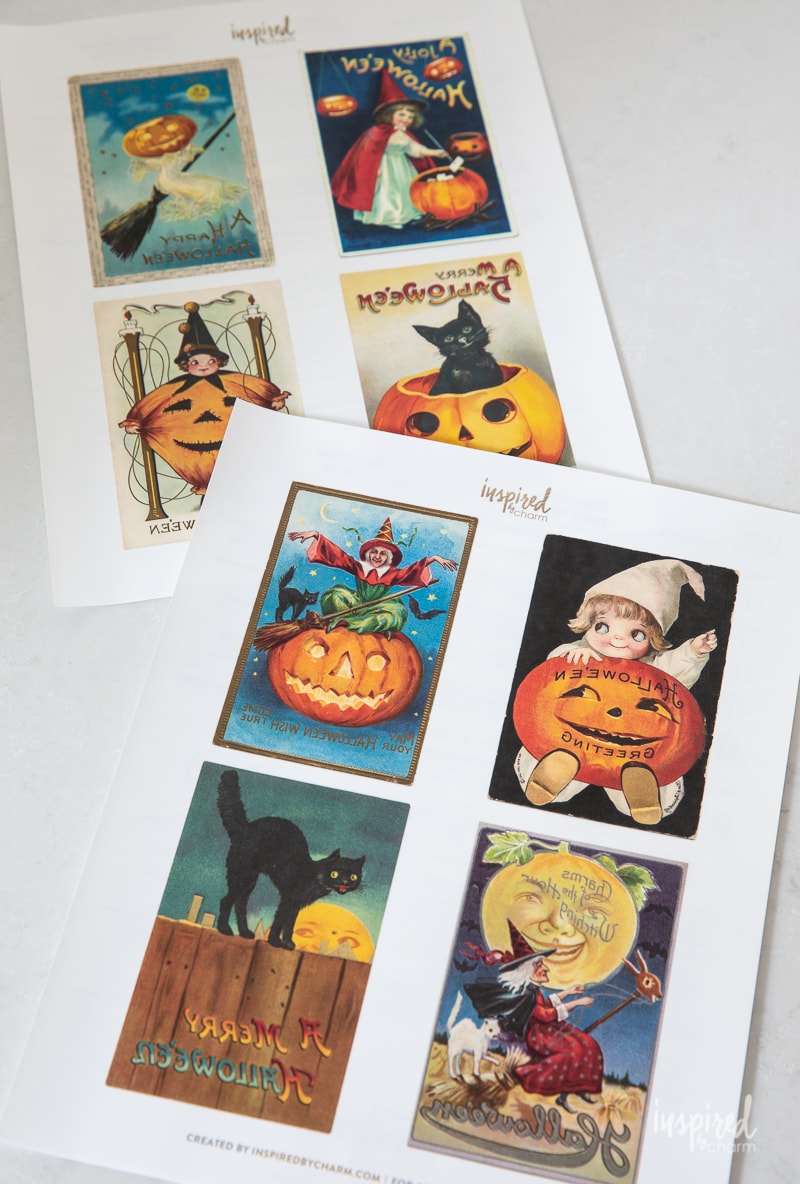
For the graphics, I wanted something vintage. As usual, I found amazing vintage art at The Graphics Fairy. She has the best selection of vintage clip art, graphics, and illustrations.
Remember this past Christmas when I used a bunch of vintage graphics to craft printable holiday gift tags? It was so much fun collecting and sourcing the graphics for those. They filled me with nostalgia and the magic of Christmas traditions.
However, my love for these Halloween graphics is different. While they are cute and have an old-timey feel, they are also quirky and maybe a bit creepy, which is perfect for Halloween.
Why You’ll Love This Project
- Nostalgic Charm: These treat bags bring a sense of vintage Halloween magic, inspired by old-fashioned graphics and cards. Whether you’re creating these for a party or simply for trick-or-treaters, they carry a timeless charm that takes you back to the Halloweens of yesteryear.
- Simple and Fun: With just a few materials and easy-to-follow steps, these Halloween Treat Bags come together in no time. No complicated tools or advanced skills are required, making this craft a joy to create for all ages.
- Completely Customizable: One of the best parts of this project is that you can fill the bags with anything you like—candy, small toys, a gift card, or even a personalized note.
- A Thoughtful Touch: Handcrafted gifts always add something extra special, and these DIY treat bags show that you put in a little extra effort. It’s a small, yet meaningful way to bring joy to anyone receiving them, from friends and family to neighborhood trick-or-treaters.
Materials
Let’s gather up the supplies you’ll need for this project.
- Printable Fabric Transfer Sheets*: These special sheets allow you to transfer your chosen vintage Halloween designs onto fabric, giving the bags their charming look.
- 5 x 7-inch Cotton Bags: These cotton drawstring bags are the perfect size for filling with treats and gifts, and their plain surface makes them ideal for adding your custom designs.
- Color Printer: You’ll need a printer capable of printing in color to bring the vintage-inspired designs to life on the transfer sheets. Don’t have a printer? You may be able to get this printed at a local office supply store.
- Iron: A household iron is essential for transferring the design from the fabric sheets to the bags. Make sure to set it to the cotton setting for the best results.
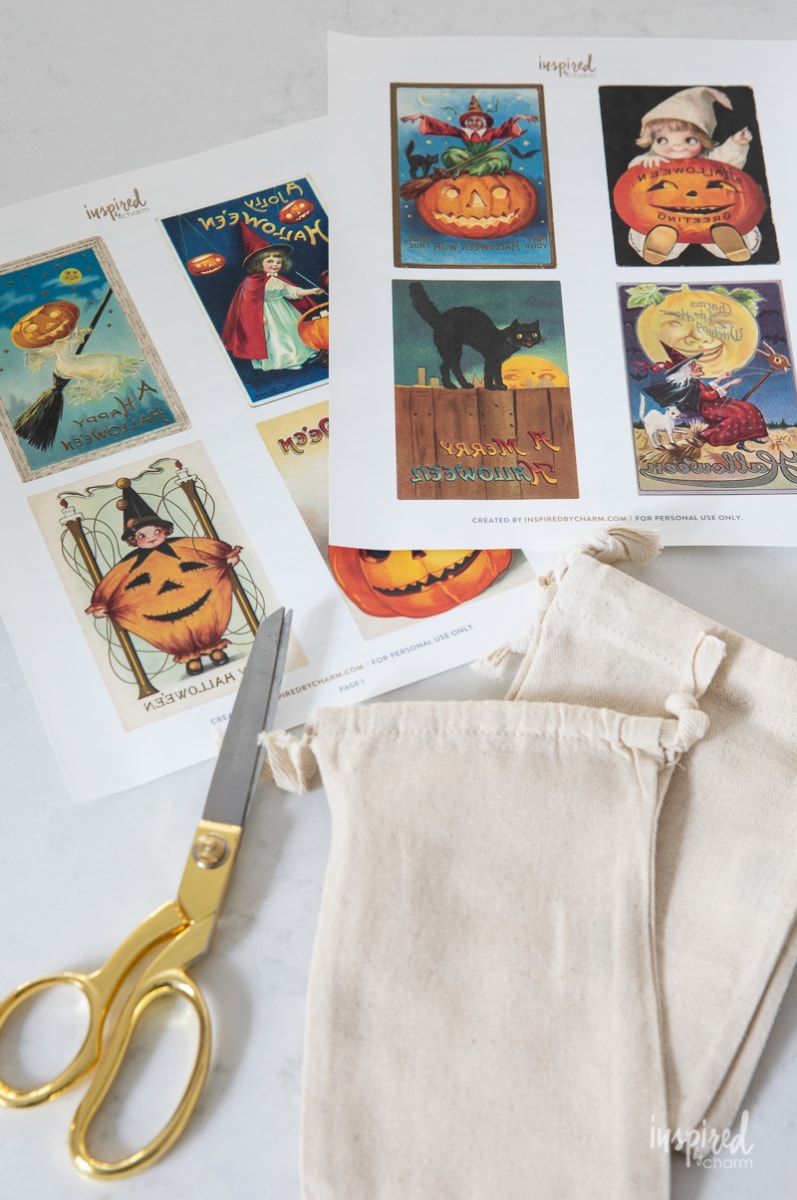
- Scissors: Use scissors to carefully cut out each graphic, making sure to trim neatly around the edges for a polished finish.
*If you use a different type or brand of fabric transfer sheets, please follow the directions on the package.
How to Make
Now that you have all of your materials. We’re ready tomato these Vintage-Inspired Halloween Treat Bags! I’ll walk you through the process below. I’ve also provided a full materials list and detailed instructions in the printable card below.
- Begin by downloading the free printable graphics file. You can access the download in the IBC Printable Library, which can be found HERE.
- With your PDF download successfully saved to your computer, load the printable fabric transfer sheets into your printer.
- Adjust the printer settings to the highest quaintly and then print. (You’ll notice that the printable looks backward or mirrored. This is okay. Since you’ll be ironing these transfers with the printed side down, you want the image of the graphic mirrored so it will read correctly when the paper backing is removed.)
- Once printed, cut out each graphic as neatly as possible.
- Next, make sure your iron is empty of water. Turn off the steam and then set the iron on high heat (cotton setting).
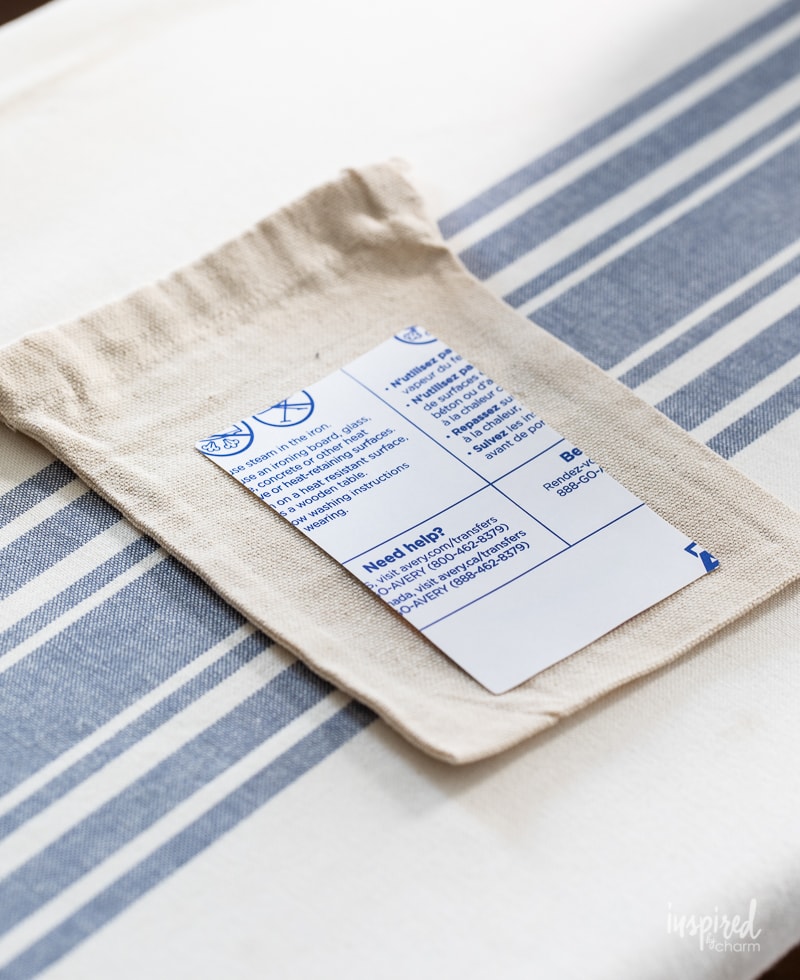
- Iron the bag to remove any wrinkles. Then place the graphic on the bag so that the printed side of the graphic faces down. I positioned the graphic a bit closer to the bottom of the bag rather than in the center of it to allow for the gathering at the top when the bag is cinched shut.
- Using the iron, apply heat to the transfer for 45-60 seconds. Apply medium pressure and be sure to move the iron around to avoid scorching the bag.
💌 SAVE THIS POST / RECIPE!

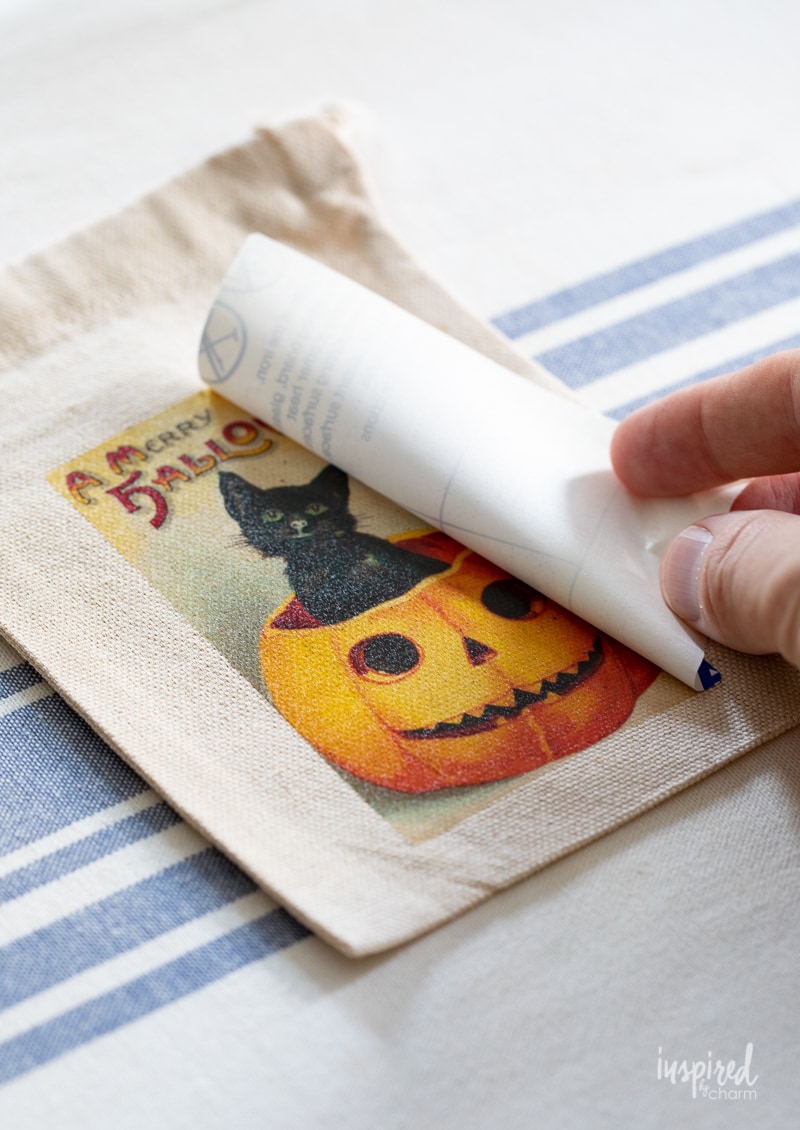
- Repeat this heat transfer process with all of the bags and graphics. Let each bag sit until it’s cool (2-3 minutes) before gently peeling off the paper backing.
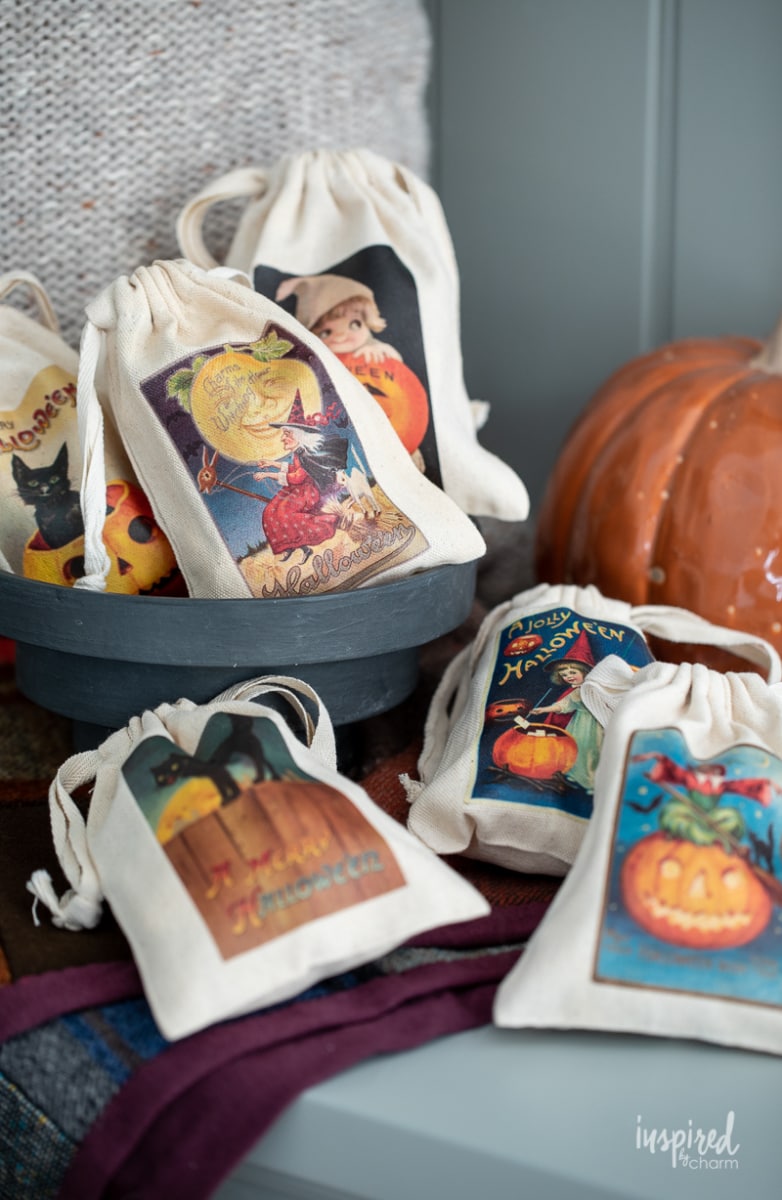
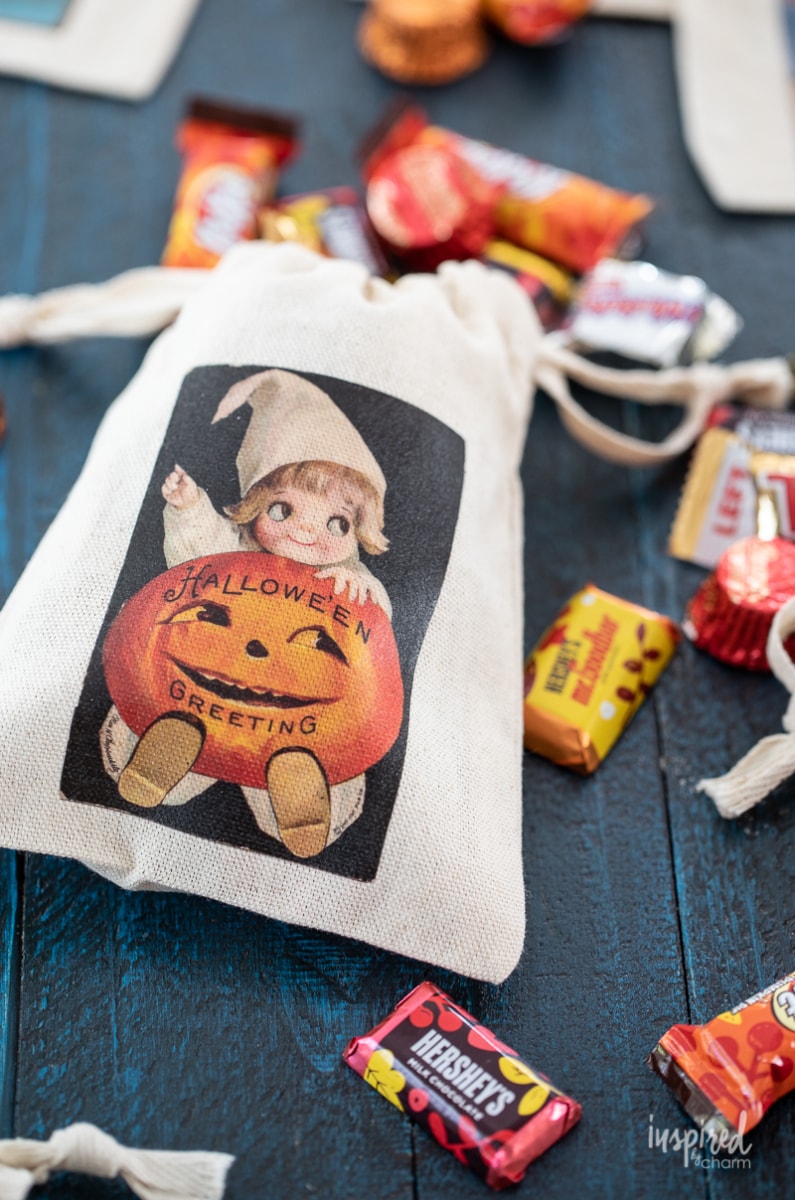
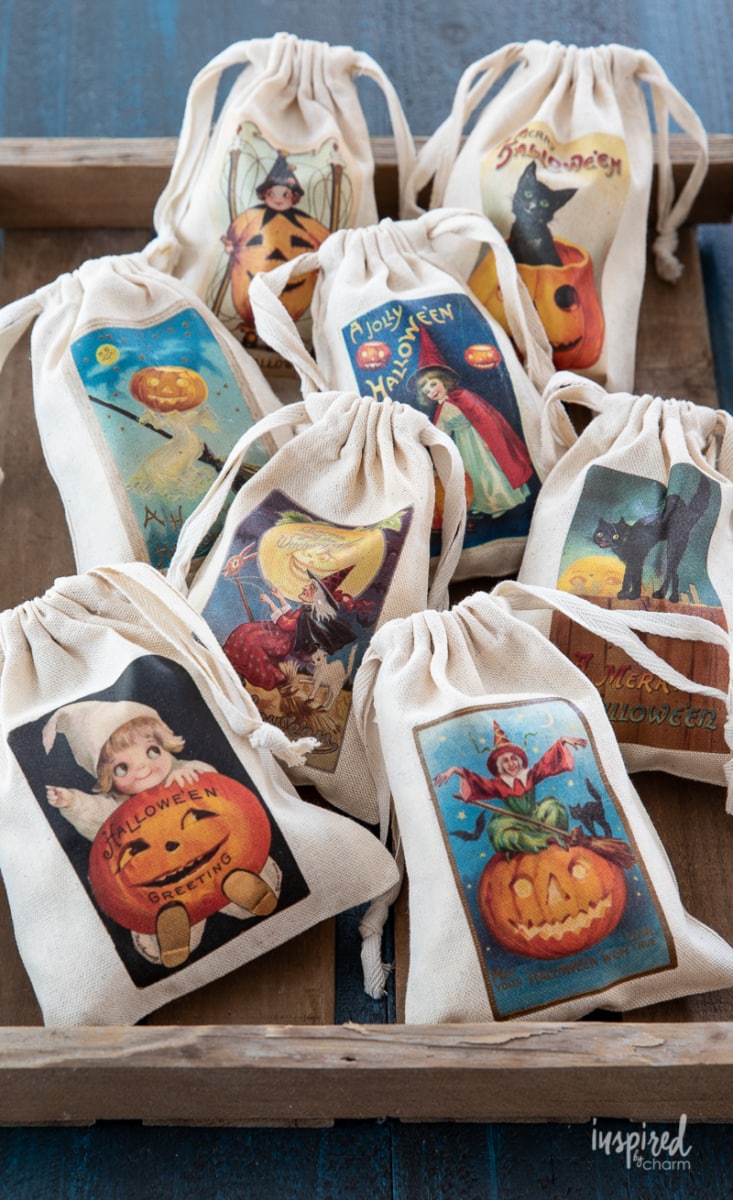
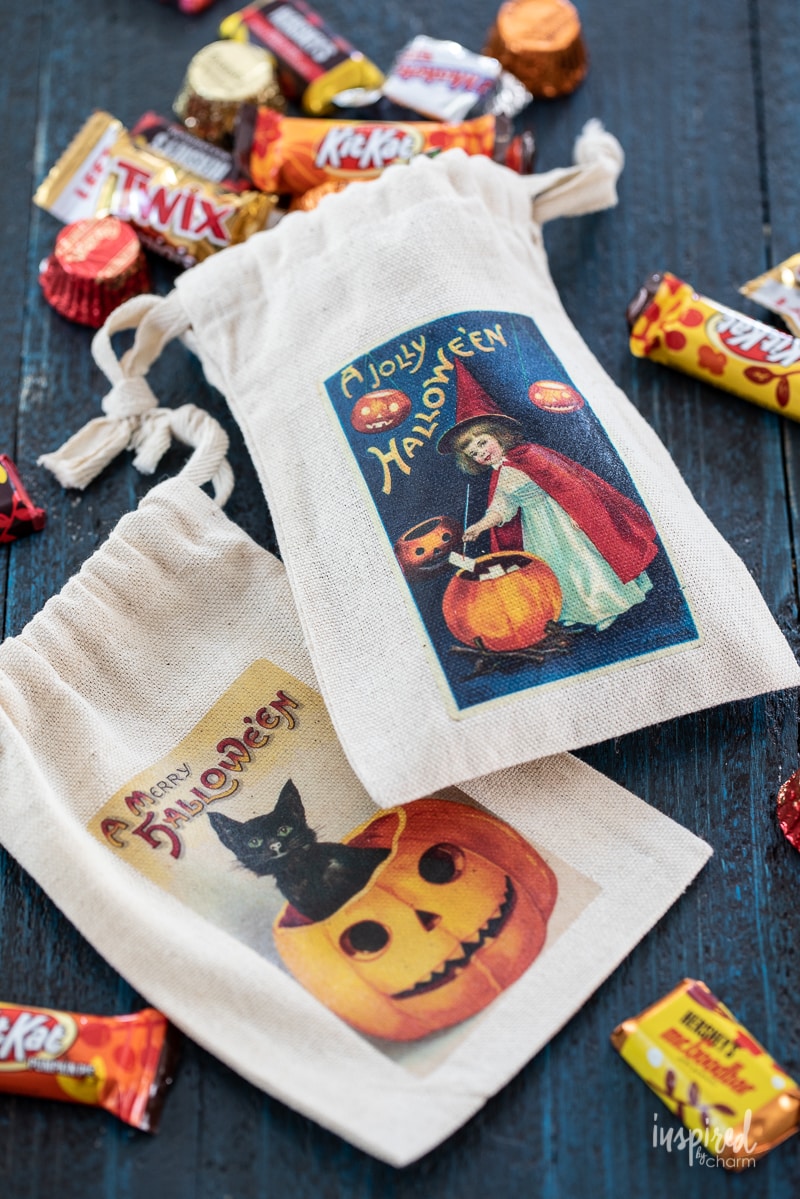
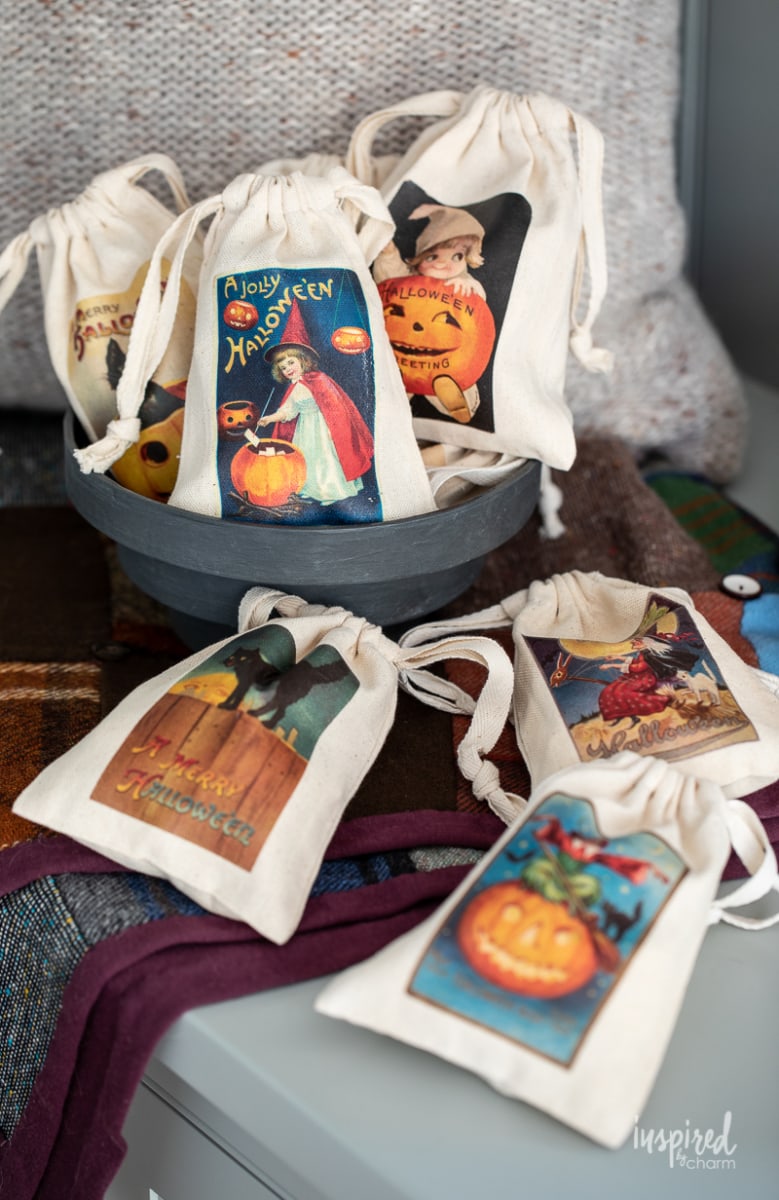
The Halloween Treat Bags are now complete and ready to be filled with candy or treats! I am majorly pleased with how these turned out! They are even better than I envisioned.
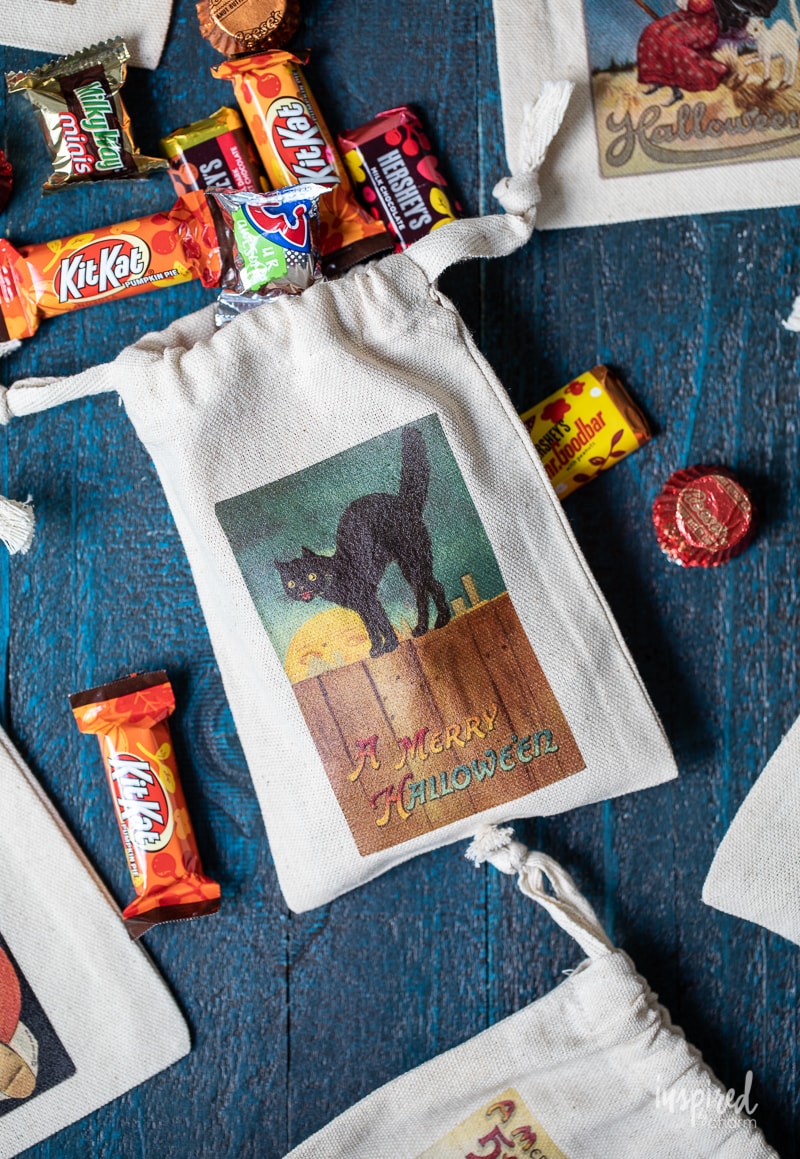
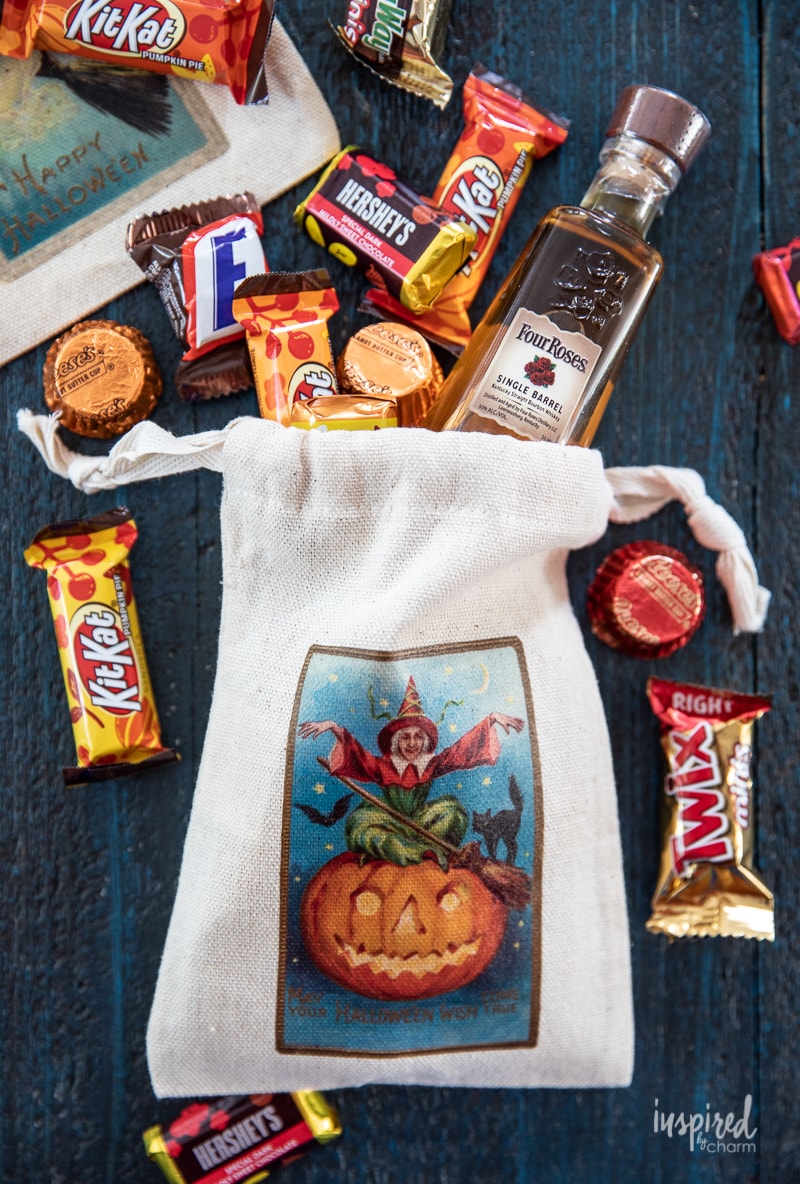
I filled my Halloween Treat Bags with candy, but you might tuck in other treats: gift cards, money, lottery tickets, small bottles of liquor (for adults), or even baked goods. And if you go with the sturdy bag, you could probably reuse it for seasonal storage or as a change purse.
There are plenty of options for gifts or personal use.
Frequently Asked Questions
Can I use these designs on bags of different sizes?
Absolutely! You can enlarge the graphics to fit any size bag, including larger tote bags. The transfer process works just as well, giving you the flexibility to use the designs for a variety of projects.
What type of printer do I need to print the fabric transfer sheets?
A standard color inkjet printer works best for printing on fabric transfer sheets. Make sure to adjust your printer settings to the highest quality for the clearest and most vibrant images.
How do I prevent the graphic from peeling or fading over time?
For the best results, be sure to follow the transfer instructions carefully, using the right amount of heat and pressure. After applying the transfer, let the bag cool completely before handling. To keep the design looking fresh, avoid excessive washing or use a gentle hand-washing method if needed.
Can I customize the design further or use my own graphics?
Yes! If you want to personalize the bags even more, feel free to use your own graphics or tweak the size and placement of the designs to suit your style. This project allows a lot of room for creativity.
More Halloween DIY Projects You’ll Love
- Printable Halloween Recipe Cards
- Halloween Flower Arrangement
- DIY Clay Ghost Garland
- Halloween Treat Buckets and Luminaries
- Chocolate Skull Cake
Once you’ve completed these Halloween treat bags, you’ll be ready to hand out something truly fang-tastic! They’re the perfect finishing touch for any Halloween party, neighborhood trick-or-treat, or spooky get-together. Plus, the fact that they’re handmade makes them feel extra special—who wouldn’t love a thoughtful, custom bag filled with goodies? You’ll be the talk of the graveyard! If make these, please leave a comment and a 5-star rating below.
Want more from Inspired by Charm? Join the IBC Mailing List for inspiration in your inbox! Follow along on Instagram and TikTok for daily updates and behind-the-scenes looks at my processes. There’s even more inspiration on Facebook and Pinterest!

Ingredients
- Printable Fabric Transfer Sheets*
- 5 5 x 7-inch Cotton Bags
- Color Printer
- Iron
- Scissors
Instructions
- Begin by downloading the printable file. (Details in the note section below.)
- With your PDF download successfully saved to your computer, load the printable fabric transfer sheets into your printer.
- Adjust the printer settings to the highest quaintly and then print.
- (You’ll notice that the printable looks backward or mirrored. This is okay. Since you’ll be ironing these transfers with the printed side down, you want the image of the graphic mirrored so it will read correctly when the paper backing is removed.)
- Once printed, cut out each graphic as neatly as possible.
- Next, make sure your iron is empty of water. Turn off the steam and then set the iron on high heat (cotton setting).
- Iron the bag to remove any wrinkles. Then place the graphic on the bag so that the printed side of the graphic faces down. I positioned the graphic a bit closer to the bottom of the bag rather than in the center of it to allow for the gathering at the top when the bag is cinched shut.
- Using the iron, apply heat to the transfer for 45-60 seconds. Apply medium pressure and be sure to move the iron around to avoid scorching the bag.
- Repeat this heat transfer process with all of the bags and graphics. Let each bag sit until it’s cool (2-3 minutes) before gently peeling off the paper backing.
- The Halloween Treat Bags are now complete and ready to be filled with candy or treats.
I have used the vintage Halloween images for a few years now. I ironed them on little fabric bags. I love them, and my coworkers and friends love them too. Do you think you will update the designs again? I’d love to have some new designs for in the future. (The same idea for the Christmas selection.) Thank you for all your creative and great ideas. I love finding ways to DIY on a budget and still making everything look so festive.
I didn’t plan on updating the designs, but I’ll definitely consider it now. Perhaps I can add a few more!
Thanks!
xo Michael
Love these! Thank you for the tutorial & for sharing where to get everything from!
Your talent amazes me, Michael! Thank you for the idea. I will use this for my grandson’s first birthday party bags. His mom has chosen a Halloween birthday party, and this will be perfect.
LOVE YOUR BLOG! I look forward to it everyday ….
Hi Michael, I just made the Halloween bags, my first attempt at transferring art. I used your templates and I love them, I’m going to give 4 to my gr. grand kids for Halloween. Thanks so much for having such a fun website. Love all your ideas. My daughter, who is quite artistic, copied your Hocus Pocus Blackboard for the display over the fireplace. I added a Haunted Mansion I painted black (a old plastic dollhouse). It really turned out quite nice.
Thanks again for all your great ideas.
This is one of my favorite diy’s! I love these vintage post cards! I would like to make another set of these… happen to have another round of Halloween printables? You make it so easy with them already the right size and on one sheet. Thanks!
These bags are so cute!
Glad I found your site, enjoy and “inspired” by everything. Making these for elderly relatives who are not able to get out and enjoy much right now. So cute. Agree with “you need to make more ideas for upcoming holidays“. Thank you for sharing your amazing talents
I just made some and they are just so adorable! Initially, I was just making them for my granddaughters but I think the adult bags may be a bigger hit for my daughters and son in laws! Such a great idea to put little liquor or wine bottles, lottery tix and a fancy chocolate.
Yay! Love that you made them already. So happy to hear that!
xo Michael
This is sooo cute…thank you!! Just ordered everything to make 🙂
LOVE!!!
I just love these bags and plan to make some soon. Thanks for posting this.
Found it! Now I feel stupid! Can’t wait to make the bags! Thank you for a great website!
Don’t feel stupid. I’m glad you found it!
xo Michael
I am on your mailing list and I am unable to find the password to make the Halloween bags. Can you let me know where it is?
Thank you.
May I please have your address? I want to “Trick or Treatl” for the adult Halloween bag! Haha!
Love these! Michael….you are soooo creative!
LOVE THIS! Your graphics are perfect! I think I will make this on a larger scale for my grandchildren’s trick or treat bags. Thank you for the inspiration and graphics!!!
Will I need to launder the bags before applying the transfer? These are fabulous and fun! Thank you for sharing with us.
No. There’s no need to wash them.
xo Michael
Love it!! Thank you for sharing. Your site and home are inspirational.
How fun! I love this look.
So darn cute! I tried the link to the paper and I couldn’t seem to get it to work? It took me to the bags. Next you need to do Christmas bags, Easter bags, etc. Too cute! Thanks for the inspiration.
Sorry about that. Thanks for letting me know. I’ve updated the link. You can find the transfer paper HERE.
xo Michael