DIY Clay Ghost Garland
This Post May Contain Affiliate Links. Please Read Our Disclosure Policy
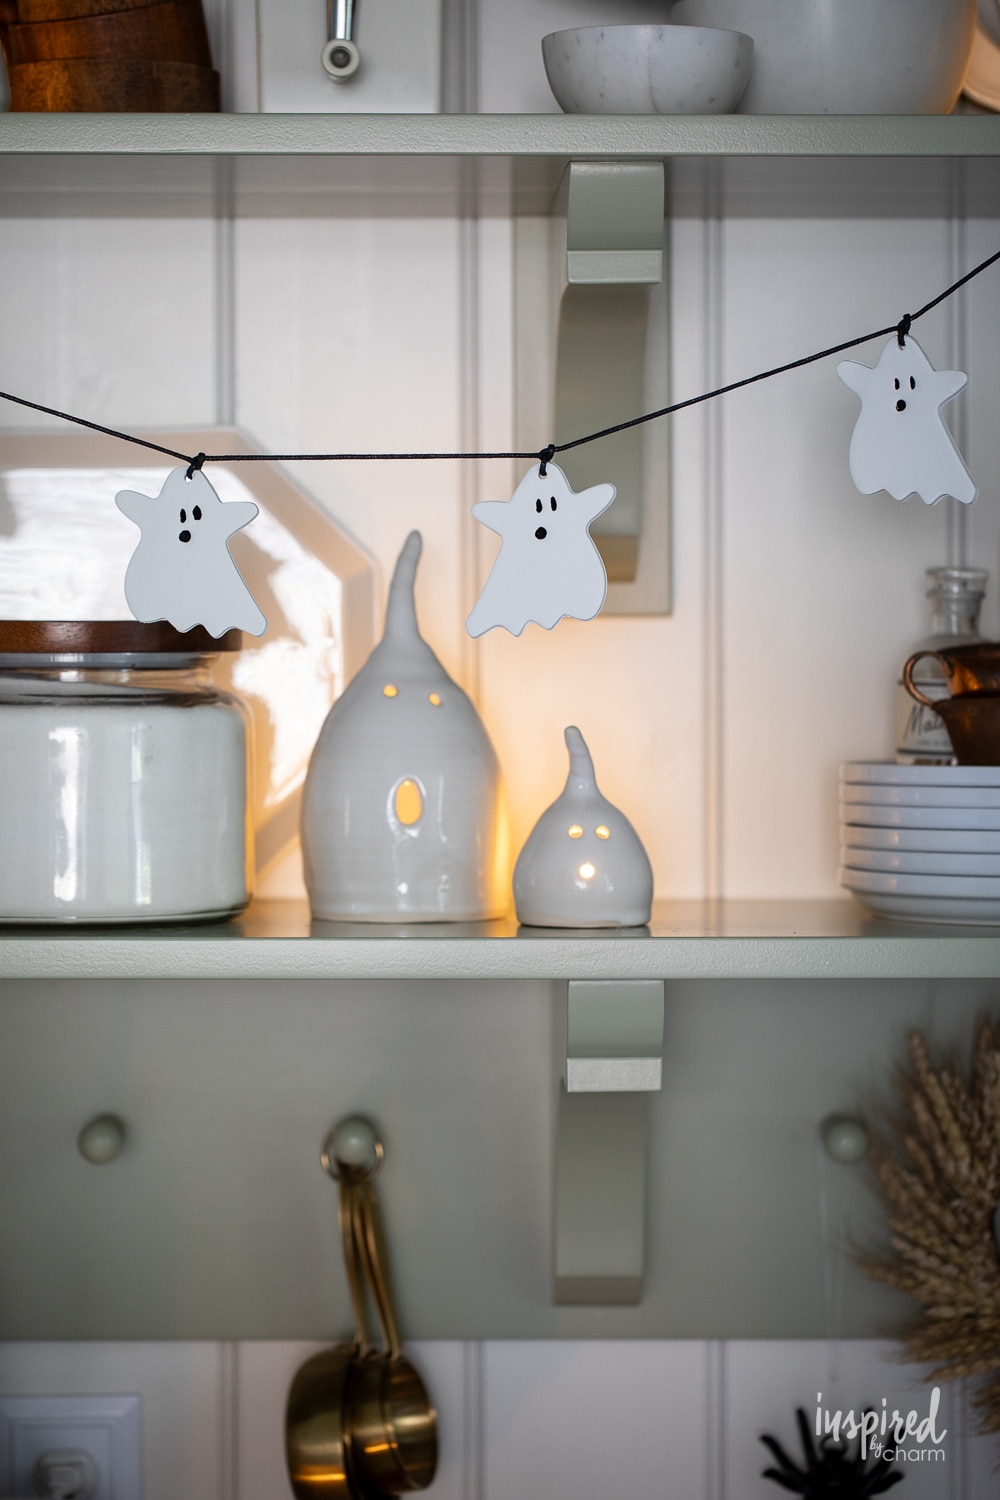
Dive into the Halloween spirit with this easy DIY Clay Ghost Garland! With a dash of creativity and a sprinkle of fun, you can turn simple oven-bake clay into boo-tiful decor. This garland will add a hauntingly perfect chic touch to your home during this spooky season.
Halloween is just around the corner, and you know what that means, right? Time to sprinkle some haunted charm around our homes! If you’re anything like me, you’re all about easy, fun, and—of course—bewitchingly beautiful DIY projects. So, today, we’re getting our crafty hands dirty (well, not too dirty!) with an adorably eerie DIY Clay Ghost Garland. Whether you’re a seasoned DIYer or a newbie, this is the perfect “treat” for your Halloween “trick.”
About a month ago I saw a ghost garland being sold by a popular home decor retailer. I thought the garland was adorable, but not the price ($60-$70). After gaining some experience from crafting a few clay ornaments last year, I decided this ghost garland could become a super easy DIY project … for a lot less money.
I had some leftover oven-bake clay on hand, so the only thing I needed to buy was some black cording. While I could’ve used some twine that I already had, I had a specific look in mind and decided to purchase something new.
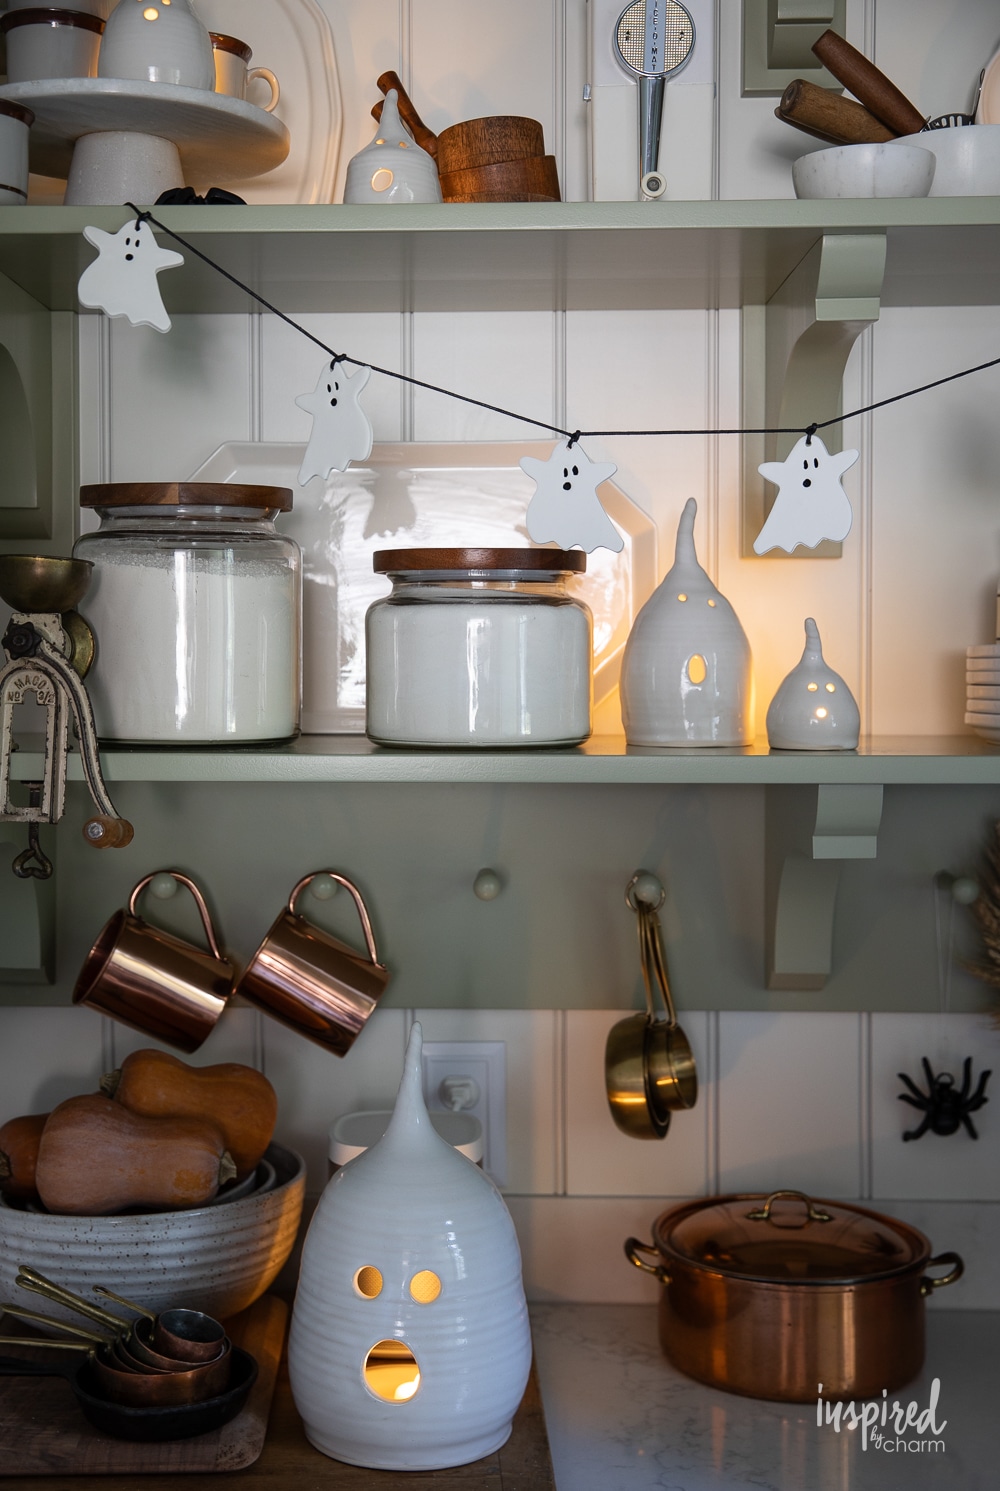
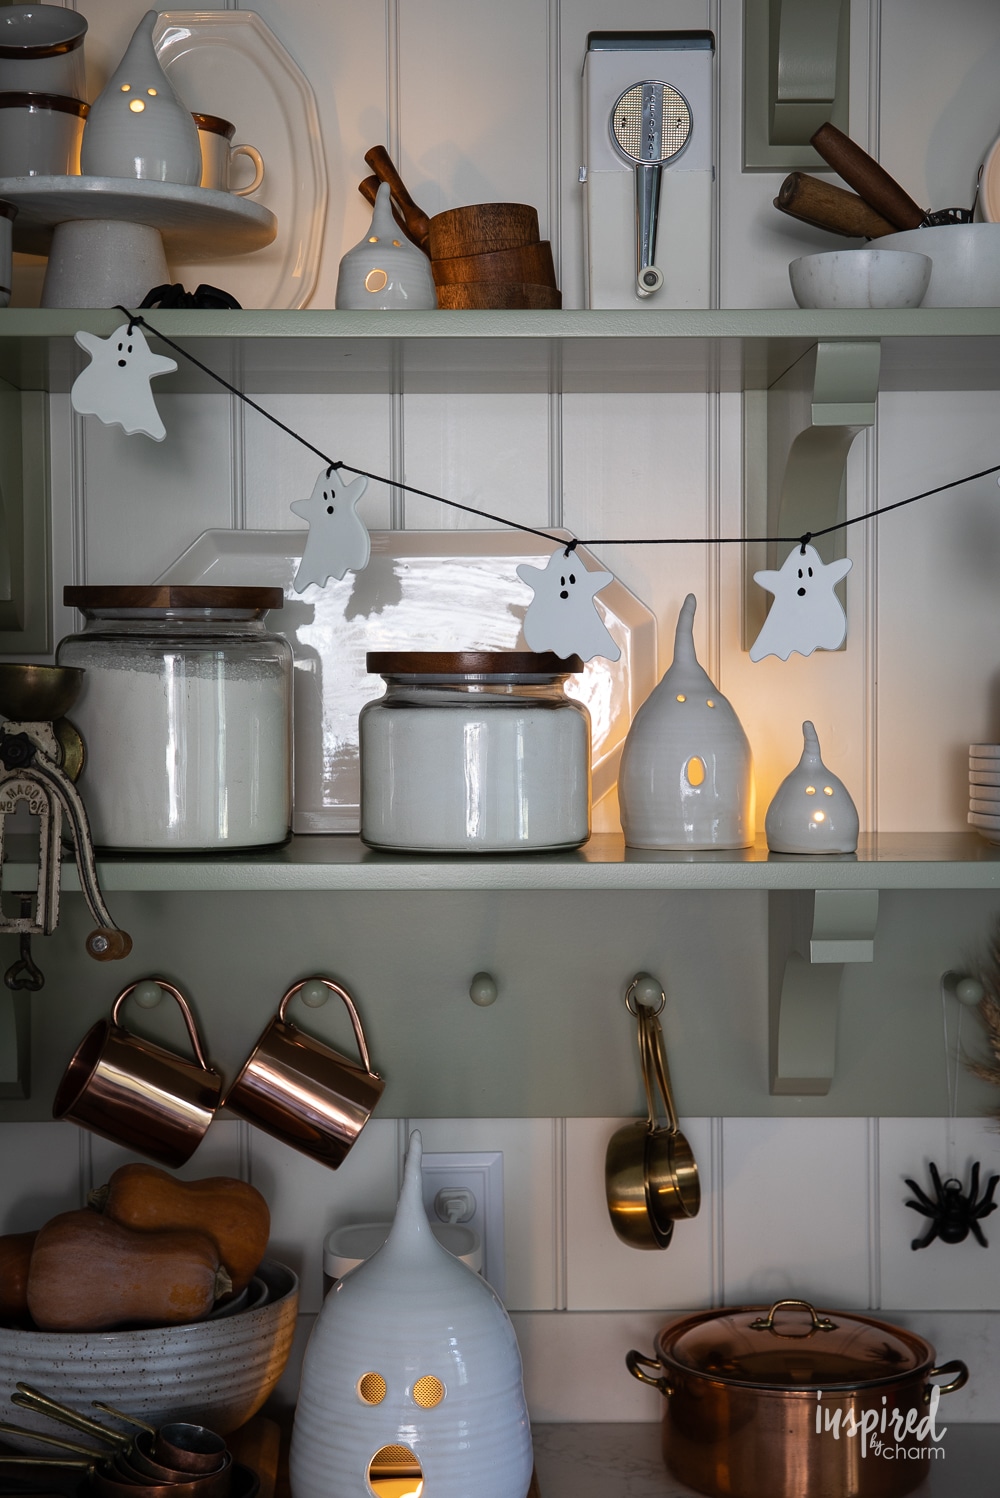
After an hour or so of crafting, I had a beautiful, custom, and hauntingly chic clay ghost garland. I’m obsessed. I think you will be too!
Why You’ll Love This Project
- It’s Spook-tacularly Simple: No need for a Ph.D. in Ghost-ology. Just roll, cut, bake, and paint! With easy-to-find materials and straightforward steps, even the most craft-challenged among us could make a hauntingly adorable garland.
- A Frightfully Fun Activity: Whether you’re looking for a ghoul’s night in or a fun project with the kiddos, this DIY checks all the boxes. Share the joy, mix up a Halloween cocktail recipes (for the adults), and make memories that’ll last way longer than the Halloween candy stash.
- Stand Out in the Spirit World: Every ghost you make is unique and will surely make your home the talk of the underworld. Who doesn’t want a home that’s a little more boo-tiful?
- Customize Your Ghostly Gang: The beauty of DIY is making it yours! Want a ghost with a goofy grin? Or perhaps one with a surprised O-shaped mouth? Let your imagination run wild as you paint your spectral buddies.
Ready to give this DIY project a ghost… I mean, go? Trust me, it’s going to be an un-boo-lievably fun ride.
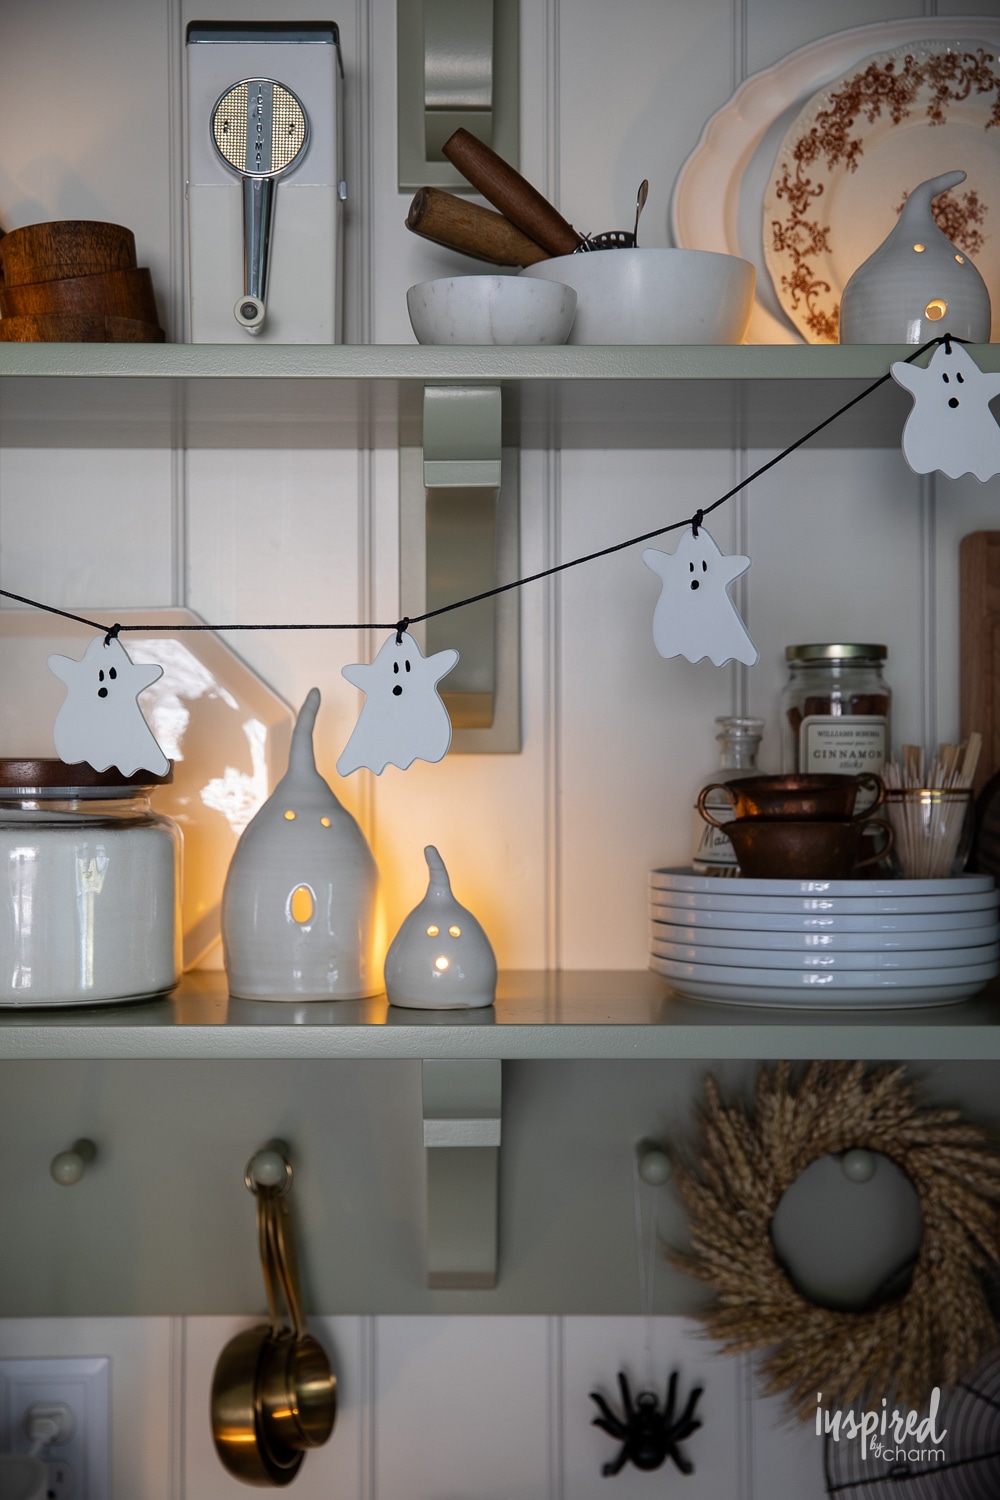
Side note: Love how I decorated my kitchen for spooky season? Then be sure to click through to see more of my haunted halloween kitchen decor.
Materials Needed
Before we get started, let me walk you through the materials list. I will share links to the exact products I used to create this haunting Halloween garland.
- oven-bake clay – I like this Sculpey brand clay. It has worked well for me in the past and I loved it here too.
- rolling pin – I purchased THIS rolling pin for the project. What I love about this rolling pin is that it can be customized to roll a perfectly consistent thickness. It was a game changer and made the process really simple.
- ghost cookie cutters – I used THIS cookie cutter. You can use any ghost cookie cutter you’d like. (You can also go rogue and use any shaped cookie cutter.)
- baking sheet – THESE baking sheets are a kitchen essential for me.
- parchment paper – You’ll want to add it to your baking sheet to protect it. I really like THESE precut sheets.
- toothpick – A toothpick or a wood skewer would do the job. Additionally, a random blunt tool is needed to create indents for the eyes and mouth. I used the end of a kitchen mixer beater. (You could get fancy and use clay sculpting tools like THESE if you’d like.)
- drill and drill bits (may be optional) – You may need a drill to increase the size of the hole used to hang the ghosts. However, you can do this without a drill.
- black paint and paintbrush – This is how you’ll give each ghost a pair of eyes and a mouth.
- cording – I used a black waxed cording like THIS. It’s very durable and looks great with this project.

Instructions
With all your supplies on hand, you’re ready to make this DIY Clay Ghost Garland. I’ll walk you through the easy steps below. I’ve also provided a full supply list and detailed instructions in the printable project card below.
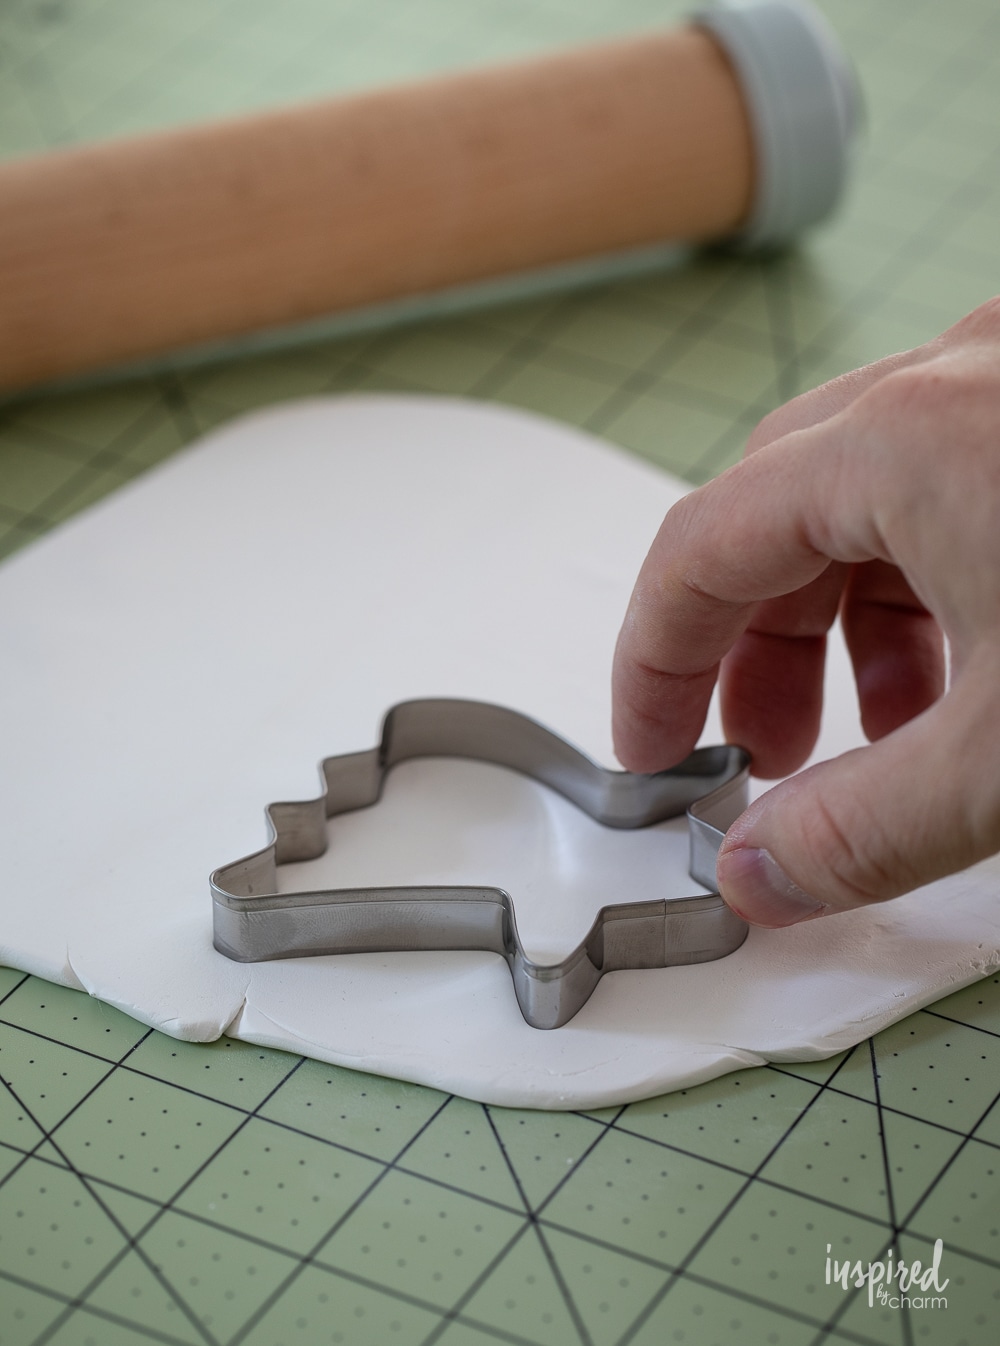
- Begin by rolling out your oven-bake clay to about ¼ of an inch.
- Use your cookie cutter to cut out the ghosts. (If desired, use the cutter on both sides to achieve ghosts facing different directions.)
- Place the ghosts on a parchment-lined baking sheet.
- Repeat with remaining clay. The clay can be reformed into a ball and rerolled as much as needed.
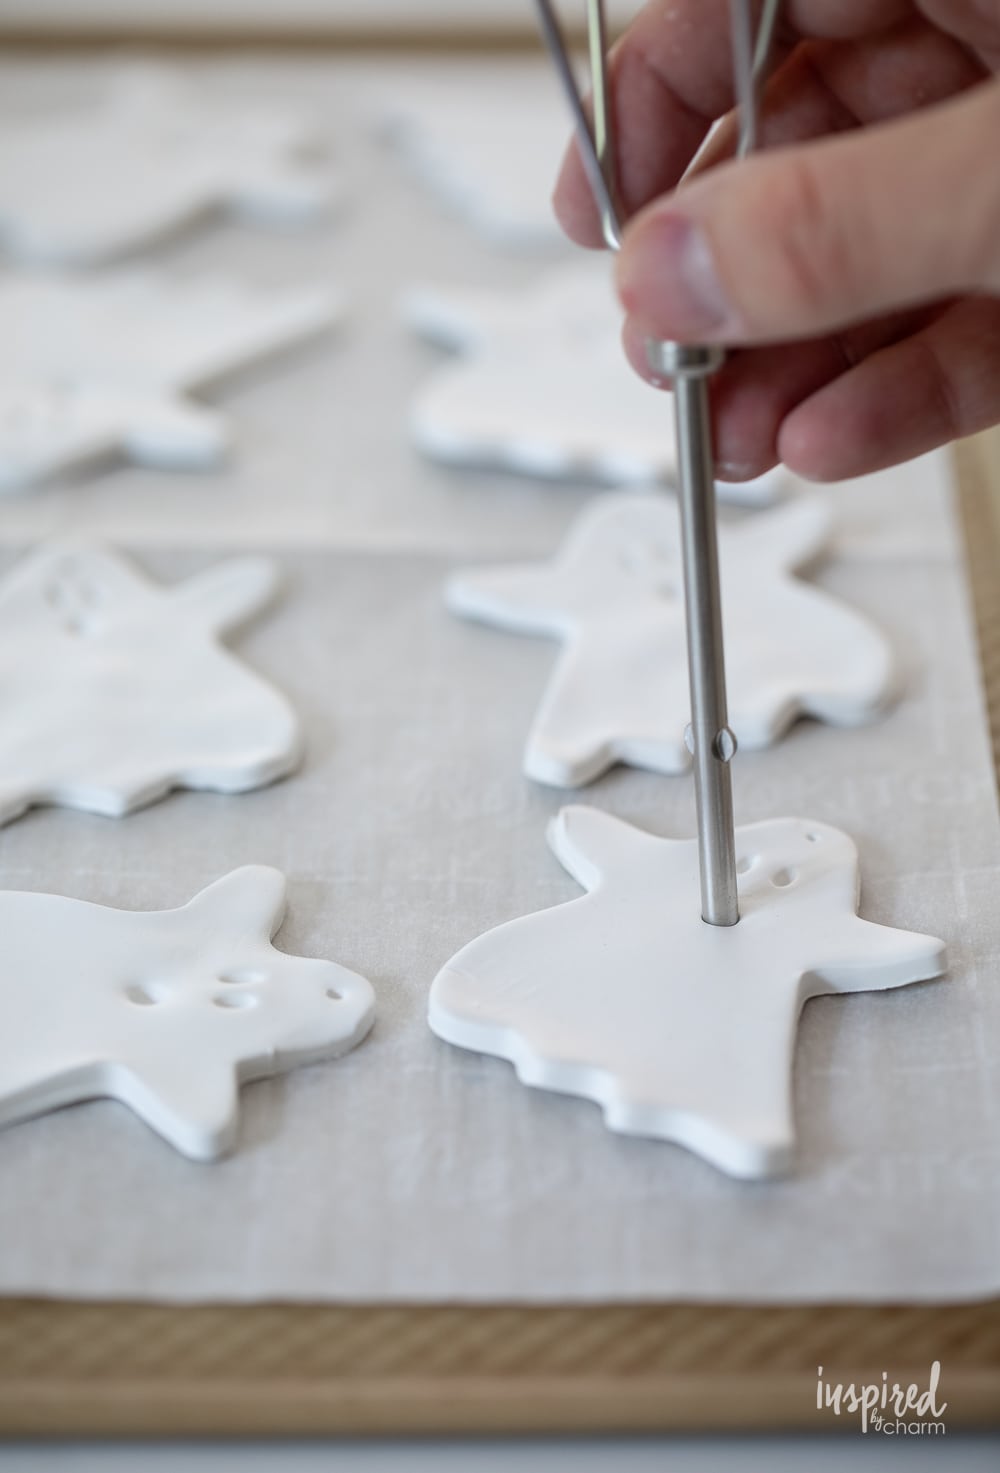
- Using a tool or an instrument with a blunt end (I used the end of a hand mixer beater) add in a pair of eyes and an open mouth. Use a toothpick to create a hanging hole in the cutout near the top. (You can use the toothpick to create a hole that is large enough for your twine or just make a small hole with the toothpick and then use a hand drill to make the hole larger once the cutout is baked.)
💌 SAVE THIS POST / RECIPE!
- Bake at 275 degrees F for about 14-15 minutes. (This is the time suggested for 1/4-inch thick ornaments. If your thickness varies, adjust the baking time according to the package directions.) Pay attention to the clay as it bakes because it can burn.
- Remove from the oven and place on a baking rack to cool.
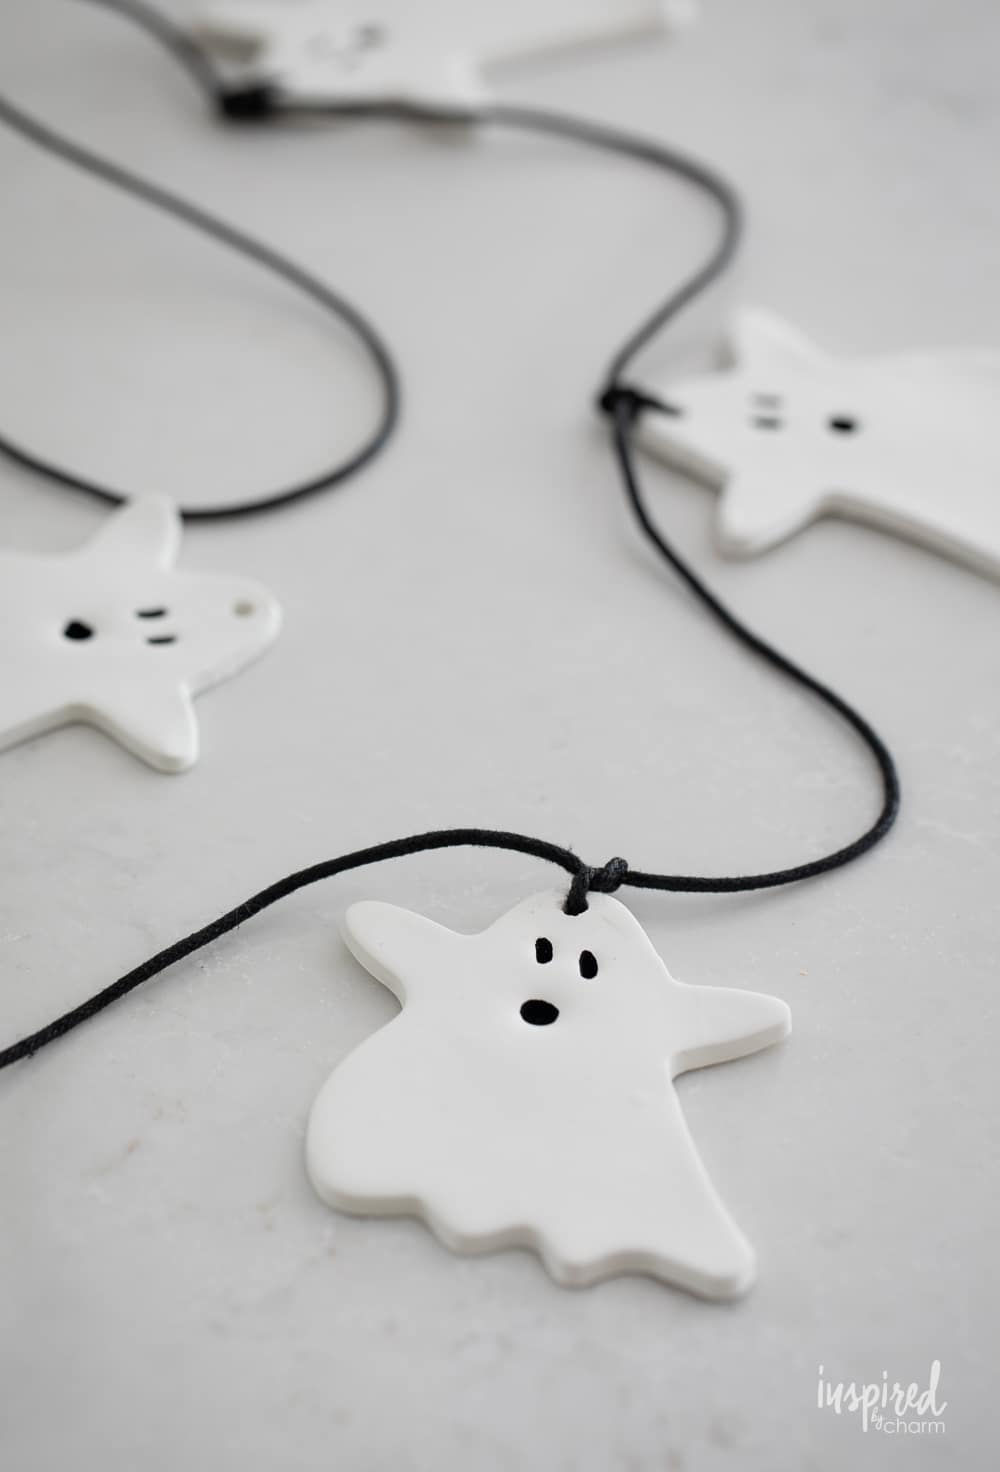
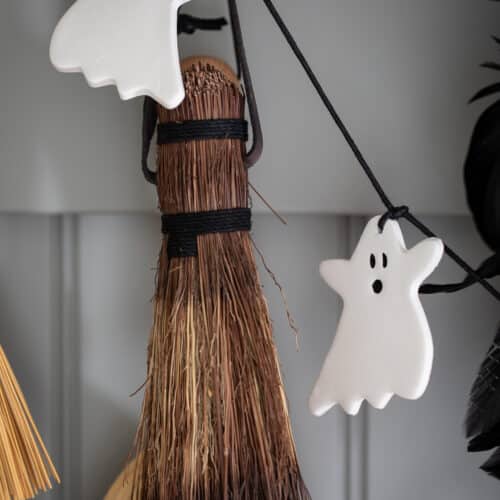
- Once cool, use a paintbrush and black acrylic paint to fill in the holes created for the eyes and mouth.

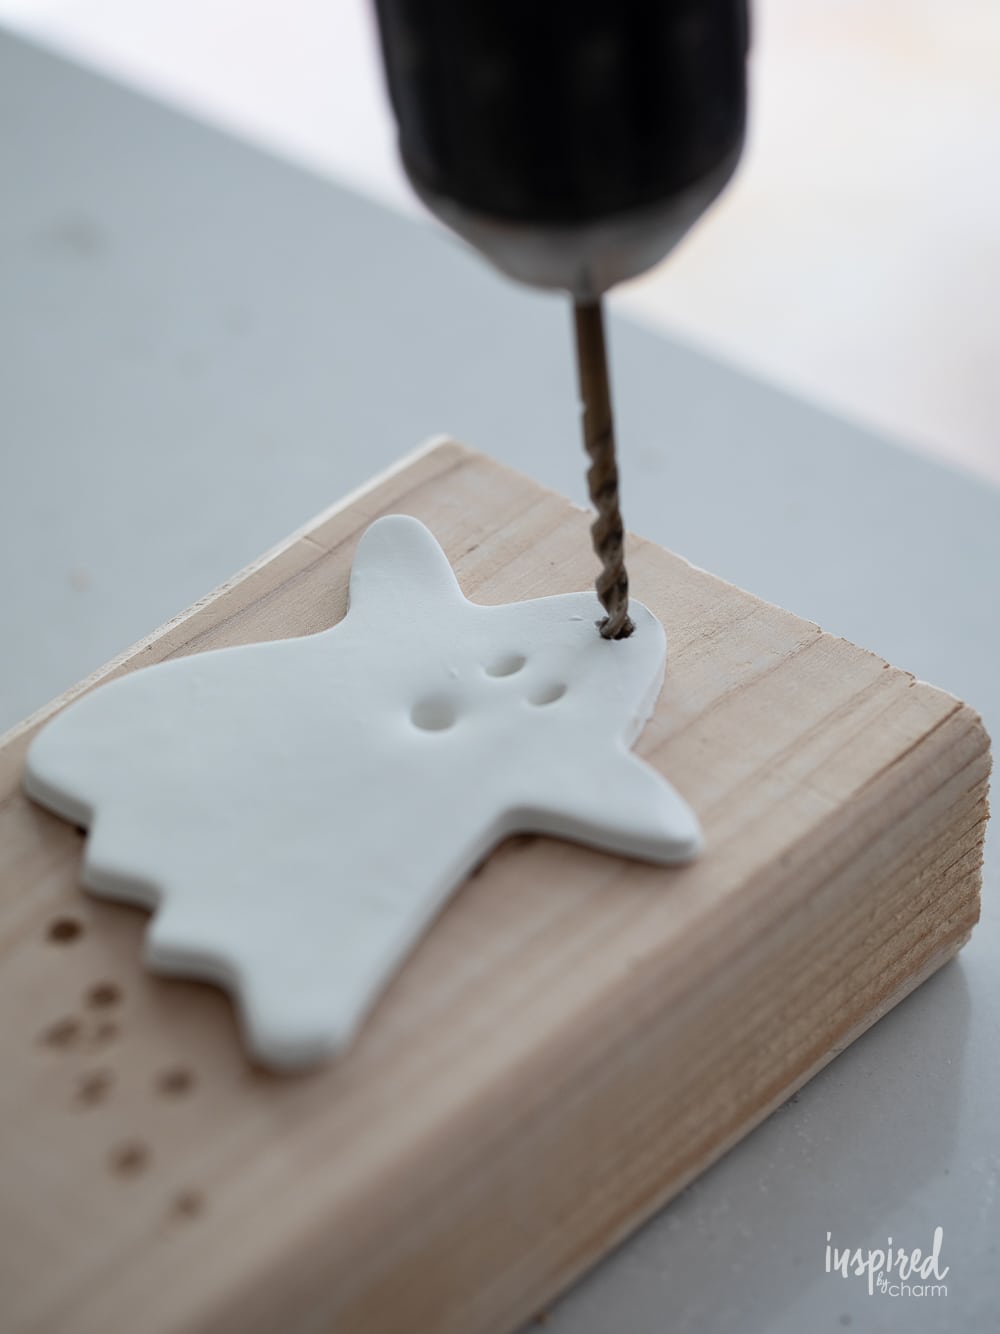
- Use your drill and a small drill bit to increase the size of the hanging hole.
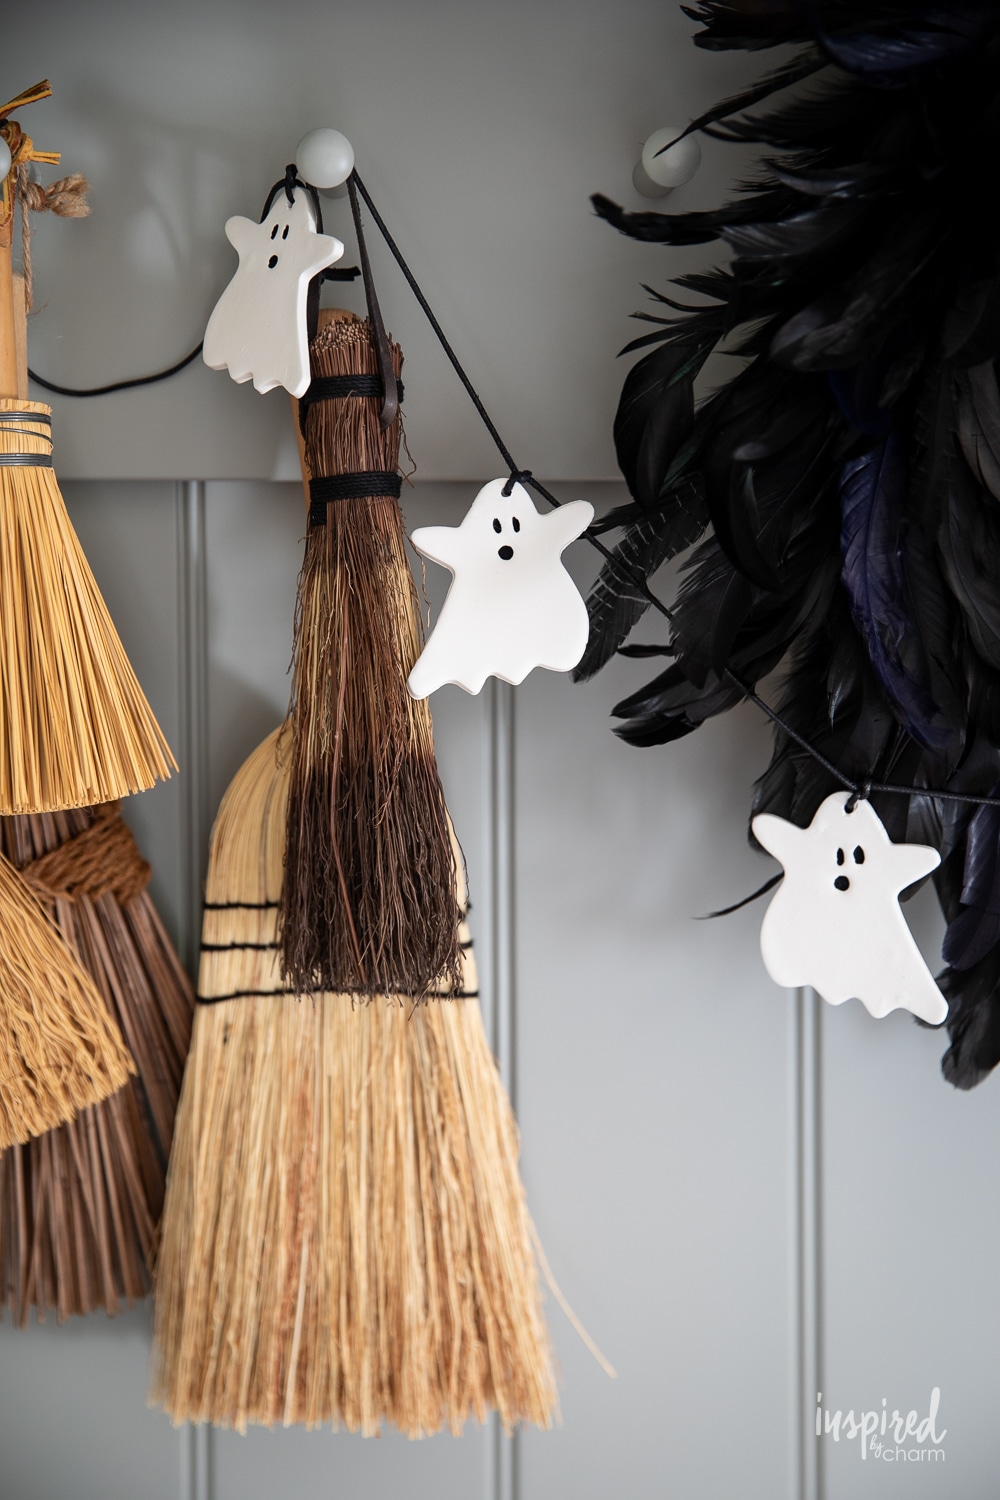
- Thread a ghost onto your cording. Tie a knot at the top to keep it in place. Repeat with the remaining ghosts. (I strung my ghosts about six inches apart.)
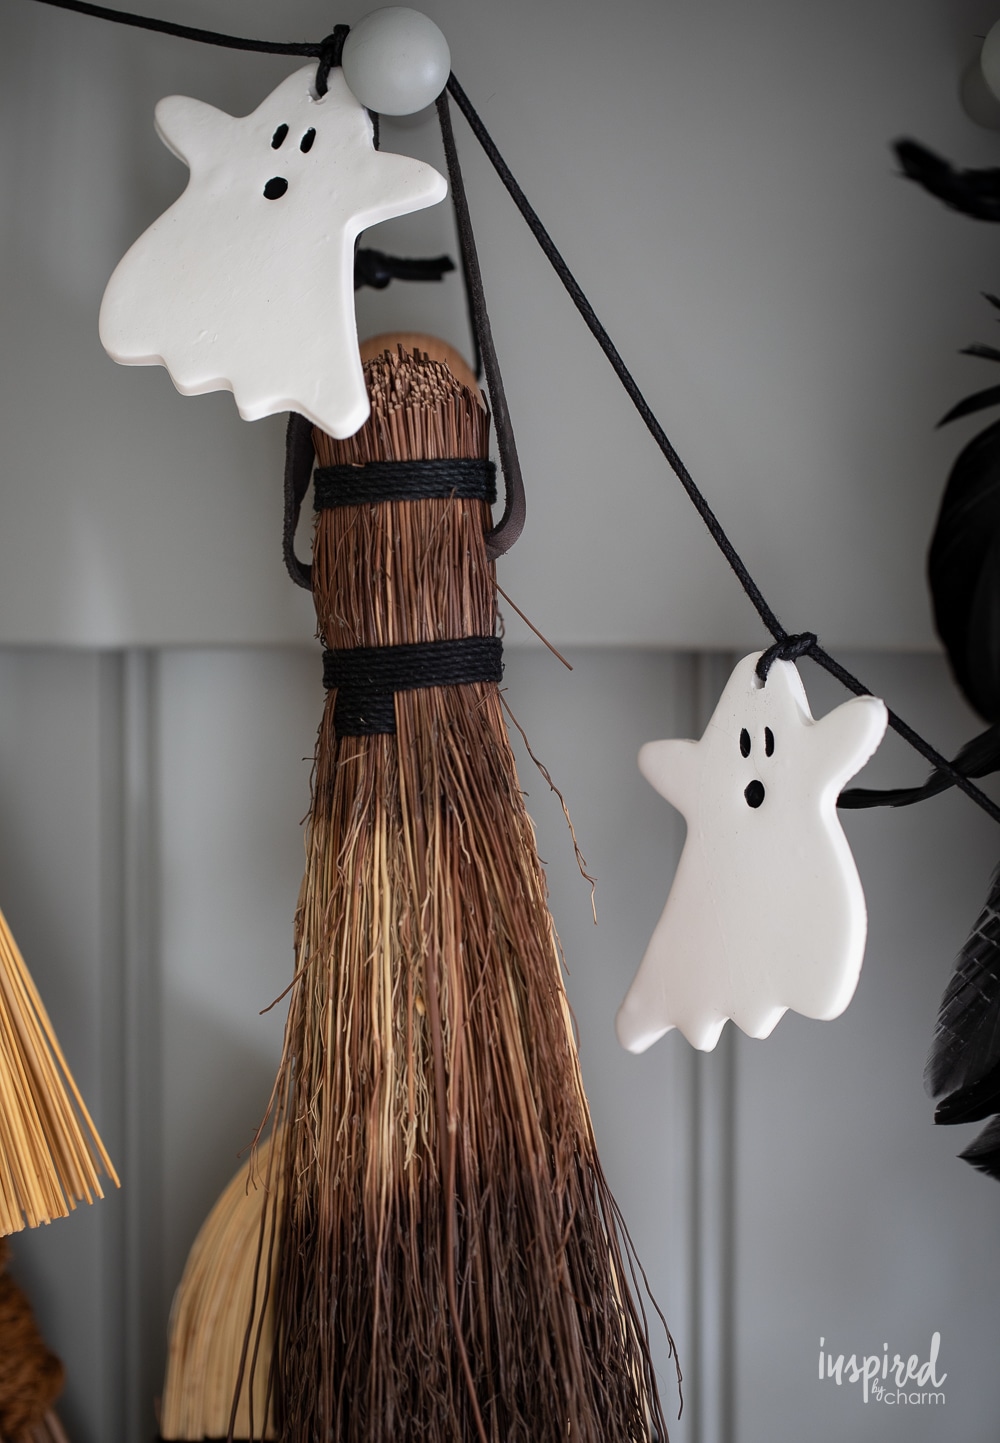
- Hang and enjoy.
Obsessed! I couldn’t be more pleased with how this garland came together at a fraction of the cost that I saw it for online.
In fact, I enjoyed this project so much that I created a bat version too! I switched up the design and materials a bit for a different look. I’ll be sharing that one with you soon! Stay tuned.
Project Variations
Speaking of garland variations. Here are a few ideas to mix up this DIY to give it more personality.
- Glow-in-the-Dark Ghosts: Mix some glow-in-the-dark clay or paint into your white clay to give your ghosts a gentle eerie glow when the lights are out.
- Glittery Ghosts: Before baking, sprinkle some fine glitter onto your ghost shapes to give them a shimmery, magical appearance.
- Floating Ghosts: Attach a clear fishing line instead of black cording for a floating ghost effect, making the ghosts appear as if they’re hovering in mid-air.
- Double-sided Facial Expressions: Paint one side of the ghost with a happy face and the other side with a spooky or sad face. You can flip them according to your mood!
- Accessorized Ghosts: Craft tiny hats, bows, or scarves from colorful clay pieces and attach them to your ghosts before baking for a stylish twist.
- Chime Ghosts: Attach small bells to the bottom of your ghosts, so they’ll jingle softly whenever there’s a breeze.
- Photo Ghosts: Once your clay ghosts are baked and painted, glue a small photo (perhaps in a spooky filter) onto individual ghosts to make a personalized family ghost garland.
Whether you’re stringing these cuties up by your window, adding them to a Halloween centerpiece, or gifting them to your favorite fellow Halloween lovers, there’s no denying the charm of this DIY Clay Ghost Garland.
More Clay Projects You May Enjoy
Till our next crafty adventure, stay spooky and keep those creative juices flowing! If you make this DIY Clay Ghost Garland, please stop back and leave a comment and a 5-star rating below.
Want more from Inspired by Charm? Join the IBC Mailing List for inspiration in your inbox! Follow along on Instagram and TikTok for daily updates and behind-the-scenes looks at my processes. There’s even more inspiration on Facebook and Pinterest!
DIY Clay Ghost Garland
Ingredients
- Oven-bake clay
- Ghost cookie cutter
- Rolling pin
- Baking sheet
- Parchment paper
- Drill and drill bit
- Paintbrush
- Black paint
- Cotton cord
Instructions
- Begin by rolling out your oven-bake clay to about ¼ of an inch.
- Use your cookie cutter to cut out the ghosts. (If desired, use the cutter on both sides to achieve ghosts facing different directions.)
- Place the ghosts on a parchment-lined baking sheet.
- Repeat with remaining clay. Clay can be reformed into a ball and rerolled as needed.
- Use a tool or an instrument with a blunt end (I used the end of a hand mixer beater) to add in a pair of eyes and an open mouth. Use a toothpick to create a hanging hole in the cutout near the top. (You can use the toothpick to create a hole that is large enough for your twine or just make a small hole with the toothpick and then use a hand drill to make the hole larger once the cutout is baked.)
- Bake at 275 degrees F for about 14-15 minutes. (This is the time suggested for 1/4-inch thick ornaments. If your thickness varies, adjust the baking time according to the package directions.) Pay attention to the clay as it bakes because it can burn.
- Remove from the oven and place on a baking rack to cool.
- Once cool, use a paintbrush and black acrylic paint to fill in the holes created for the eyes and mouth.
- Use your drill and a small drill bit to increase the size of the hanging hole.
- Thread a ghost onto your cording. Tie a knot at the top to keep it in place. Repeat with the remaining ghosts. (I strung my ghosts about six inches apart.)
- Hang and enjoy.
Love these!
Thank you!!
xo Michael
Can I string these up on my covered porch?
I haven’t tried that, so I’m not 100% sure. They are baked so the clay sure be cured. However, if you want to put them outside I would maybe spray them with a clear sealer.
xo Michael
Wondering where you got the ceramic ghosts on the shelves. The candle holders
They are from Mollie Jenkins Pottery.
xo Michael
Your ghost garland is super cute and your instructions and variations are clear and easy to follow – I have my ghosts made – just need to string them into a garland and hang them! Thank you.
So happy to hear that Angie! Thank you!!
xo Michael
YAY! I hope you had fun making them! I’m sure they’ll turn out boo-tiful!
xo Michael
This would fit our theme perfectly. Can we buy one or enter to win one?!
I’m sorry. I don’t have any extra to sell or giveaway. If you have an hour or so you can easily make one.
xo Michael
You make everything so easy and approachable. This is why I love you. From the materials list to the details instructions. You also give everything I need. I don’t comment much, but thank you for your years of recipes, ideas, inspiration…. all for free.
Wow! You just made my whole day! This was the best. Thank you!!
xo Michael
Cant wait for my Amazon order to come in so I can make my own clay garland. Fantastic and quick little project
Yay!! You’ll have so much fun! It’s a great project.
xo Michael
What a wonderful idea! Also love the added ideas for “personalizing” the ghosts. Thank you.
You’re so welcome! Thank you!
xo Michael