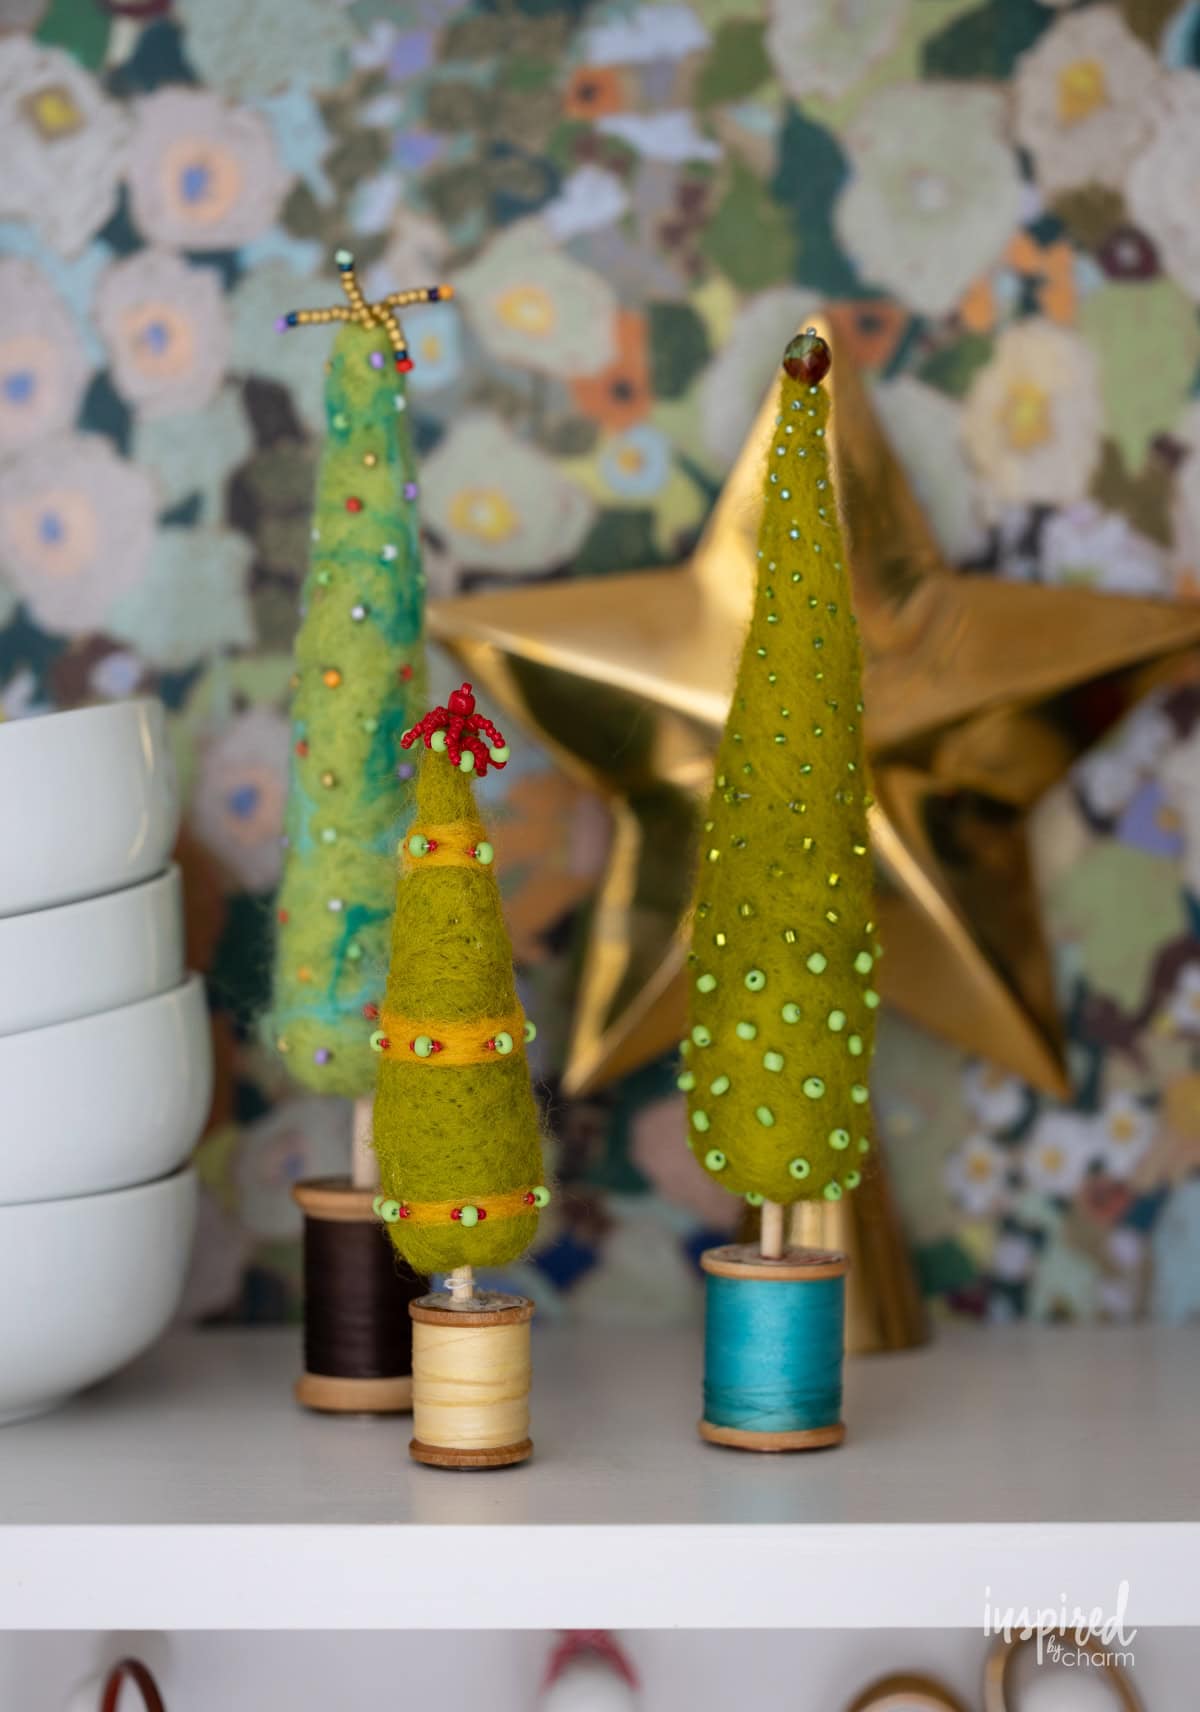
Handmade Needle-Felted Christmas Trees
This Post May Contain Affiliate Links. Please Read Our Disclosure Policy
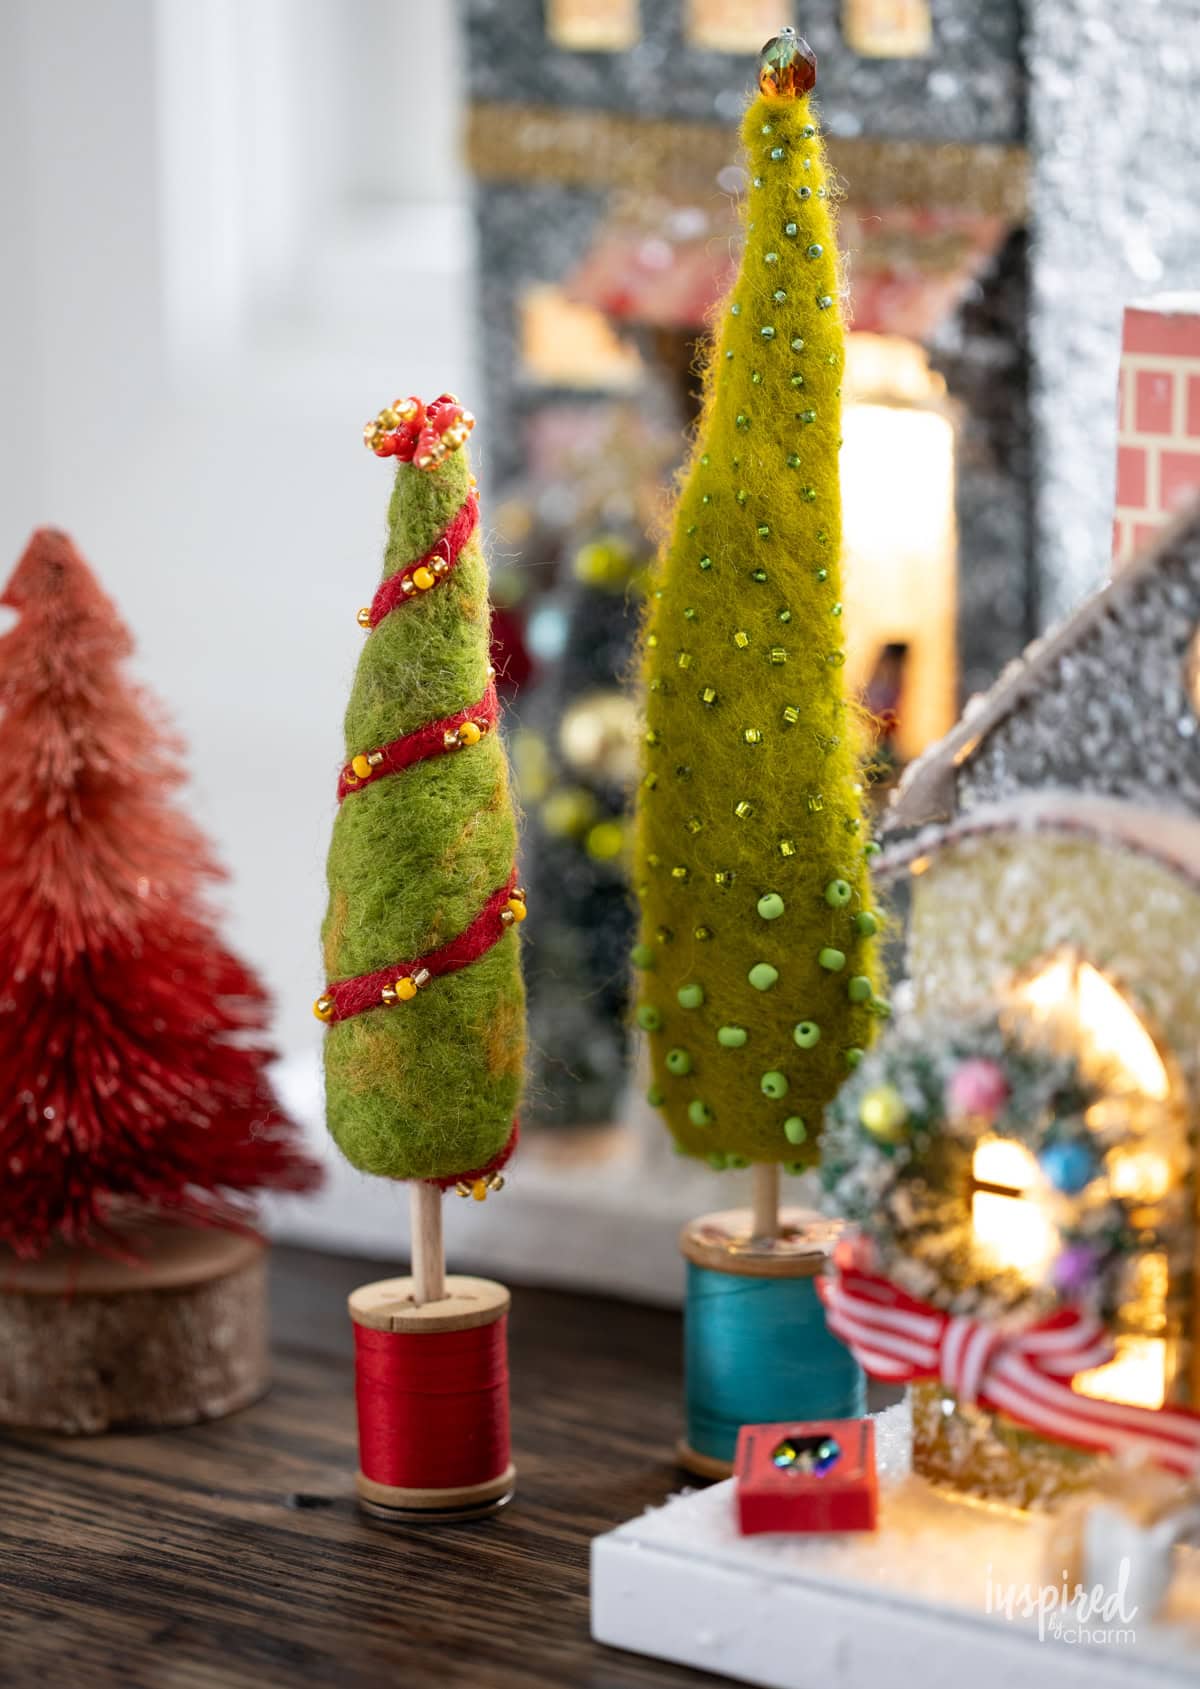
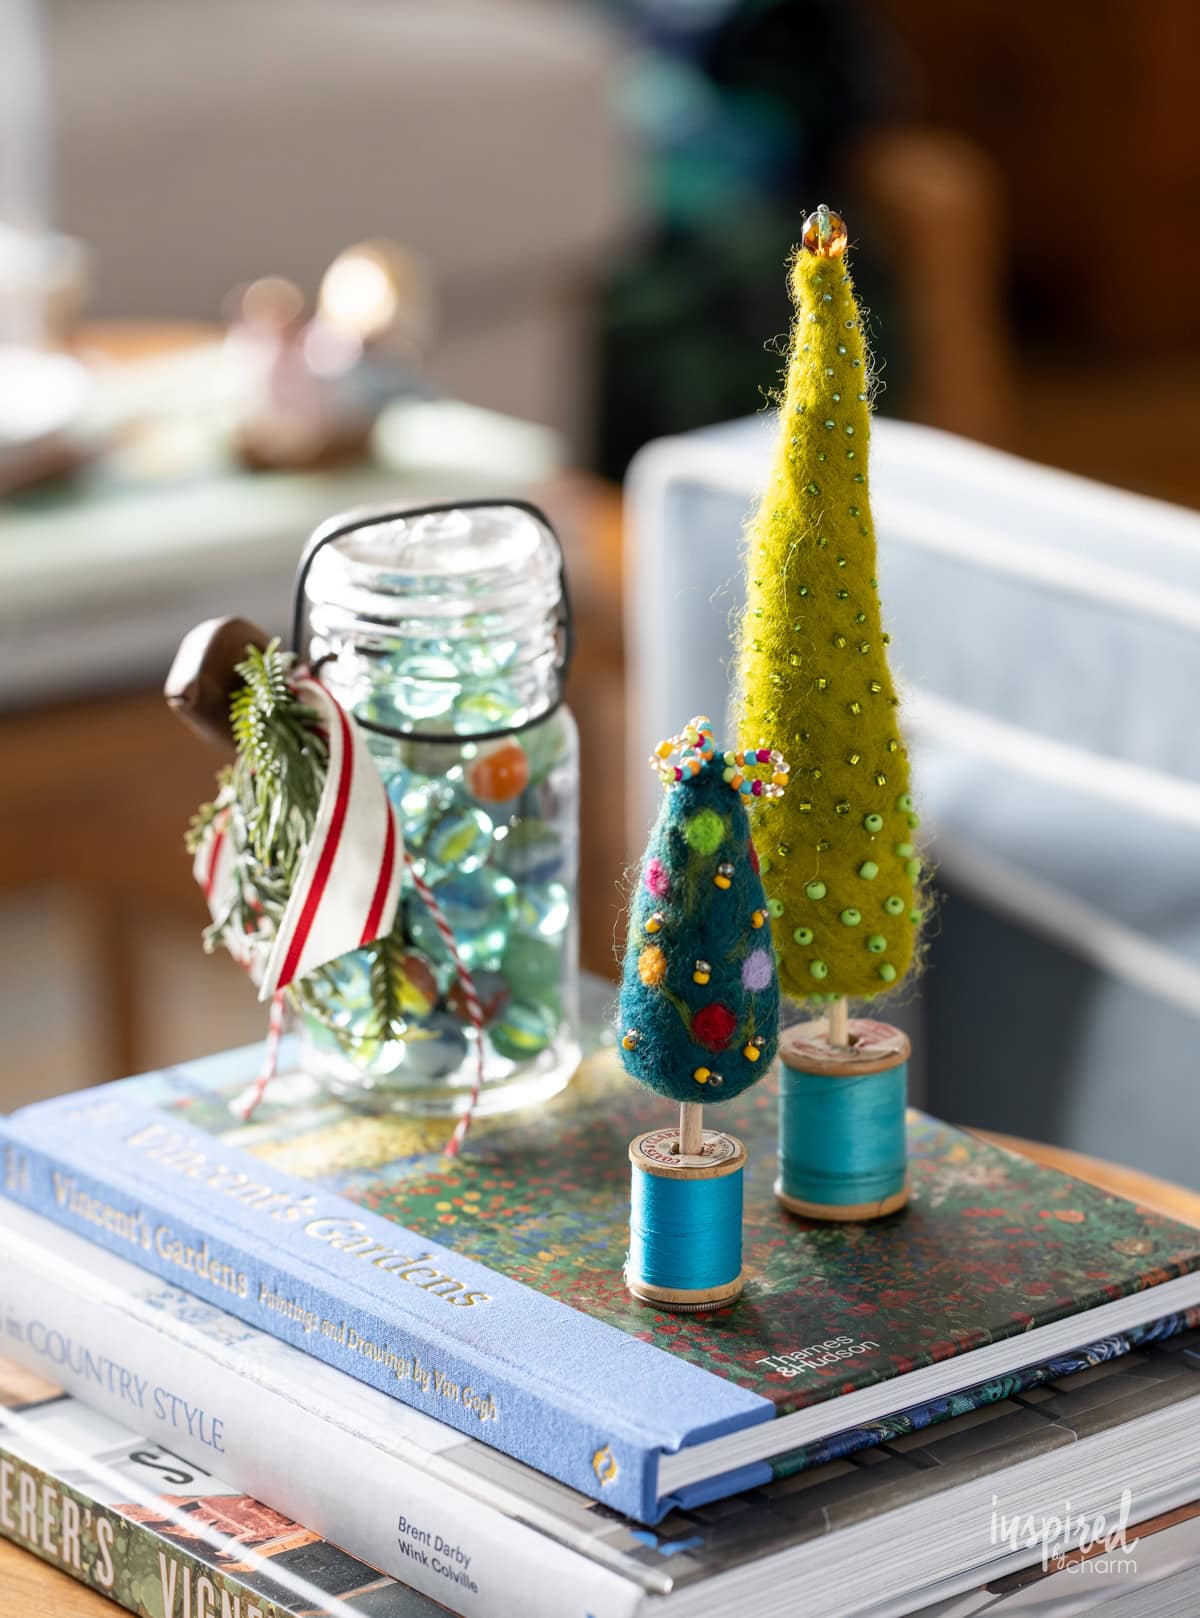
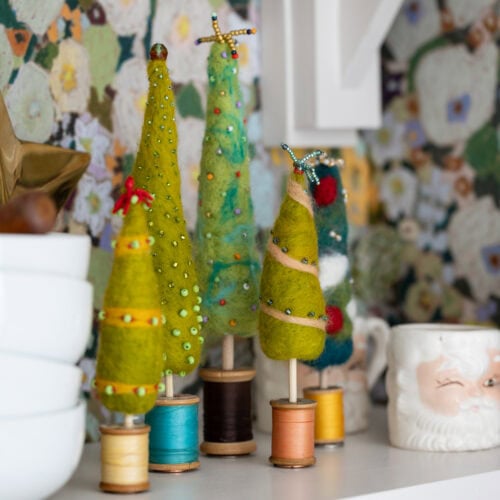
Learn how to make these adorable Needle-Felted Christmas Trees with colorful wool, tiny beads, and vintage wooden thread spools. This whimsical Christmas craft is such a fun way to create one-of-a-kind holiday decorations. Make a few in different colors and sizes to create your own charming little Christmas forest!
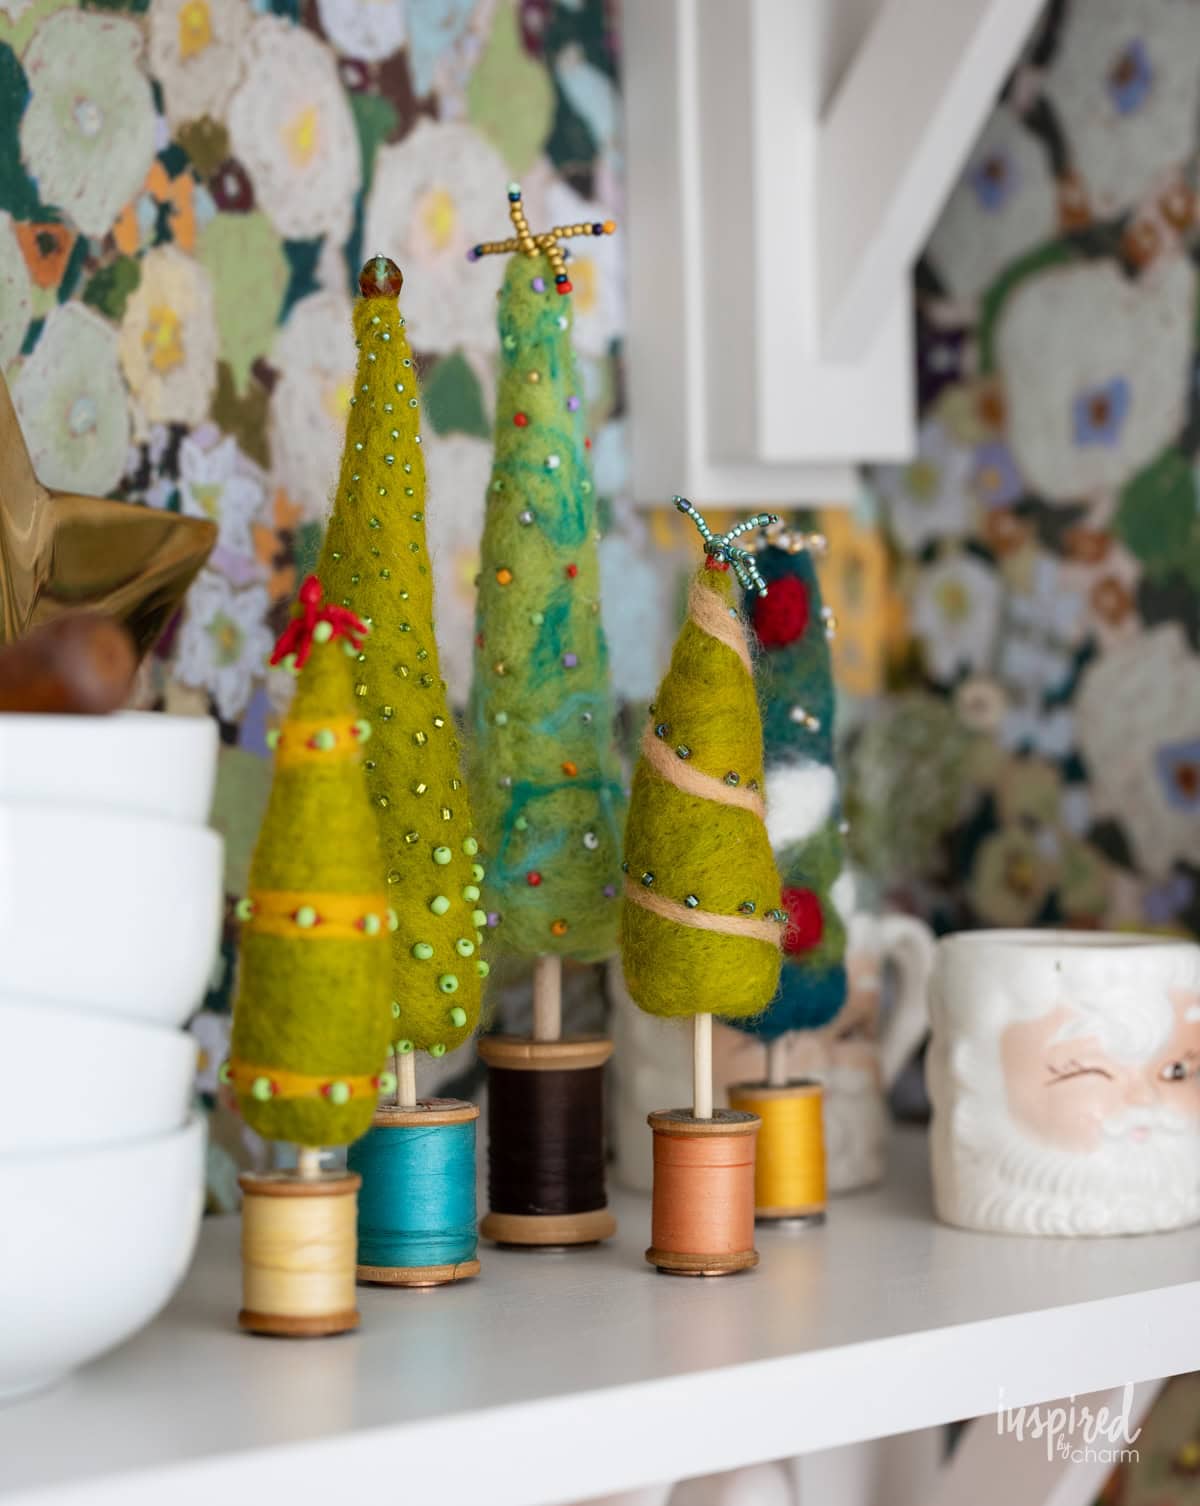
You are in for such a fun project today! These Needle-Felted Christmas Trees are easily one of my favorite Christmas decor projects I’ve made recently. They’re colorful, whimsical, a little quirky, and just so darn cute!
A couple of years ago, I was browsing a local handmade holiday market when I came across the most adorable little felted Christmas trees. Naturally, I fell in love and bought two. Only two! As soon as I got home, I was kicking myself for not buying more. Of course, when I went back, they were all gone.
So, I waited a year, went back to the same market, and wouldn’t you know it? The vendor wasn’t selling them anymore. Whomp. Whomp.
At that point, I decided to take matters into my own hands. I took a closer look at the trees I already had and thought, “I wonder if I could make these myself?” I’d done a little needle felting before, so I figured it was worth a try.
And here we are! I couldn’t love them more!
The best part about making these yourself is that you can create them exactly how you like: tall trees, short trees, green trees, blue trees, colorful garlands, little beaded ornaments. There are SO many possibilities! My mom and I worked on this project together, so a few of the trees you see here are hers. We had so much fun making them, and even though we’ve already created quite the collection, I’m itching to make more.
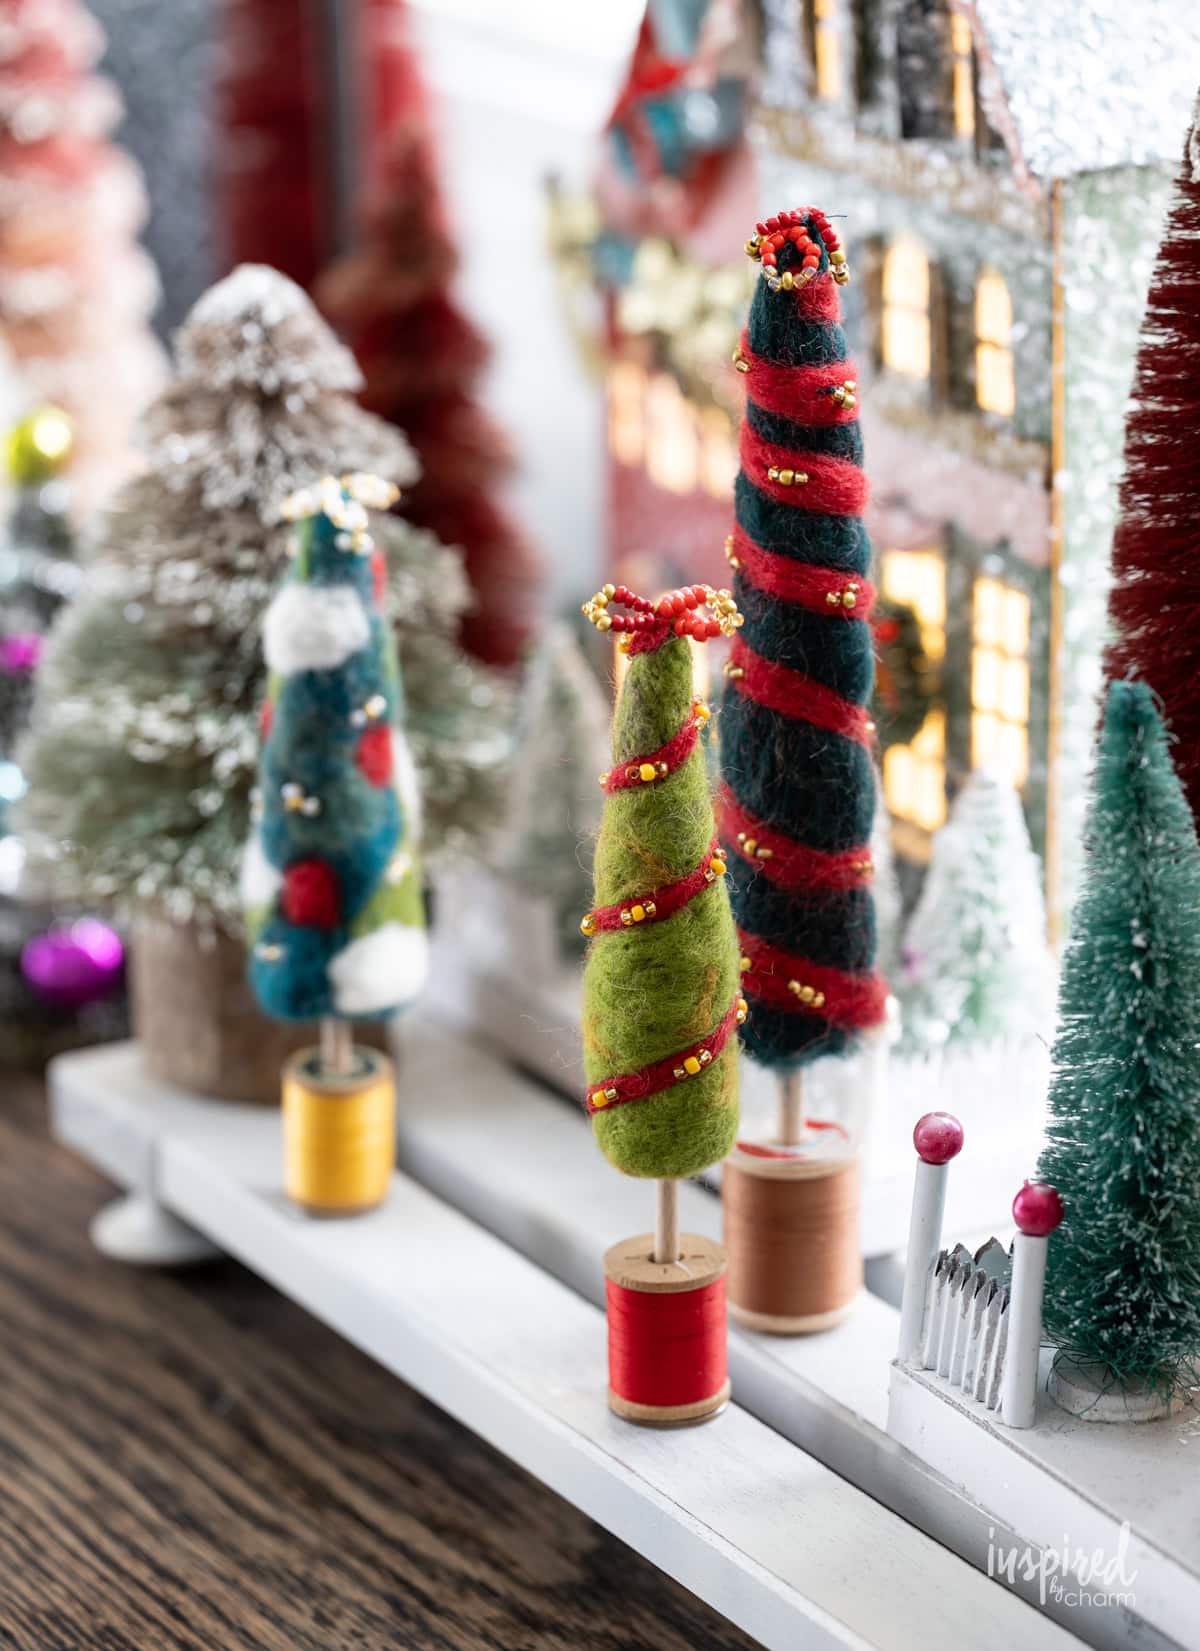
They’re adorable on their own, but I also love tucking them into a little Christmas village, pairing them with vintage Putz houses, or grouping a bunch to create a whimsical forest. There are so many fun ways to use them in your holiday decorating.
I just think they’re the happiest little trees!
Now, before we get into the details, one quick note: If you’ve never tried needle felting, I recommend watching a beginner tutorial online to get a feel for the process. It’s actually pretty simple! You’re essentially using a special needle to poke wool fibers until they tangle together and hold their shape. Just be careful because those needles are SHARP!
Alright, let’s make some trees!
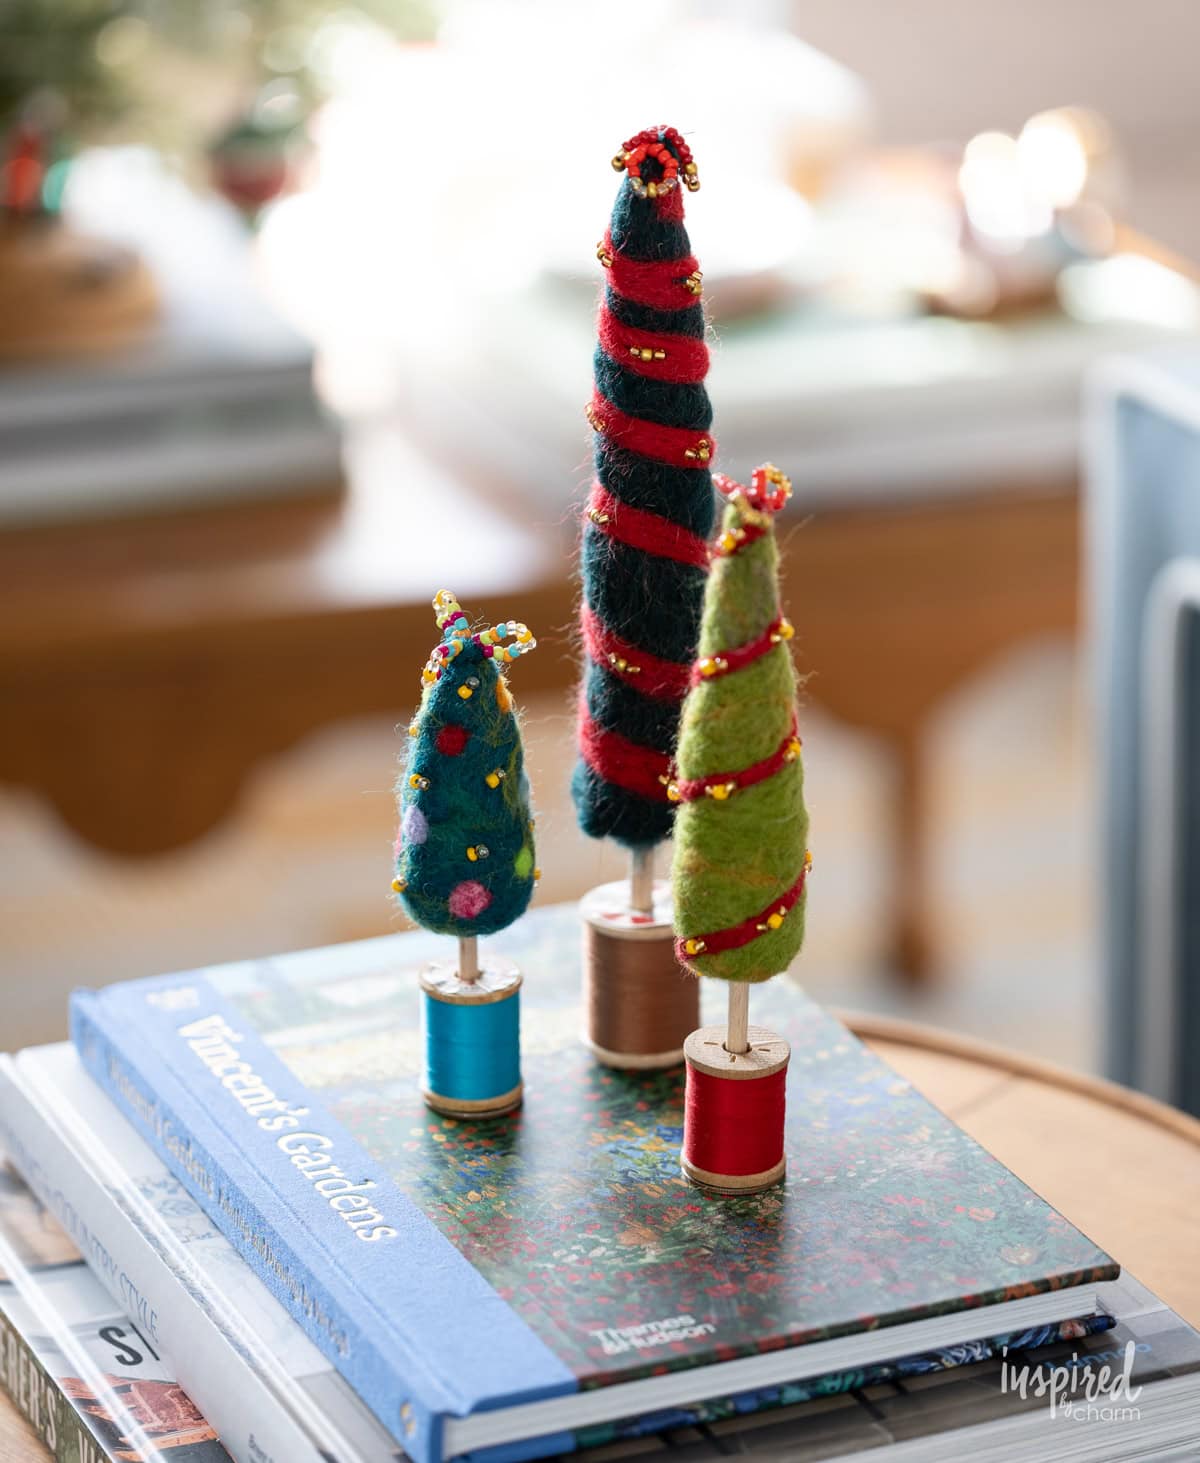
Why You’ll Love This Project
- Easy to Make: This project looks more complicated than it actually is. With just a little glue, ribbon, and a handful of thread spools, you’ll have an adorable mini wreath in no time.
- Full of Vintage Charm: There’s something so sweet and nostalgic about old wooden thread spools, especially with their colorful threads and vintage labels. They give each wreath an individual character!
- A Great Way to Repurpose: If you have a collection of old thread spools sitting around, this is a fun way to give them new life. I love finding creative uses for things that might otherwise go unused.
Love handmade decor for the holiday? Me too! If you want to gather some more ideas, check out this post filled with all my best handmade Christmas decor.
Materials
Let’s get into the materials list for this uniquely charming project. Here’s what you’ll need:
- Wool Roving – Choose a variety of colors for your trees. I like mixing different shades of green with unexpected colors like pink, blue, and yellow. You’ll also want extra colors for adding garlands and other decorations.
- Needle Felting Mat or Foam Block – This provides a soft surface to work on while felting and protects your table (and your needle!) as you work.
- Felting Needle – These special needles have tiny barbs that help tangle the wool fibers as you poke them, allowing you to shape and sculpt your trees.
- Vintage Wooden Thread Spools – These make the cutest little tree bases! I especially love using spools that still have colorful thread on them. You can often find them at thrift stores, antique shops, and flea markets.
- Small Beads – Use an assortment of tiny beads in different colors, shapes, and sizes to create ornaments, garlands, and whimsical tree toppers.
- Sewing Needle and Thread – For attaching the beads and creating those fun little beaded toppers. Choose a thread color that blends with your wool.
- Wooden Dowels or Small Sticks – These serve as the trunks of your trees. You’ll want something thin enough to fit inside the hole of your wooden thread spools.
- Pennies – Glue one to the bottom of each spool to add a little extra weight and help keep your trees standing upright.
- Tacky Glue and Hot Glue Gun – Hot glue works great for securing the dowels to the spools, while tacky glue helps attach the felted trees to their trunks.
- Scissors and a Small Awl or Skewer – Scissors are handy for cutting thread and dowels (if using thin wooden sticks), while an awl, skewer, or small screwdriver can be used to create a hole in the bottom of each felted tree.
How To Make
Okay, ready to craft these Needle-Felted Christmas Trees? Let’s do it! I’ll still take you through the steps below. I’ve also provided a full materials list and detailed instructions in the printable how-to card below.
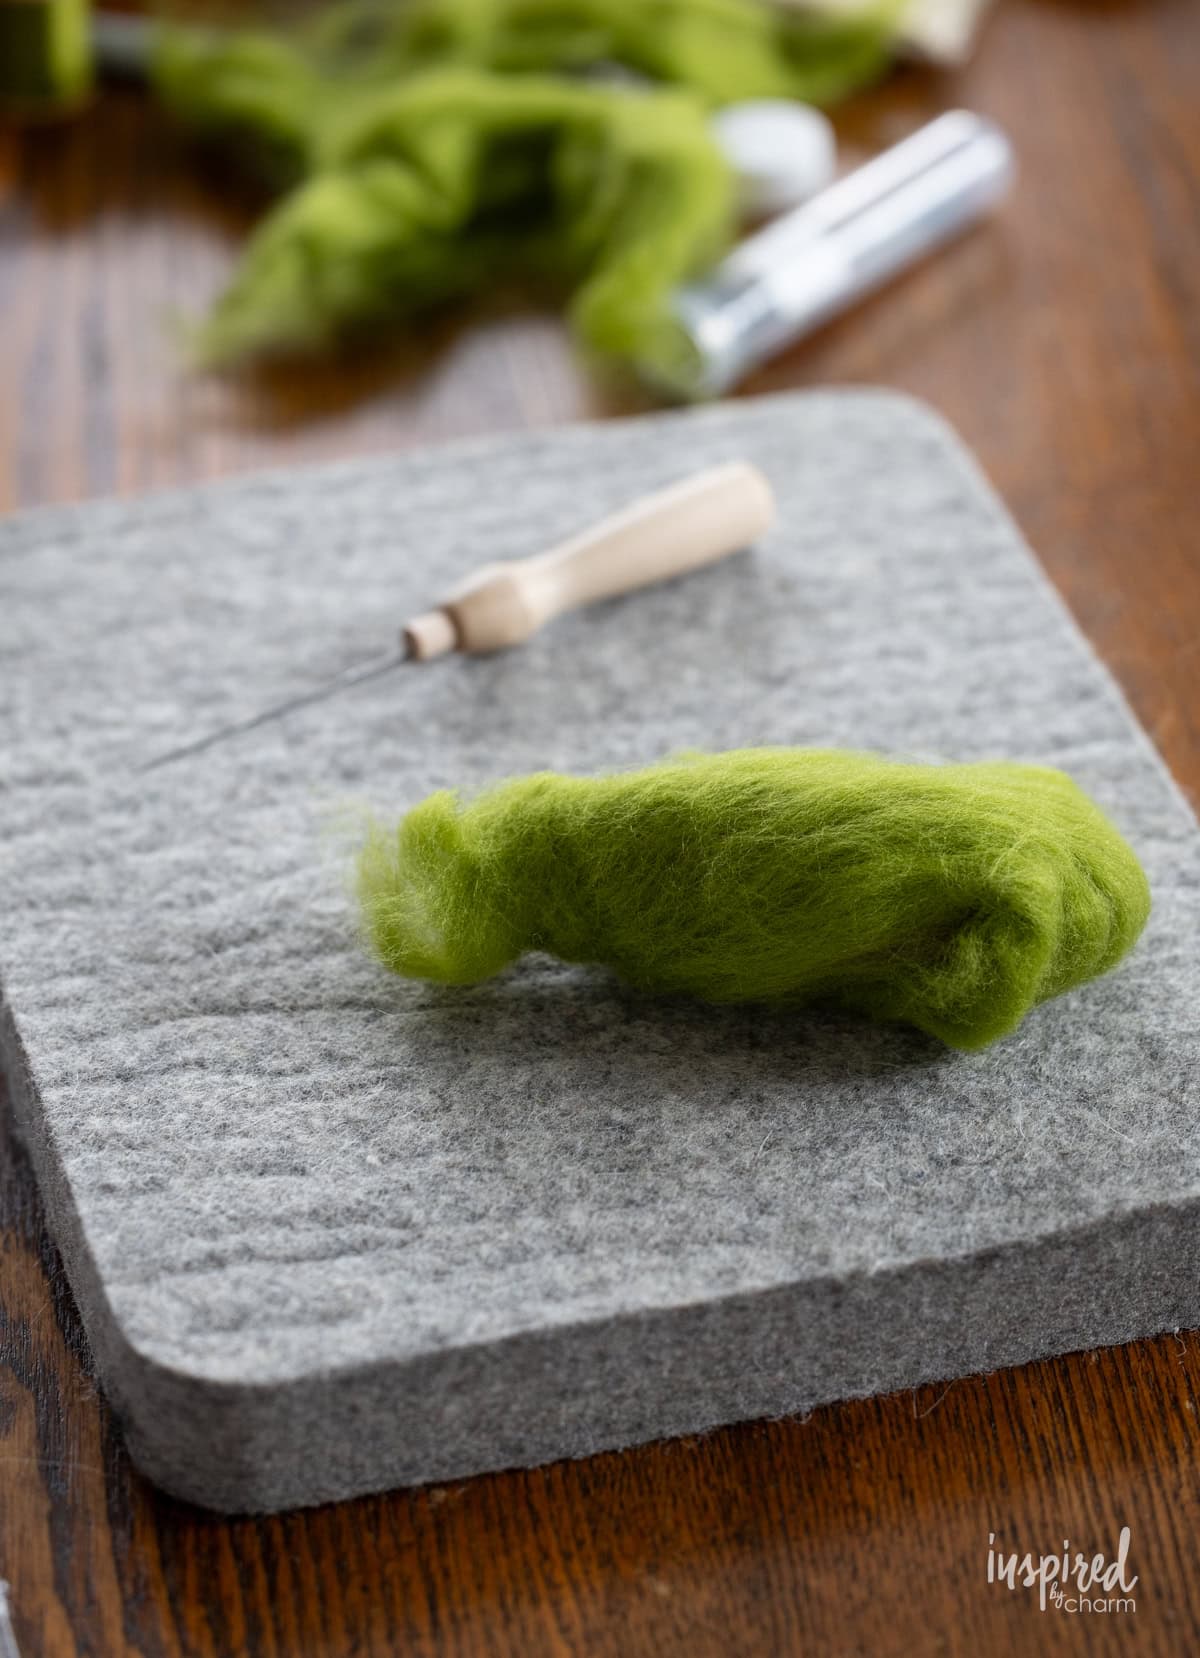
- Start by pulling off a generous handful of wool roving in your desired color. Using your hands, loosely roll and shape the wool into a cone, making one end narrow for the top and the other wider for the base. Don’t worry about getting it perfect. You can adjust the shape as you go.
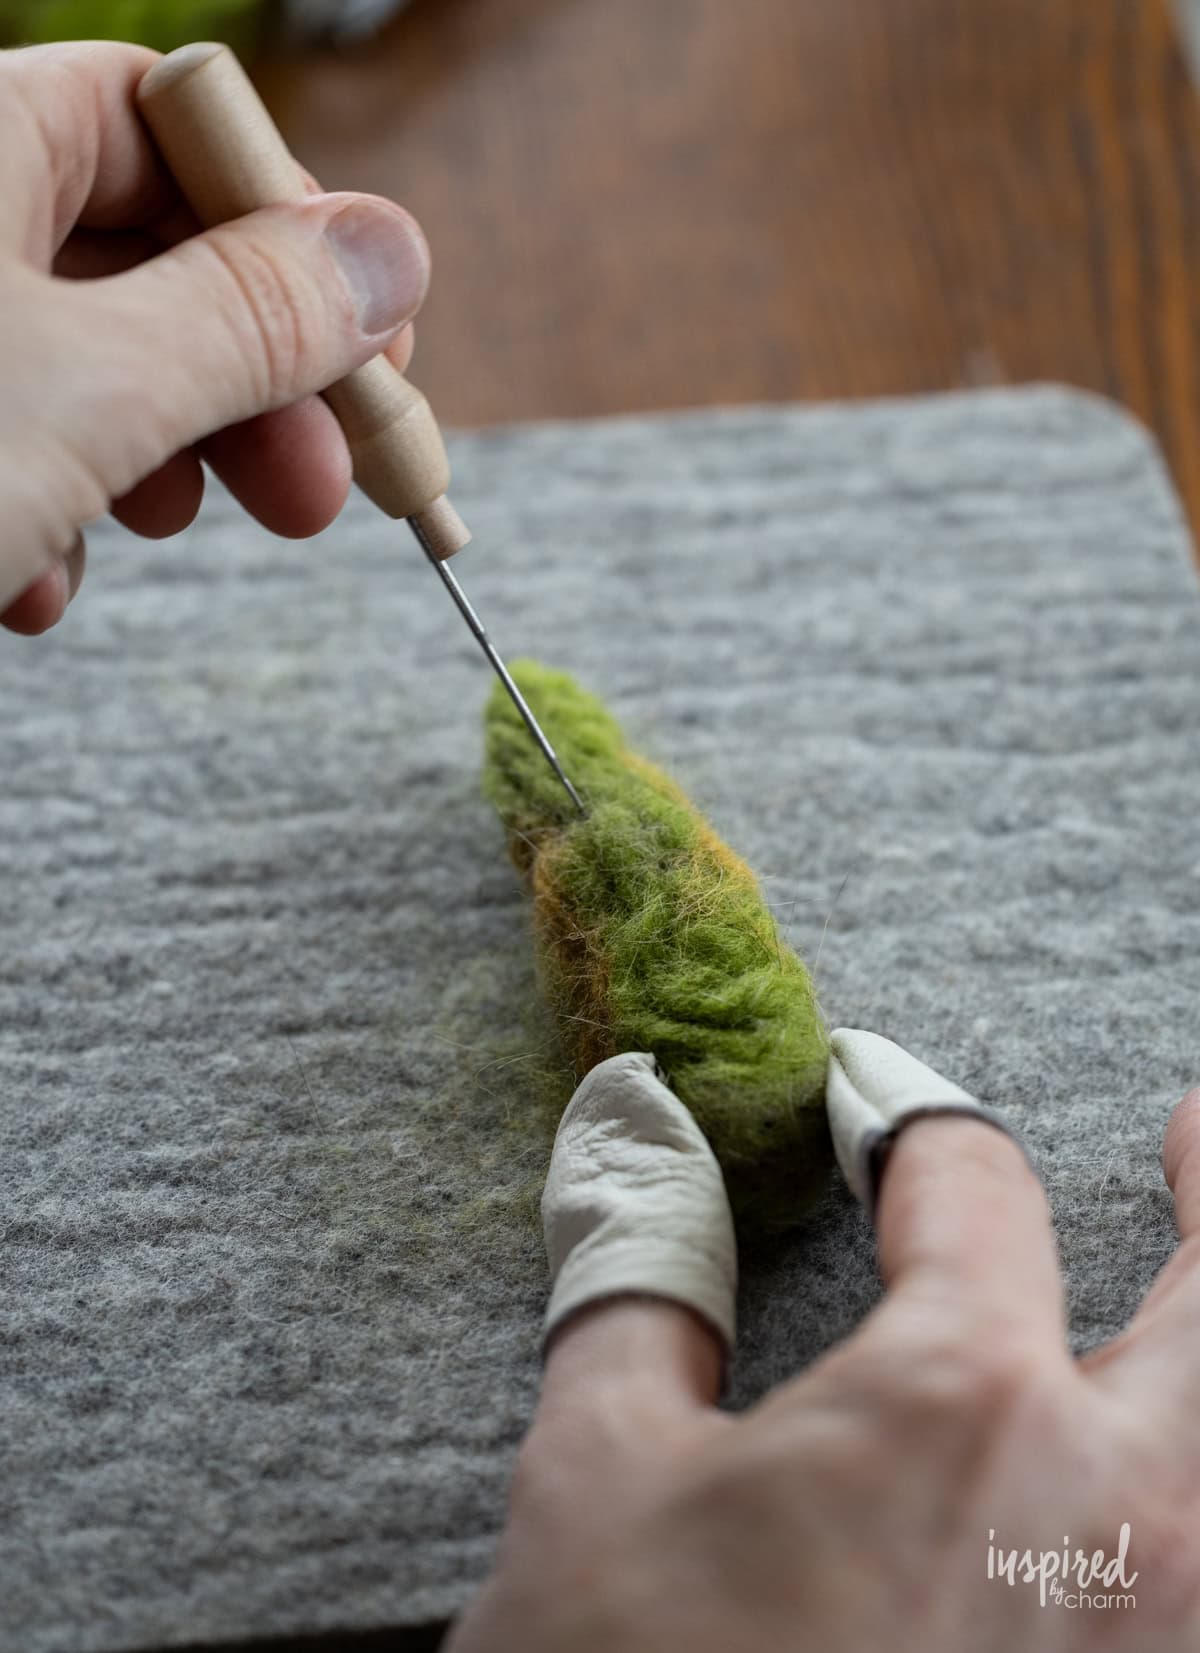
- Place the wool on your felting mat and begin poking it repeatedly with your felting needle. Work the needle straight in and out, turning the wool as you go to felt all sides. As the fibers begin to tangle together, the wool will become firmer and start holding its shape. Continue until you’re happy with your tree. If you want to make an area fuller or adjust the shape, simply add more wool and felt it into place.
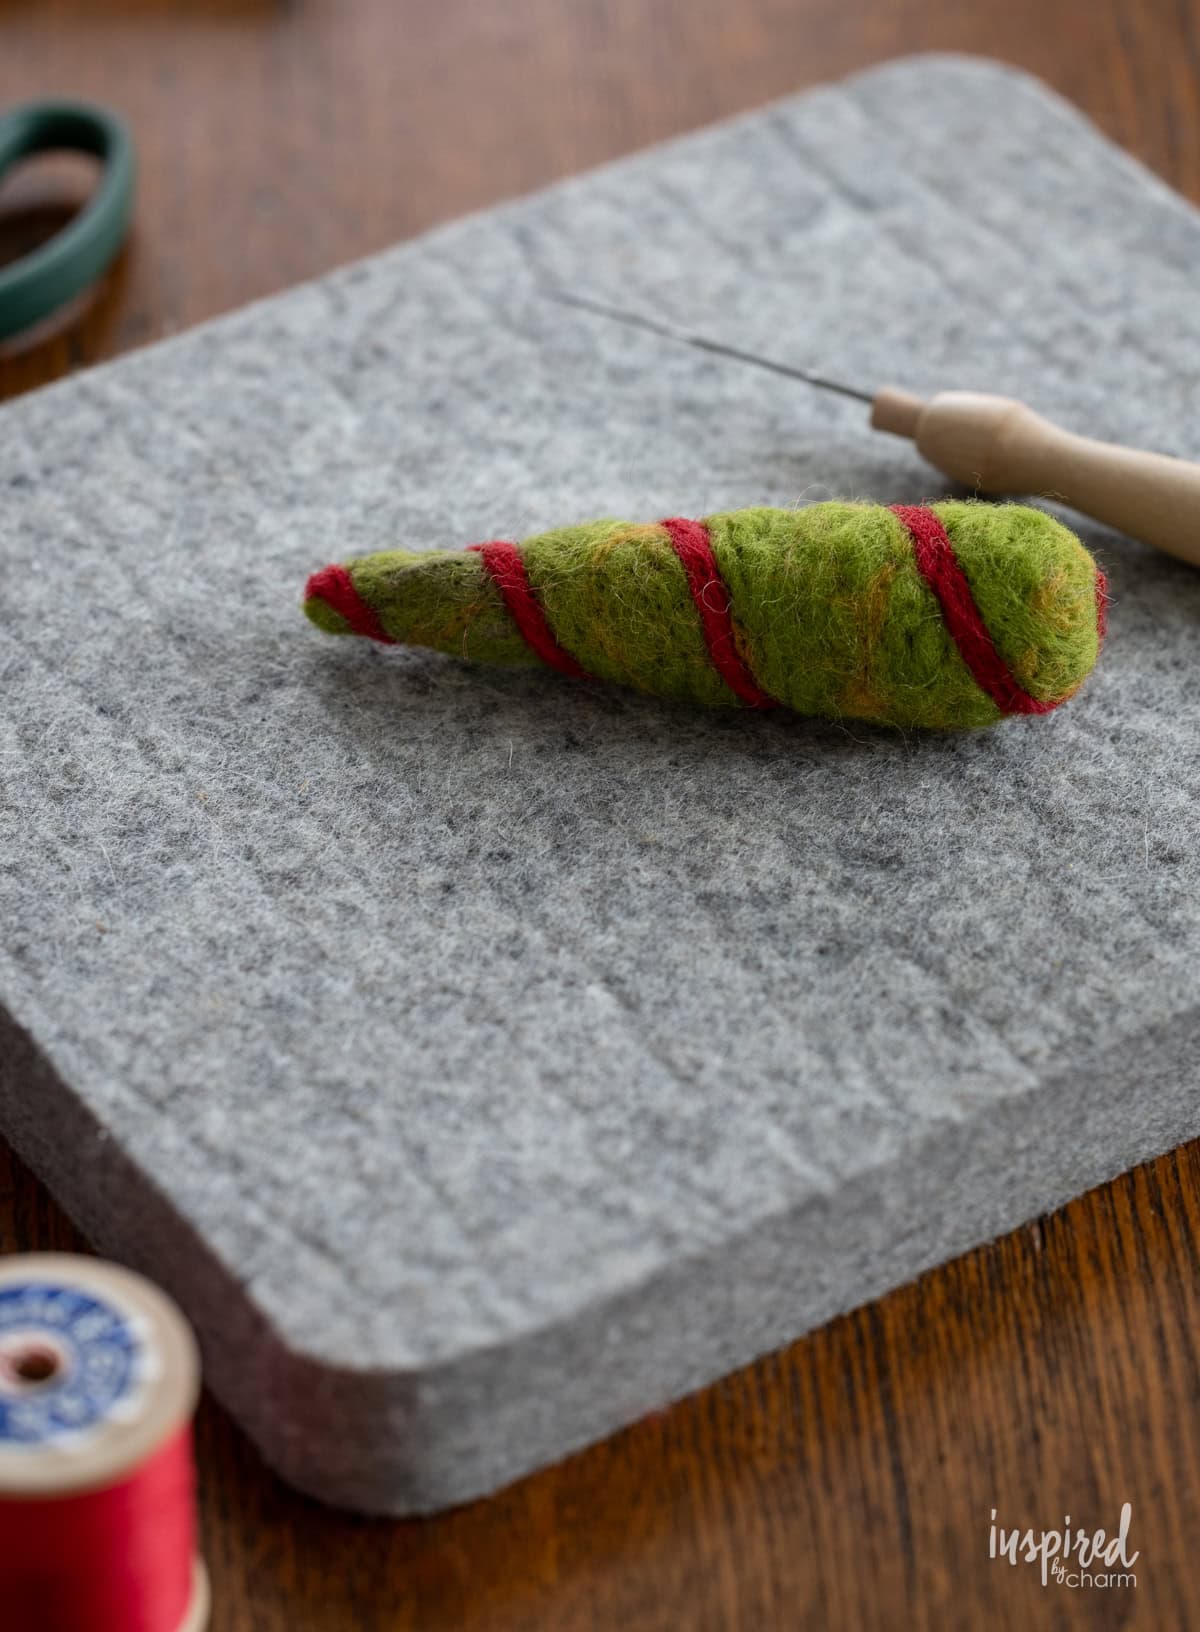
- Once you have your basic tree shape, you can have fun adding different colors and decorations! Layer on little wisps of wool in different shades to create variation, or use contrasting colors to make garlands and ornaments. For a garland, twist a thin strand of wool between your fingers, wrap it around the tree, and use your felting needle to secure it in place.
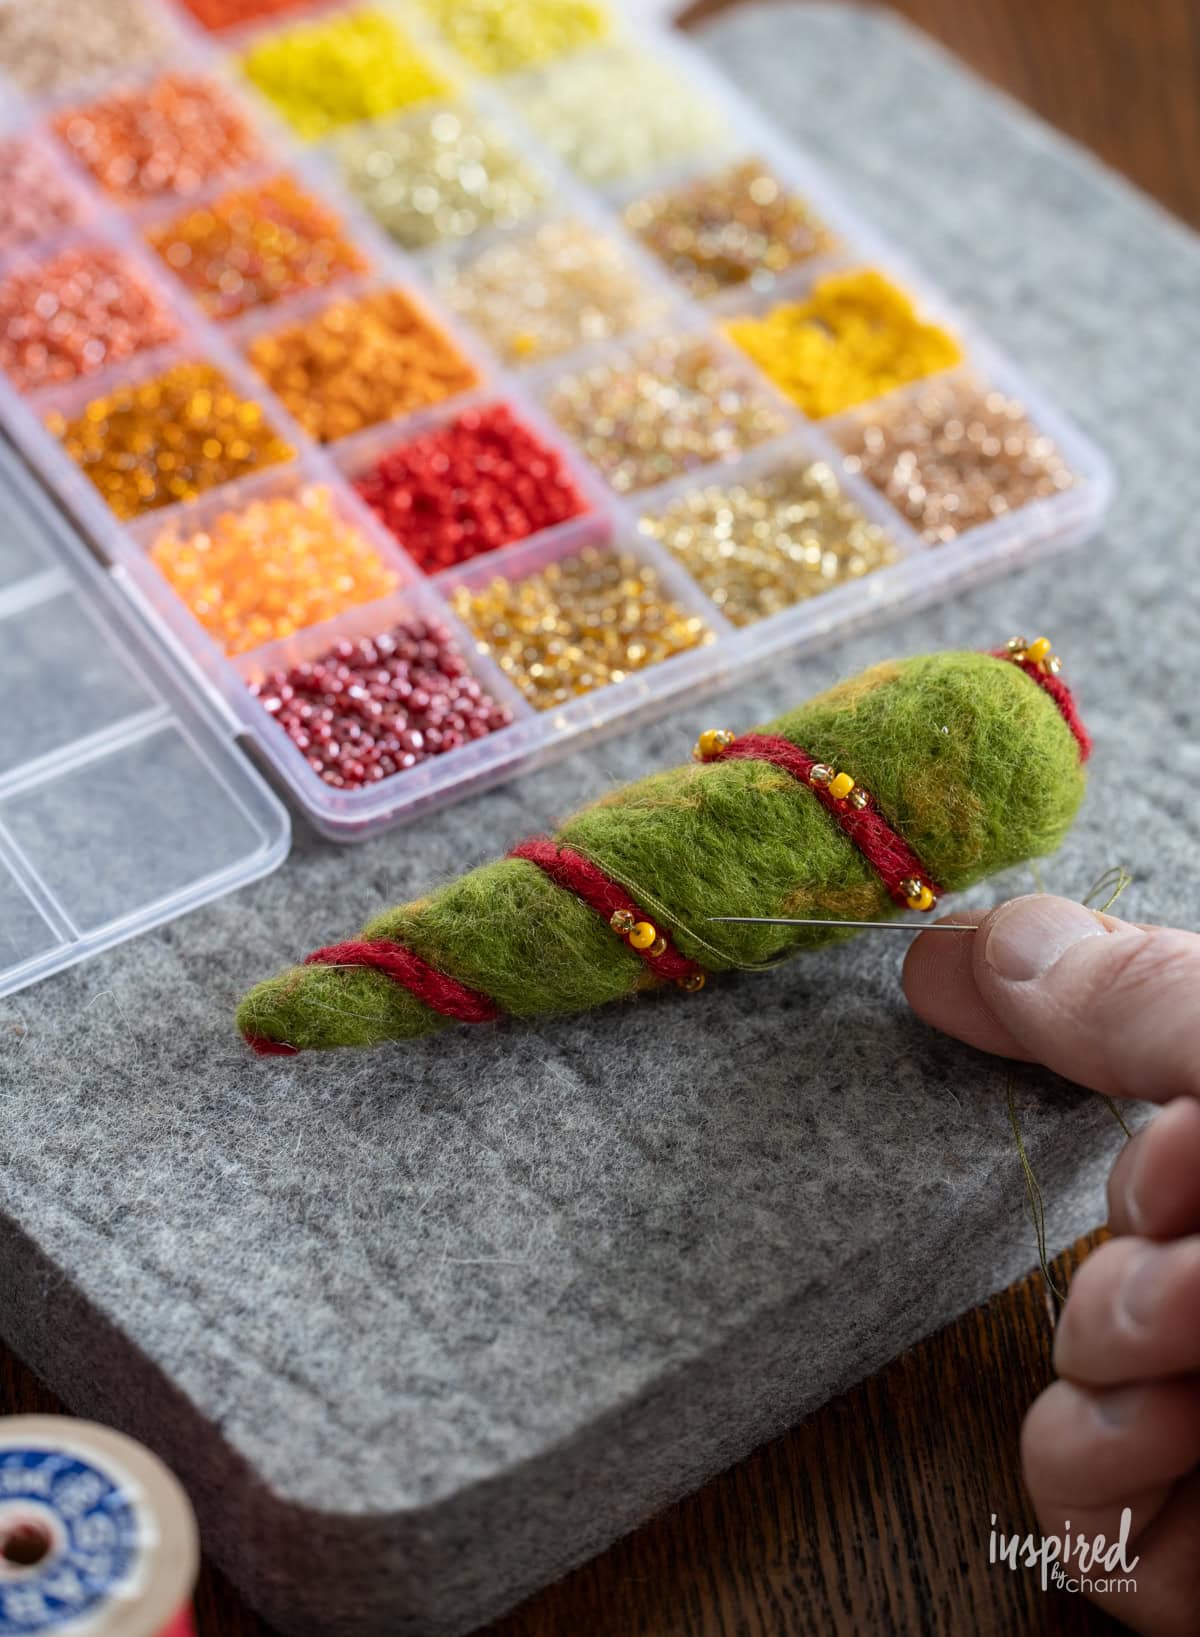
- For a little extra sparkle, use a regular sewing needle and thread to stitch small beads onto your tree. You can scatter them randomly, arrange them along the garland, or create little clusters. You can also make a fun beaded tree topper! Bring your needle and thread through the top of the tree, string on about 12 beads, then insert the needle back into the top near where you started to create a loop. Bring the needle back out at the top and repeat until you have as many loops as you’d like. Secure the thread with a knot, hiding it in the wool.
- With your tree decorated, use a small awl, skewer, or screwdriver to carefully make a hole in the center of the bottom of the tree. This is where the wooden dowel will go. Set the tree aside.
- Next, grab a vintage wooden thread spool. I like using spools that still have colorful thread on them! Hot glue a penny to the bottom of the spool to add a little weight and help the tree stand upright.
- Cut a small wooden dowel or stick to your desired length. Mine were approximately 4 to 5 inches long, but you can adjust this depending on the size of your tree. Add a little hot glue inside the top hole of the spool and insert the dowel, keeping it straight while the glue sets.
- Finally, add a little tacky glue to the top of the dowel and gently insert it into the hole you made in the bottom of your felted tree. Adjust everything so the tree stands straight, then allow the glue to dry completely.
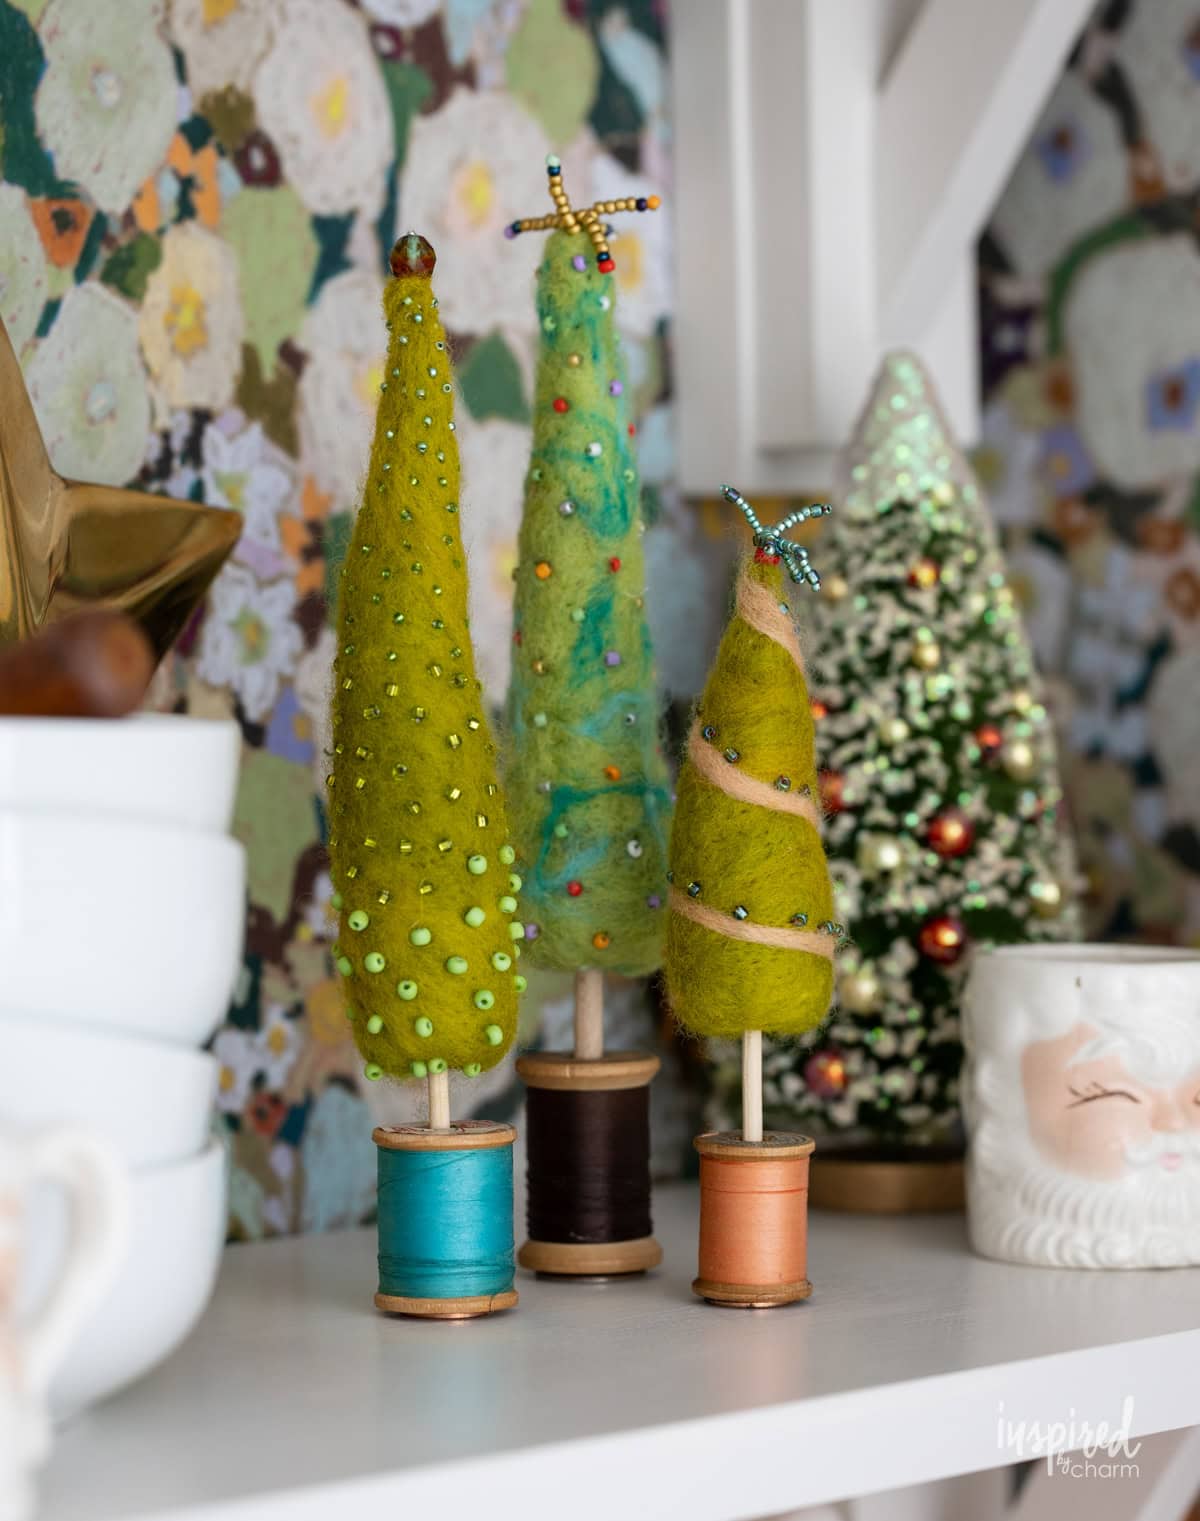
And that’s it! Make a few in different heights, shapes, and colors to create your own little forest of whimsical Christmas trees. I especially love how the colorful vintage thread spools add a little extra charm to each one!
More Handmade Holiday Decor Ideas You’ll Love
- Vintage Spool Mini Wreaths
- Pipe Cleaner Loop Garland
- Vintage Bobbin Garland
- Marshmallow Wreath
- Paper Plate Dove Garland
Aren’t these little Needle-Felted Christmas Trees just the cutest? I hope you’ll give this project a try and have as much fun making them as we did. Play around with colors, get creative with the decorations, and don’t worry about making them perfect. That’s part of their charm!
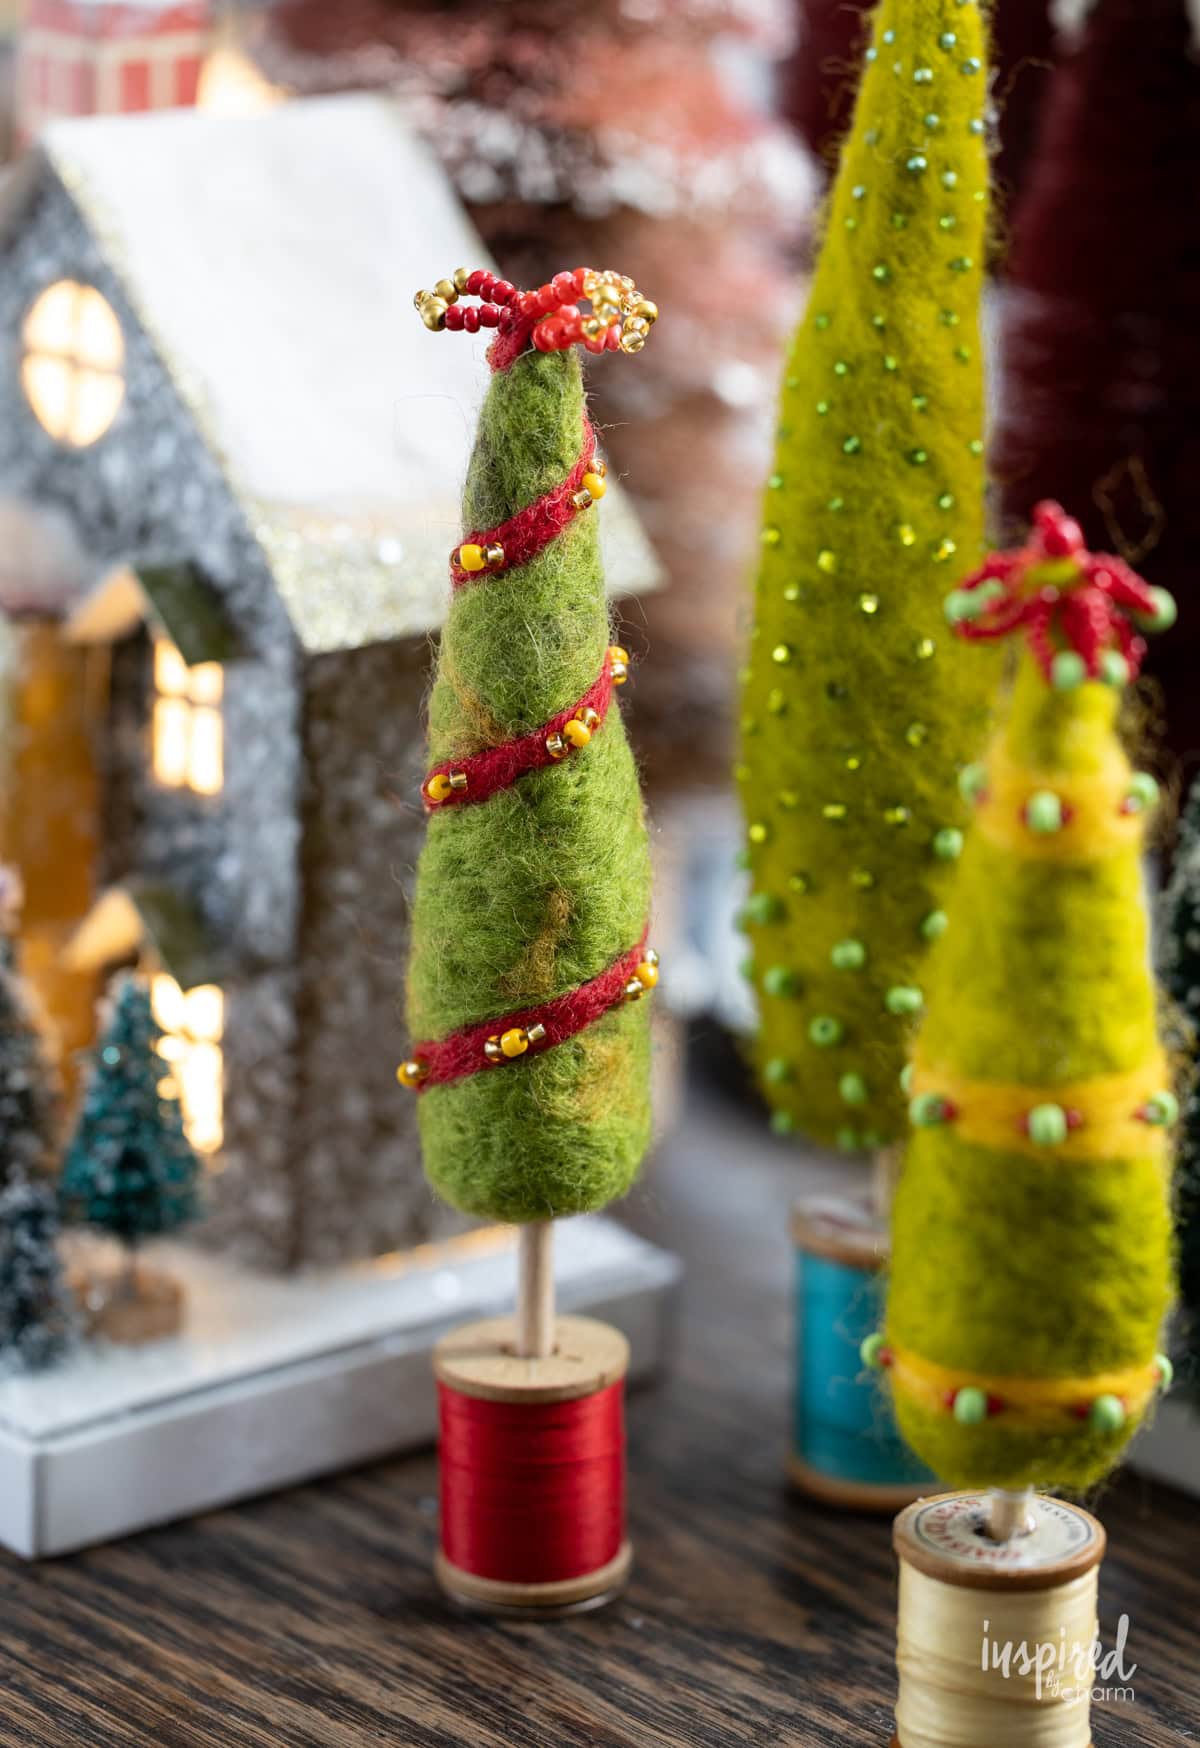
I have a feeling that once you make one or two, you’ll want to create a whole little forest. I know I do!
I’d love to hear how yours turns out! Please stop back and leave a comment and a 5-star rating below.
Want more from Inspired by Charm? Join the IBC Mailing List for inspiration in your inbox! Follow along on Instagram and TikTok for daily updates and behind-the-scenes looks at my processes. There’s even more inspiration on Facebook and Pinterest!
Needle-Felted Christmas Trees
Ingredients
- Wool roving in assorted colors
- Needle felting mat or foam block
- Felting needle
- Vintage wooden thread spools
- Small beads in assorted colors and sizes
- Sewing needle and thread
- Small wooden dowels or sticks
- Pennies
- Tacky glue
- Hot glue gun
- Scissors
- Small awl, skewer, or screwdriver
Instructions
- If you’ve never tried needle felting before, I recommend watching a quick beginner tutorial online to get a feel for the process. It’s pretty simple! You’re essentially using a special needle to poke wool fibers until they tangle together and hold their shape. Just be careful because felting needles are very sharp!
- Start by pulling off a generous handful of wool roving in your desired color. Using your hands, loosely roll and shape the wool into a cone, making one end narrow for the top and the other wider for the base. Don’t worry about getting it perfect. You can adjust the shape as you go.
- Place the wool on your felting mat and begin poking it repeatedly with your felting needle. Work the needle straight in and out, turning the wool as you go to felt all sides. As the fibers begin to tangle together, the wool will become firmer and start holding its shape. Continue until you’re happy with your tree. If you want to make an area fuller or adjust the shape, simply add more wool and felt it into place.
- Once you have your basic tree shape, you can have fun adding different colors and decorations! Layer on little wisps of wool in different shades to create variation, or use contrasting colors to make garlands and ornaments. For a garland, twist a thin strand of wool between your fingers, wrap it around the tree, and use your felting needle to secure it in place.
- For a little extra sparkle, use a regular sewing needle and thread to stitch small beads onto your tree. You can scatter them randomly, arrange them along the garland, or create little clusters. You can also make a fun beaded tree topper! Bring your needle and thread through the top of the tree, string on about 12 beads, then insert the needle back into the top near where you started to create a loop. Bring the needle back out at the top and repeat until you have as many loops as you’d like. Secure the thread with a knot, hiding it in the wool.
- With your tree decorated, use a small awl, skewer, or screwdriver to carefully make a hole in the center of the bottom of the tree. This is where the wooden dowel will go. Set the tree aside.
- Next, grab a vintage wooden thread spool. I like using spools that still have colorful thread on them! Hot glue a penny to the bottom of the spool to add a little weight and help the tree stand upright.
- Cut a small wooden dowel or stick to your desired length. Mine were approximately 4 to 5 inches long, but you can adjust this depending on the size of your tree. Add a little hot glue inside the top hole of the spool and insert the dowel, keeping it straight while the glue sets.
- Finally, add a little tacky glue to the top of the dowel and gently insert it into the hole you made in the bottom of your felted tree. Adjust everything so the tree stands straight, then allow the glue to dry completely.