Pipe Cleaner Loop Garland
This Post May Contain Affiliate Links. Please Read Our Disclosure Policy
This nostalgic DIY Pipe Cleaner Loop Garland proves that holiday decorating does not need to be complicated to feel special. With minimal materials and easy assembly, you can create a custom garland to add a festive touch to your home during the holidays.

I have another fun DIY Christmas garland to share with you today, this Pipe Cleaner Loop Garland. This may be the easiest garland I have ever made and definitely the one with the fewest materials. The finished look is charming and nostalgic, and it feels right at home during the holiday season.
This is not a garland I claim to have invented. It is an old-fashioned craft that I believe is making a comeback. I am sure I have seen versions of this before, but they never really caught my attention until I spotted it on @ashtonscottage’s Christmas tree. Her tree is absolutely stunning. As I was admiring all the thoughtful details, I noticed the garland and immediately knew I wanted to try making it.

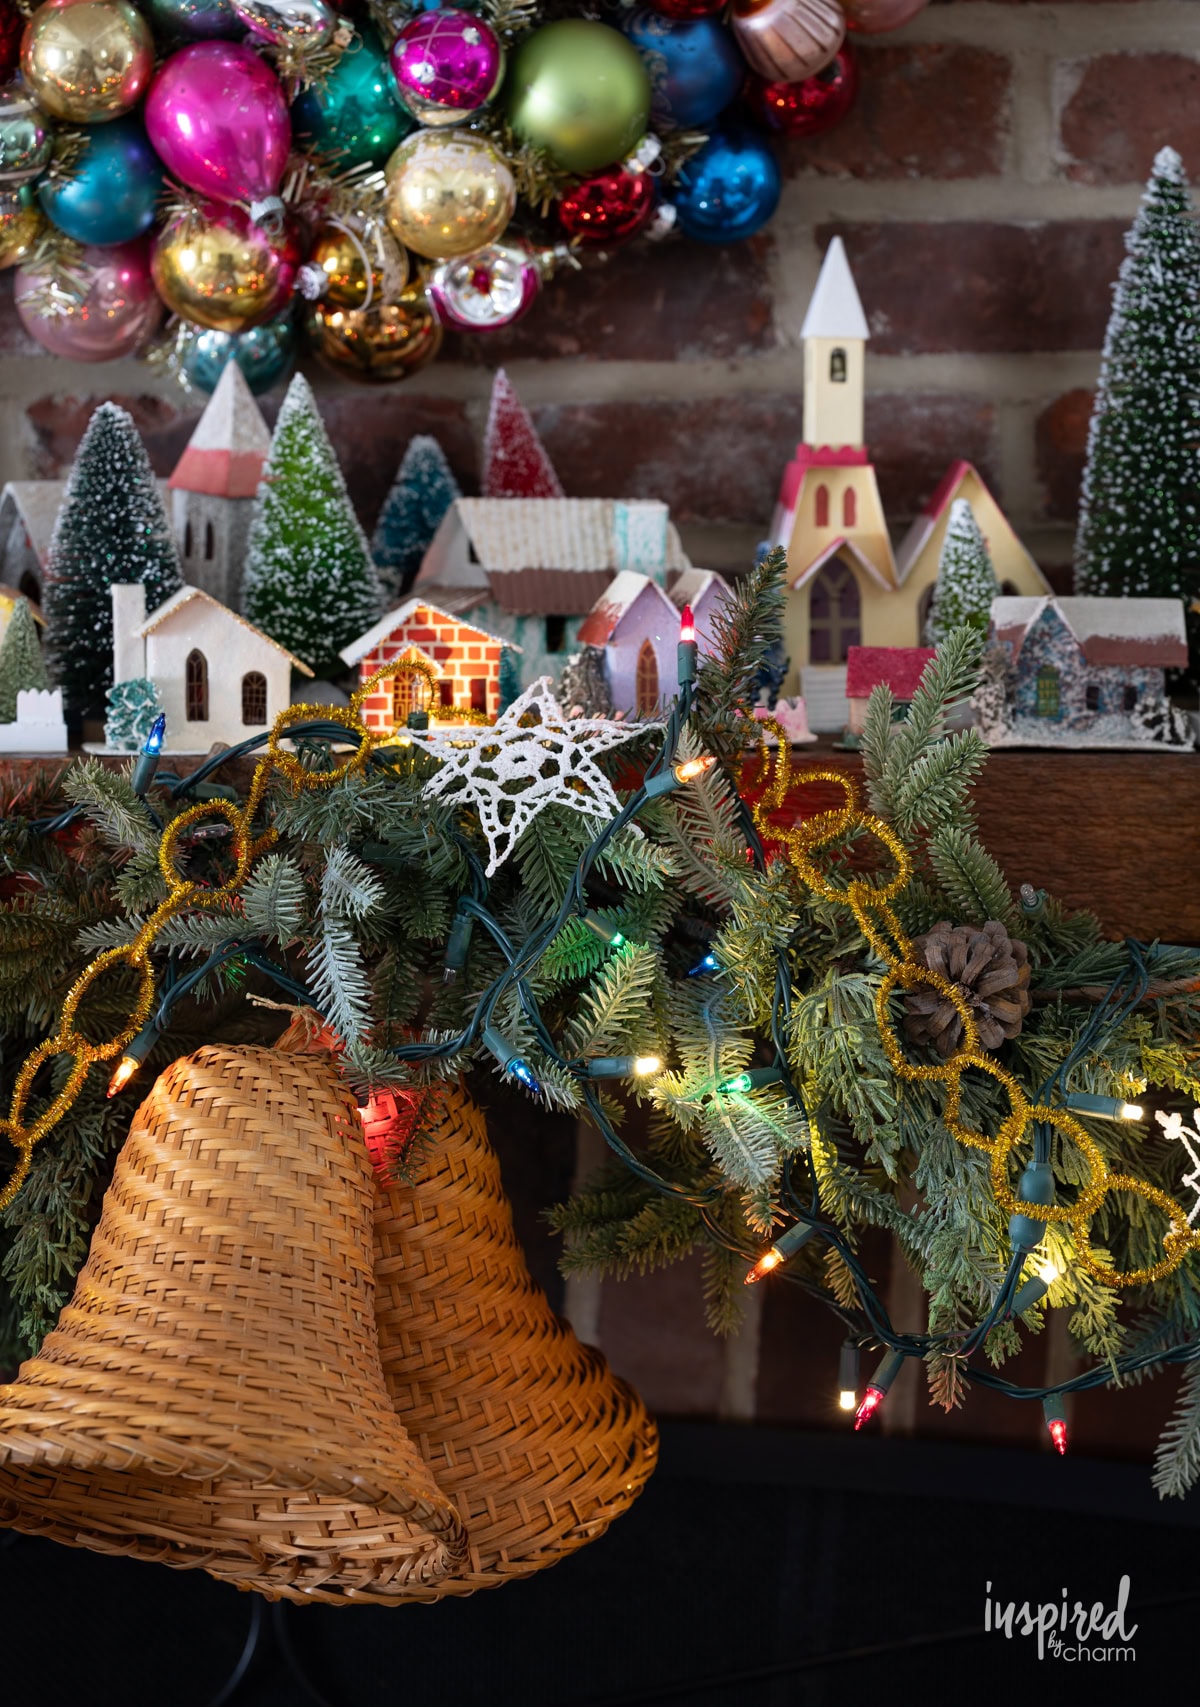
The process could not be simpler. You are essentially interlocking loops of pipe cleaners into one another. That is it. Even with such an easy method, the end result feels incredibly festive and full of charm. I chose silver and gold for my garland, but you could easily use any color or combination you like. The metallic pipe cleaners work especially well since they catch the light beautifully from a Christmas tree, mantel garland, or anywhere else you display them.
I used the silver Pipe Cleaner Loop Garland on my Christmas tree. I’m only sharing a few close-up shots since I am not quite finished decorating it yet. Rather than wrapping it all the way around, I added it in a more relaxed and intentional way, placing it in specific spots and letting it feel a bit random. I really love the look. The gold version found its way onto my mantel garland, where I ran it across the entire length. Both styles feel a little different, but I honestly love them equally.
You’re going to like how easy this project is and how effortlessly it blends in with your Christmas decor. Let’s get into the details.
Why You’ll Love This Project
- It is incredibly easy to make. This is one of those projects you can finish in one sitting without any stress or complicated steps. It is perfect for a cozy afternoon craft or a last-minute decorating idea.
- It has a charming, nostalgic feel. This garland feels old-fashioned in the best way and adds a soft, familiar touch to your holiday decor. It looks especially lovely mixed in with lights, greenery, and vintage-inspired ornaments.
- It is simple to customize. You can make it as long or short as you like and use any colors that fit your Christmas style. Whether you go metallic, classic red and green, or something unexpected, it adapts beautifully to your aesthetic.
Love handmade decor for the holiday? Me too! If you want to gather some more ideas, check out this post filled with all my best handmade Christmas decor.


Materials
Let’s get into the materials list for this uniquely charming project. Here’s what you’ll need:
- Pipe cleaners – These are the star of the project and create both the structure and the sparkle of the garland. Metallic pipe cleaners work especially well since they catch the light beautifully, and any color will do.
- Scissors – A basic pair of scissors is all you need to cut the pipe cleaners in half and to keep everything neat and uniform as you work. You can also use wire cutters if you prefer.
How To Make
Okay, ready to loop together this pipe cleaner garland? Let’s do it! I’ll still take you through the steps below. I’ve also provided a full materials list and detailed instructions in the printable card below.
💌 SAVE THIS POST / RECIPE!
- Begin by cutting each pipe cleaner in half.
- Take one half and bend it into a loop, crossing the two ends over each other by about ½ inch.


- Holding the loop in place, wrap the ends around the loop itself, twisting them snugly so the loop is secured. Use your fingers to gently adjust the shape until it looks round and even.

- To add another loop, slide a new half pipe cleaner through the first loop. Bend it into a loop, again crossing the ends over each other by about ½ inch. Wrap and twist the ends around the loop to secure it, then adjust the shape as needed.

- Continue adding loops the same way, always threading the new piece through the previous loop before wrapping and twisting it closed. Keep going until the garland reaches your desired length.


Variations
One of the best parts about this garland is how easy it is to customize. Once you understand the basic loop technique, you can really have fun playing with color, shape, and texture to create something that feels personal to your home.
- Try changing up the colors of the pipe cleaners. A single color creates a clean and classic look, while alternating two colors feels playful and intentional. Mixing several colors can give the garland a whimsical, collected feel that works especially well on trees or in children’s spaces.
- Instead of forming simple circles, experiment with shaping the pipe cleaners into different designs. Stars, bows, trees, or even loose heart shapes can add visual interest while still keeping the garland lightweight and flexible. You can repeat one shape throughout or mix several for a more eclectic look.
- Before twisting the ends into place, try sliding beads or small jingle bells onto the pipe cleaners. This adds both texture and a little movement, especially when the garland is hung on a tree or near lights. Just be sure the beads have large enough holes to slide easily onto the pipe cleaners.
- Adjust the size of the loops themselves. Larger loops make a bolder statement and work well on mantels or stair railings; smaller loops feel delicate and are perfect for wrapping around a tree or tucking into greenery.

More Handmade Holiday Decor Ideas You’ll Love
- Articulated Figures for Christmas
- Christmas Pinecone Elves
- Clothespin Snowflakes
- Vintage Bobbin Garland
- Vintage Christmas Ornament Wreath
- Handmade Gingerbread Decor Ideas
If you give this Pipe Cleaner Loop Garland a try, I hope it brings a bit of joy to your home as it has to mine. I’d love to hear how your garland turns out! Please stop back and leave a comment and a 5-star rating below.
Want more from Inspired by Charm? Join the IBC Mailing List for inspiration in your inbox! Follow along on Instagram and TikTok for daily updates and behind-the-scenes looks at my processes. There’s even more inspiration on Facebook and Pinterest!

Pipe Cleaner Loop Garland
Ingredients
- Pipe cleaners
- Wire Cutters or Scissors
Instructions
- Begin by cutting each pipe cleaner in half.
- Take one half and bend it into a loop, crossing the two ends over each other by about ½ inch.
- Holding the loop in place, wrap the ends around the loop itself, twisting them snugly so the loop is secured. Use your fingers to gently adjust the shape until it looks round and even.
- To add another loop, slide a new half pipe cleaner through the first loop. Bend it into a loop, again crossing the ends over each other by about ½ inch. Wrap and twist the ends around the loop to secure it, then adjust the shape as needed.
- Continue adding loops the same way, always threading the new piece through the previous loop before wrapping and twisting it closed. Keep going until the garland reaches your desired length.
- NOTE: I ordered a box of 200 pipe cleaners each for the gold and silver. I ended up using the entire lot of 200 silver pipe cleaners. This made enough to wrap around my Christmas tree and my Mom’s Christmas tree with garland to spare.
Fantastic idea and great to have children join in the fun. Thank you!
What a great, inexpensive Christmas decor idea. Thank you for sharing.
Hi Michael:Someone donated a new pack of vintage cream colored pipe cleaners to our thrift shop. Couldn’t sell them, so I brought them home, sitting on my desk trying to figure out what to do with them. I just finished the chain and draped it on the swag of my welsh cupboard. Took 10 minutes and I love it. Thanks for sharing. https:forthelovofold.com
Right!? It’s the best!!! So happy to hear that!
xo Michael
These pipe cleaner garlands saved my tree. I have an 18 month old Grandson and I didn’t want to risk my prescious ornaments. I used shatterproof ones and made paper stars and pipe cleaner garland. It made me unreasonably happy 😁
This made my day!! So smart!
xo Michael
Wonderful! It will be a great craft to do with my grandchildren. Look forward to seeing it on your tree when done.
Thank you and Happy Holidays!!
Sheila
It really is! They will have a blast. Enjoy.
xo Michael
A simple design, but so attractive!