Articulated Paper Figures for Christmas
This Post May Contain Affiliate Links. Please Read Our Disclosure Policy
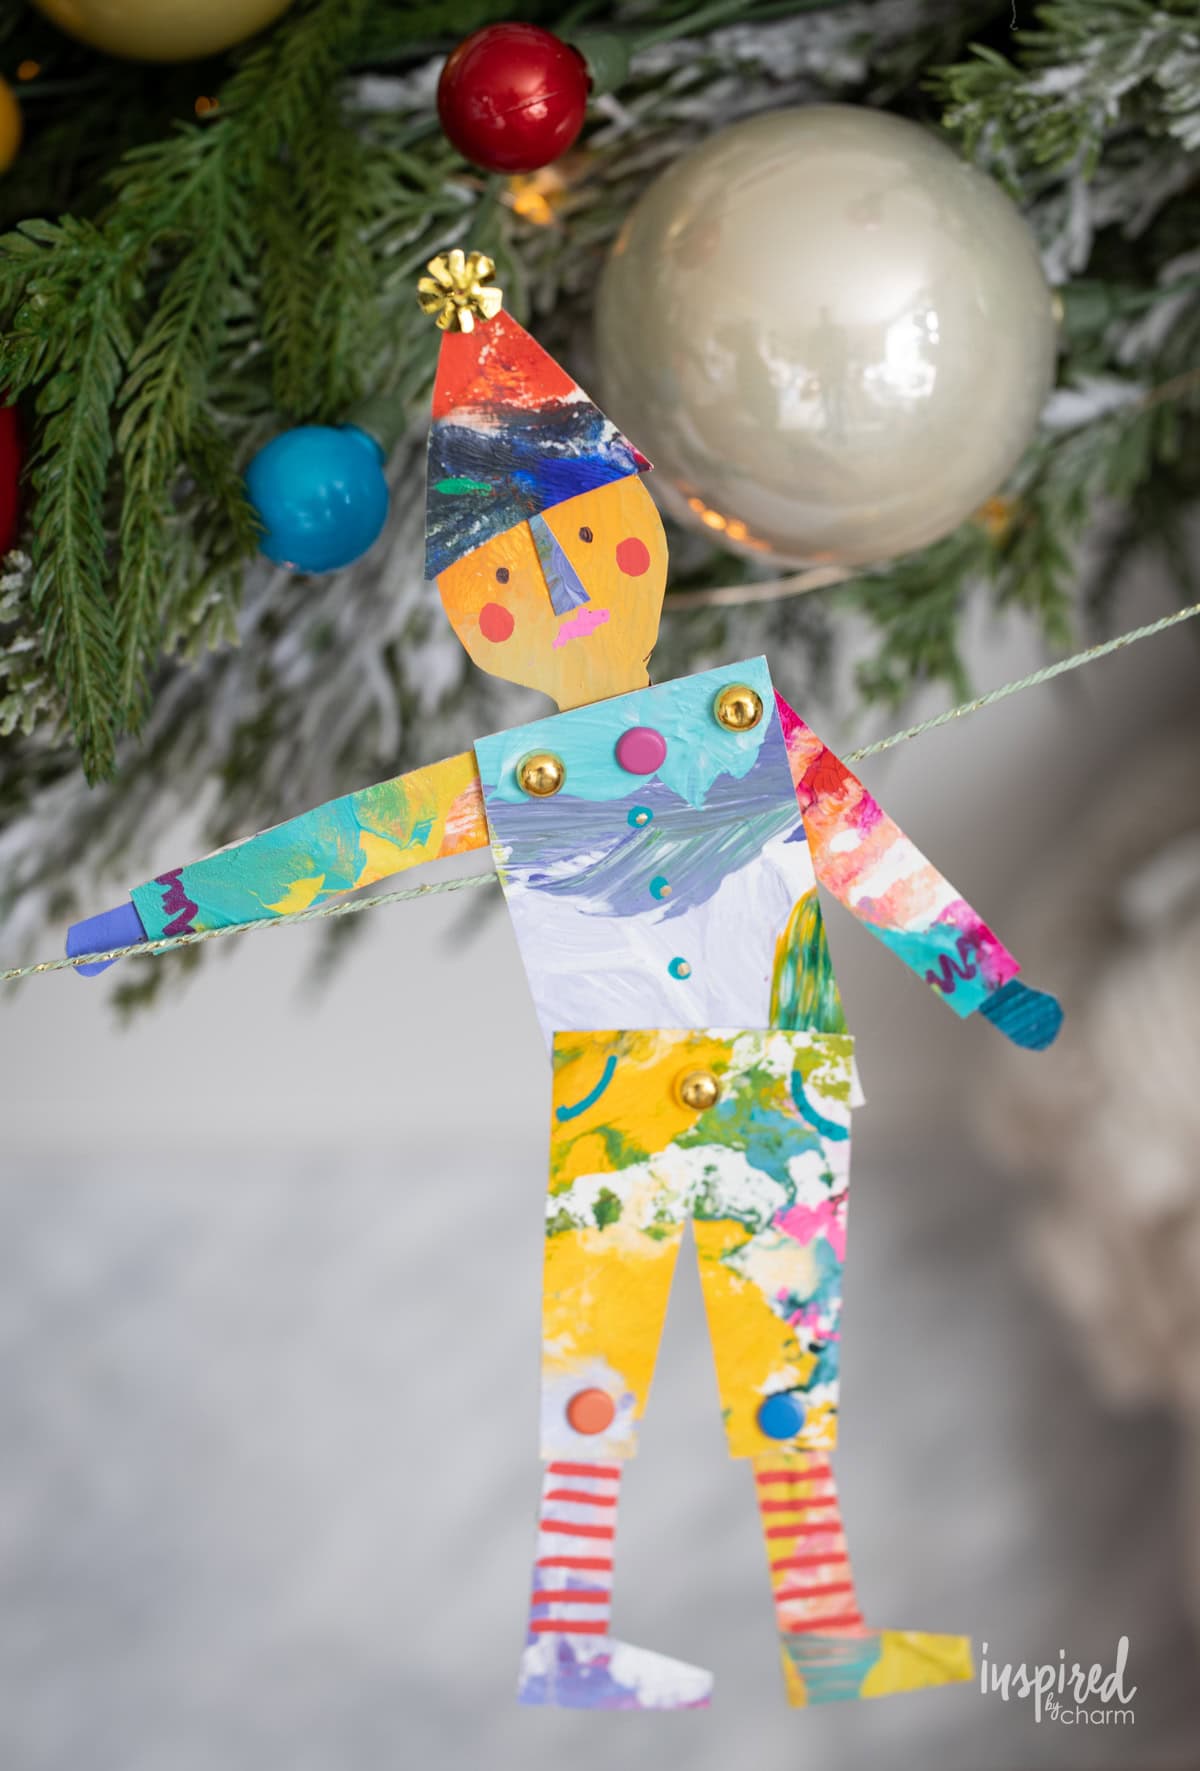
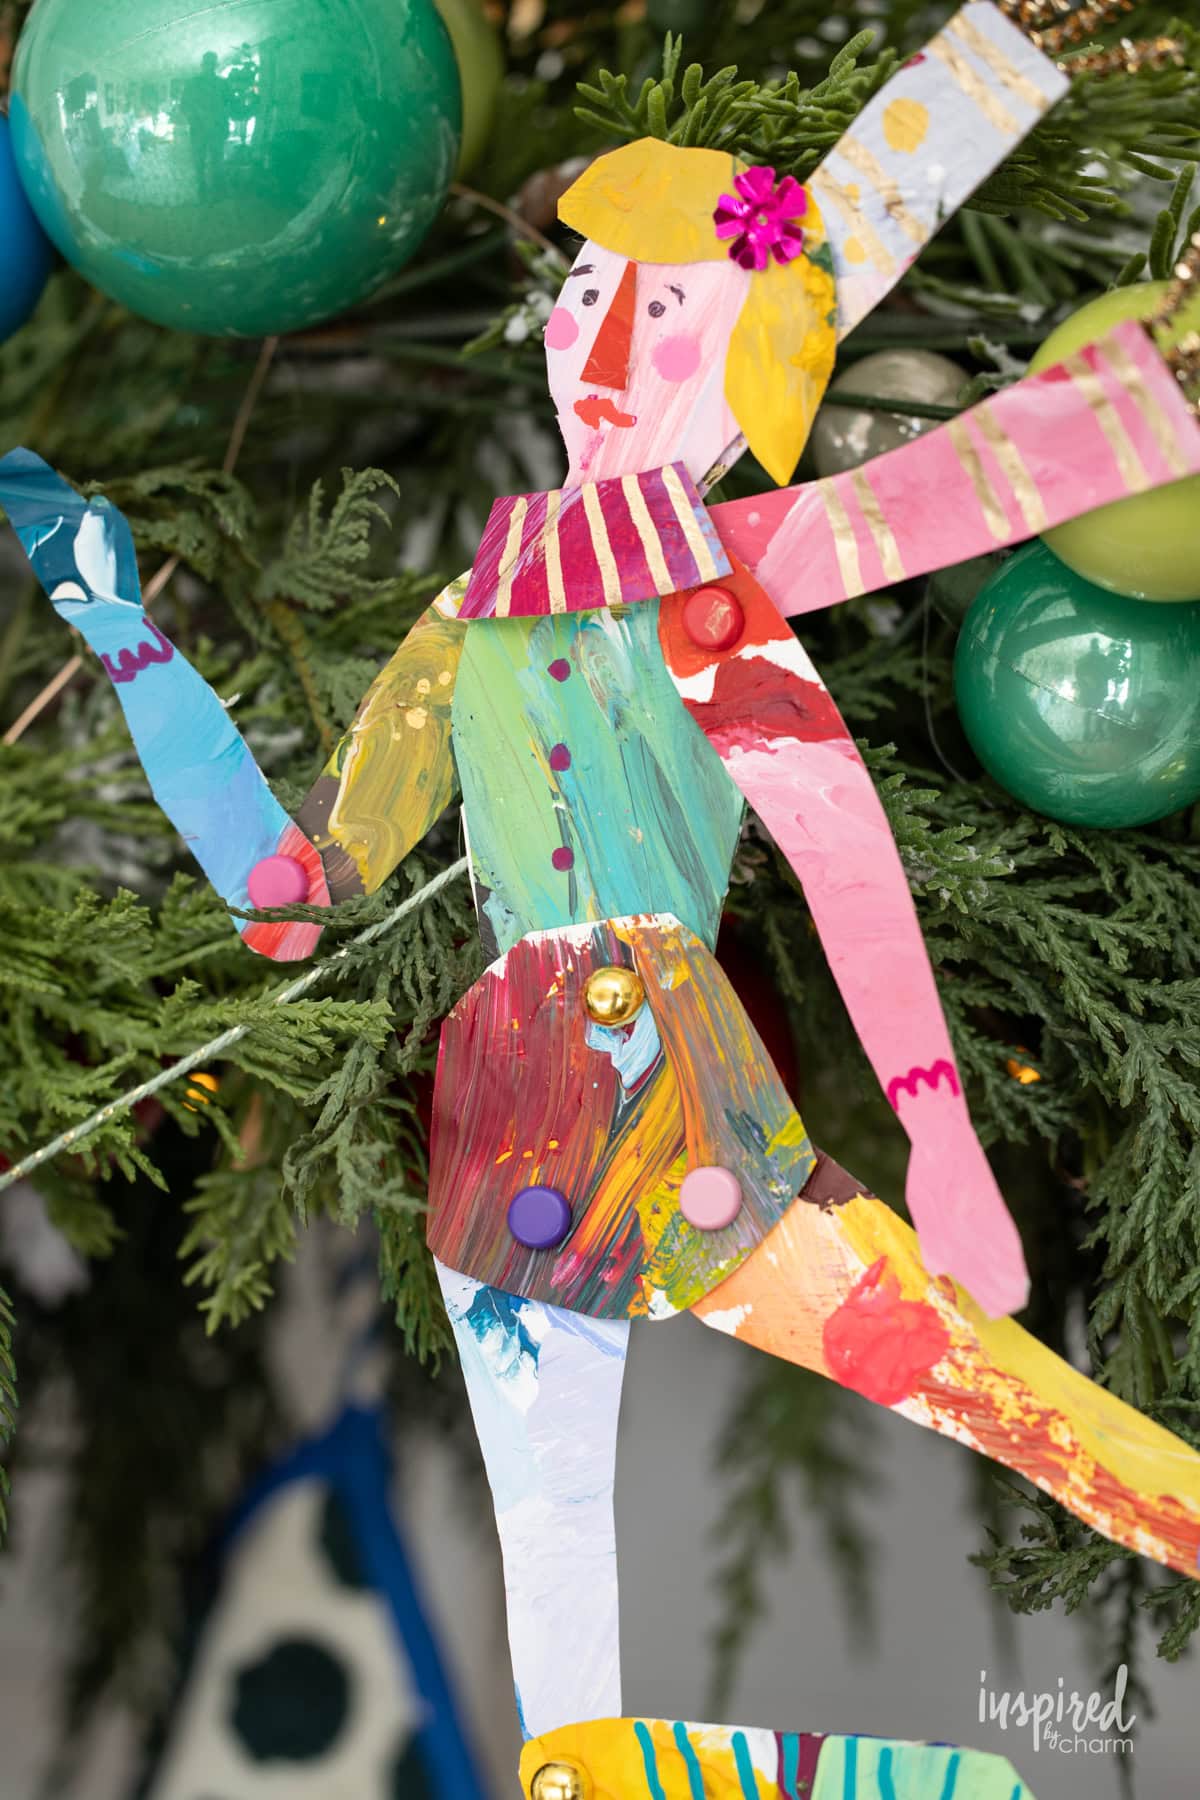
Create charming, articulated paper figures for Christmas using painted paper plate palettes. This easy, handmade project is fun for everyone and can be customized with simple craft supplies to create colorful, unique, and one-of-a-kind ornaments, garlands, or festive decor.

There is something special about taking a simple, everyday item from my studio and turning it into a holiday decoration that feels full of life. That is exactly what happened with these Articulated Paper Figures for Christmas. If you’re new here, I use paper plates as palettes when I paint. By the end of a painting session, they are covered in the most interesting colors and patterns. I can never bring myself to throw them away, so I save them and repurpose them. This season, I finally decided to turn them into something playful and unexpected, and these quirky, articulated figures were the result. Once I made the first one, I knew I was onto something charming.

My approach to Christmas decorating over the past few years has leaned into things that feel unique. I love mixing in vintage pieces and always find myself drawn to handmade holiday decor. While I still enjoy traditional projects, I also like to introduce ideas that feel a little unusual and make people pause for a moment of festive wonder. These Articulated Paper Figures fit the bill perfectly. No two will ever look the same, and that is part of the magic. You can make and decorate them any way you like, and it becomes a fun project for anyone of any age. You can create people, animals, pets, trees, or anything your imagination comes up with and then decorate them with whatever craft supplies you have on hand.

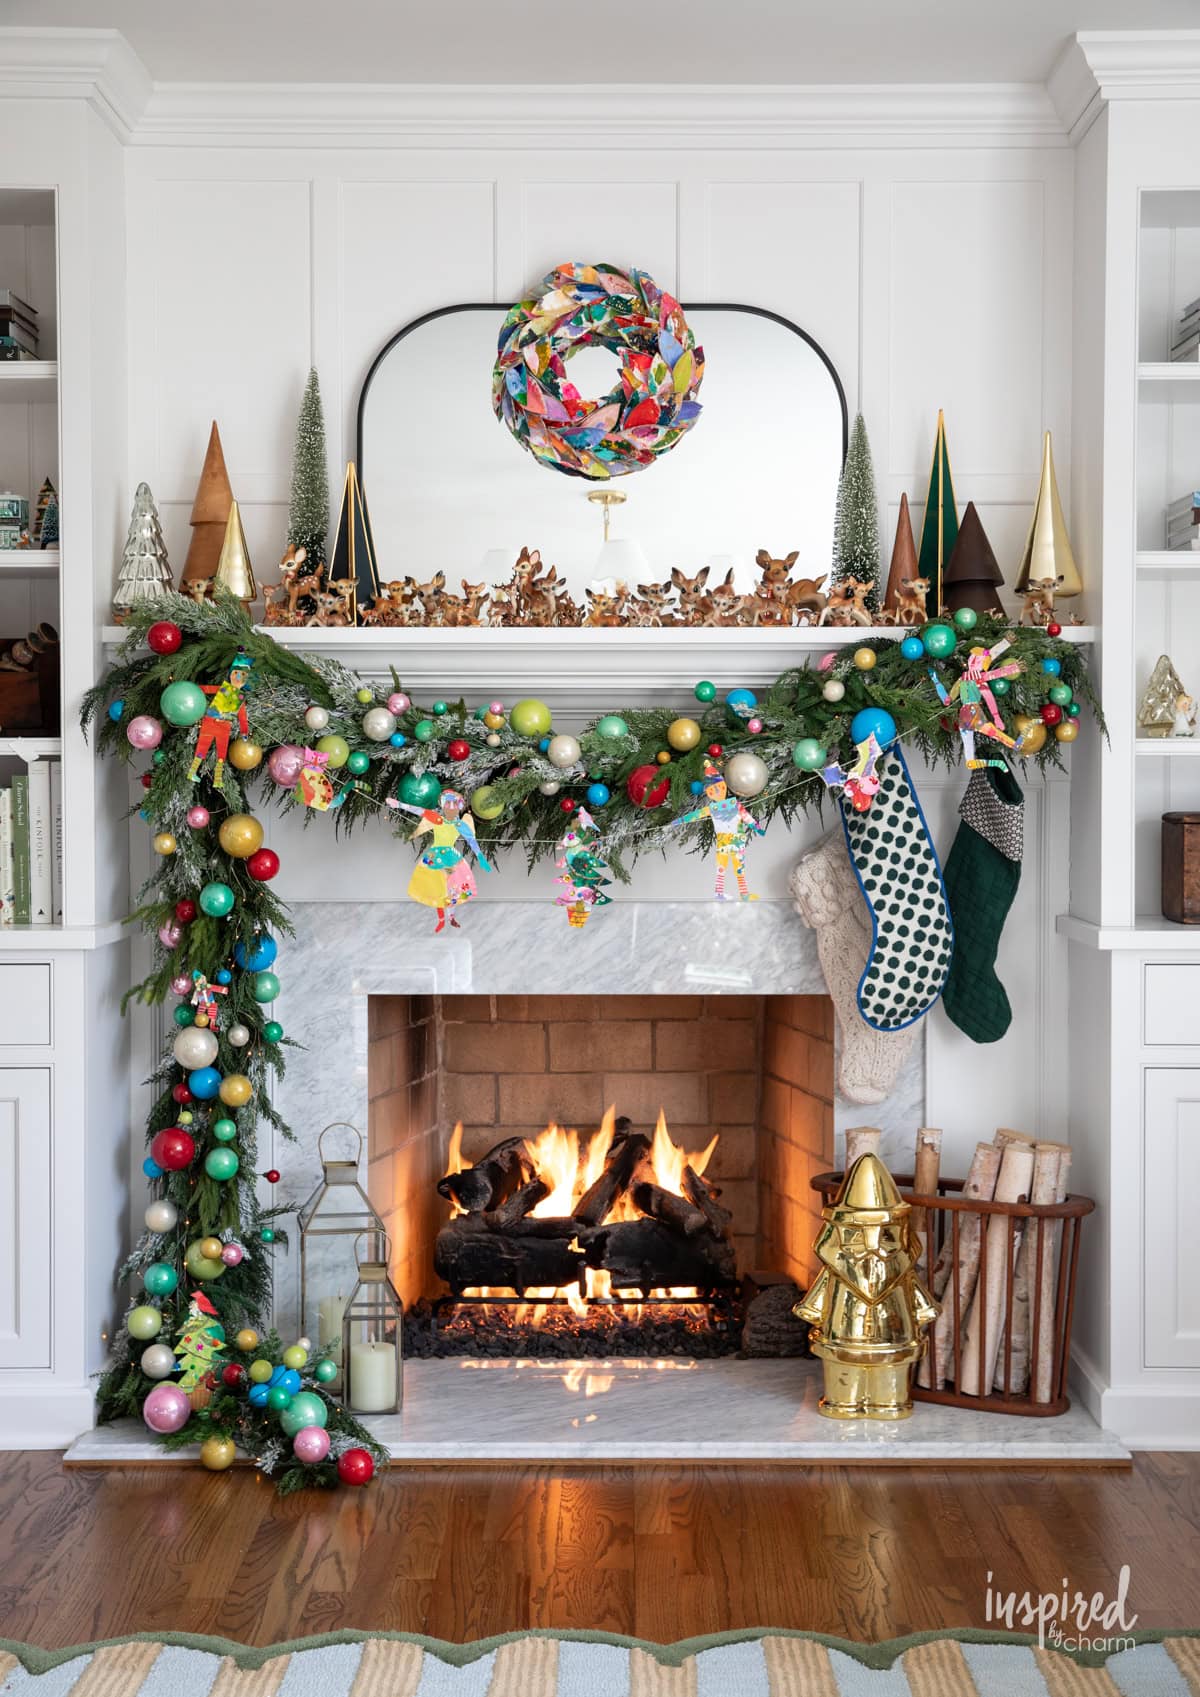
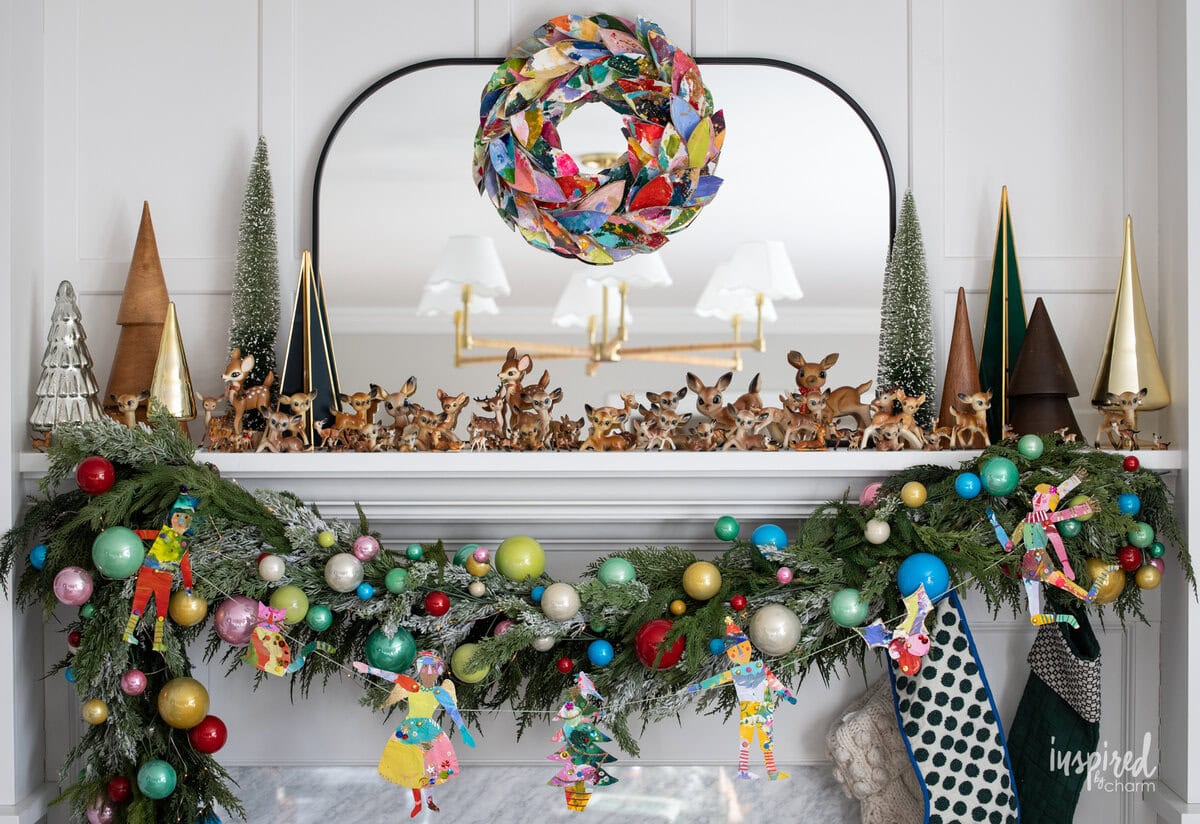
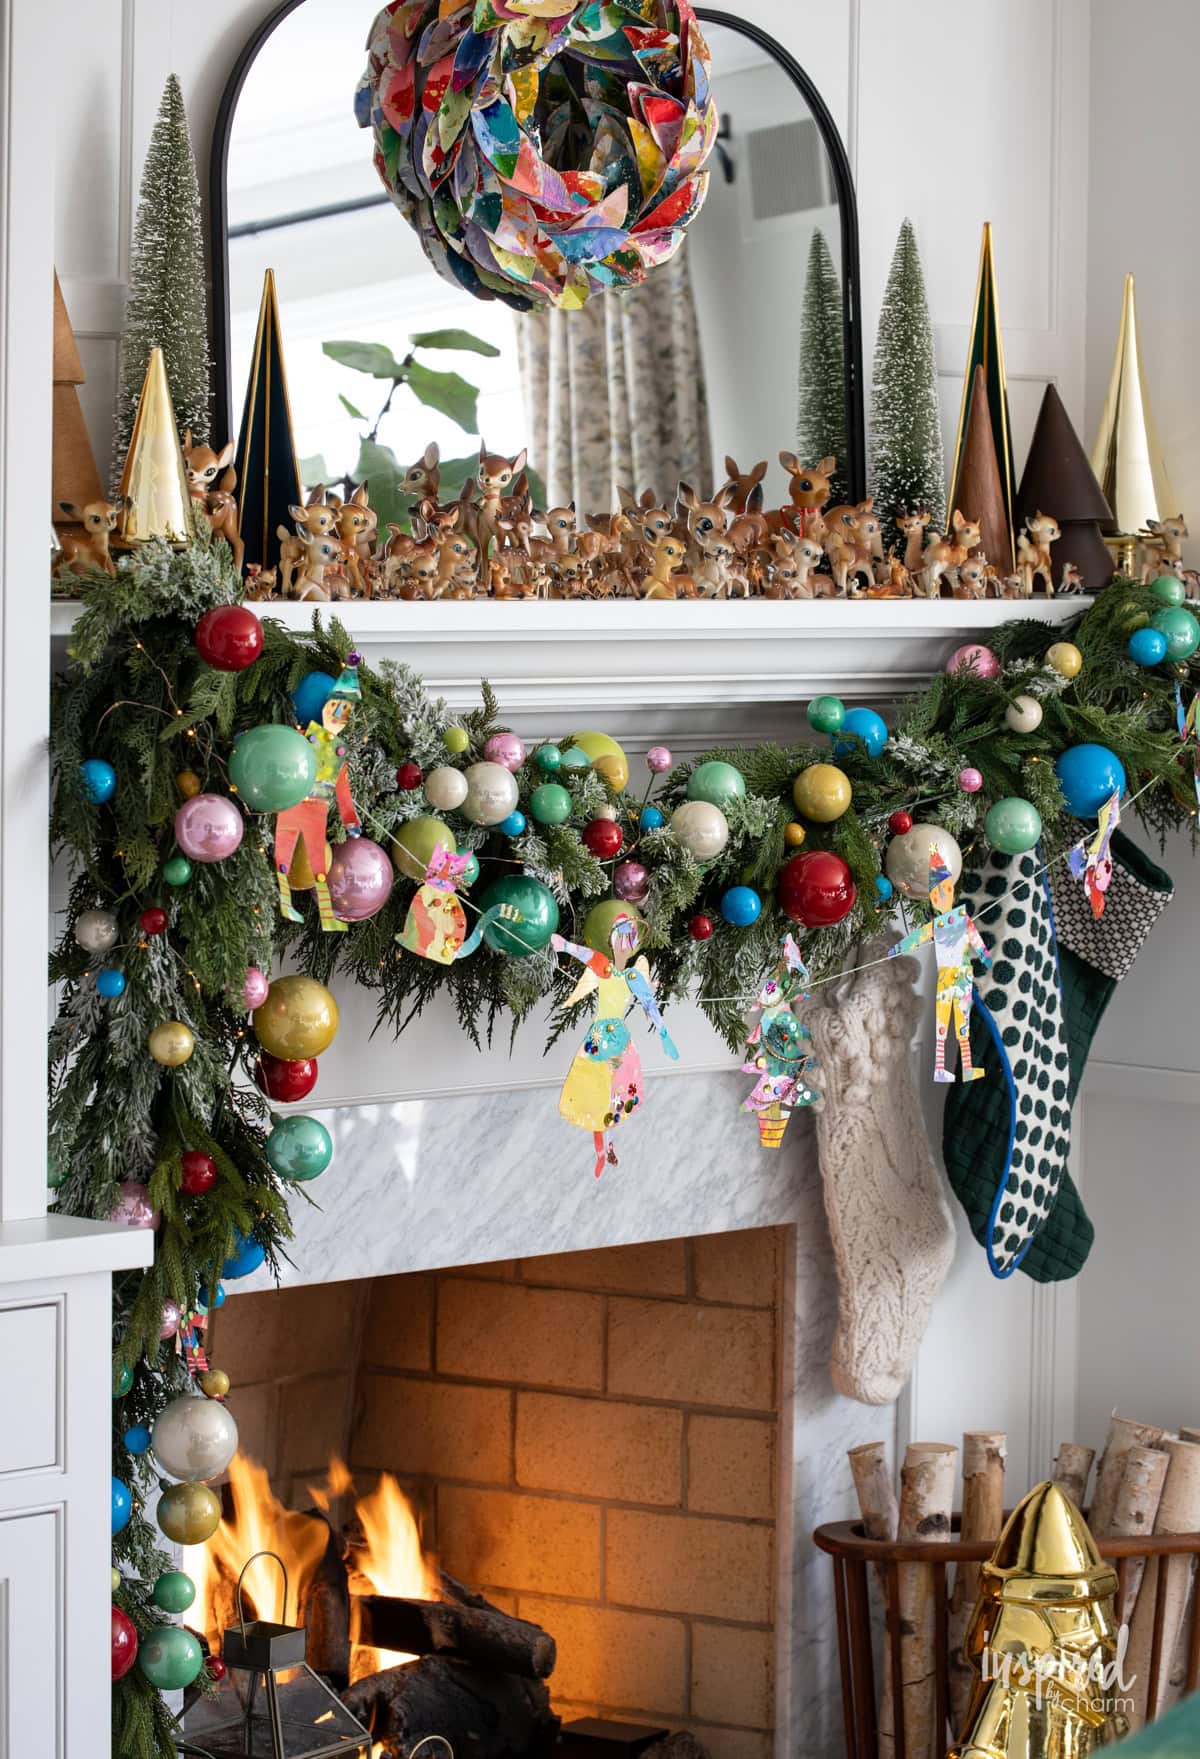
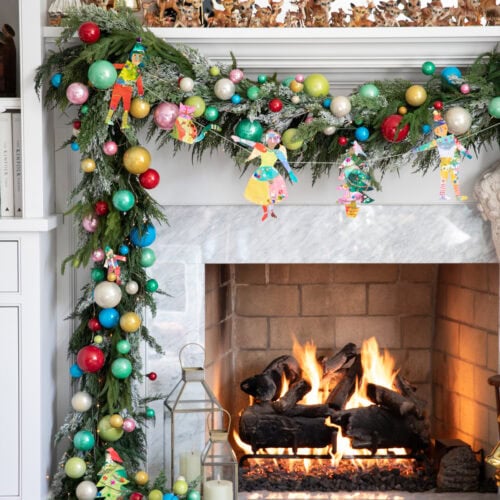
I attached mine to a string to create a garland for my Christmas mantel, but you can easily use them as ornaments or display them around your home as standalone pieces. And while mine have a holiday spin, this project is not limited to any one season. With a little creativity, it can be enjoyed all year long.
Similar to this project, last year I used some of my paper plate palettes to create doves that became a garland and ornaments for my tree. Also, earlier this season, I cut leaves from the painted plates and turned them into this colorful wreath. Those posts were such favorites with readers that I wanted to come up with something new. I hope you enjoy these figures just as much.
What I love most about this project is how freeing it feels. You do not need to be an artist or have years of crafting experience. You just need a bit of imagination. Every figure takes on its own personality, and there is something joyful about watching them come together. Whether you hang them as a garland or tuck them around your home, they bring a lighthearted spirit to the season that feels wonderfully handmade and completely your own. Let’s get into the details.

Why You’ll Love This Project
- The creative possibilities are endless. Make people, pets, animals, trees, or any whimsical shape that comes to mind, and decorate them with whatever craft supplies you have on hand.
- These figures are made from materials you may already have, which gives each one a built-in story and makes the whole project feel personal. No two pieces will ever look the same, and that’s part of the fun.
- The process is simple and relaxing. You can follow a pattern or freehand your own shapes, and the painted paper plates do most of the creative work for you. It’s an easy way to make something that feels playful and full of character.
- You can display your finished figures in so many ways. Hang them as ornaments, tuck them into your holiday decor, attach them to twine for a garland, or save them as little keepsakes to enjoy year after year.
Love handmade decor for the holiday? Me too! If you want to gather some more ideas, check out this post filled with all my best handmade Christmas decor.
Materials
Let’s get into the materials list for this uniquely charming project. Here’s what you’ll need:
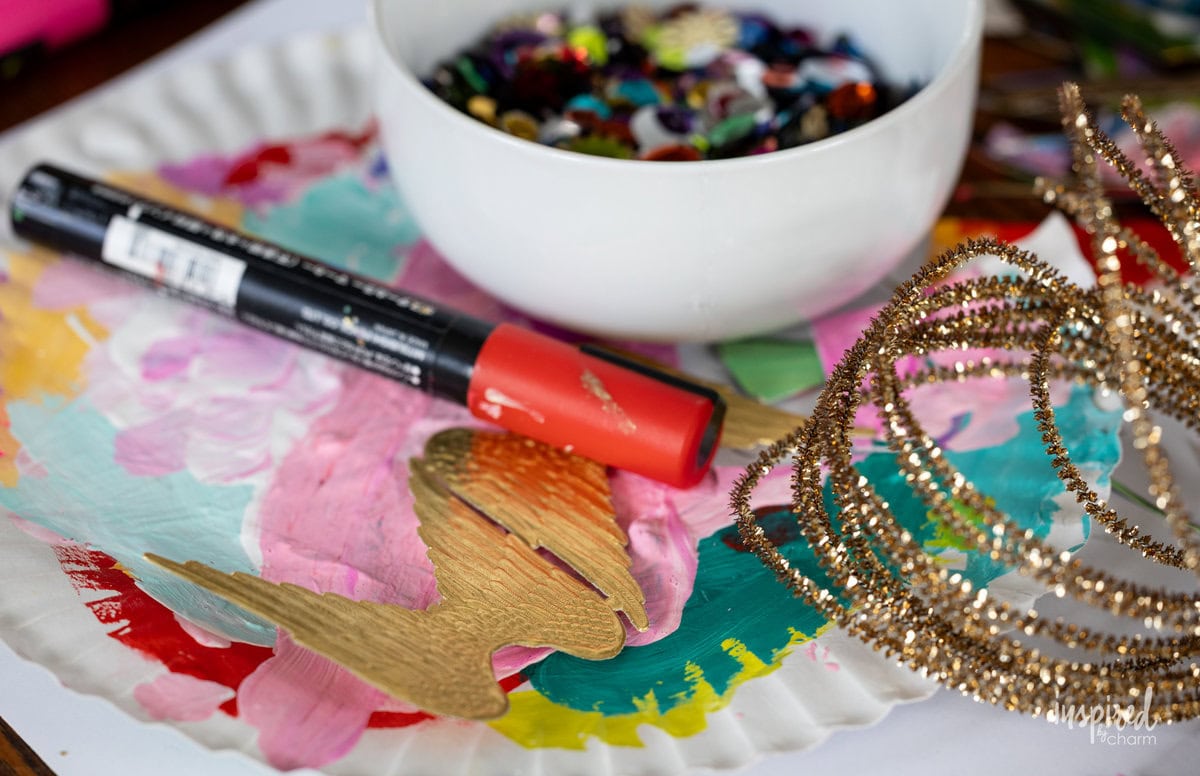
- Paper plate palettes – These become the base of the project. Dried paint on the palettes creates natural patterns and color combinations that give each figure its personality. If you do not have a stack of paint-covered plates ready to go, no worries. You can use any sturdy paper. And, you can paint your own, have your kids paint a few sheets, or pick up some beautiful cardstock at the craft store.
- Paper doll patterns – Printable templates or hand-drawn shapes help you map out the arms, legs, and body pieces so everything fits together easily. You can find the one I relied on here.
- Pencil – A pencil lets you trace your patterns onto the painted plates while still being able to adjust or erase as needed.
- Scissors – A sharp pair of scissors makes it easy to cut out the shapes and follow the curves of each pattern cleanly.
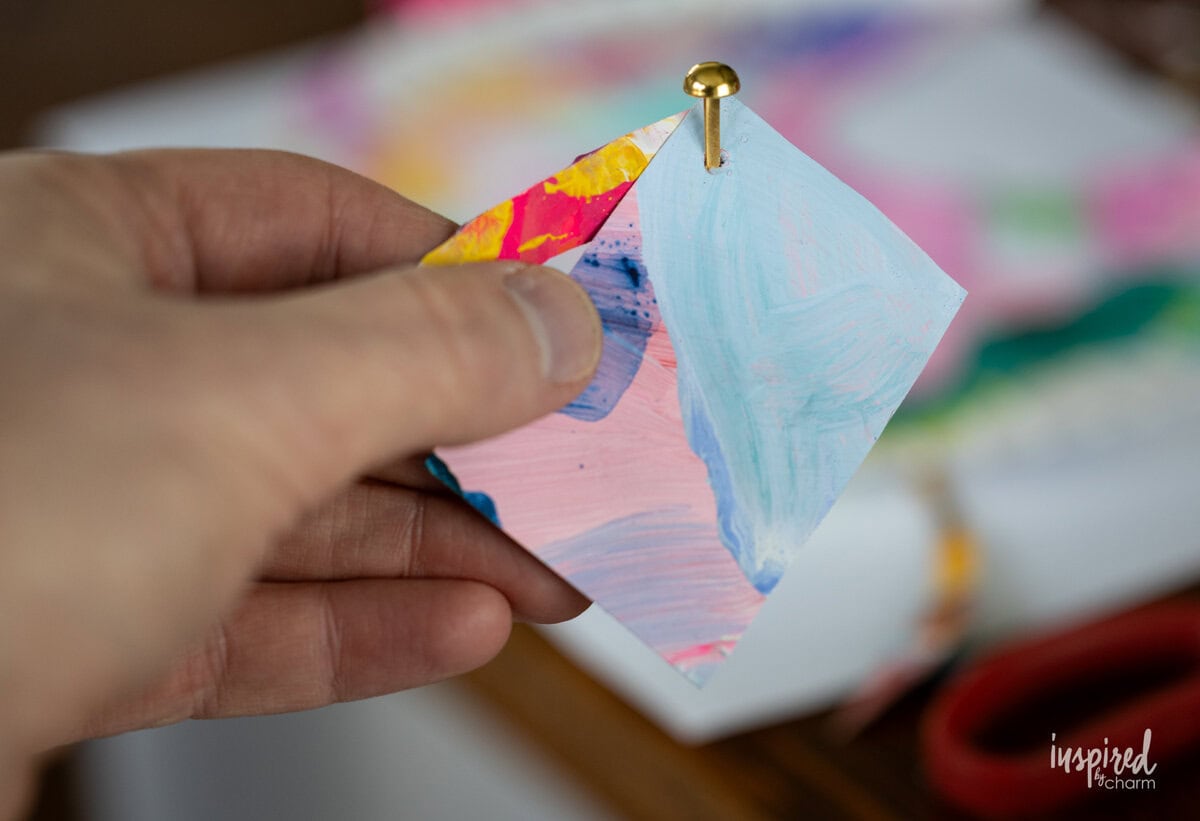
- Fasteners – These small metal brads connect the limbs and let the finished figures move at the joints for that classic articulated feel.
- Acrylic markers – Markers work beautifully on the painted plates and are perfect for adding small details, facial expressions, and extra pops of color. I love this metallic gold marker too.
- Hot glue and glue sticks – Hot glue helps attach any embellishments securely and also works well when connecting the finished figures to twine.
- Sequins, glitter, paper wings, and other embellishments – These little extras bring sparkle, texture, and personality to each character, letting you customize your creations in endless ways.
- Strong tape – Tape is a quick and easy option for attaching the finished figures to twine or securing small pieces that don’t need hot glue.
- Twine – A length of twine turns your figures into a garland, but it can also be used to hang individual pieces as ornaments or decor.
💌 SAVE THIS POST / RECIPE!
How To Make
Okay, ready to assemble these Articulated Paper Figures for Christmas? Let’s do it! I’ll still take you through the steps below. I’ve also provided a complete materials list and detailed instructions in the printable recipe card below.
- Begin by cutting out your paper doll patterns. You can find all kinds of free templates online, or you can draw your own. You can find the one I used here. Also, for one of my figures, I kept things really simple and sketched out a basic body shape without using a template at all.
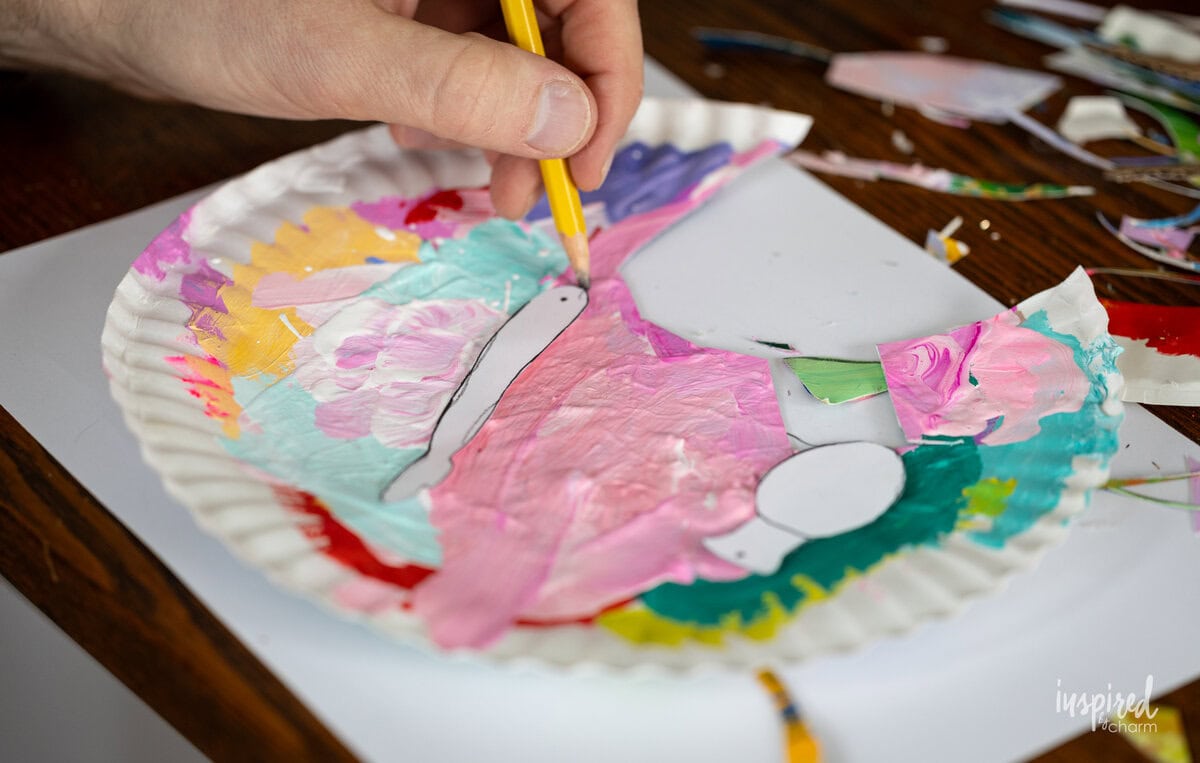
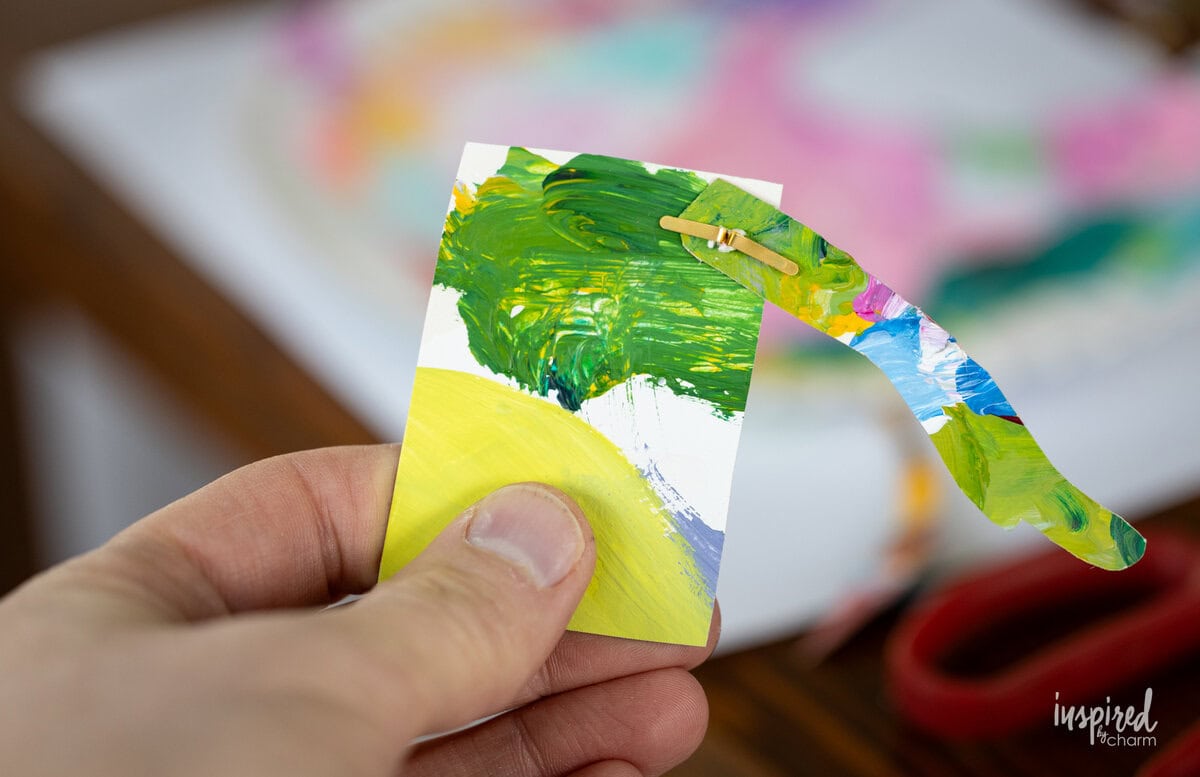
- Trace these patterns onto your paper plate palettes with a pencil, then cut out each piece. Every plate has its own mix of color and texture, so tracing first helps you pick the parts of the design you want to highlight.
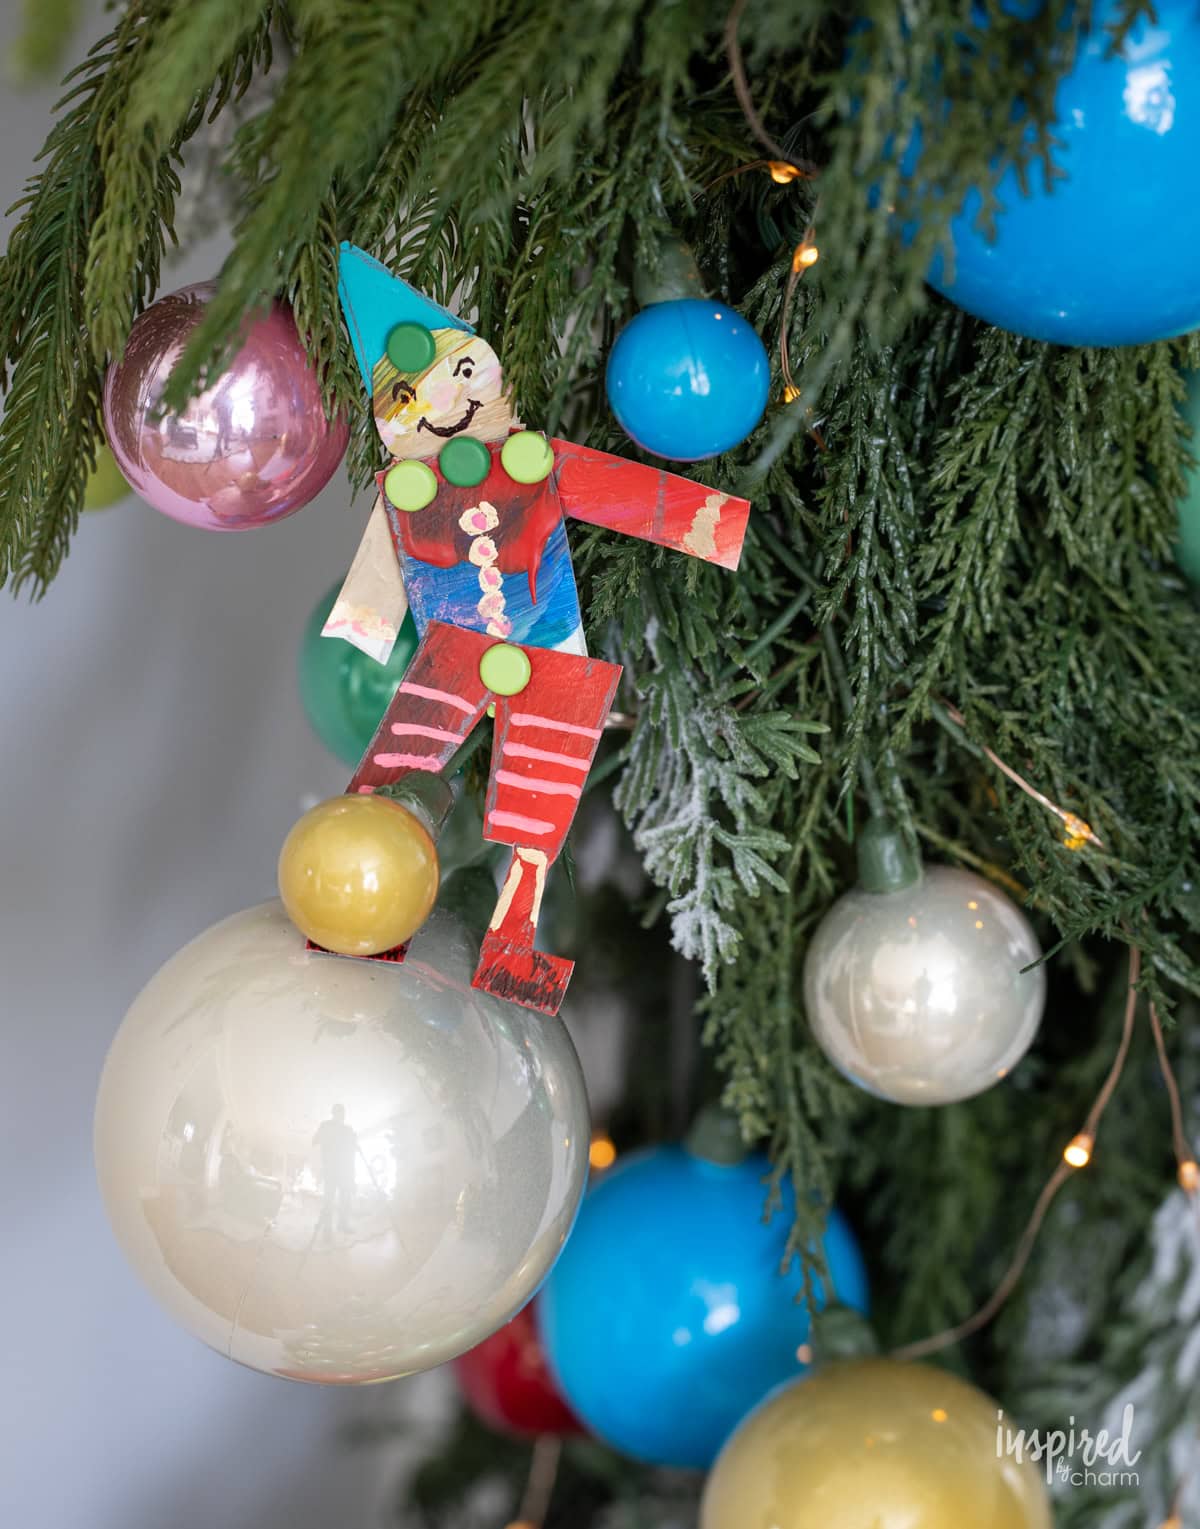
- Use the tip of a pair of scissors or a sharp craft knife to make a small hole anywhere a joint will connect two parts. Attach the pieces with fasteners so that the arms, legs, and/or other parts can move. You can add as many joints as you like. Think about the personality you want your figure to have as you assemble it. While joints for figures are somewhat standard, you can make creative choices with the jointed parts of a Christmas tree, a sprig of holly, etc.
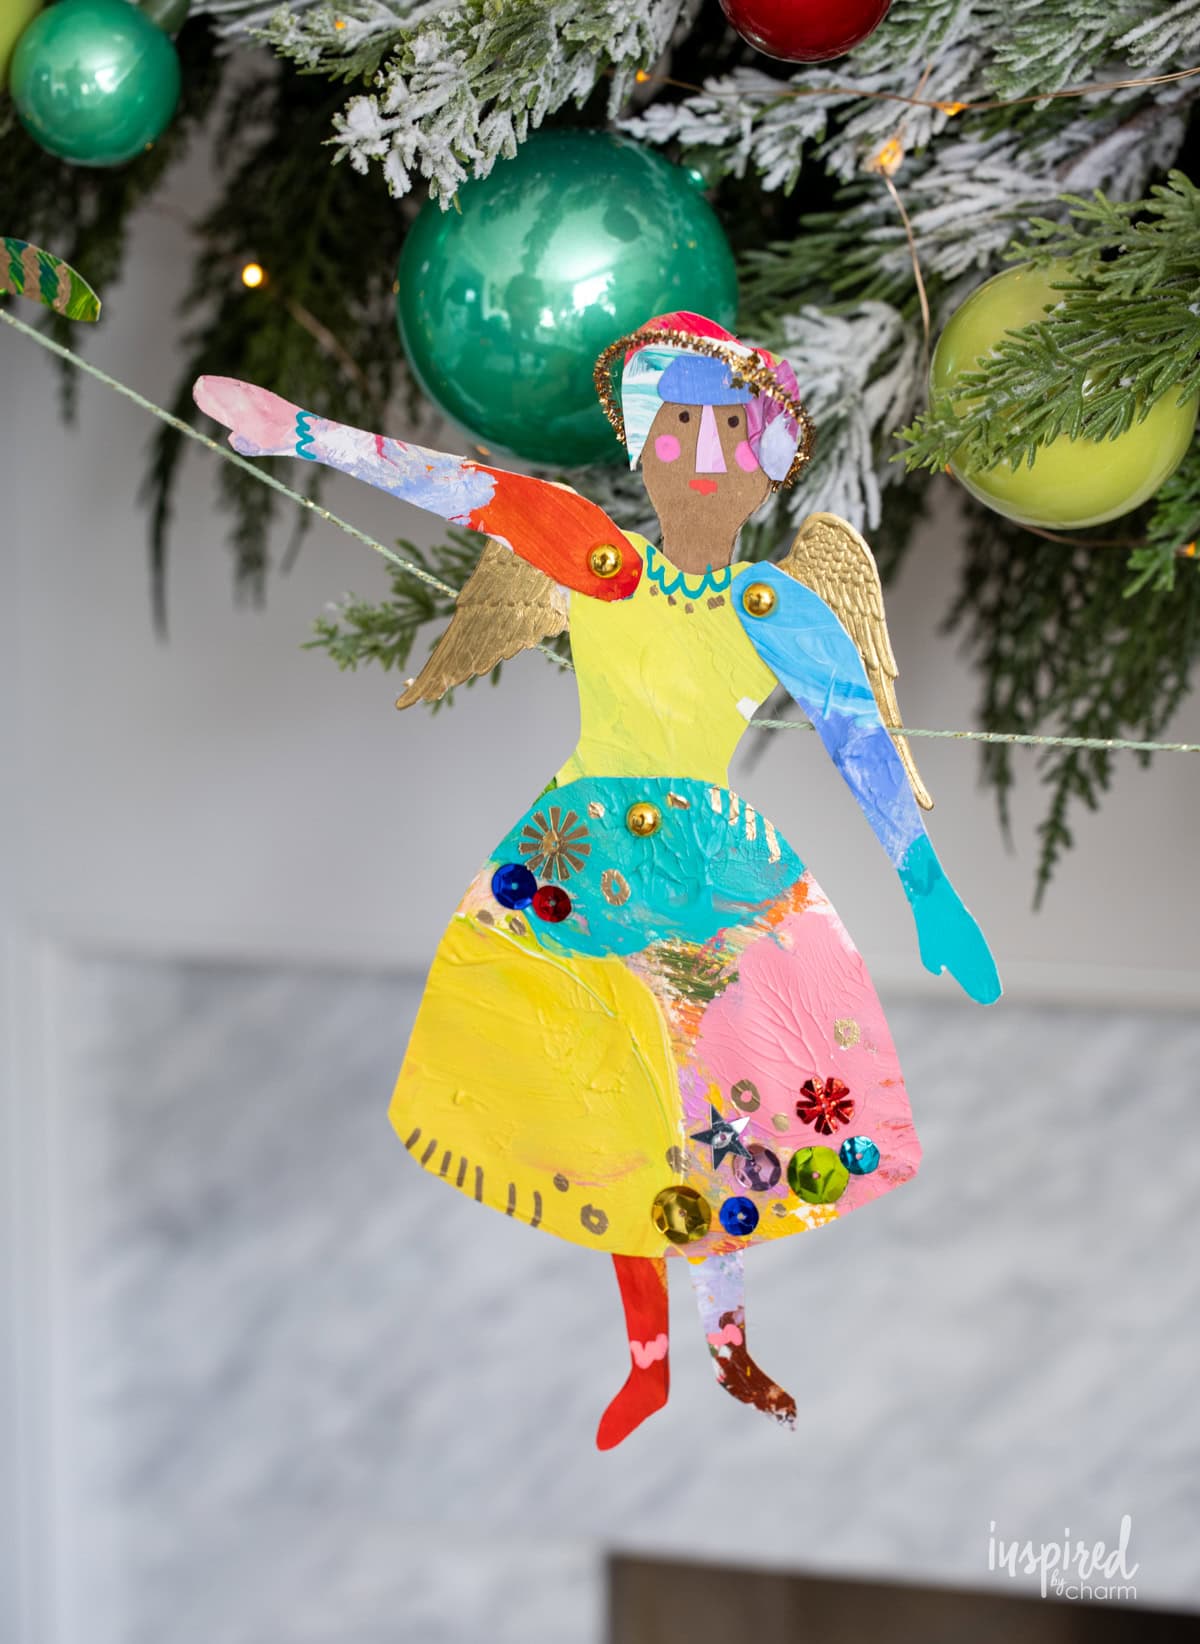
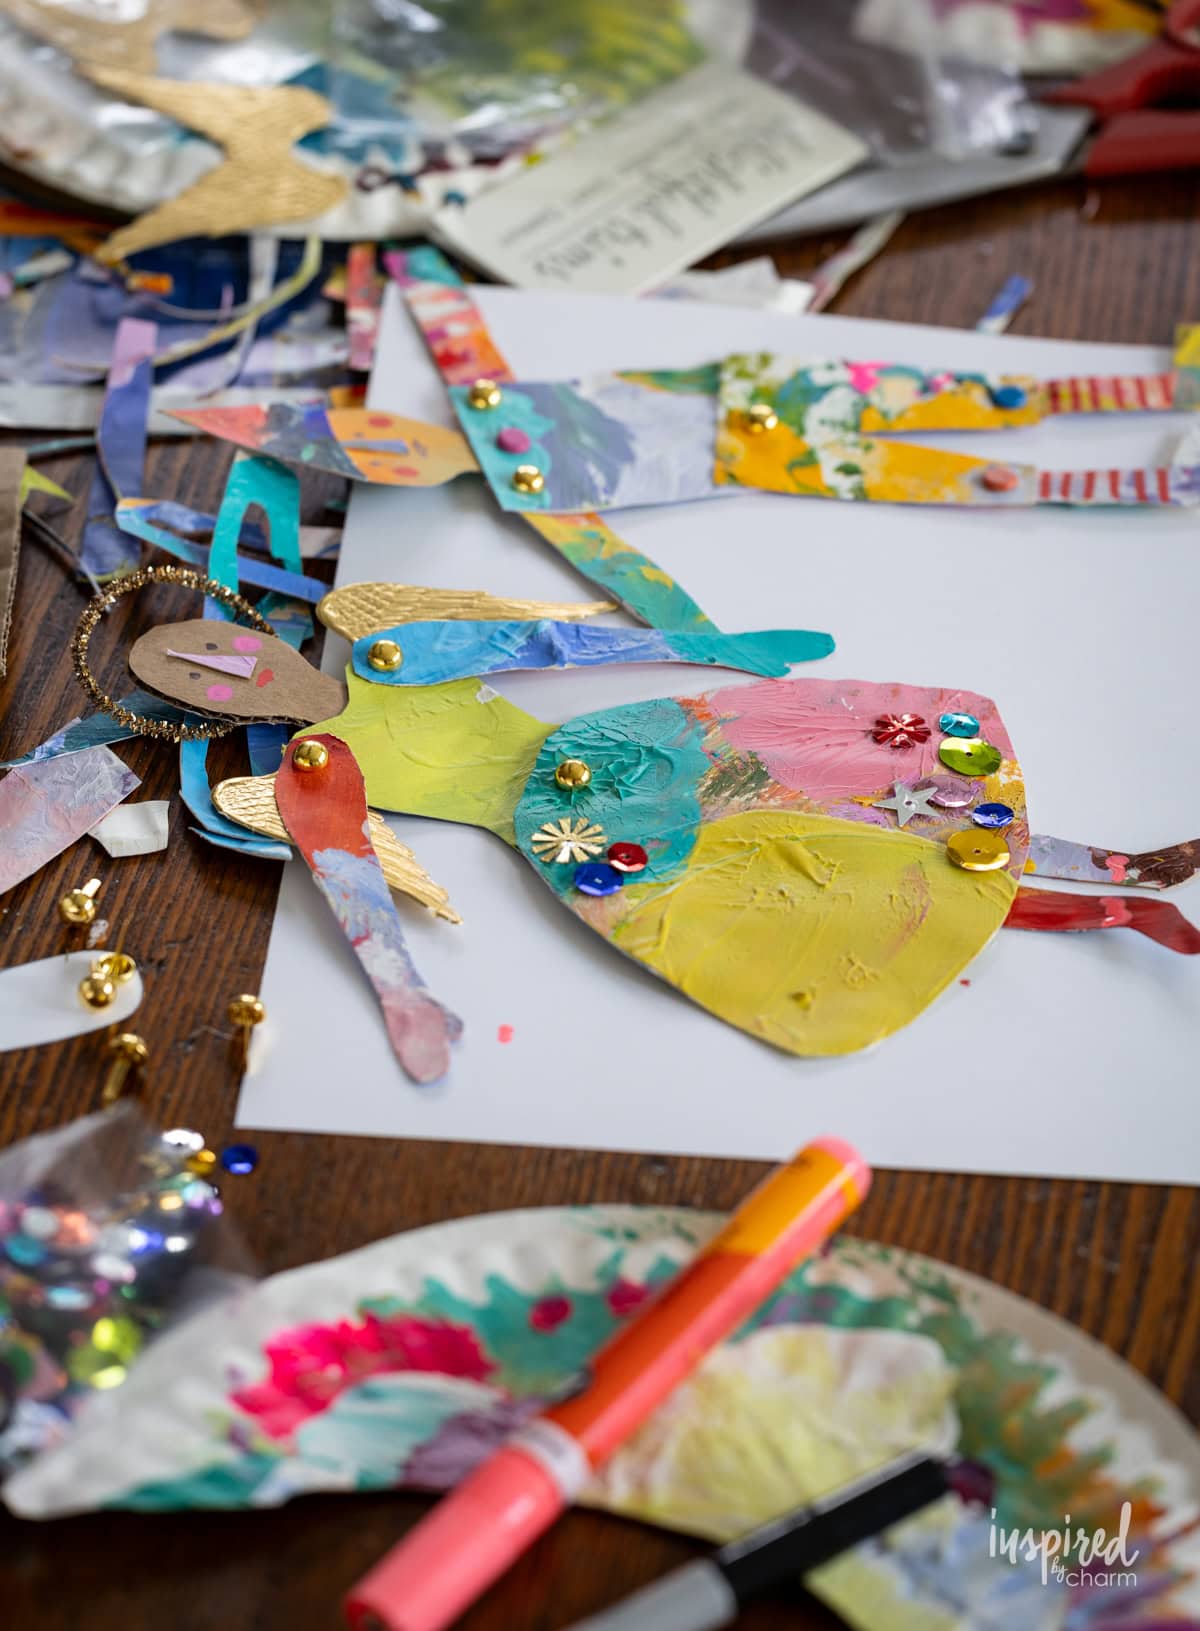
- Once the base shape is finished, you can start adding accessories. Hats, scarves, tiny shoes, paper wings, or whatever details feel fun and fitting. Acrylic markers work well for drawn-on elements, and sequins or glitter add a little holiday sparkle. Feel free to mix materials and play. If you’re adding 3D elements, be sure that they don’t block your desired articulation.
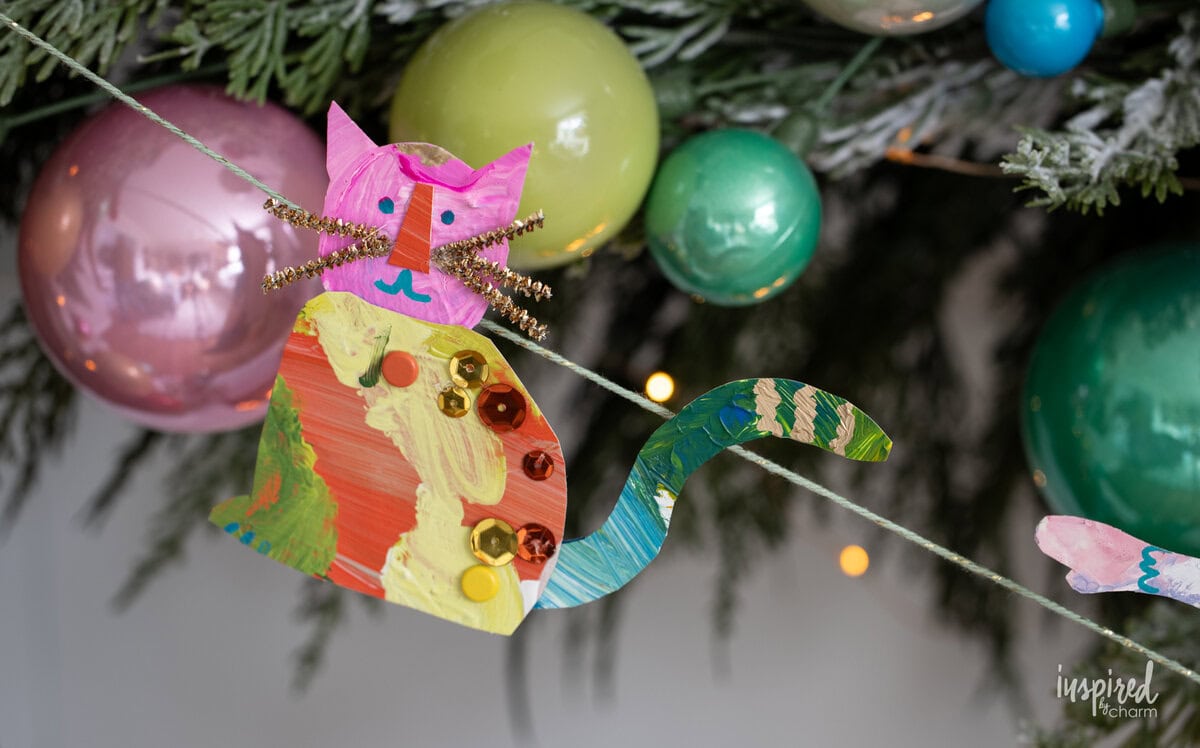
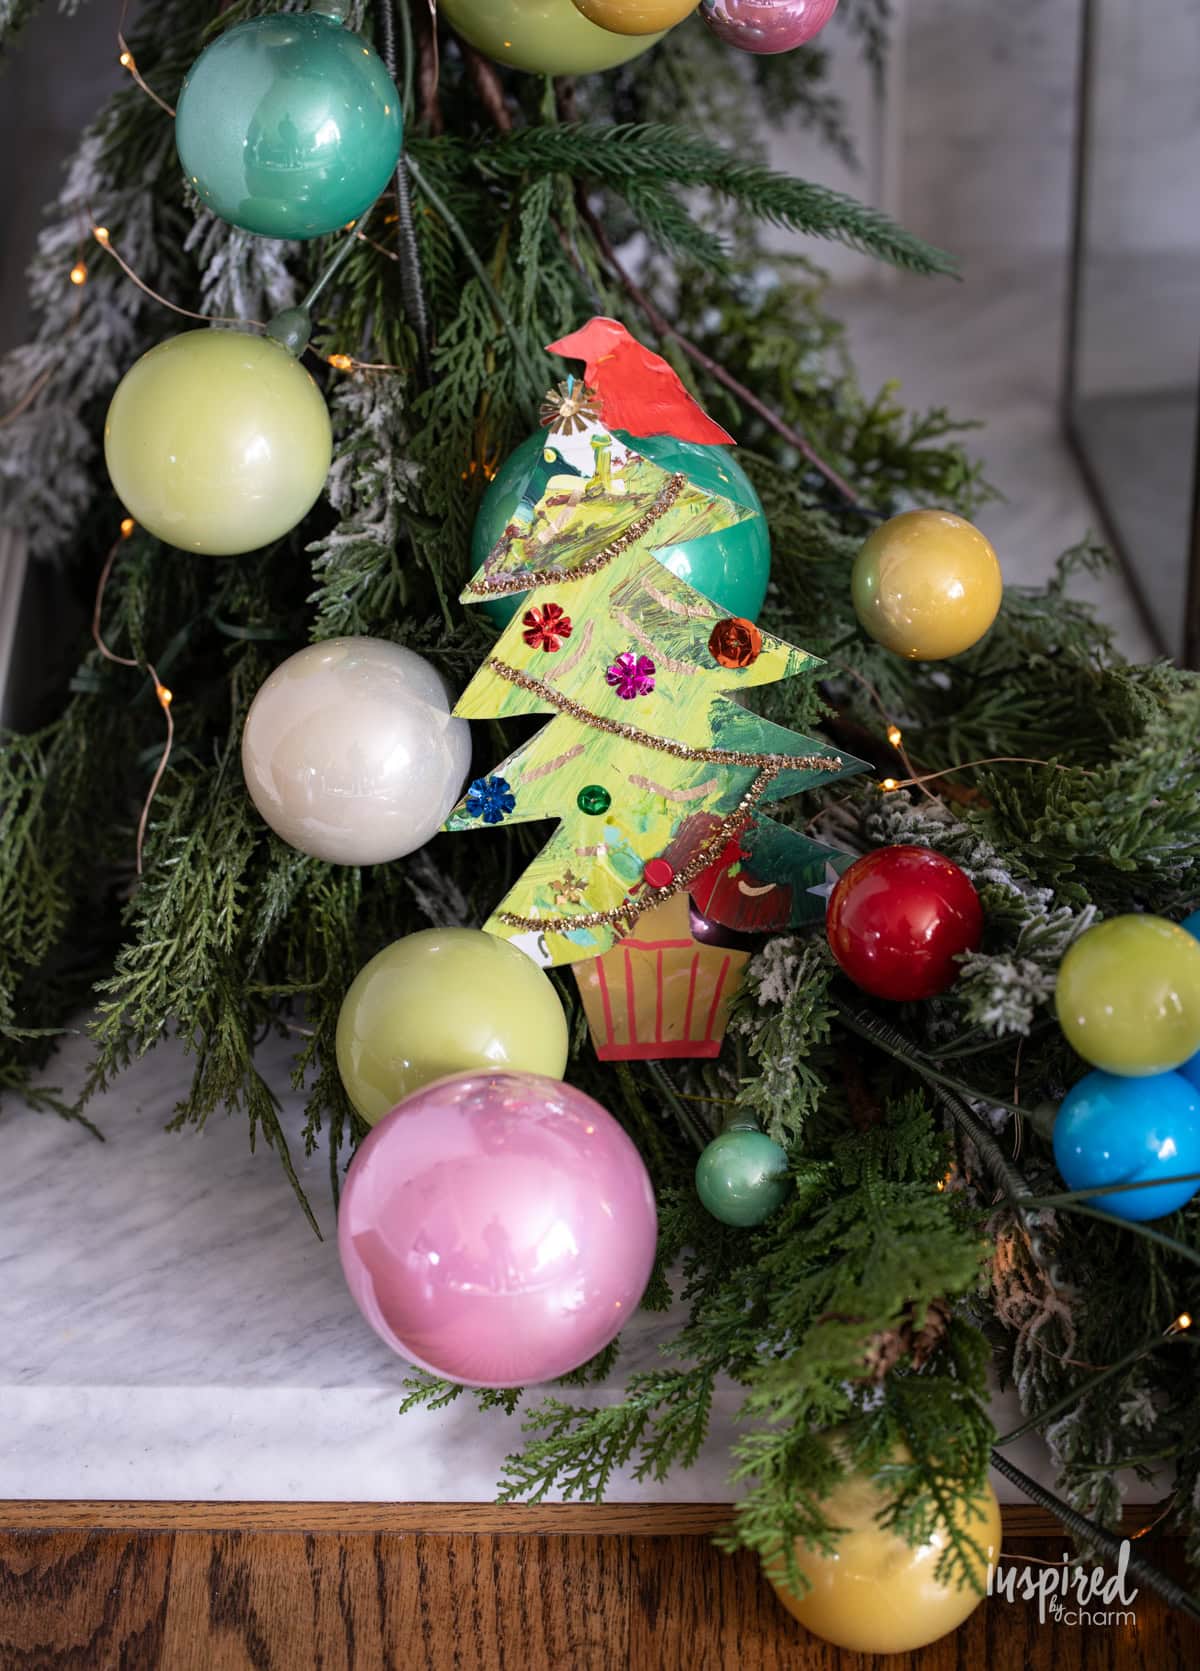
- Continue making as many figures as you’d like. I created people, a cat, a Christmas tree, and even a sprig of holly. This is the part where things get wonderfully quirky, so let your imagination go where it wants to.
- At this point, your figures are ready to display. They work beautifully as ornaments, wall decor, or tucked into a shelf vignette. If you want to make a garland as I did, simply attach each figure to a length of twine with hot glue or strong tape and arrange them in whatever order feels charming.
And that’s it! Voila!
Variations
Once you make your first figure, it is almost impossible not to start dreaming up new versions. This project is so flexible! You can adjust the shapes, the style, or even the purpose to create a whole collection that feels personal and full of charm.
- Create a themed set. Make a group of figures that share a common idea, such as carolers, woodland animals, gingerbread people, angels, or holiday storybook characters. A themed set looks especially sweet displayed together on a mantel or tree.
- Try different paper sources. If you do not have painted plates on hand, experiment with watercolor paper, old artwork, scrapbook sheets, cereal/food boxes, or wrapping paper. Each material gives the figures a completely different look and can help match the style of your seasonal decor.
- Play with scale. Cut a few pieces larger or shrink them down for miniature versions. Mixing sizes adds a playful rhythm to a garland or ornament grouping and gives you more creative ways to decorate with them.
- Add dimensional details. Try layering small cutouts to create clothing, wings, hats, or accessories. You can bend or curl paper pieces for depth or attach tiny pom poms, buttons, or ribbon scraps to give each figure even more personality.
- Switch up how you display them. Hang a single figure as an ornament, tie one to a gift as a handmade topper, tuck them into a bookshelf, or create a standing display by attaching them to a popsicle stick or small block. Changing the presentation makes each one feel new.
More Handmade Holiday Decor Ideas You’ll Love
- Christmas Pinecone Elves
- Clothespin Snowflakes
- Vintage Bobbin Garland
- Vintage Christmas Ornament Wreath
- Handmade Gingerbread Decor Ideas
My mom and I worked on this project together, and we had so much fun. Once we got going, the ideas for variations just started to flow. We crafted for hours, had a blast, and loved the results. If you try making these Articulated Paper Figures for Christmas (Made from Painted Paper Plate Palettes), I’d love to hear how yours turn out! Please stop back and leave a comment and a 5-star rating below.
Want more from Inspired by Charm? Join the IBC Mailing List for inspiration in your inbox! Follow along on Instagram and TikTok for daily updates and behind-the-scenes looks at my processes. There’s even more inspiration on Facebook and Pinterest!
Articulated Paper Figures for Christmas
Ingredients
- Paper plate palettes* or other colorful papers or artwork
- Paper doll patterns found online or drawn by hand
- Pencil
- Scissors
- Fasteners
- Acrylic markers
- Hot glue and glue sticks
- Sequins, glitter, paper wings, tiny embellishments, etc.
- Strong tape
- Twine
Instructions
- Begin by cutting out your paper doll patterns. You can find all kinds of free templates online, or you can draw your own. You can find the one I used here. Also, for one of my figures, I kept things really simple and sketched out a basic body shape without using a template at all.
- Trace these patterns onto your paper plate palettes with a pencil, then cut out each piece. Every plate has its own mix of color and texture, so tracing first helps you pick the parts of the design you want to highlight.
- Use the tip of a pair of scissors or a sharp craft knife to make a small hole anywhere a joint will connect. Attach the pieces with fasteners so that the arms, legs, and/or other parts can move freely. You can add as many joints as you like. Think about the personality you want your figure to have as you assemble it. While joints for figures are somewhat standard, you can make creative choices with the jointed parts of a Christmas tree, a sprig of holly, etc.
- Once the base shape is finished, you can start adding accessories. Hats, scarves, tiny shoes, paper wings, or whatever details feel fun and fitting. Acrylic markers work well for drawn-on elements, and sequins or glitter add a little holiday sparkle. Feel free to mix materials and play. If you’re adding 3D elements, be sure that they don’t block your desired articulation.
- Continue making as many figures as you’d like. I created people, a cat, a Christmas tree, and even a sprig of holly. This is the part where things get wonderfully quirky, so let your imagination go where it wants to.
- At this point, your figures are ready to display. They work beautifully as ornaments, wall decor, or tucked into a shelf vignette. If you want to make a garland as I did, simply attach each figure to a length of twine with hot glue or strong tape and arrange them in whatever order feels charming.
Michael, I’m always delighted to see what you come up with from your paper plate palettes. They never disappoint. I’m recently home from the hospital, but I’ve read at least some of your challenge posts. Somehow, I couldn’t comment there.
I struggled my whole life with never feeling that what I did was ever good enough. Hogwash. We are all uniquely made, and how we choose to express ourselves is unique as well. Studying others is helpful, because by emulating you may discover a process that hadn’t occurred to you. Participating in a challenge is just that, a challenge. You can always return to what is familiar and satisfying, but presumably you accepted the challenge because you desire to stretch yourself a little. But don’t kick the paper plates to the floor. They are genius.
Thank you so much Gayle. What a great perspective. And yes, that’s why I’m in the challenge and why I’ll stay in it. Mostly it’s been a whole lot of fun. I hope that by sharing my process it may resonate with someone else. Thanks so much again. (and sorry you couldn’t comment over there. I’m not sure why. Maybe you need an account?)
xo Michael
I love this “recipe”!
Michael I am so blown away by these! They are truly little works of art! I am imagining so many uses for these. We have grandkid birthday parties that I could see these being a total hit and a blast to make! Thanks for the inspiration and I hope you get lots of time after Christmas to just have some creative play time! Merry Christmas and thanks for the joy!
I absolutely love these —it inspires me to use my creativity and supplies on hand. I even want to invite my young grandkids over for an afternoon of creating something special as gifts for their parents!
That sounds perfect! Thanks Carol!
xo Michael
I love the whimsical decorations! They are awesome! Where did you get the ornaments (round balls) for your garland?
It’s actually a garland of ornaments. They were from Anthropologie. I believe they are sold out though.
xo Michael
OMGosh, Michael! This is the cutest idea! Full of so much joy! I love it! Merry Christmas to you and yours! (Sorry for all the !!!’s but I couldn’t help myself. lol)
Awww, Bradford. So nice to hear from you. Thank you so much!! <3 (And you never need to apologize for the !!!!! - I used them a lot myself so I understand! Ha!)
xo Michael
These are so whimsical and fun!!
Thank you Michelle!
xo Michael
These are fabulous!! I’m definitely going to give it a try. So cute and creative.
Thanks so much Karen!
xo Michael
Wow!!! These figure decorations are so over-the-top unique and creative! And you married the decor around them to perfection! So cool M and Mom!!
You’re the best D! Thank you so much. It was so fun! And I love that no one else will have the same thing!
xo M
Michael, your whimsical mantel is inspiring! I just love these quirky paper pallet creations❤️
Awww – thanks so much Jana!
xo Michael
So creative Michael and another homemade from the heart project, the best kind ❤️
I agree! And totally one-of-a-kind. It was so fun making them with you.
xo Michael