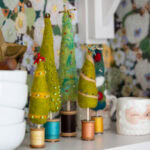
Needle-Felted Christmas Trees
Learn how to make these adorable Needle-Felted Christmas Trees with colorful wool, tiny beads, and vintage wooden thread spools. This whimsical Christmas craft is such a fun way to create one-of-a-kind holiday decorations. Make a few in different colors and sizes to create your own charming little Christmas forest!
Ingredients
- Wool roving in assorted colors
- Needle felting mat or foam block
- Felting needle
- Vintage wooden thread spools
- Small beads in assorted colors and sizes
- Sewing needle and thread
- Small wooden dowels or sticks
- Pennies
- Tacky glue
- Hot glue gun
- Scissors
- Small awl, skewer, or screwdriver
Instructions
- If you've never tried needle felting before, I recommend watching a quick beginner tutorial online to get a feel for the process. It's pretty simple! You're essentially using a special needle to poke wool fibers until they tangle together and hold their shape. Just be careful because felting needles are very sharp!
- Start by pulling off a generous handful of wool roving in your desired color. Using your hands, loosely roll and shape the wool into a cone, making one end narrow for the top and the other wider for the base. Don't worry about getting it perfect. You can adjust the shape as you go.
- Place the wool on your felting mat and begin poking it repeatedly with your felting needle. Work the needle straight in and out, turning the wool as you go to felt all sides. As the fibers begin to tangle together, the wool will become firmer and start holding its shape. Continue until you're happy with your tree. If you want to make an area fuller or adjust the shape, simply add more wool and felt it into place.
- Once you have your basic tree shape, you can have fun adding different colors and decorations! Layer on little wisps of wool in different shades to create variation, or use contrasting colors to make garlands and ornaments. For a garland, twist a thin strand of wool between your fingers, wrap it around the tree, and use your felting needle to secure it in place.
- For a little extra sparkle, use a regular sewing needle and thread to stitch small beads onto your tree. You can scatter them randomly, arrange them along the garland, or create little clusters. You can also make a fun beaded tree topper! Bring your needle and thread through the top of the tree, string on about 12 beads, then insert the needle back into the top near where you started to create a loop. Bring the needle back out at the top and repeat until you have as many loops as you'd like. Secure the thread with a knot, hiding it in the wool.
- With your tree decorated, use a small awl, skewer, or screwdriver to carefully make a hole in the center of the bottom of the tree. This is where the wooden dowel will go. Set the tree aside.
- Next, grab a vintage wooden thread spool. I like using spools that still have colorful thread on them! Hot glue a penny to the bottom of the spool to add a little weight and help the tree stand upright.
- Cut a small wooden dowel or stick to your desired length. Mine were approximately 4 to 5 inches long, but you can adjust this depending on the size of your tree. Add a little hot glue inside the top hole of the spool and insert the dowel, keeping it straight while the glue sets.
- Finally, add a little tacky glue to the top of the dowel and gently insert it into the hole you made in the bottom of your felted tree. Adjust everything so the tree stands straight, then allow the glue to dry completely.