Peppermint Sugar Cookies
This Post May Contain Affiliate Links. Please Read Our Disclosure Policy
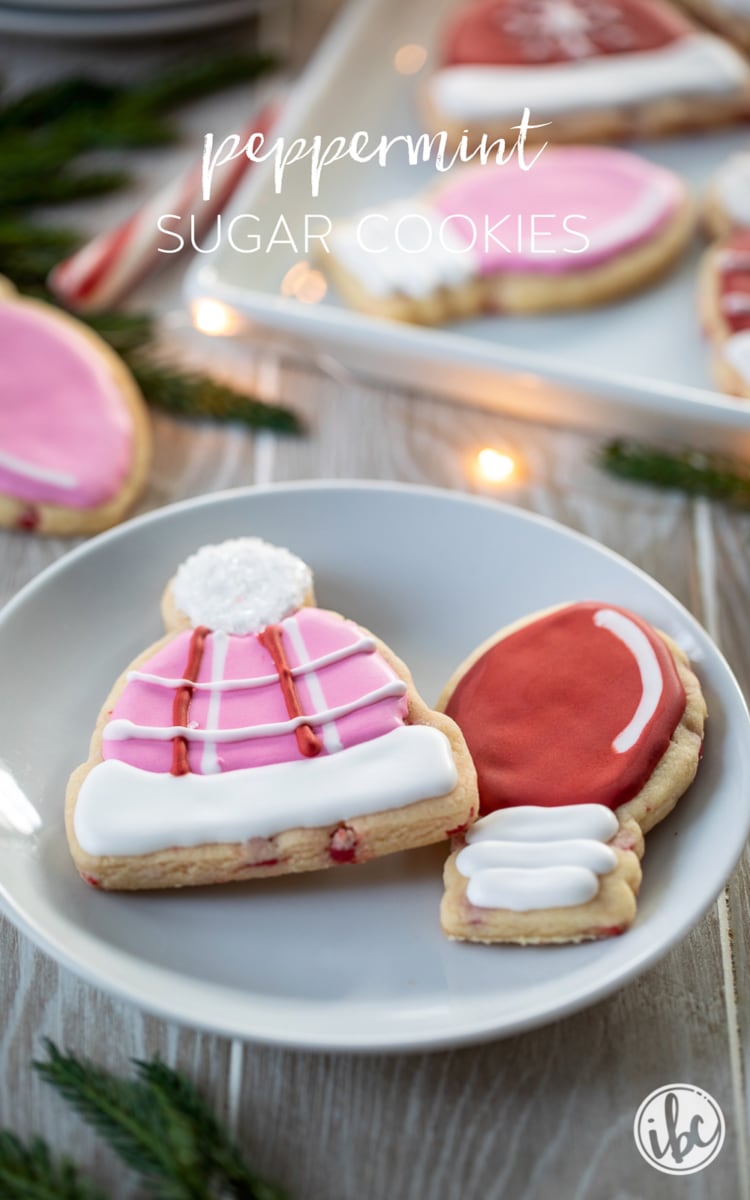
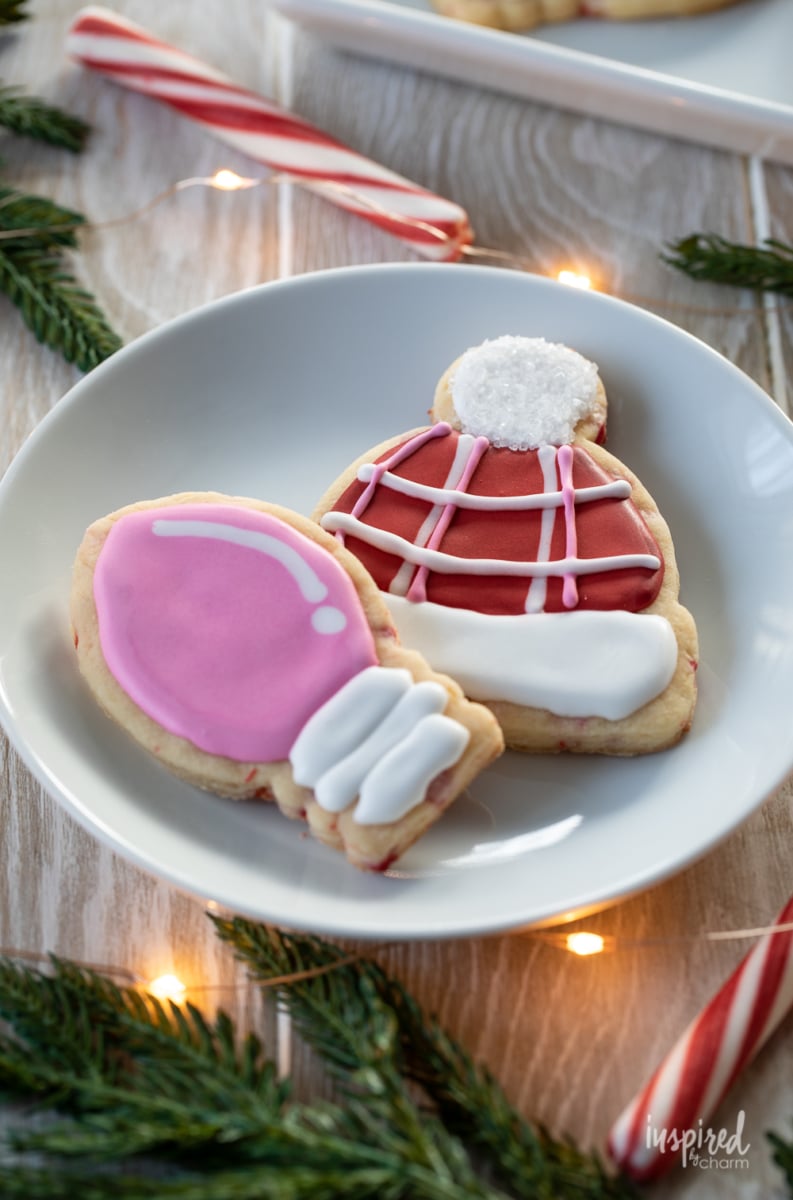
Sugar cookies get a festive upgrade with peppermint baking chips and adorable colorful designs piped in royal icing. These Peppermint Sugar Cookies are as cute as they are delicious.

Peppermint Sugar Cookies
I have been having so much fun making these festive cut-out sugar cookies decorated with royal icing. I couldn’t be more excited to add another cutout cookie to my baking repertoire: Peppermint Sugar Cookies in Christmas bulb and cozy winter hat designs.


Last year, I wanted to try my hand at this type of cookie, so I made these Christmas Tree Gingerbread Cookies and Orange Almond Mushroom Cookies.
Even though the process to make these is intensive (6+ hours with skill and patience required), I still enjoy the decorating process. This year I decided to try my hand at piping again with some new designs and landed on these Thermos Gingerbread Cookies and now these Peppermint Sugar Cookies.

While my royal icing making and piping skills still require practice, I was having a blast with these Peppermint Sugar Cookies! It’s so funny because when I’m a few hours into the process of decorating the cookies, I am thinking to myself, “never again!” But when the next day comes along, my brain is saying, “I wonder what I can do next?” Ha!
Since I’ve done gingerbread and orange almond cookies, I wanted to try a new flavor. I decided to go with white chocolate peppermint. I wasn’t exactly sure how to achieve this flavor, but then I found these Andes Peppermint Crunch baking chips and knew they would be perfect.


I was right! They give just the right amount of peppermint flavor with a little hint of creamy white chocolate. I couldn’t have asked for anything better!
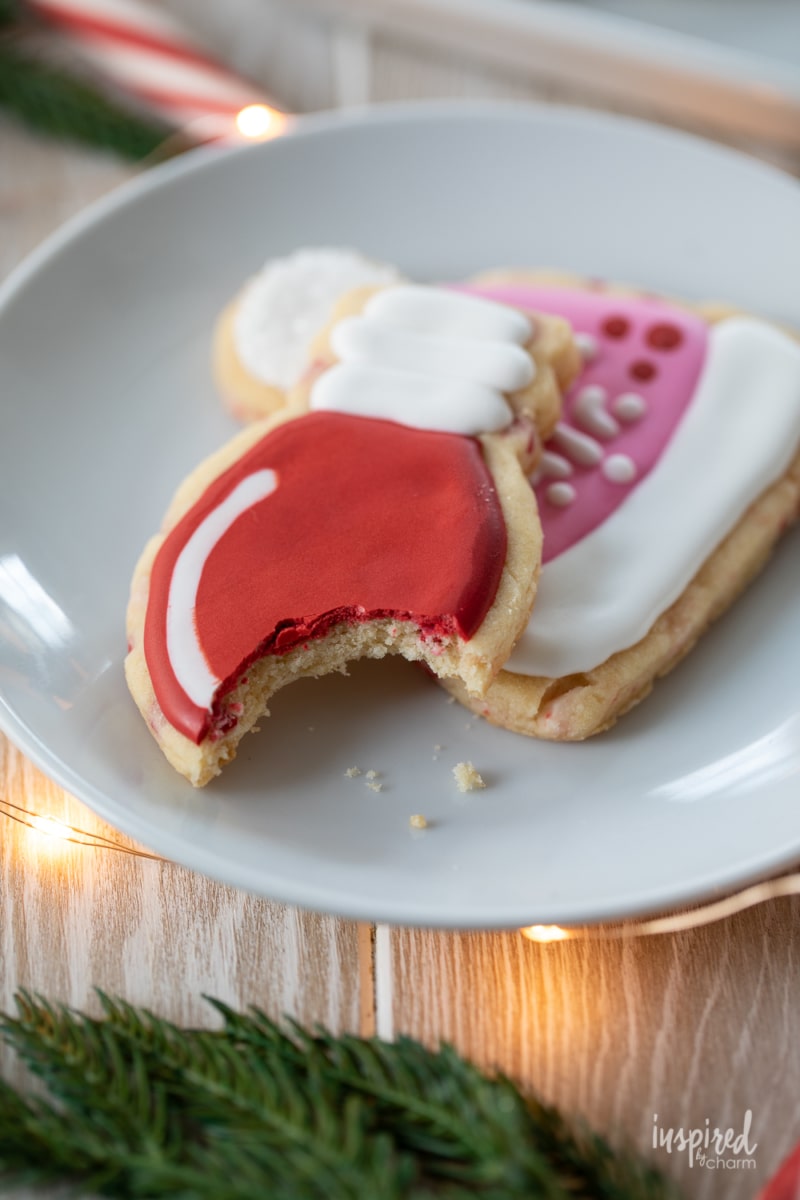
Because of the peppermint theme, I opted to make Christmas lightbulb and cozy winter hat shapes in colors of pink, white, and red. The whole combination of colors and flavors turned out perfectly.
It’s also worth mentioning that sometimes cookies like these can have a hard texture and no flavor. That is not the case with this cookie or any of the other ones I have made that are similar. There is no point in going through all of this work to create a cookie that isn’t anything but delicious. That’s why I add in flavors like seasonal spice, orange almond, or peppermint to create a really delicious cookie.
In fact, second to my beloved Cream Wafer Cookies, the Christmas Tree Gingerbread Cookies were my go-to Christmas cookie last year. SO GOOD!

I definitely recommend giving these a try. Even if you want to opt for a different icing, the base of these cookies is just so yummy with the perfect splash of peppermint.
Let’s get baking!
Kitchen Tools I Recommend for This Recipe:
Whether you’re wondering what equipment you’ll need for this recipe, curious about my favorite utensils, or if you’re just looking to stock your own kitchen, these are the kitchen tools I recommend for this recipe:
-
winter hat cookie cutter (standard size)
- light bulb cookie cutter (standard size)
Want more? You can find the list of My Ultimate Kitchen Essentials HERE.
How to Make Peppermint Sugar Cookies:
Begin by preheating your oven to 350 degrees F.
In a medium bowl, whisk together the flour, baking powder, and salt. Set aside.
To the bowl of an electric mixer fitted with the paddle attachment, add the butter and sugar. Beat on medium until light and fluffy: about 3 minutes.
Add the egg and vanilla extract. Beat for another 1-2 minutes to combine, scraping down the side of the bowl as necessary.
Add the flour mixture to the butter mixture in thirds. Start with your mixer on low, then increase the speed to combine. Continue adding and mixing until all of the flour is incorporated.
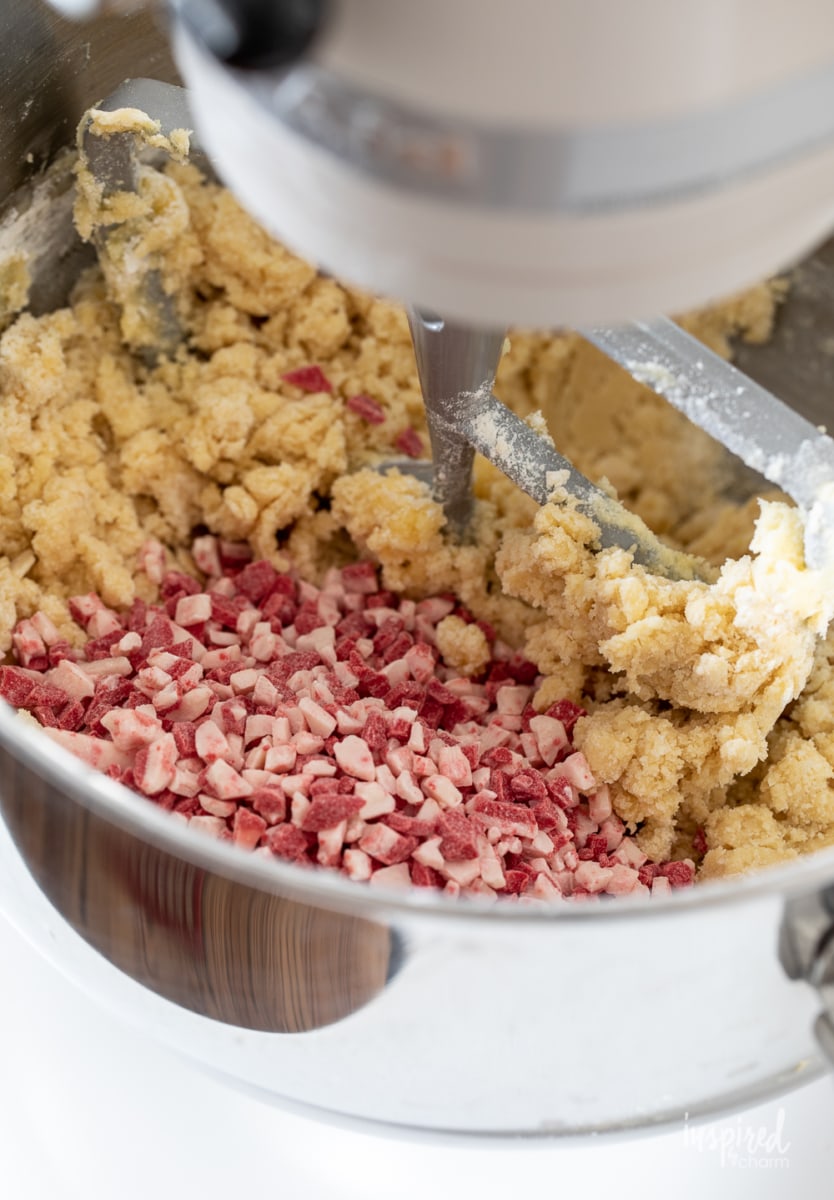
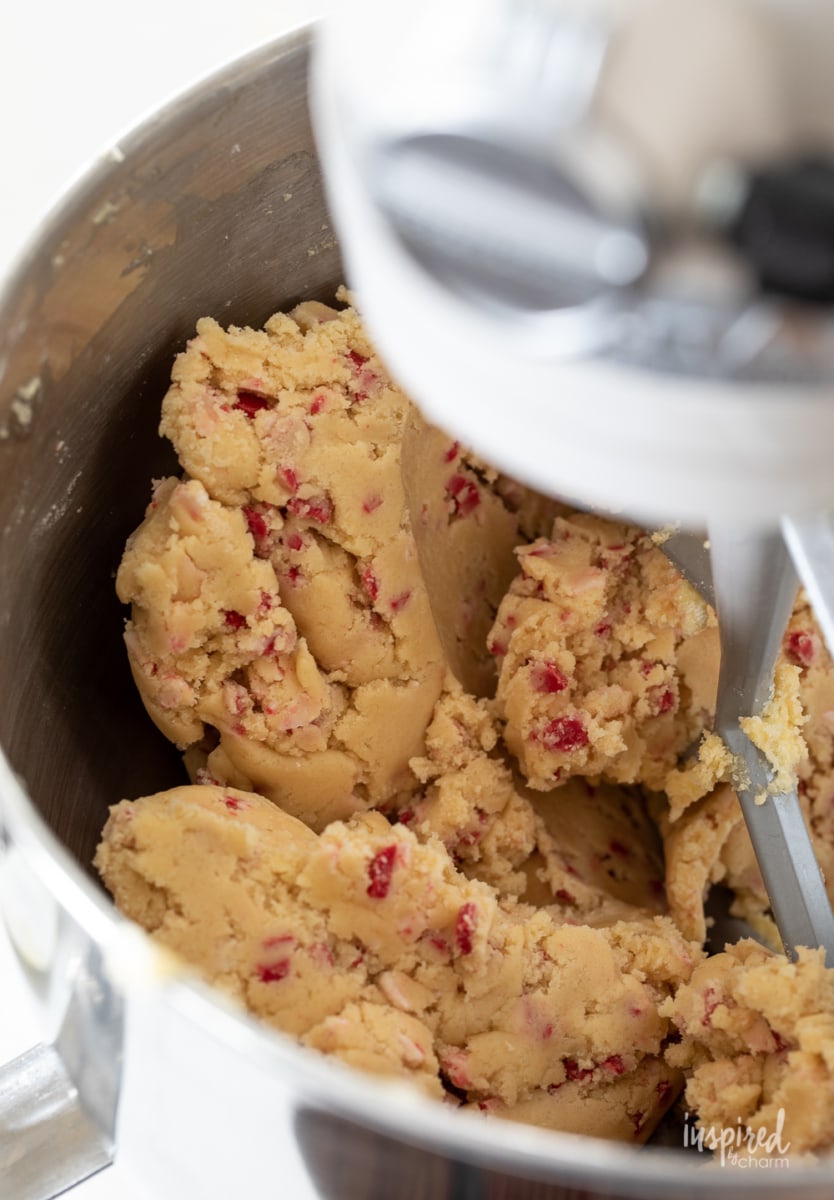
The dough will seem crumbly in the bowl. You’ll know the dough is ready when it starts pulling away from the sides of the bowl. Once the flour is mostly incorporated, add the peppermint crunch baking chips. Mix until just combined.
💌 SAVE THIS POST / RECIPE!
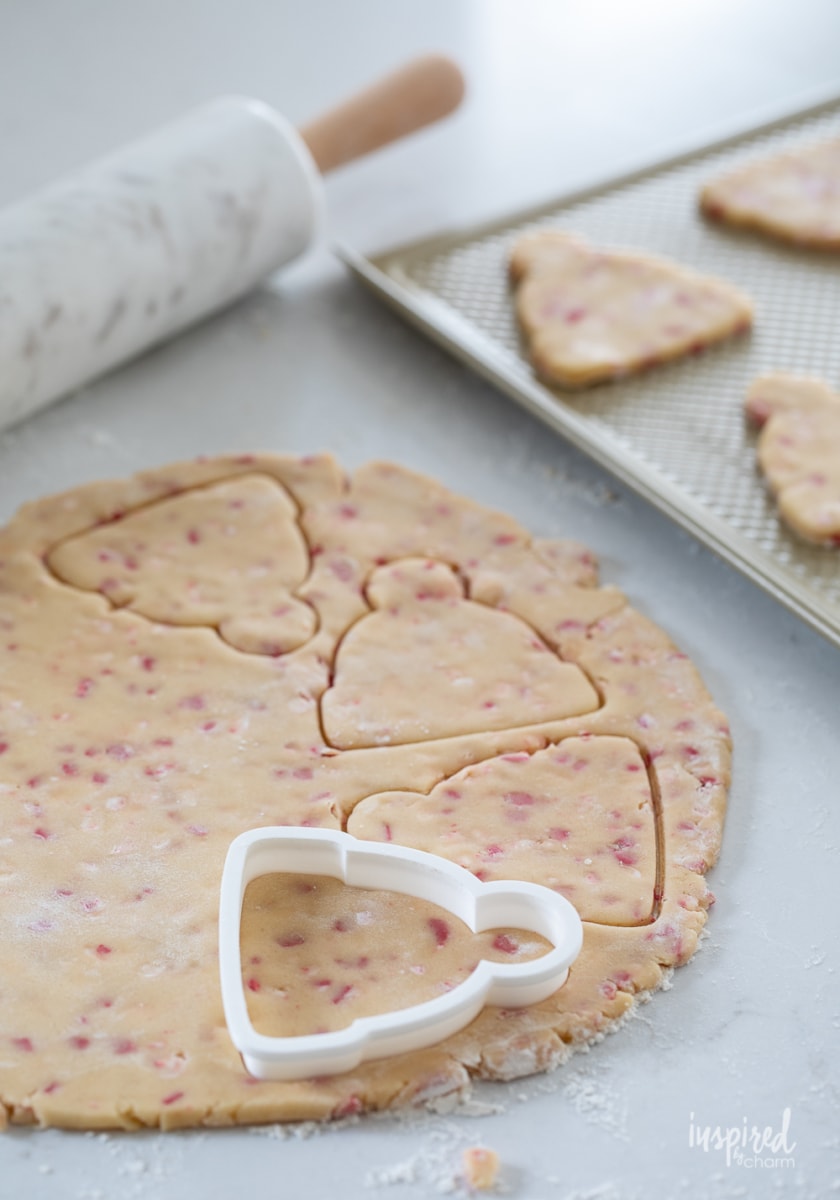
Take half of the dough and roll it out onto a lightly floured surface. Roll out to 1/4 to 1/2 inch in thickness. Cut out your cookies into the desired shapes and place them onto an ungreased cookie sheet. Place the baking sheet of cookies into the freezer for about five minutes.
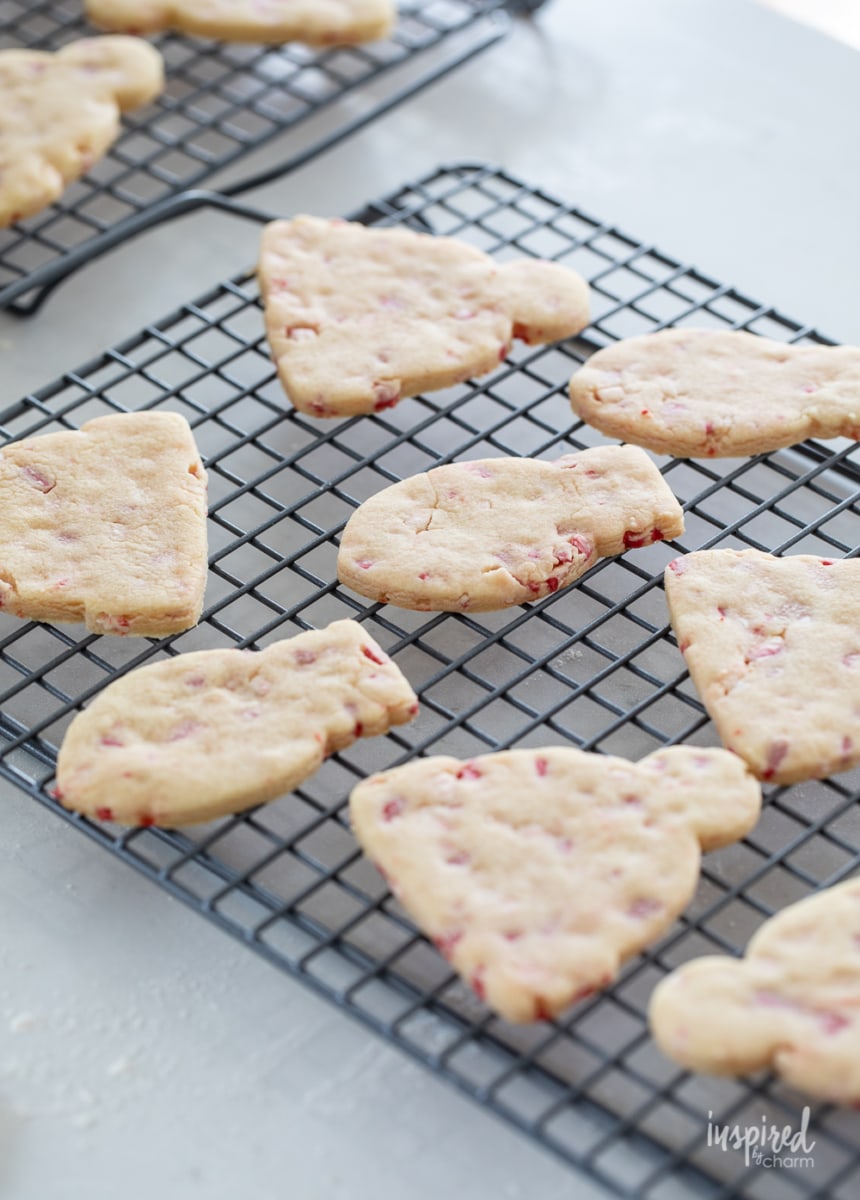
Remove the baking sheet from the freezer and bake the cookies for 9-11 minutes. (The time will depend on the size and thickness of your cookies.)
Allow the cookies to cool on the baking sheet for just about one minute. Then move the cookies to a wire rack to finish cooling.
Meanwhile, prepare the royal icing.
Add the confectioners’ sugar and meringue powder to the bowl of a stand mixer. (You can also use a hand mixer.) Whisk to combine.
With the mixer on low, add one tablespoon of warm water at a time. Once all six tablespoons have been added, add in the corn syrup.
Continue to mix at low to medium speed adding more warm water, one tablespoon at a time, to achieve the desired consistency. The ideal consistency is something that is a bit thicker than corn syrup.
Making “proper” royal icing takes time and practice. You need to get a feel for it to know the consistency you need. It took me 30 minutes to figure it out and I still needed to adjust things. Have patience and take your time.
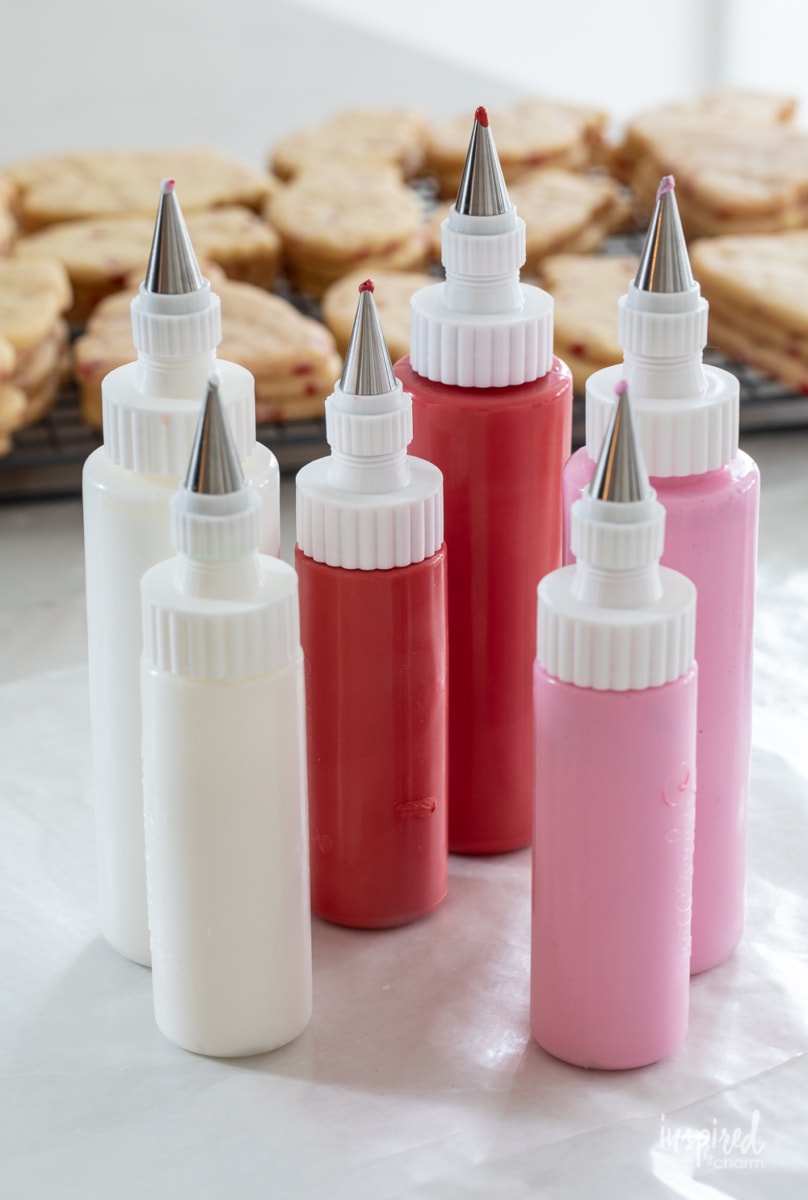
Divide the royal icing into three separate bowls. Add food coloring to each bowl to achieve the desired color. (I went with red, pink, and white. You can create as many or as few colors, as you’d like.)
I highly recommend gel food color. You can find the brand that I used (and love) HERE.
Transfer the icing to a piping bag or piping bottle. I’ve linked the bottles I used HERE.
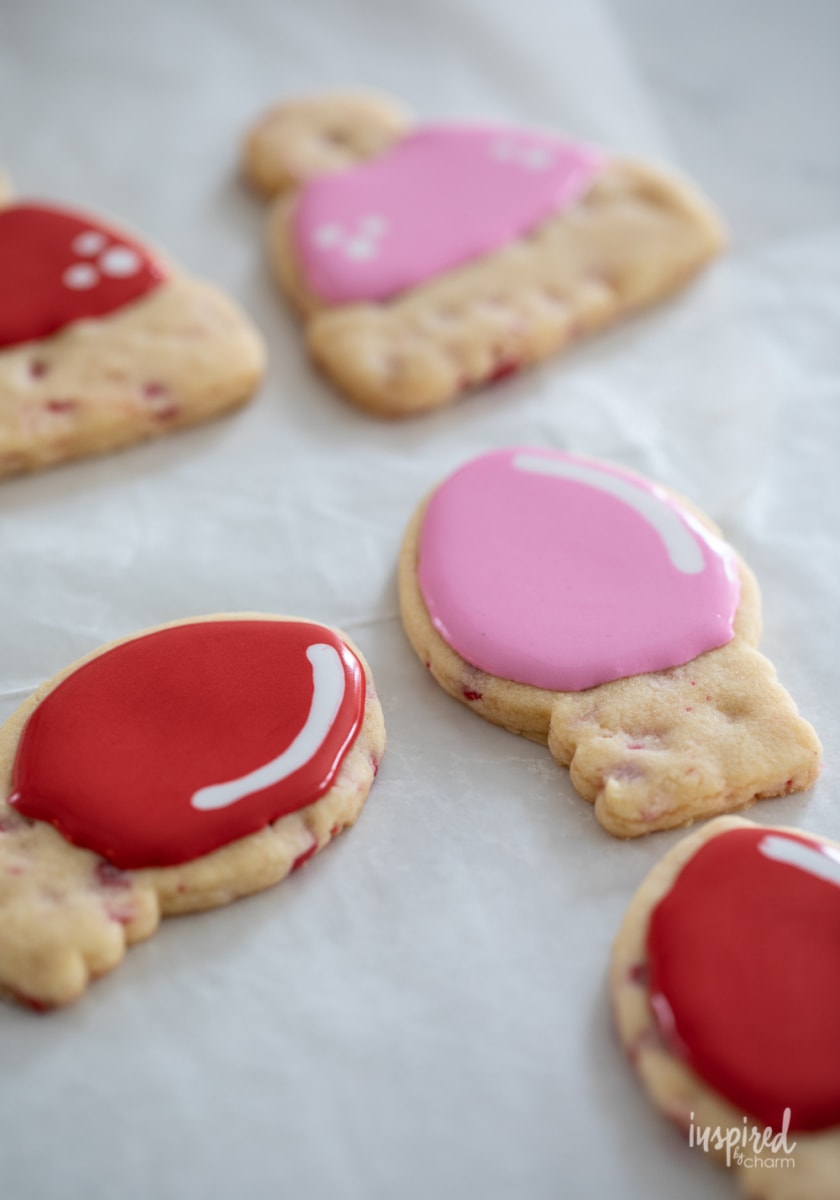

Pipe the colored icing onto the cookies first. Let it harden, then move on to the white icing. Finish up with any decorative details.
Allow the icing to completely harden. Then, pack and store these cookies in an airtight container.

And voila! Aren’t they adorable?
From their flavor to their design, I couldn’t be happier with how these Peppermint Sugar Cookies turned out. They are magical all around.

Want even more Christmas cookie recipes?
I have a post dedicated to all of my favorite recipes. There are more than 26 types of cookies for you to try! You can find that post HERE.
Happy Baking!

Love this Recipe and Want More?
Join the IBC Mailing List to get all of my recipes, projects, and ideas sent straight to your inbox! I hope you’ll also join me on social media for daily updates and behind-the-scenes looks at my work and adventures.
Connect with Michael! Instagram // Facebook // Pinterest // Twitter
Have you tried this recipe? Follow me on Instagram, then share YOUR dish with #myIBC and tag @inspiredbycharm. It’s fun to see how folks are using recipes from IBC.
Peppermint Sugar Cookies Recipe:

Peppermint Sugar Cookies
Ingredients
- 3 cups all-purpose flour
- 1 teaspoon baking powder
- 1/4 teaspoon salt
- 1 cup unsalted butter softened
- 1 cup sugar
- 1 egg
- 1 teaspoon vanilla extract
- 3/4 cup Andes Peppermint Crunch baking chips
Royal Icing:
- 4 cups confectioners' sugar
- 3 tablespoons meringue powder
- 6 tablespoons warm water to start
- 1 tablespoon corn syrup
- red and pink gel food coloring
Instructions
- In a medium bowl, whisk together the flour, baking powder, and salt. Set aside.
- To the bowl of an electric mixer fitted with the paddle attachment, add the butter and sugar. Beat on medium until light and fluffy: about 3 minutes.
- Add the egg and vanilla extract. Beat for another 1-2 minutes to combine, scraping down the sides of the bowl as necessary.
- Add the flour mixture to the butter mixture in thirds. Start with your mixer on low, then increase speed to combine. Continue adding and mixing until all of the flour is incorporated.
- The dough will seem crumbly in the bowl. You'll know the dough is ready when it starts pulling away from the side of the bowl. Once the flour is mostly incorporated, add the peppermint crunch baking chips. Mix until just combined.
- Take half of the dough and roll it out onto a lightly floured surface. Roll out to 1/4 to 1/2 inch in thickness. Cut out your cookies into the desired shapes and place them onto an ungreased cookie sheet. Place the baking sheet of cookies into the freezer for about five minutes.
- Remove the baking sheet from the freezer and bake the cookies for 9-11 minutes. (The time will depend on the size and thickness of your cookies.)
- Allow the cookies to cool on the baking sheet for just about one minute. Then move the cookies to a wire rack to finish cooling.
- Meanwhile, prepare the royal icing.
- Add the confectioners' sugar and meringue powder to the bowl of a stand mixer. (You can also use a hand mixer.) Whisk to combine.
- With the mixer on low, add one tablespoon of warm water at a time. Once all six tablespoons have been added, add in the corn syrup.
- Continue to mix at low to medium speed adding more warm water, one tablespoon at a time, to achieve the desired consistency. The ideal consistency is something that is a bit thicker than corn syrup.*
- Divide the royal icing into three separate bowls. Add food coloring to each bowl to achieve the desired color. (I went with red, pink, and white. You can create as many or as few colors, as you'd like.)
- I highly recommend gel food color.** (I've linked the brand that I used, and love, in the notes section below.)
- Transfer the icing to a piping bag or piping bottle.*** (I've linked the bottles I used in the notes section below.)
- Pipe the colored icing onto the cookies first. Let it harden, then move on to the white icing. Finish up with any decorative details.
- Allow the icing to completely harden. Then, pack and store these cookies in an airtight container.
Min definitely didn’t look as good as yours, but they were so delicious. Loved the texture and flavor.
I’m certain they were beautiful! I’m glad you enjoyed them!
xo Michael
Doesn’t say temp for preheating the oven to bake cookies???