Thermos Gingerbread Cookies
This Post May Contain Affiliate Links. Please Read Our Disclosure Policy
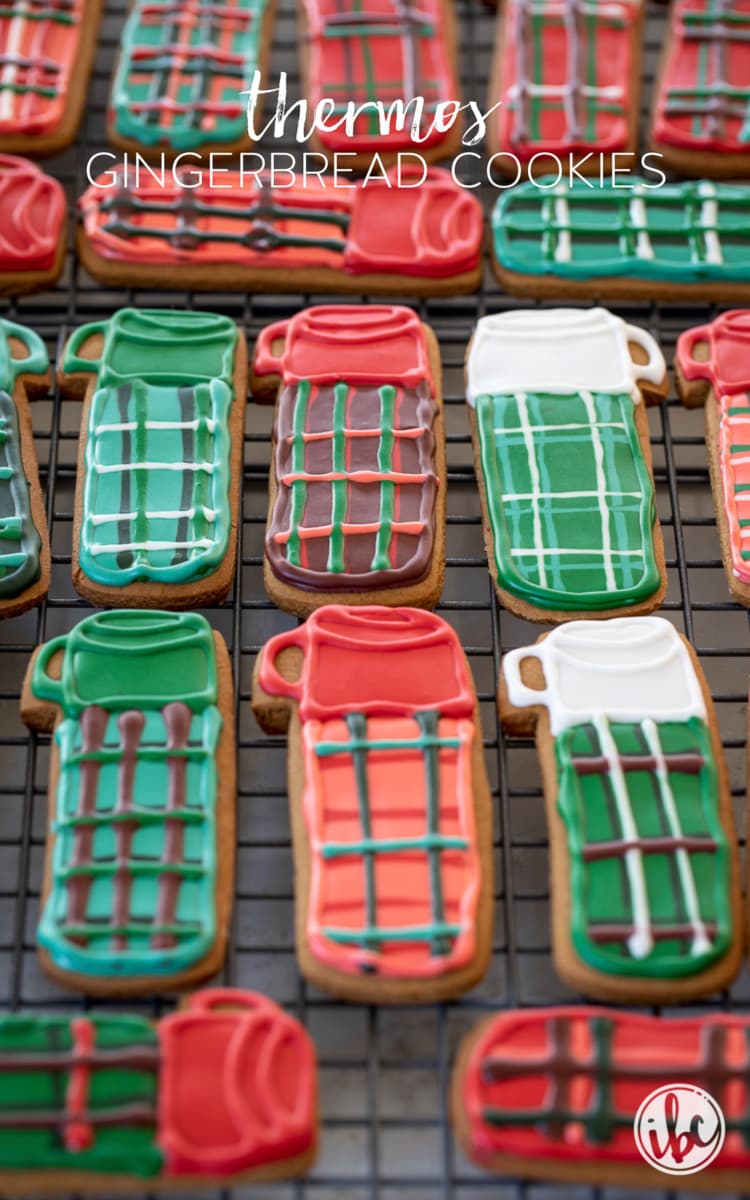
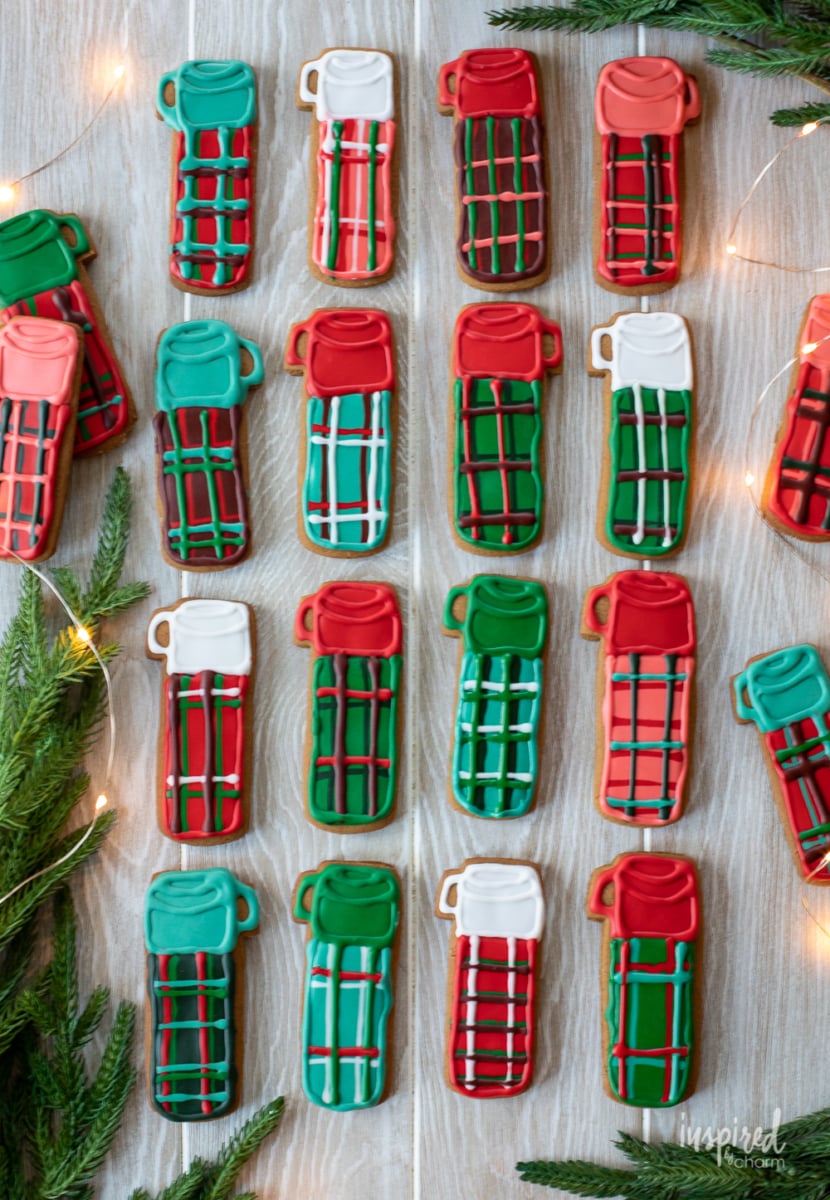
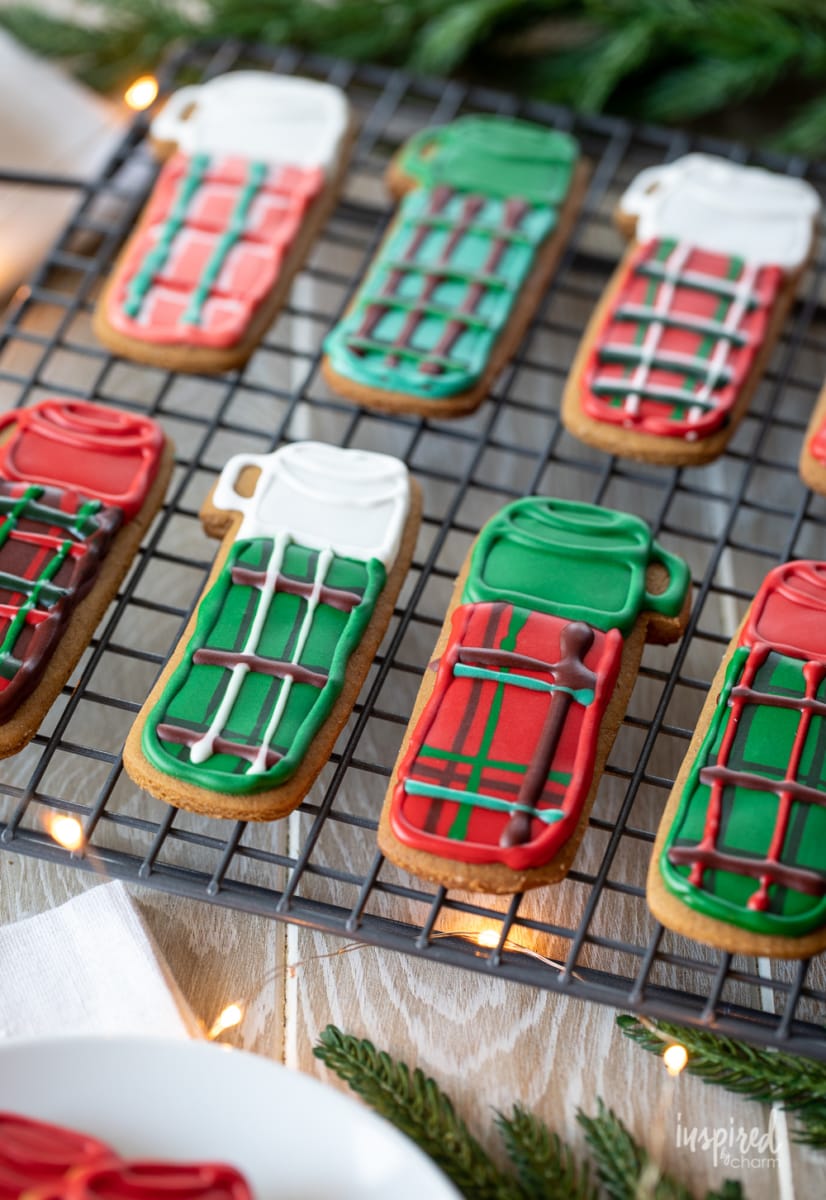
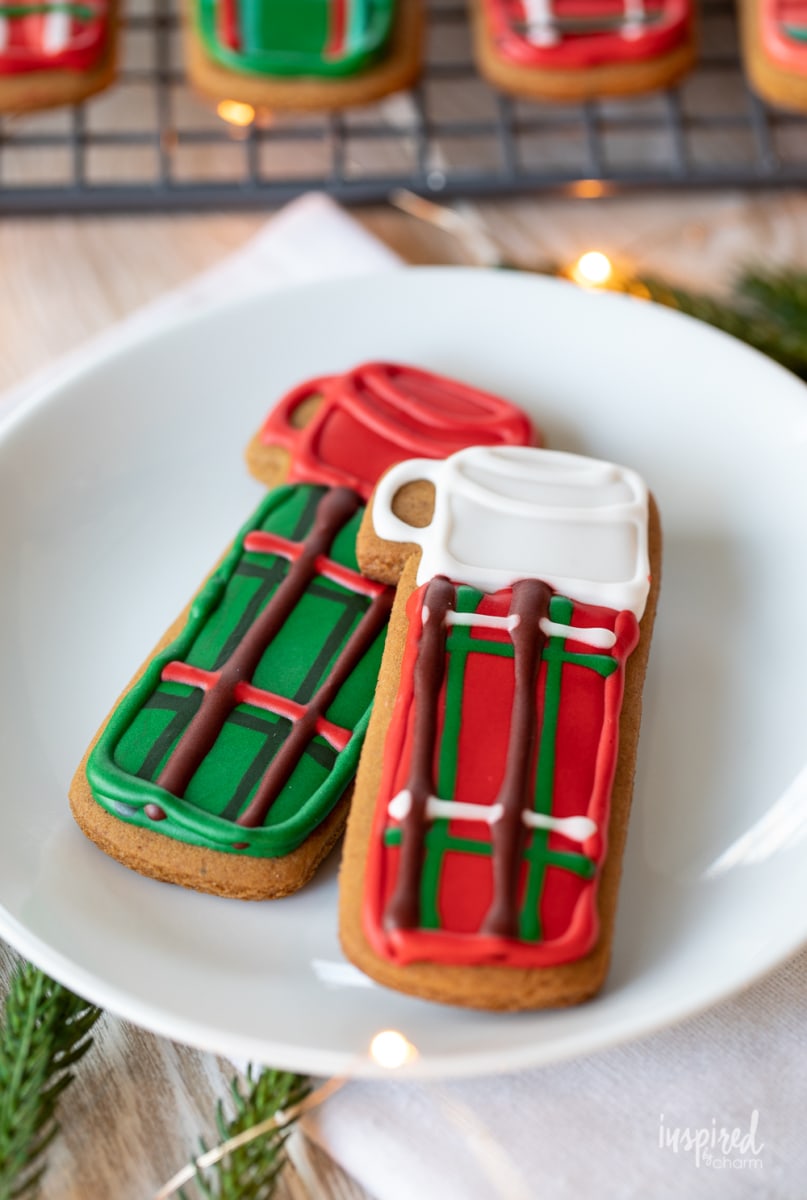
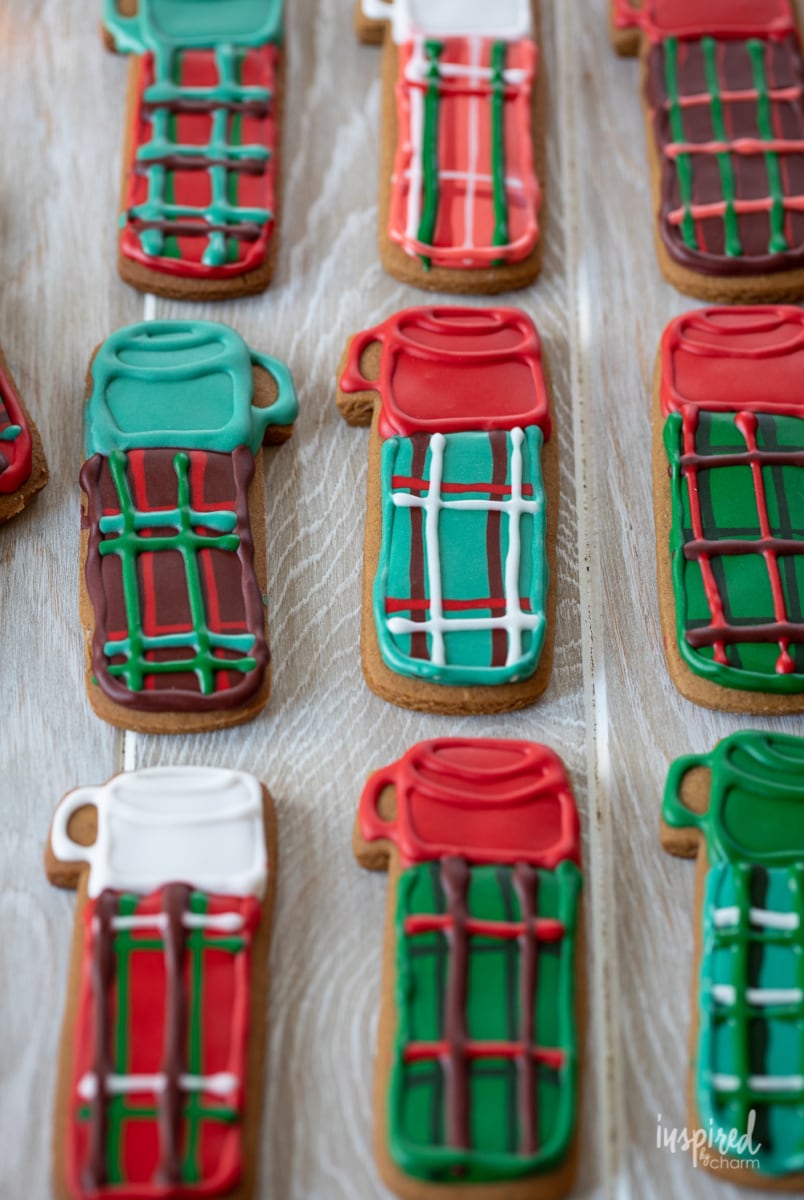
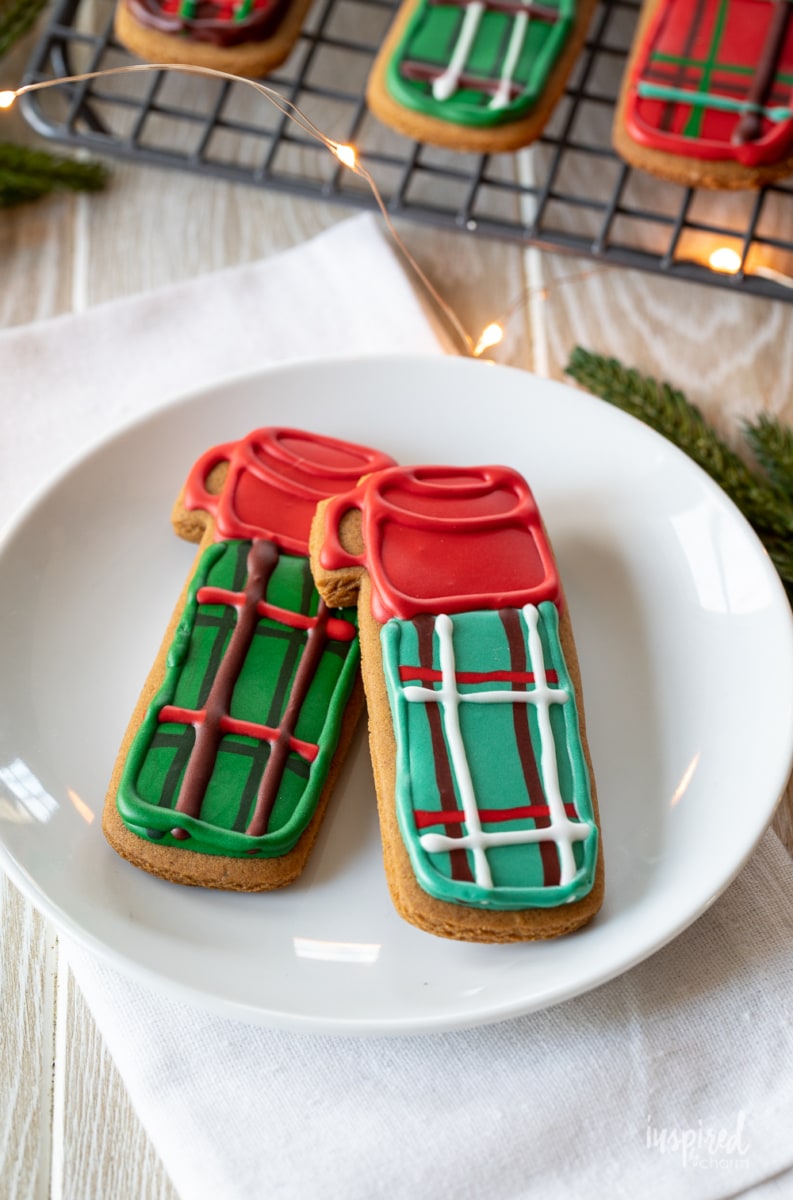
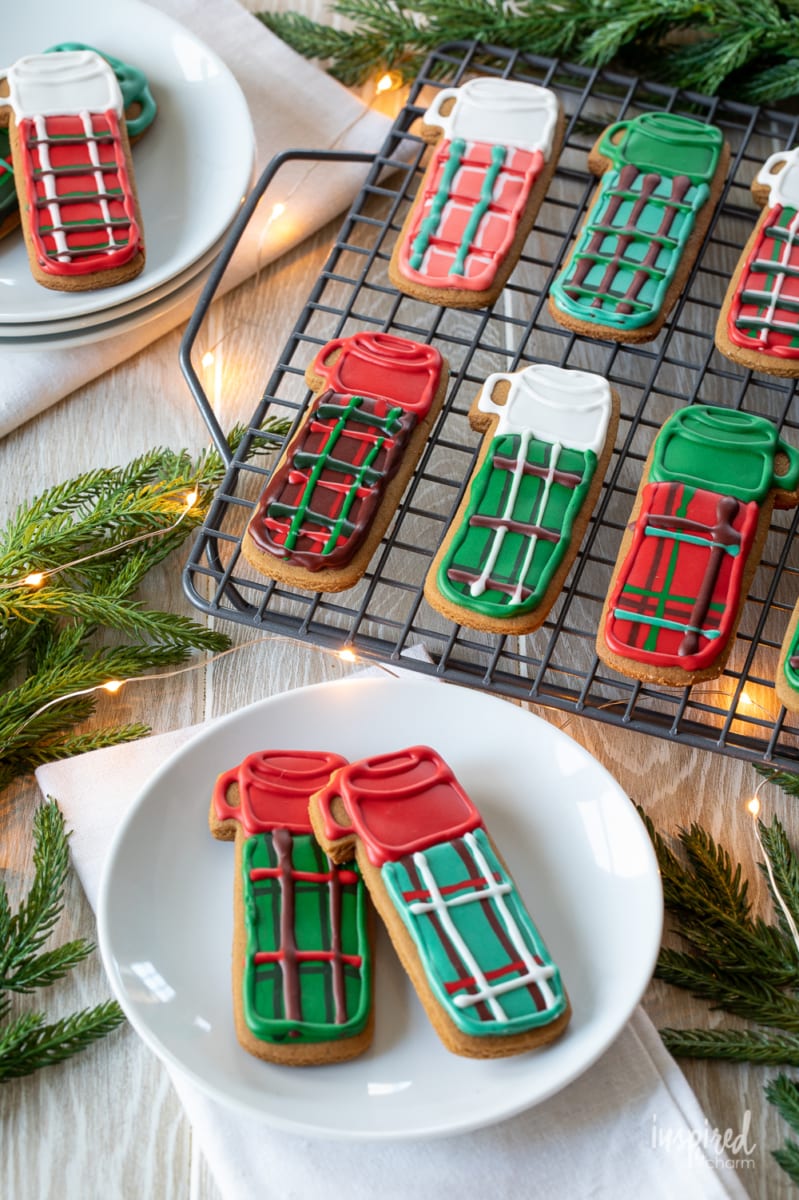
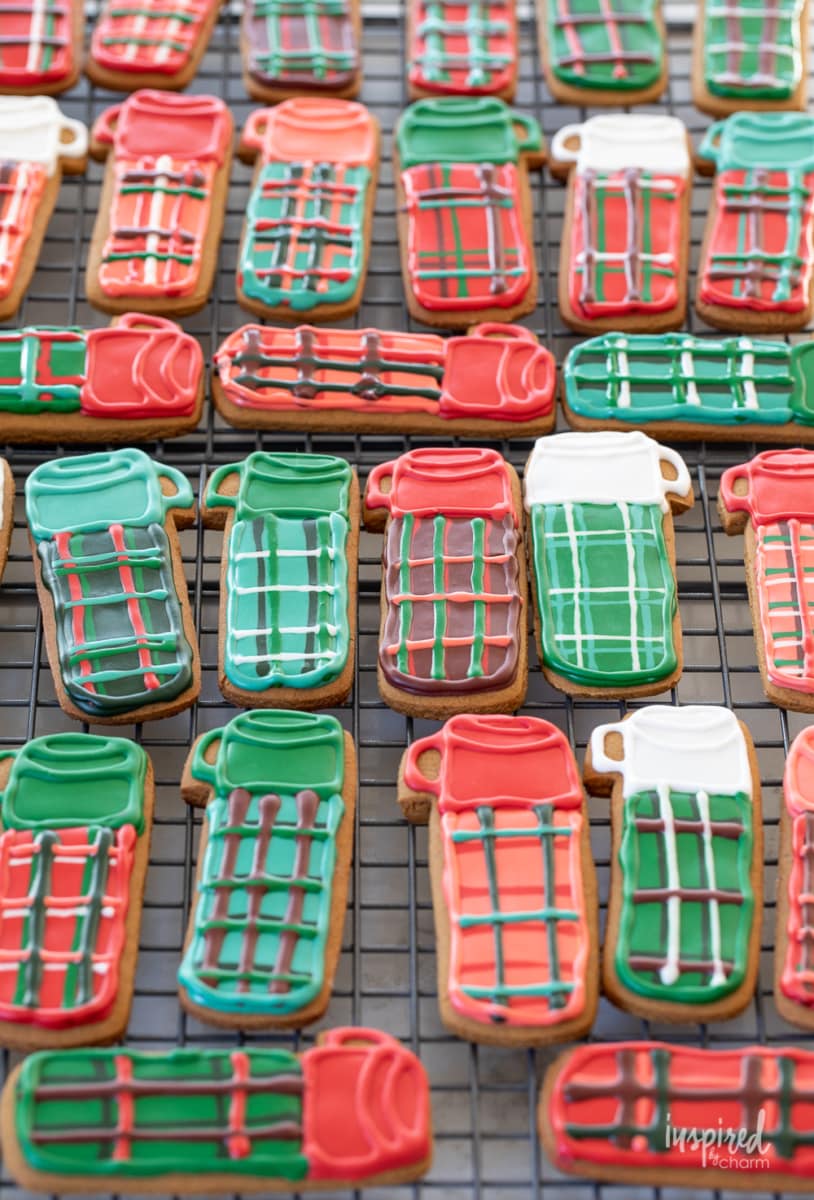
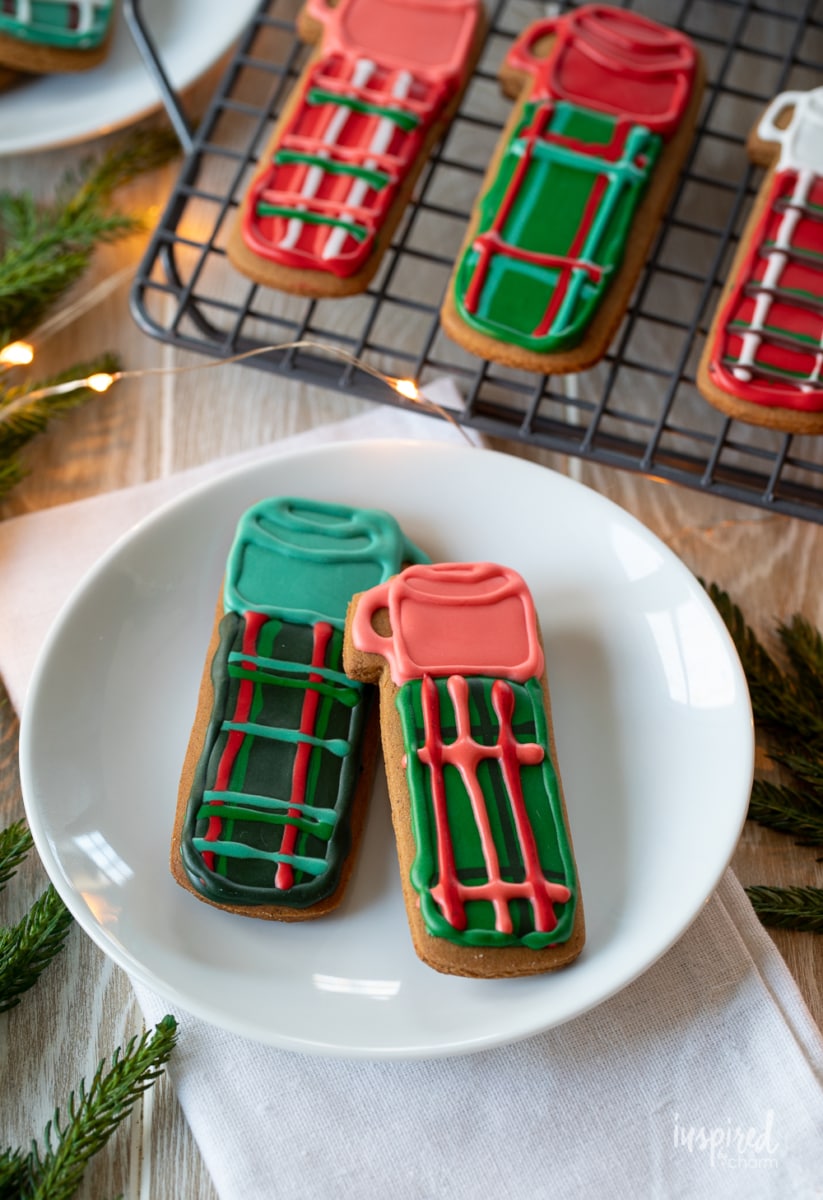
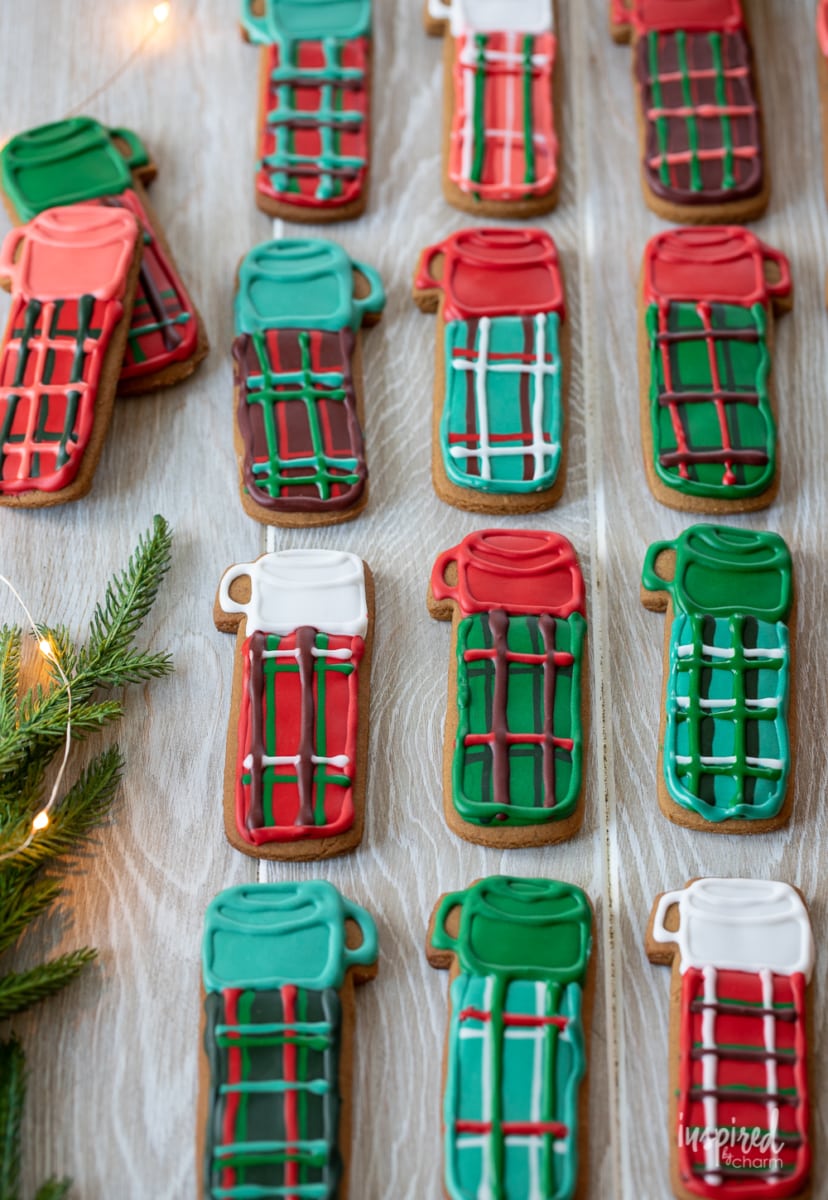
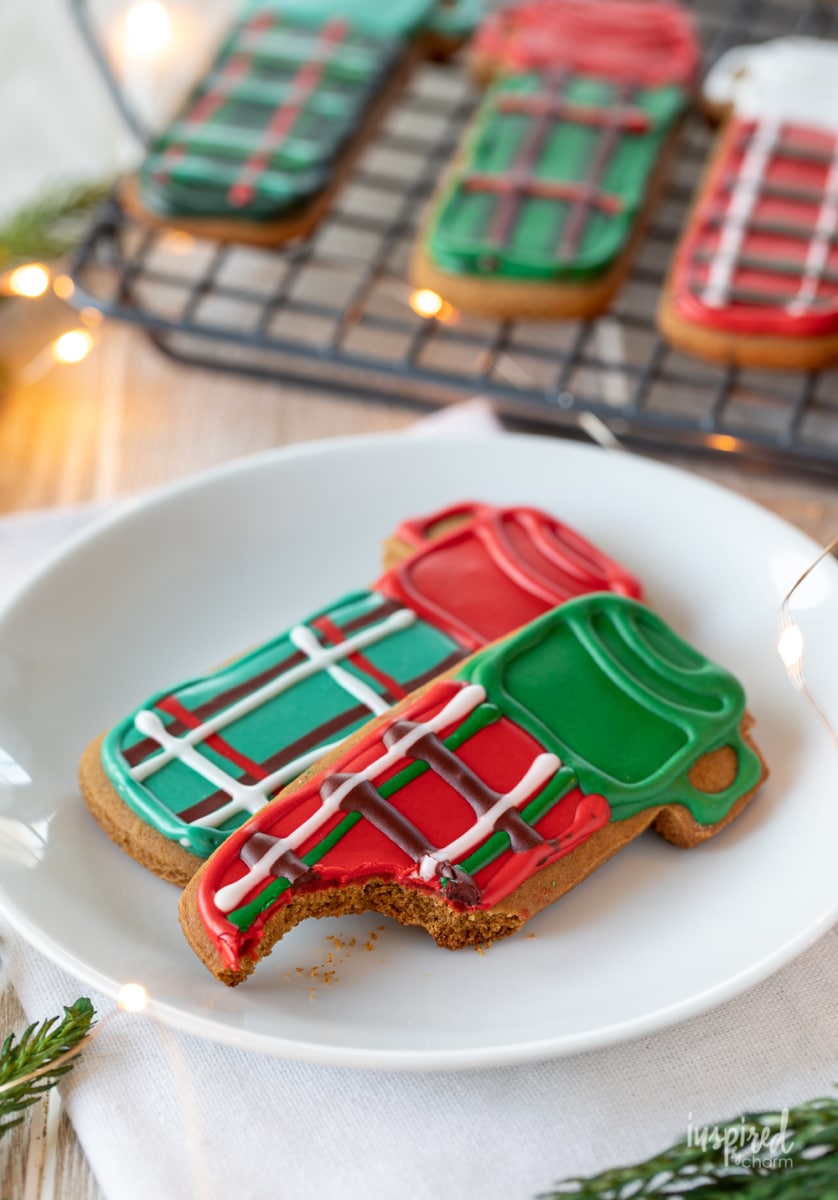
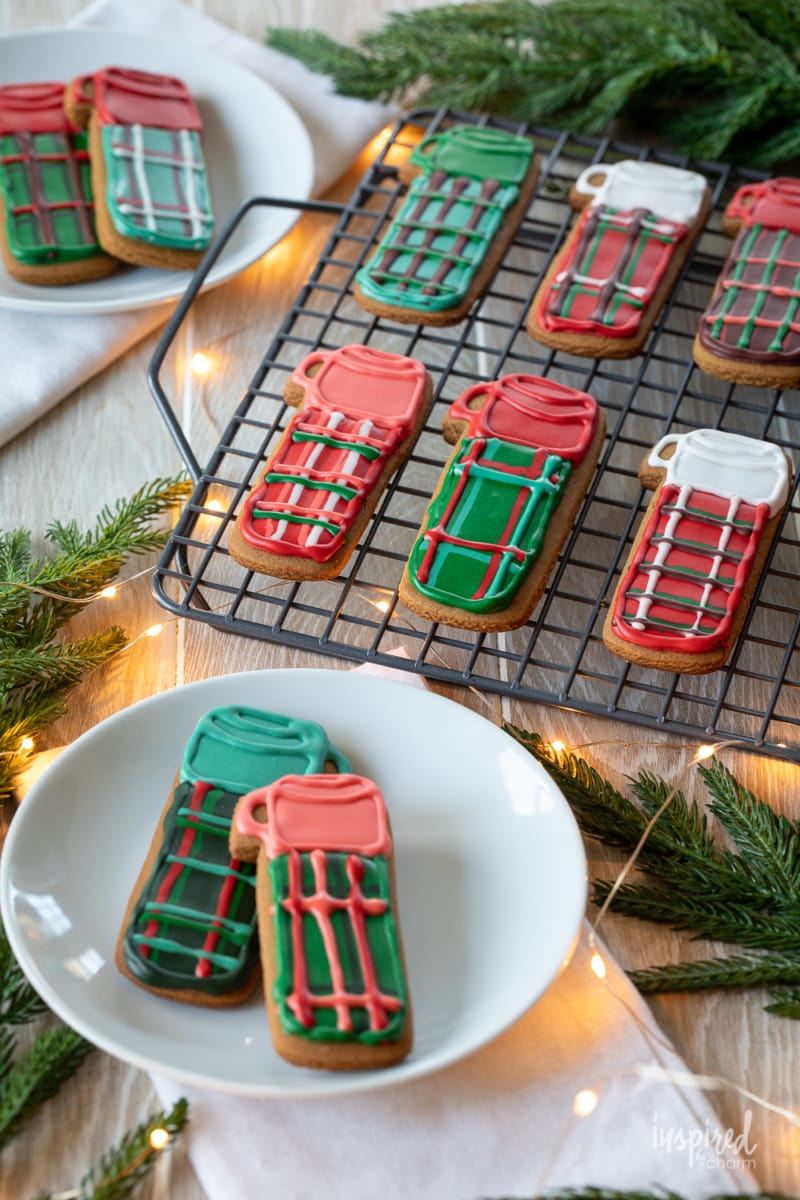
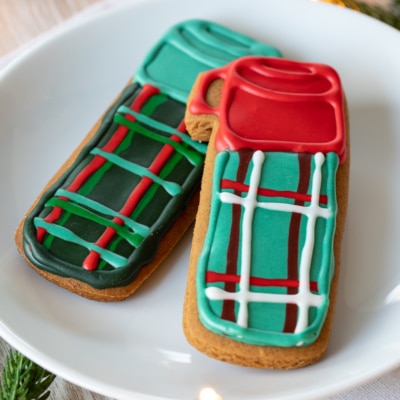
Inspired by vintage plaid thermoses, I’ve baked and decorated these jolly Thermos Gingerbread Cookies. Their unique decorative pattern and delicious gingerbread flavor will make them a star on your holiday cookie platter.
Thermos Gingerbread Cookies:
You might know that I have an infinity for vintage thermoses. I can’t help it, but the plaid and vintage vibes just make my heart happy. When I saw this thermos cookie cutter, I knew what had to be done: Thermos Gingerbread Cookies.
Last year, I dove into the art of piped cookie decorating and made these Christmas Tree Gingerbread Cookies and these Orange and Almond Mushroom Cookies.
There is definitely a skill and talent to this type of cookie decorating that I have yet to master, but I am having a ton of fun working up my skills with each new batch of cookies! It’s really an art. I will say that these Thermos Cookies are not by any means perfect, far from it actually. My lines are a bit wonky and thick and there are some drips and drizzles, but I love them just the same.
Every time I tackle a cookie such as these, I learn something new. Maybe after a few more attempts, I’ll be a pro! I suppose I’m just at that awkward stage where my vision does not match my skill level. Plus, there’s “charm” in the imperfections, right? (Pun intended.)
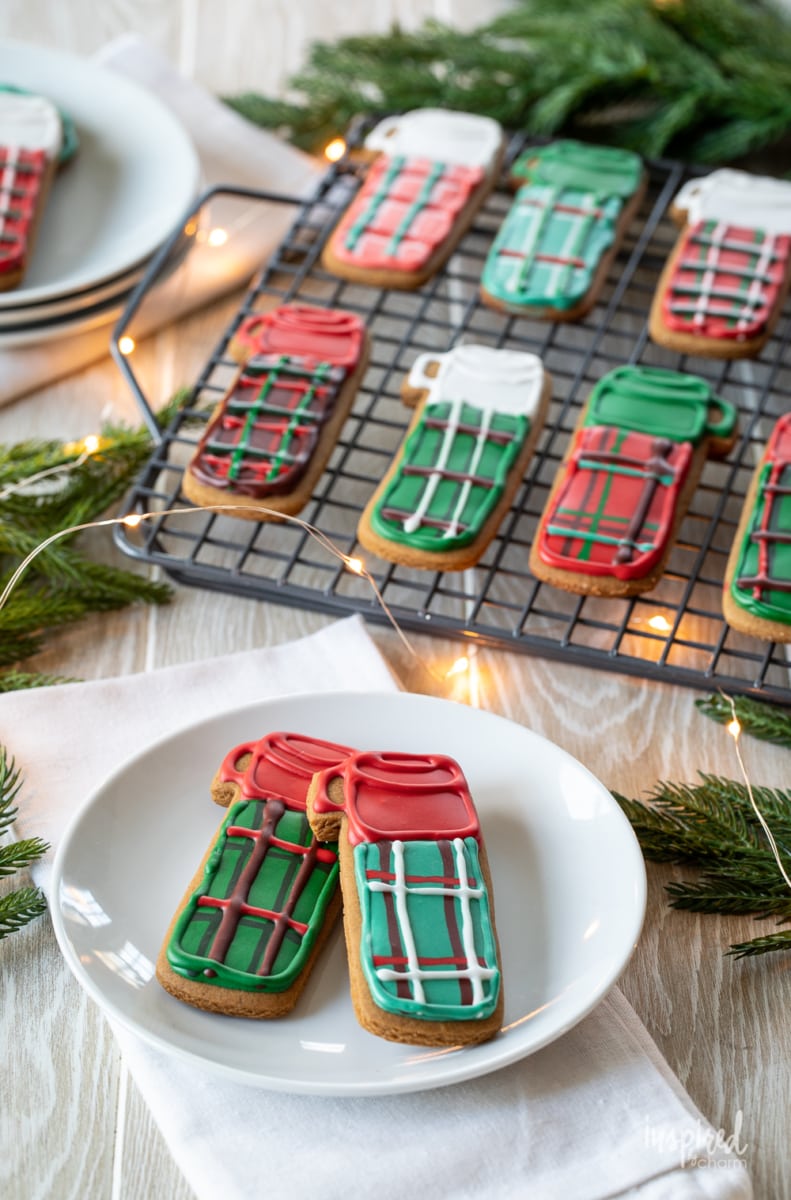
Regardless, they are still pretty darn cute and I’m so glad I took the time to make them. I certainly think they will be the standout on my Christmas cookie platter.
Speaking of Christmas cookies, I have an entire blog post dedicated to my favorite Christmas Cookie recipes. If you’re looking for some new festive and delicious recipes, you can find them all HERE.

I also need to say that I really love this gingerbread cookie recipe. (It’s the same one I used for my Christmas Tree Gingerbread Cookies last year.) It’s full of seasonal flavor that just feels like a holiday hug. So even if you don’t go the fancy piping route, just make a batch of these cookies and slather them with some frosting. You’ll be glad you did.
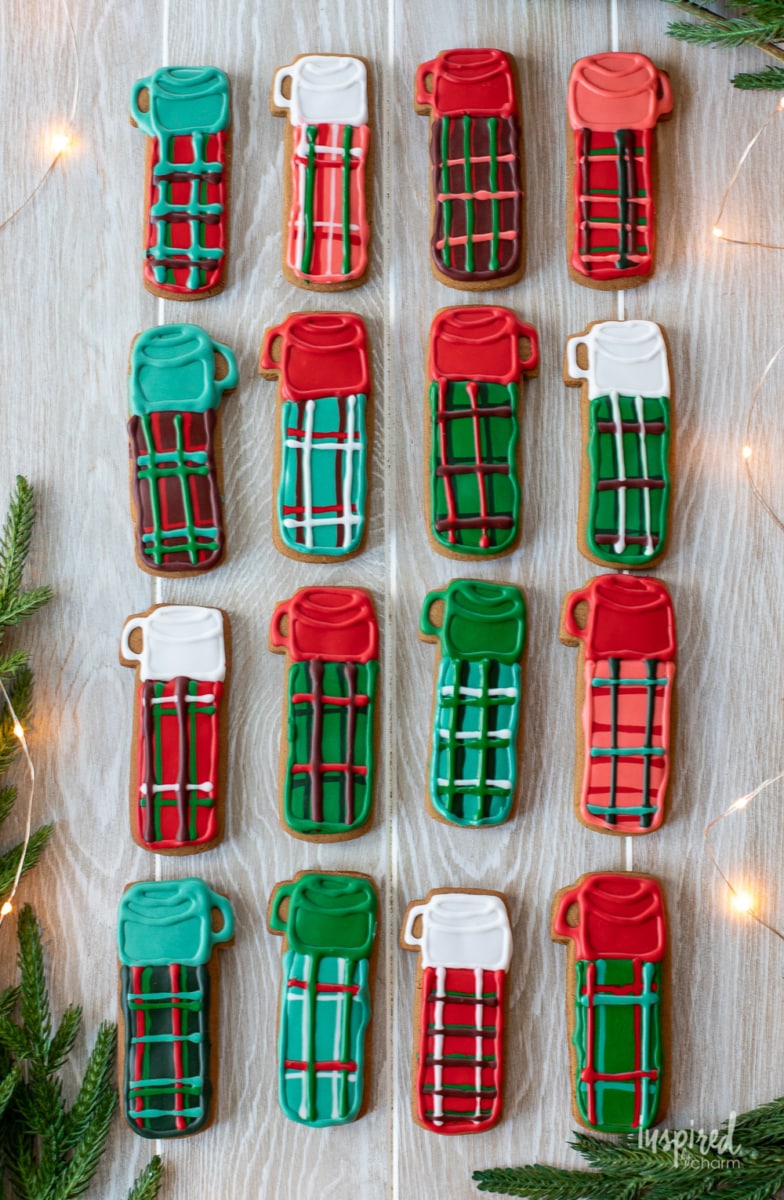
And if you do decide to go the extra mile and pipe the fancy decorations, one thing I will say is that these cookies take time. I think I spent about 6.5 hours from start to finish decorating approximately 3 dozen cookies. I know, I know, it’s a commitment! I just felt that this detail was worth noting before you get started.
Making royal icing is an art. Getting the perfect consistency for piping and filling is an acquired skill. I tried to provide the best direction below, but it ultimately just takes trial and error. Go into this with patience and do a few practice cookies to test things out. You’ve got this!
Okay, let’s make some Thermos Gingerbread Cookies!
Kitchen Tools I Recommend for This Recipe:
Whether you’re wondering what equipment you’ll need for this recipe, curious about my favorite utensils, or if you’re just looking to stock your own kitchen, these are the kitchen tools I recommend for this recipe:
Want more? You can find the list of My Ultimate Kitchen Essentials HERE.
How to make Thermos Gingerbread Cookies:
In a medium bowl, whisk together the flour, ginger, cinnamon, baking soda, cloves, and salt. Set aside.
In the large bowl of an electric mixer, cream together the butter and brown sugar for 3-4 minutes or until light and fluffy. Add the egg, molasses, and vanilla. Mix to combine.
Gradually add the dry ingredients to the wet ingredients. Mix to combine. Cover and refrigerate the dough overnight or for at least 4 hours.
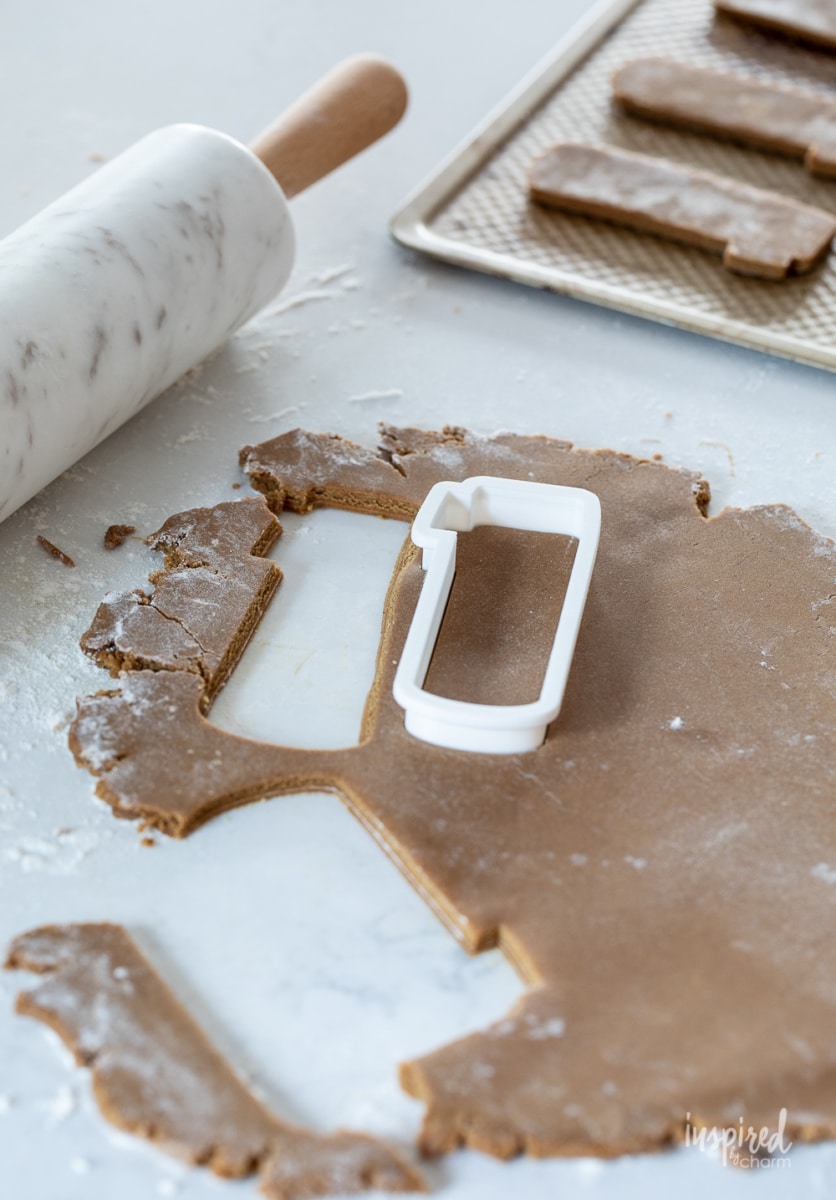
Preheat the oven to 350 degrees F. Divide the chilled dough in two. On a lightly floured surface, roll out half of the dough so it is about 1/4 to 1/2-inch thick. Cut out desired shapes with cookie cutters. Place the shapes about 1-inch apart on a cookie sheet. Place the baking sheet of cookies into the freezer for about five minutes.
💌 SAVE THIS POST / RECIPE!
Remove the cookies from the freezer and bake for 9-11 minutes or until the edges of the cookies barely start to brown. Cool for 30-60 seconds on the cookie sheet. Then, transfer the cookies to cooling racks to cool completely.
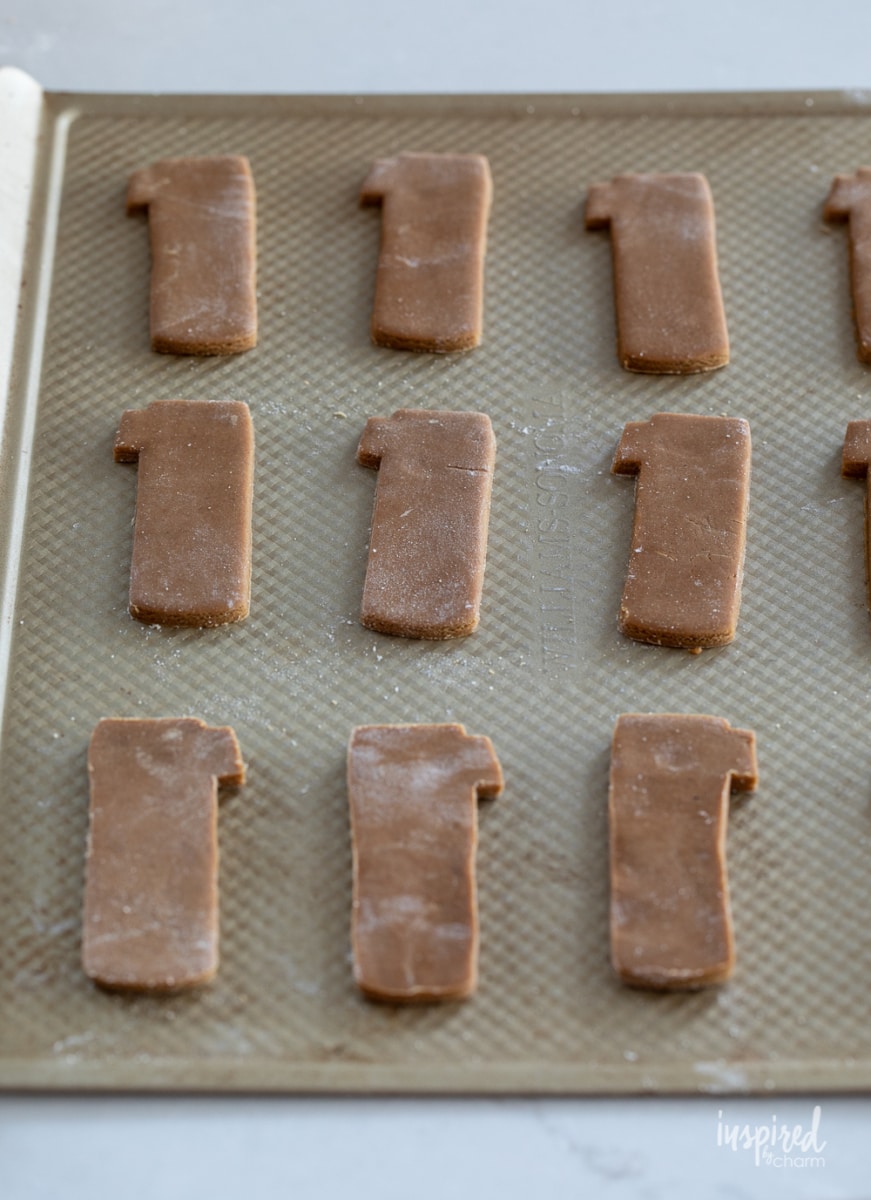
Repeat with the remaining dough.

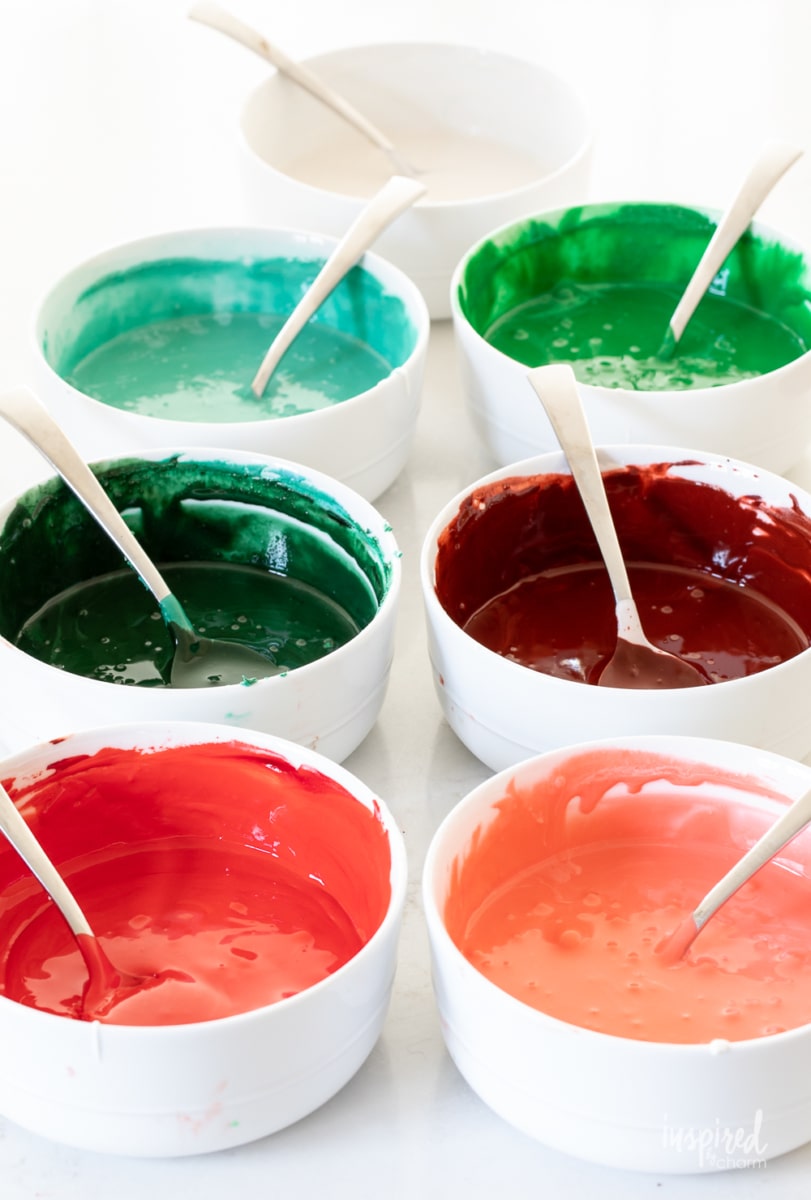
While the cookies cool, prepare the royal icing.
Add the confectioners’ sugar and meringue powder to the bowl of a stand mixer. (You can also use a hand mixer.) Whisk to combine.
With the mixer on low, add one tablespoon of warm water at a time. Once all six tablespoons have been added, pour in the corn syrup.
Continue to mix at low to medium speed adding more warm water, one tablespoon at a time, to achieve the desired consistency. The ideal consistency is something that is a bit thicker than corn syrup.
(Making “proper” royal icing takes time and practice. You need to get a feel for it to know the consistency you need. It took me 30 minutes to figure it out and I still needed to adjust things. Have patience and take your time.)
Decide how many colors you are going to use and divide the icing into that many bowls. Add food coloring to each of the bowls to achieve the desired colors. I highly recommend using gel food coloring. THIS gel coloring is my favorite.
Transfer the icing to a piping bag or piping bottle. (You can find the bottles I used HERE.)
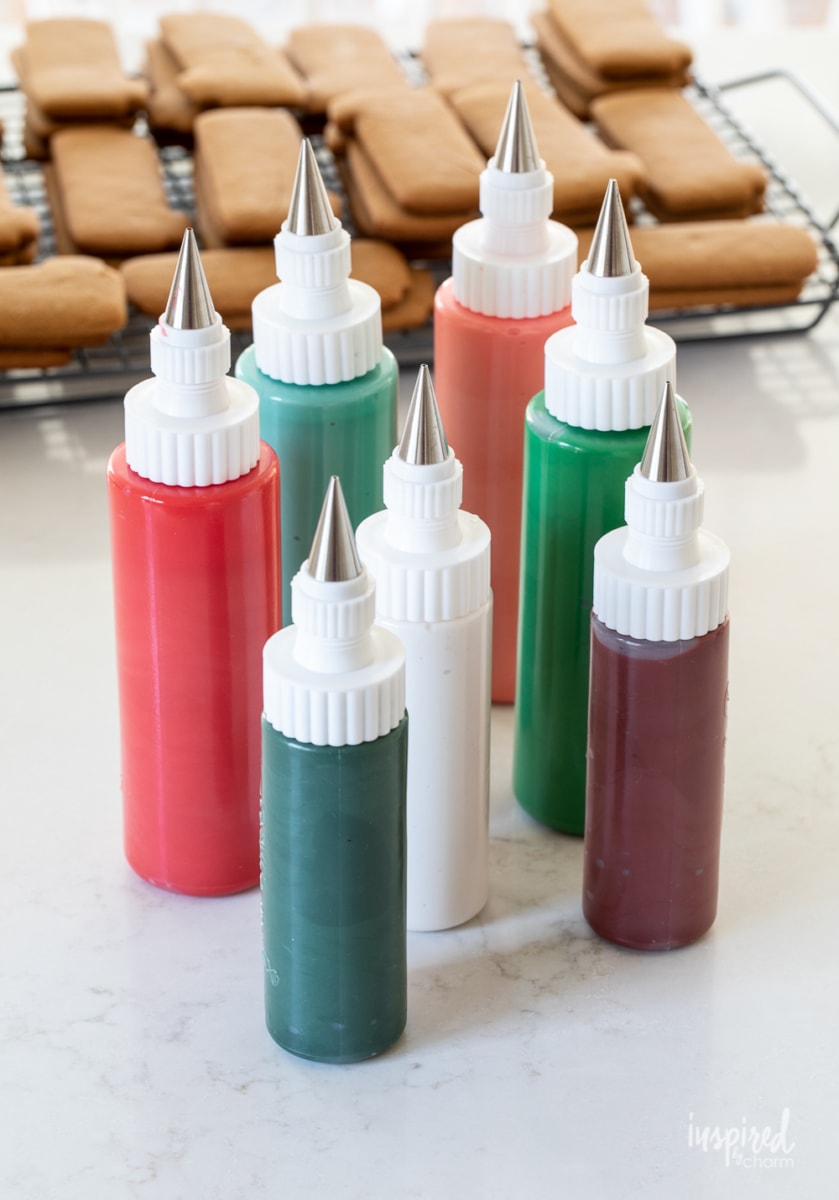
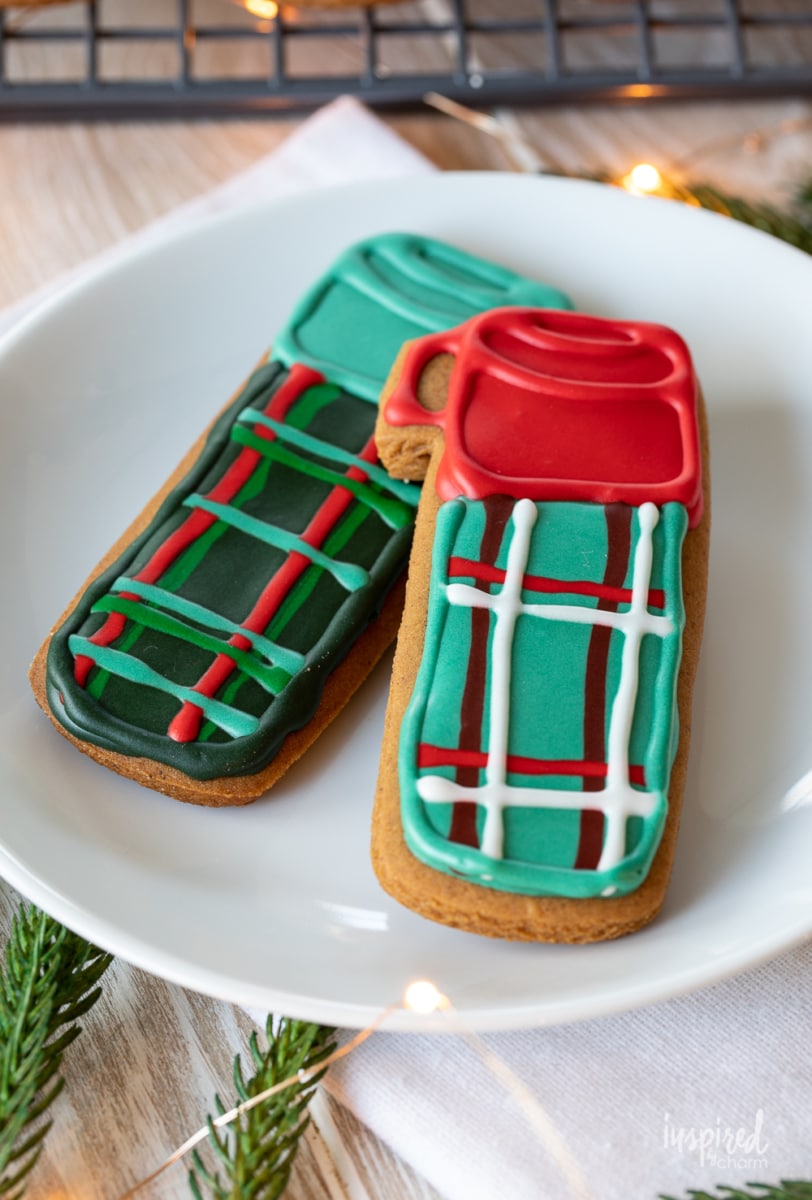
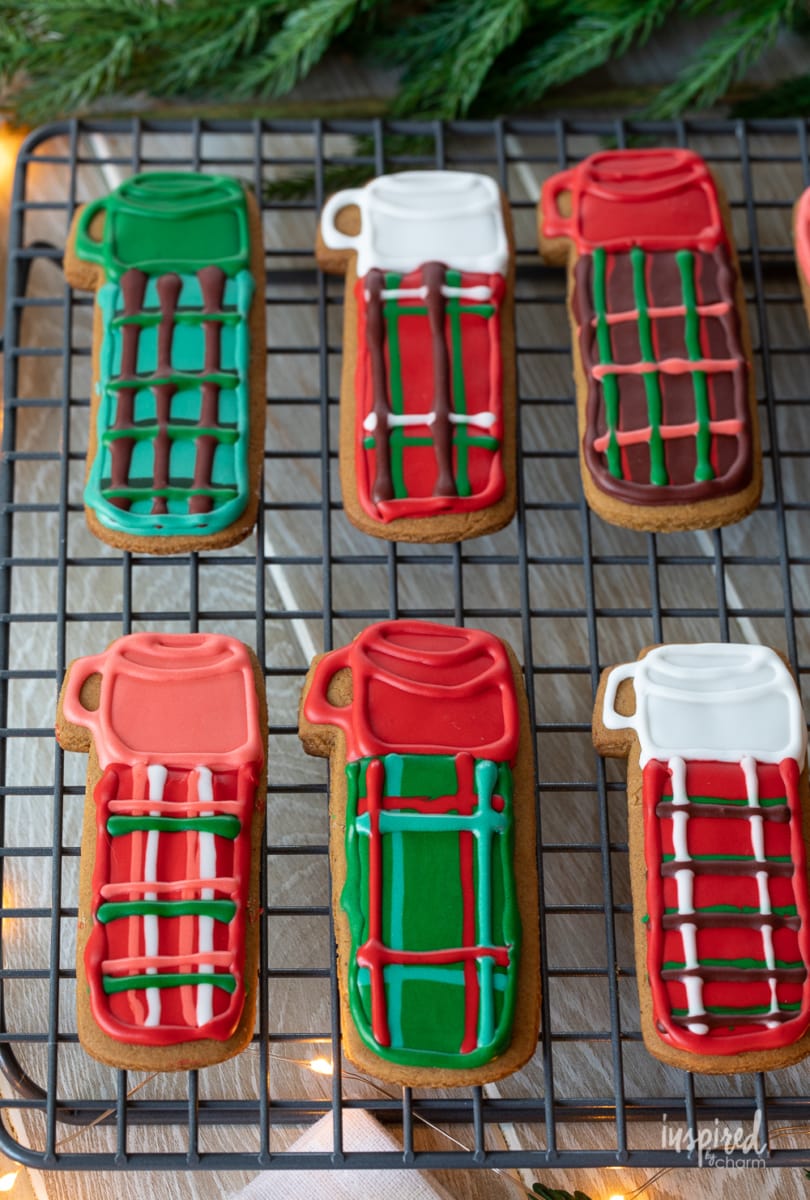
Now you’re ready to pipe. I piped all the thermos tops first, then did the bases. For the stripes, I added some when the first layer was still wet. Then I added on more stripes once that layer was set. You can do whatever you like best. I recommend practicing on a couple of cookies first.
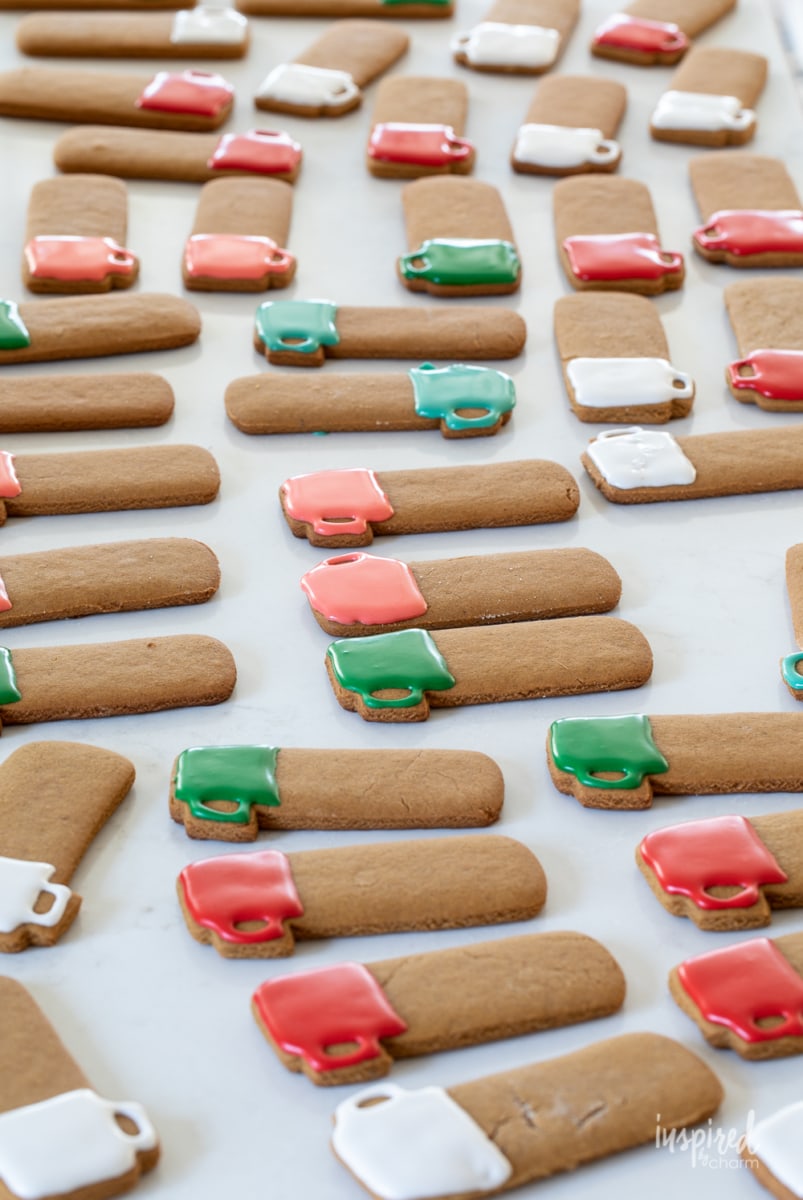
To finish off the thermos design, I piped an edge around the lid and base in the same color respectively.

Allow the icing to completely harden. Then, pack and store these cookies in an airtight container.
And that is it, my friends. Your adorable vintage-inspired Thermos Gingerbread Cookies are complete and ready to add a little color and seasonal flavor to your Christmas cookie trays!
I hope you enjoy making them as much as I did.
Happy Holiday Baking! (Oh, and sorry not sorry for all the photos. I couldn’t help myself. Ha!)
Love this Recipe and Want More?
Join the IBC Mailing List to get all of my recipes, projects, and ideas sent straight to your inbox! I hope you’ll also join me on social media for daily updates and behind-the-scenes looks at my work and adventures.
Connect with Michael! Instagram // Facebook // Pinterest // Twitter
Have you tried this recipe? Follow me on Instagram, then share YOUR dish with #myIBC and tag @inspiredbycharm. It’s fun to see how folks are using recipes from IBC.
Thermos Gingerbread Cookie Recipe:
Thermos Gingerbread Cookies
Equipment
Ingredients
Gingerbread Cookies:
- 4 cups all-purpose flour
- 2 teaspoons ground ginger
- 2 teaspoons cinnamon
- 1 1/2 teaspoons baking soda
- 1/2 teaspoon ground cloves
- 1/2 teaspoon salt
- 3/4 cup butter softened
- 1 cup packed brown sugar
- 1 egg
- 3/4 cup molasses
- 1/2 teaspoon vanilla extract
Royal Icing:
- 4 cups confectioners' sugar
- 3 tablespoons meringue powder
- 6 tablespoons warm water to start, plus 4-6 more
- 1 tablespoon corn syrup
- various colors of gel food coloring
Instructions
- In a medium bowl, whisk together the flour, ginger, cinnamon, baking soda, cloves, and salt. Set aside.
- In the large bowl of an electric mixer, cream together the butter and brown sugar for 3-4 minutes or until light and fluffy. Add the egg, molasses, and vanilla. Mix to combine.
- Gradually add the dry ingredients to the wet ingredients. Mix to combine. Cover and refrigerate the dough overnight or for at least 4 hours.
- Preheat the oven to 350 degrees F. Divide the chilled dough in two. On a lightly floured surface, roll out half of the dough so it is about 1/4 to 1/2-inch thick. Cut out desired shapes with cookie cutters. Place the shapes about 1 inch apart on a cookie sheet. Place the baking sheet of cookies into the freezer for about five minutes.
- Remove the cookies from the freezer and bake for 9-11 minutes or until the edges of the cookies barely start to brown. Cool for 30-60 seconds on the cookie sheet. Then, transfer the cookies to cooling racks to cool completely.
- Repeat with the remaining dough.
- While the cookies cool, prepare the royal icing. Add the confectioners' sugar and meringue powder to the bowl of a stand mixer. (You can also use a hand mixer.) Whisk to combine.
- With the mixer on low, add one tablespoon of warm water at a time. Once all six tablespoons have been added, pour in the corn syrup.
- Continue to mix at low to medium speed adding more warm water, one tablespoon at a time, to achieve the desired consistency. The ideal consistency is something that is a bit thicker than corn syrup.*
- Decide how many colors you are going to use and divide the icing into that many bowls. Add food coloring to each of the bowls to achieve the desired colors.
- Transfer the icing to a piping bag or piping bottle.** (I've linked the bottles I used in the notes section below.)
- Now you're ready to pipe. I piped all the thermos tops first, then did the bases. For the stripes, I added some when the first layers were still wet. Then, I added on more stripes once that layer was set. You can do whatever you like best. I recommend practicing on a couple of cookies first.
- To finish off the thermos design, I piped an edge around the lid and base in the same color respectively.
- Allow the icing to completely harden. Then, pack and store these cookies in an airtight container.
I made your gingerbread tree cookies last year and they were a winner. Mine didn’t look as goods yours, but we loved them just the same. These are next level. Wow!