Living Room Cabinetry Reveal
This Post May Contain Affiliate Links. Please Read Our Disclosure PolicyIt’s an exciting day! I’m thrilled to share my new living room cabinetry and updated fireplace and mantel.
Living Room Cabinetry Reveal
As I mentioned back in September when I shared the design plan for this renovation, I have been itching to update the cabinetry and mantel in my living room since the day I moved into this home two years ago. Well, that day has finally come and I couldn’t be more pleased with the results.
Before we get to the after, let’s start with the before. Here’s where I started:
Now, I realize this situation wasn’t terrible, but a couple things bothered me. Here’s a little recap of what I mentioned before:
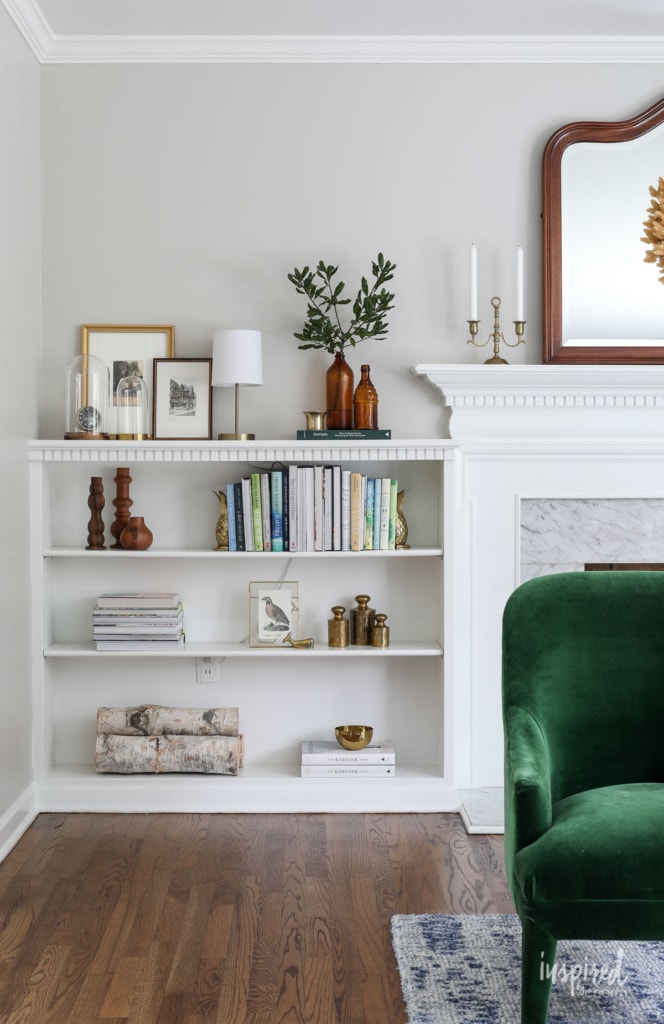
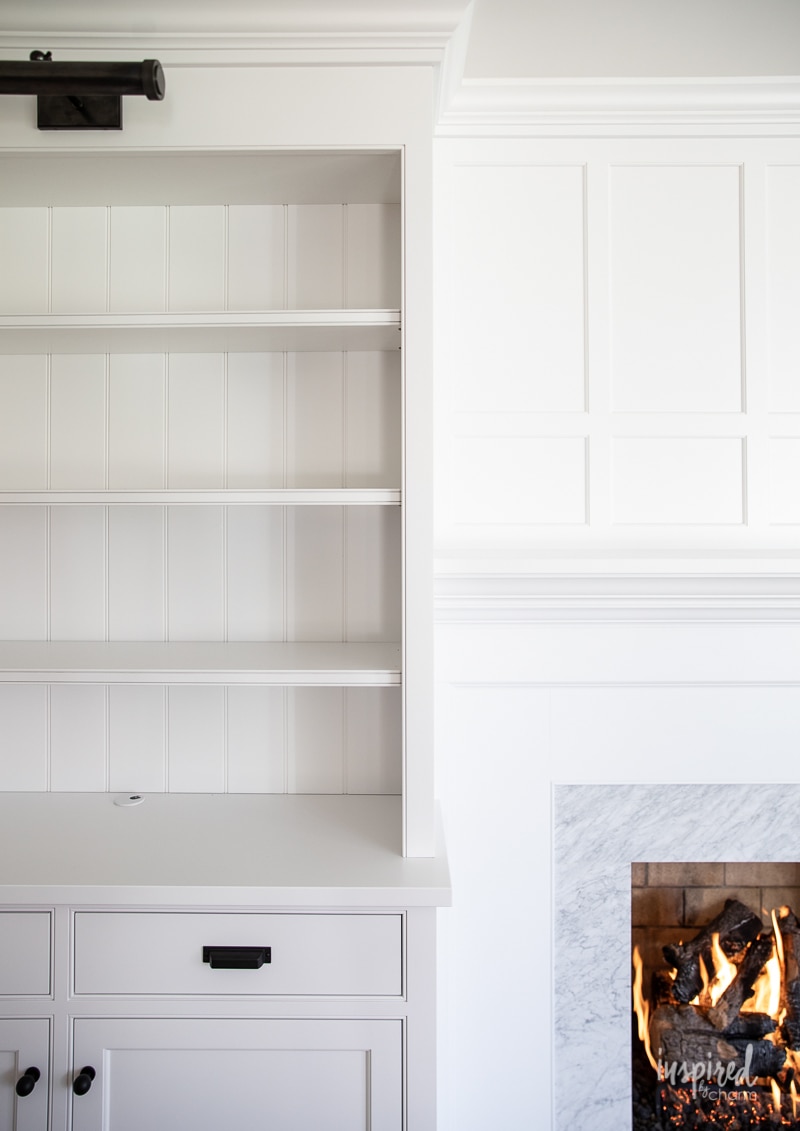
- The shelves in the bookcases are only 8 inches deep so they aren’t practical for book storage. (At least half of the books I own won’t fit on the shelves without hanging off the edge.)
- I don’t love the mantel. I’m not a fan of the dentil molding, and like the bookcases, the mantel is narrow, making it hard to style.
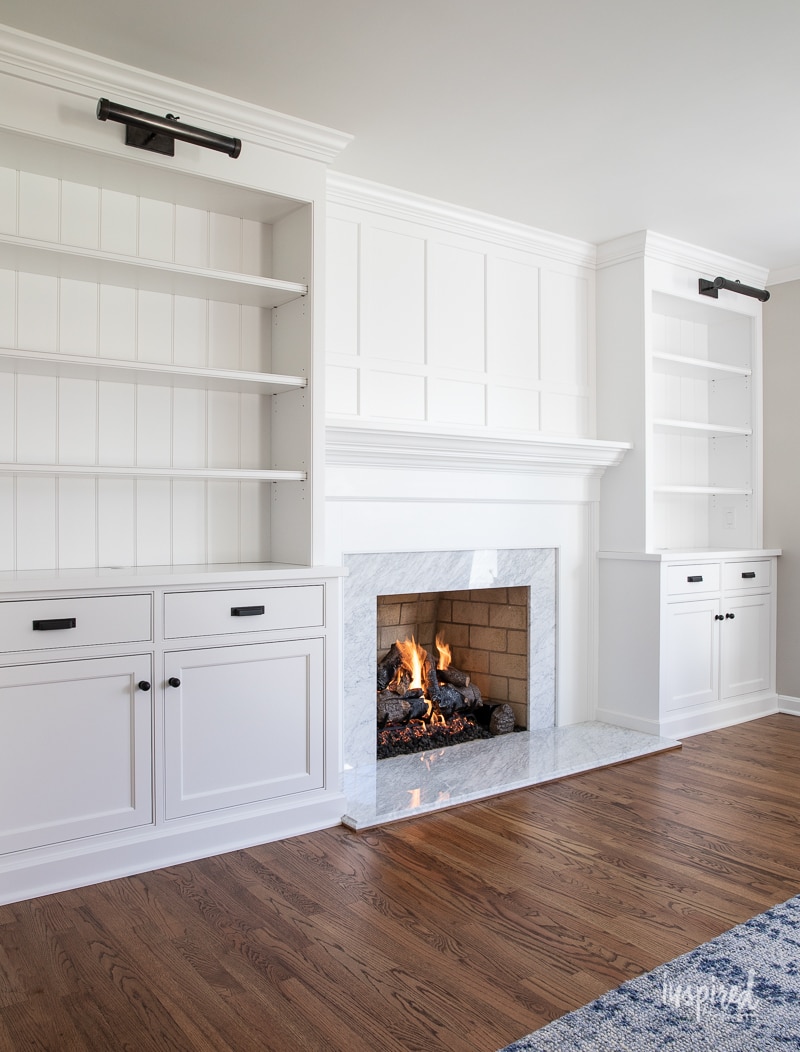
- Because I have two other wood-burning fireplaces in my home, I’d love to have gas-burning logs in the living room so I can have a fire with the flip of a switch and no sooty mess to clean up.
- With the new cabinetry in my kitchen and entryway, the existing fireplace and bookcases in the living room feel dated. New cabinetry would elevate the entire room.
Okay, so now you’re all caught up on where I started. Let’s take a look at the after!
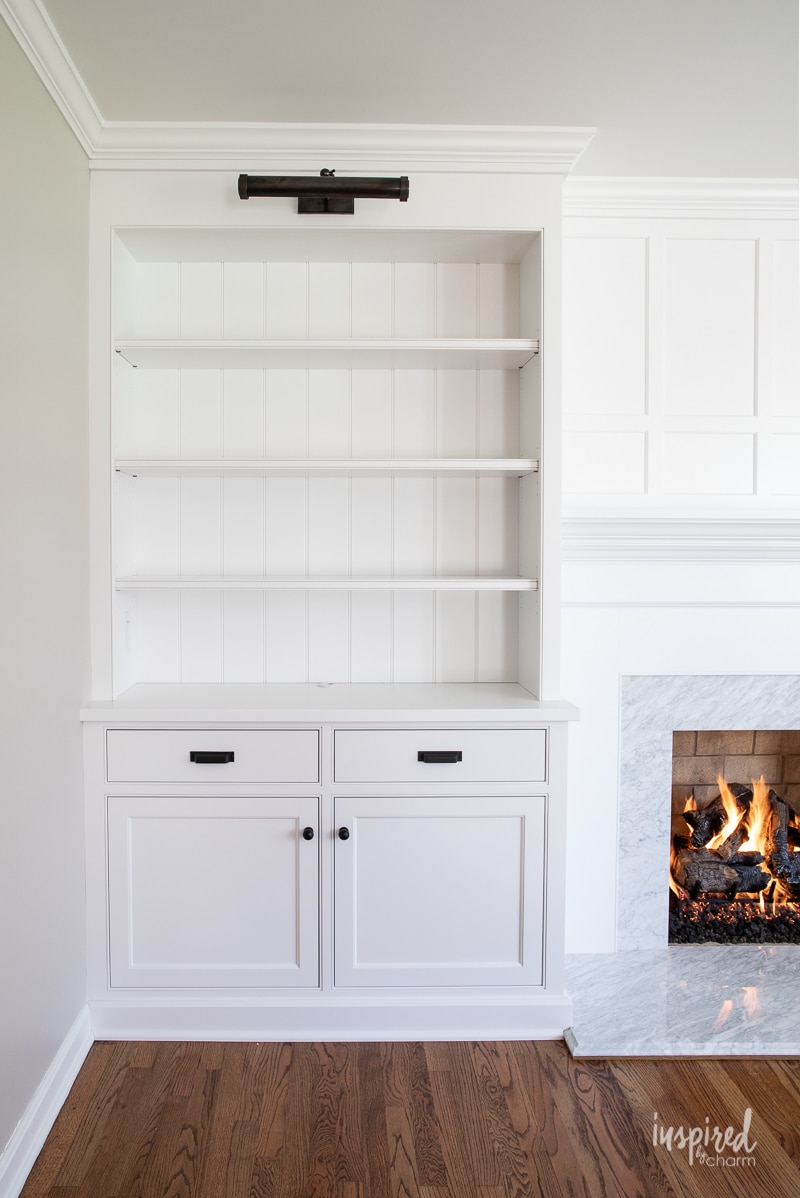
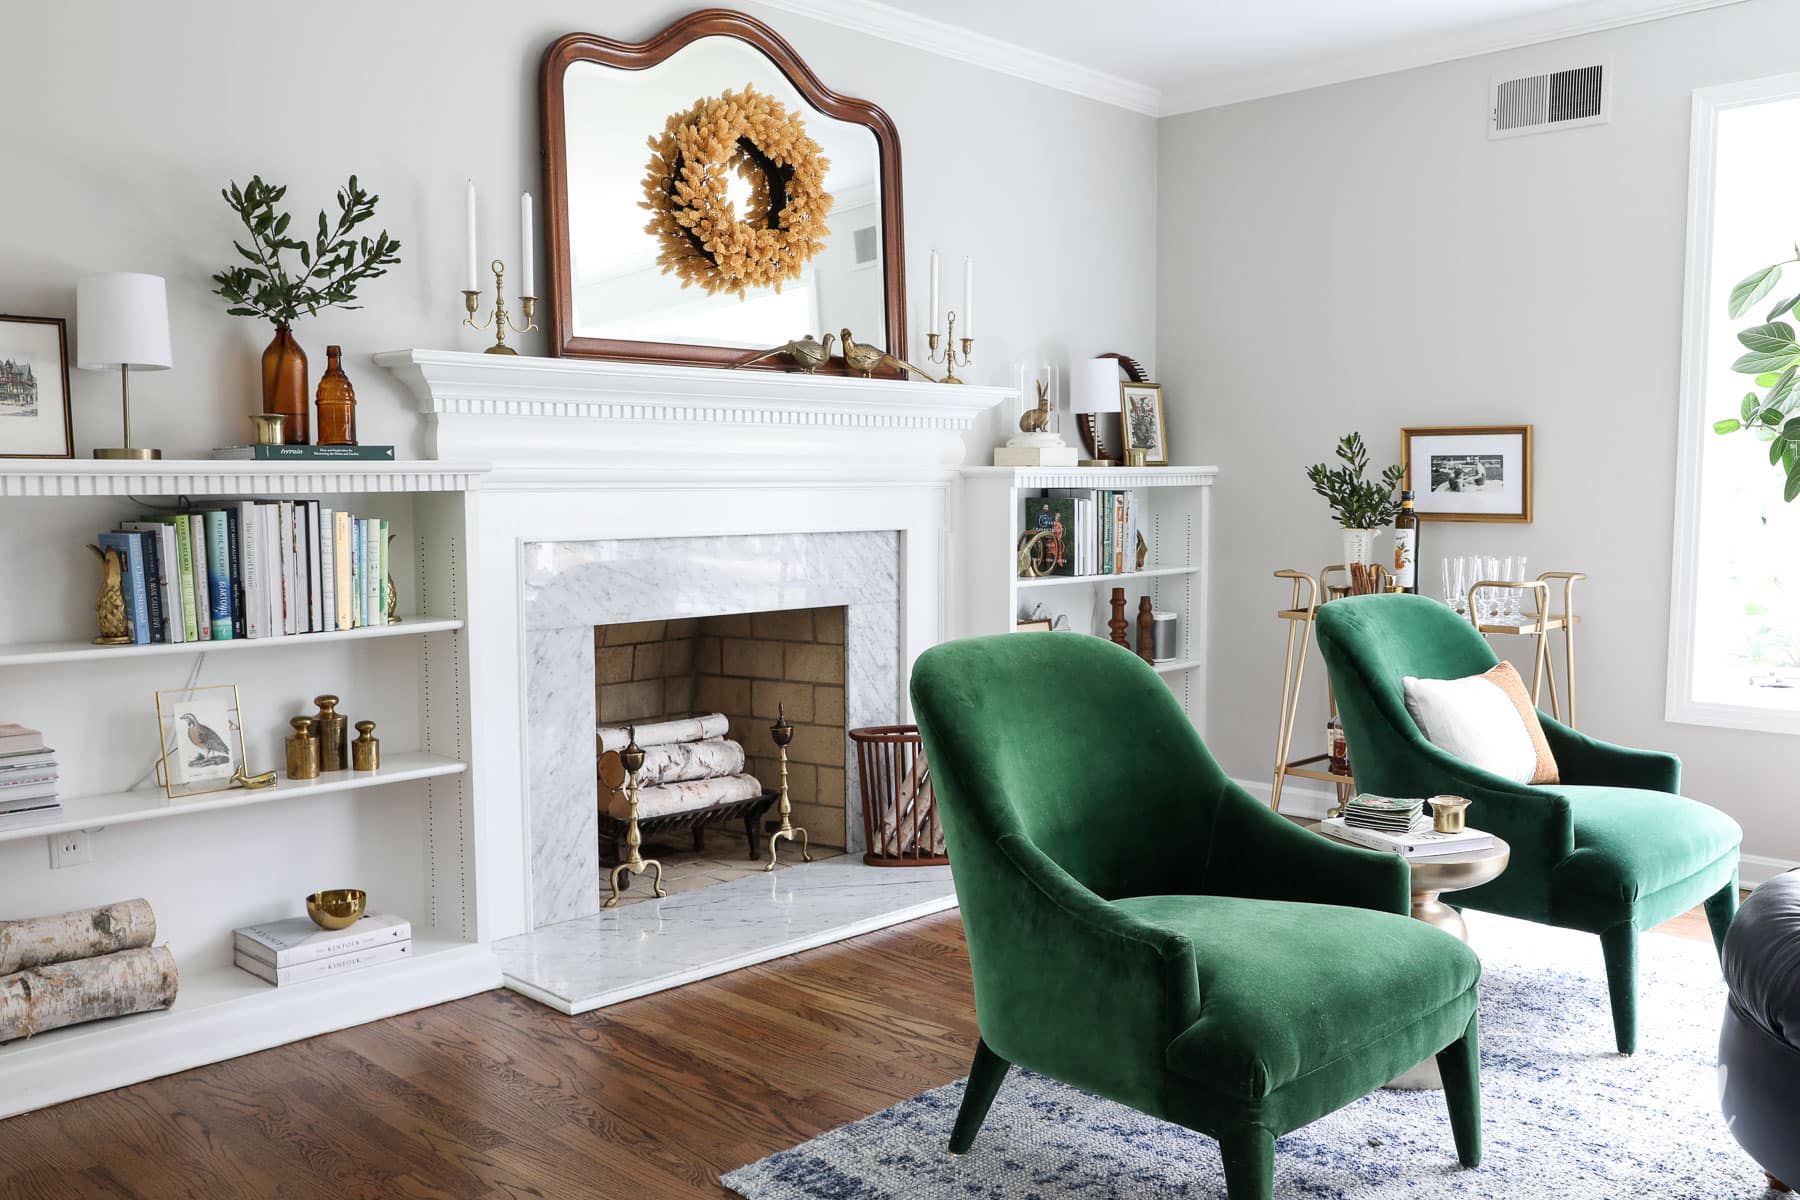
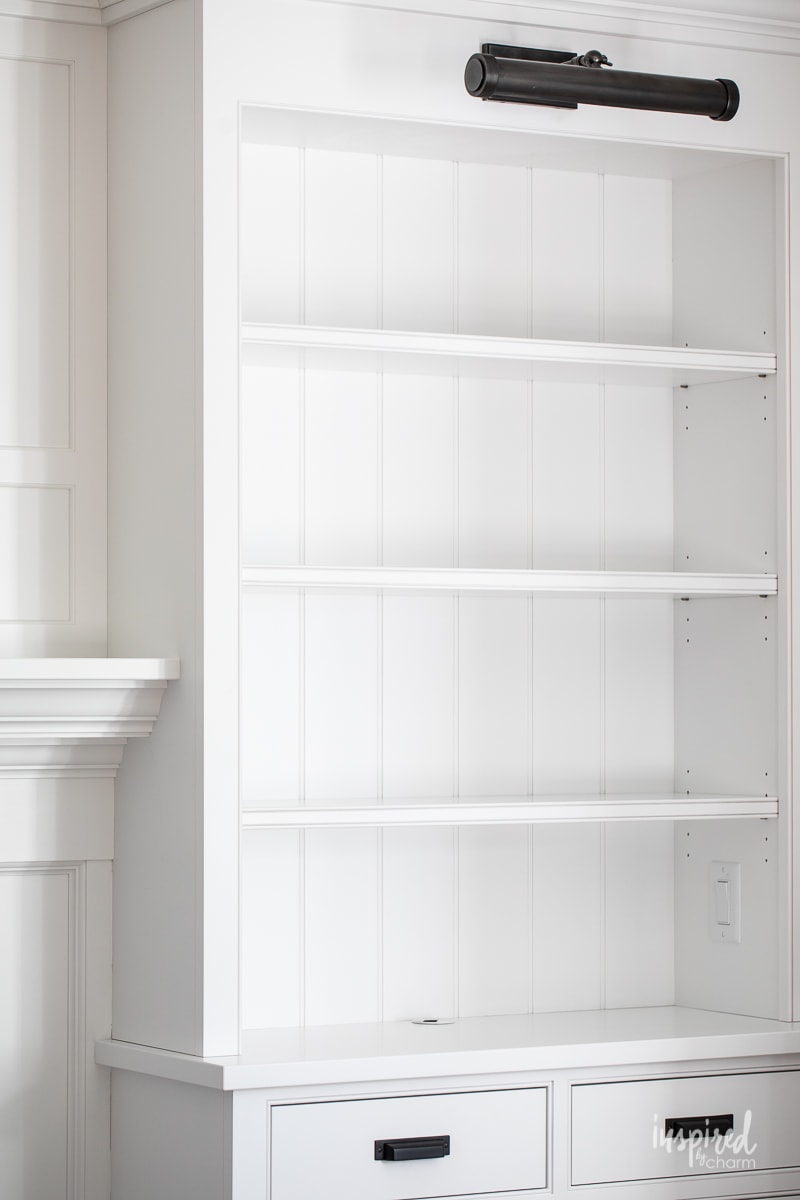
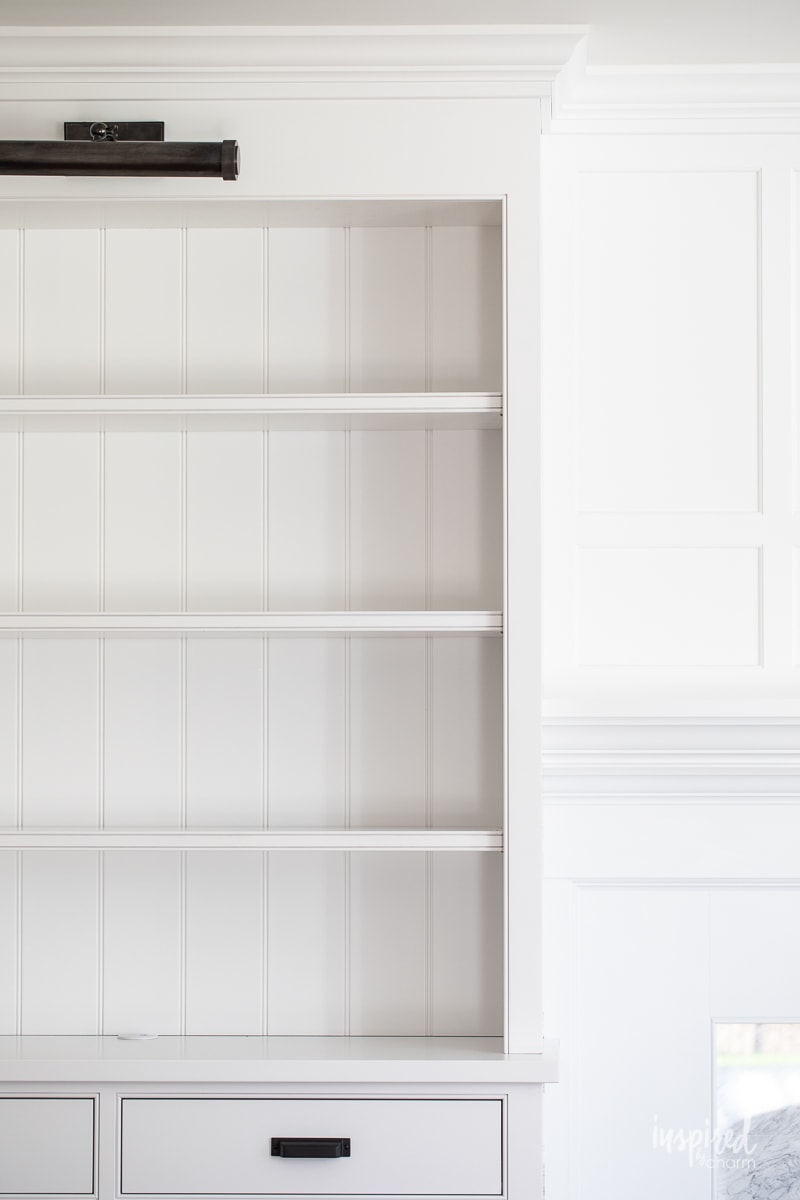
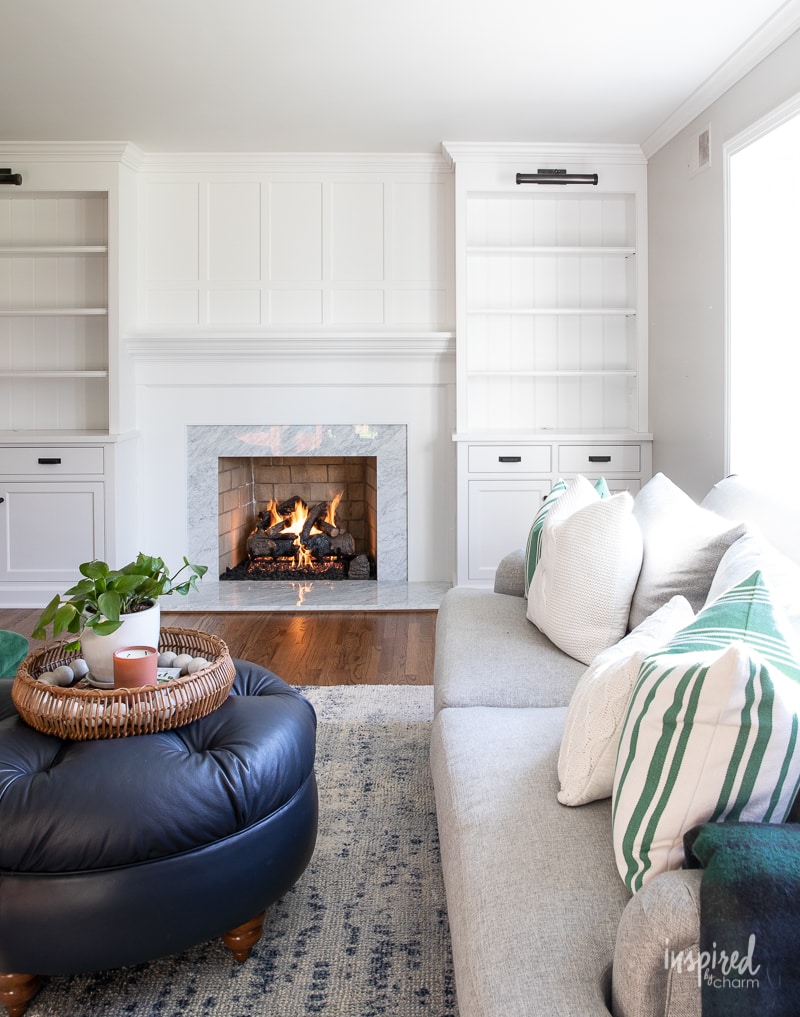
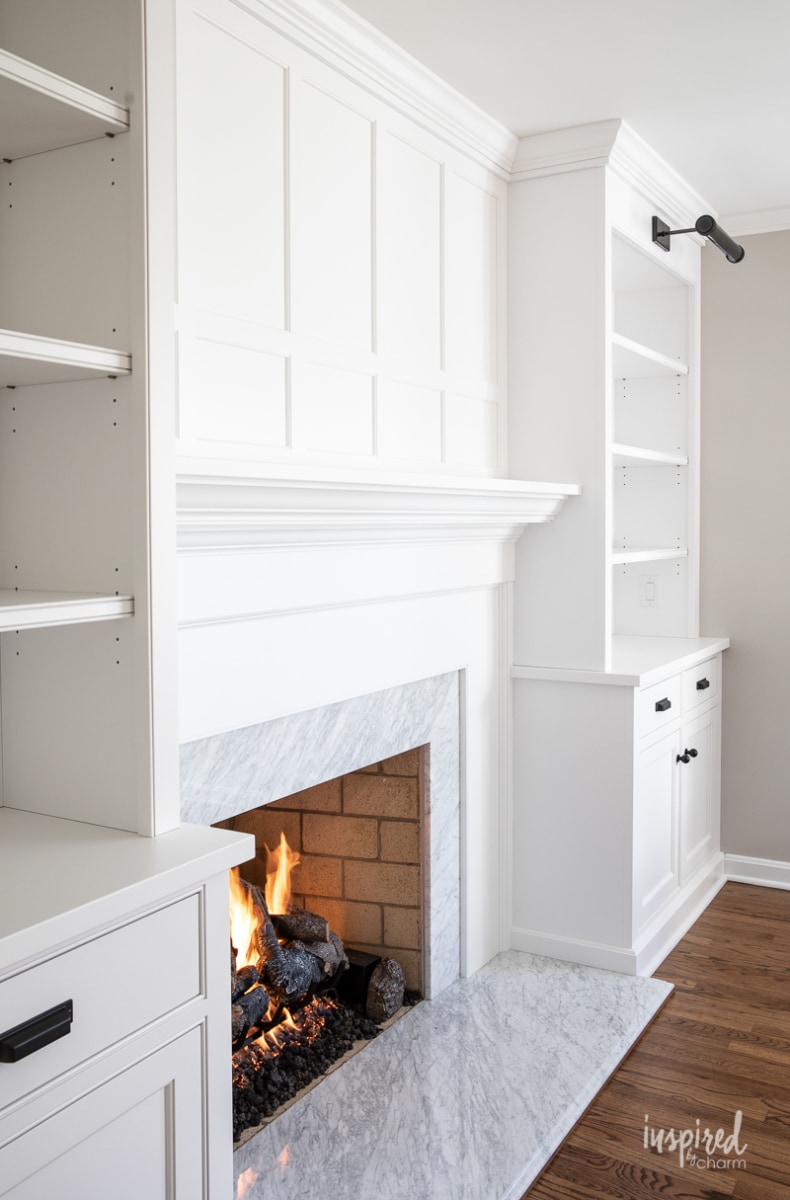
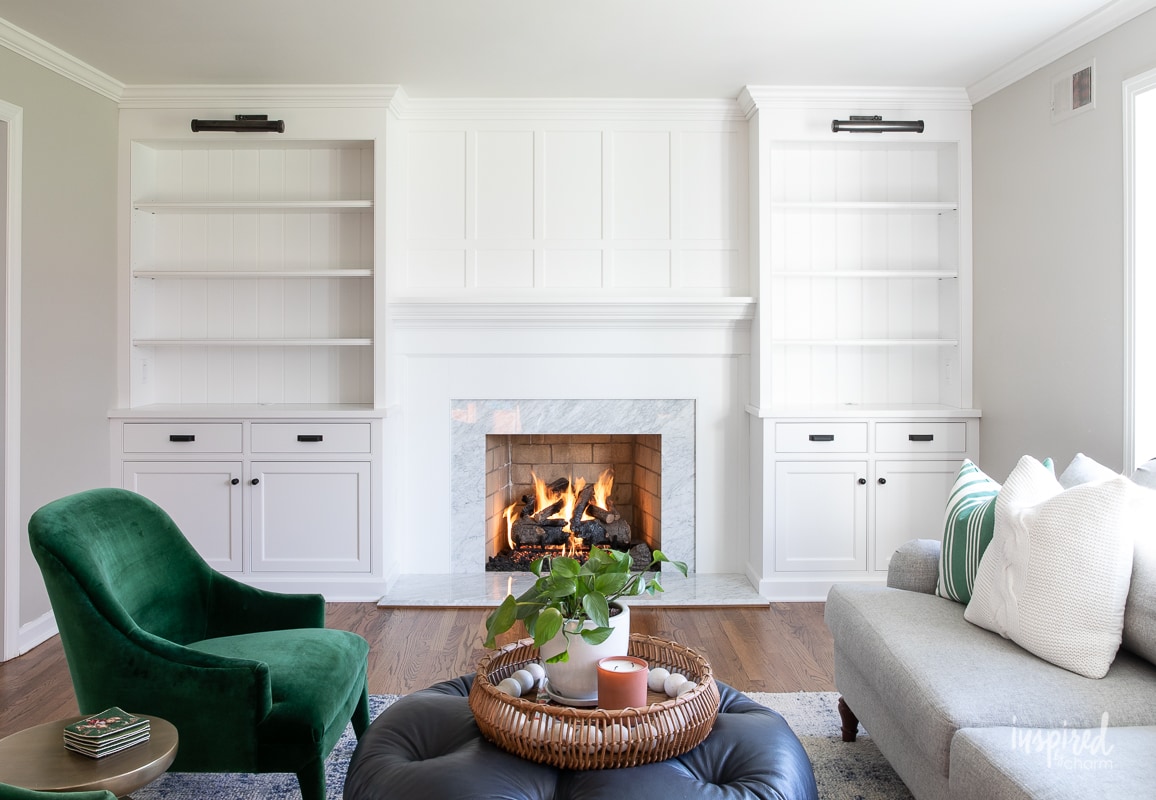
Ta-da! Isn’t it spectacular? I couldn’t be more pleased with the results. And yes, I realize that there is absolutely zero decor on the shelves. Sorry about that. I had wanted to decorate this all for fall, but then life happened and I just couldn’t get it together. However, the holiday season is upon us and you know I’ll be styling this entire space up for Christmas. It’s going to be magical!
I with with classic white for the cabinetry. It’s timeless and will be the perfect background for my seasonal decorating endeavors. The color is Sherwin-Williams Extra White SW 7006. The finish is custom to the cabinet maker, but I’d say it’s between a satin and matte.
For this project I worked with Drury Cabinetry. This name might sound familiar as they are the ones that did my entryway cabinetry. They are AH-mazing! It was a joy to work with them. Their work is stunning (clearing) and I’m already thinking about what I can have them do next. If you are anywhere near Pittsburgh and need cabinetry, I highly recommend them. Let them know I sent you!
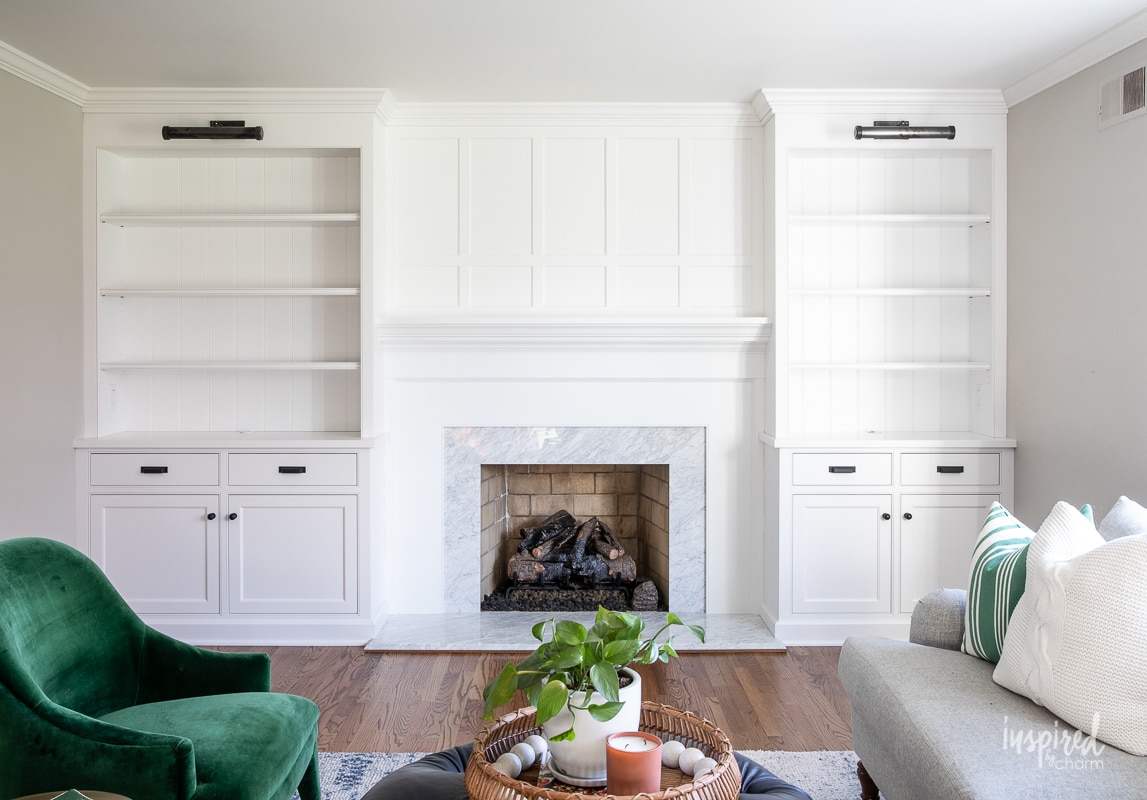
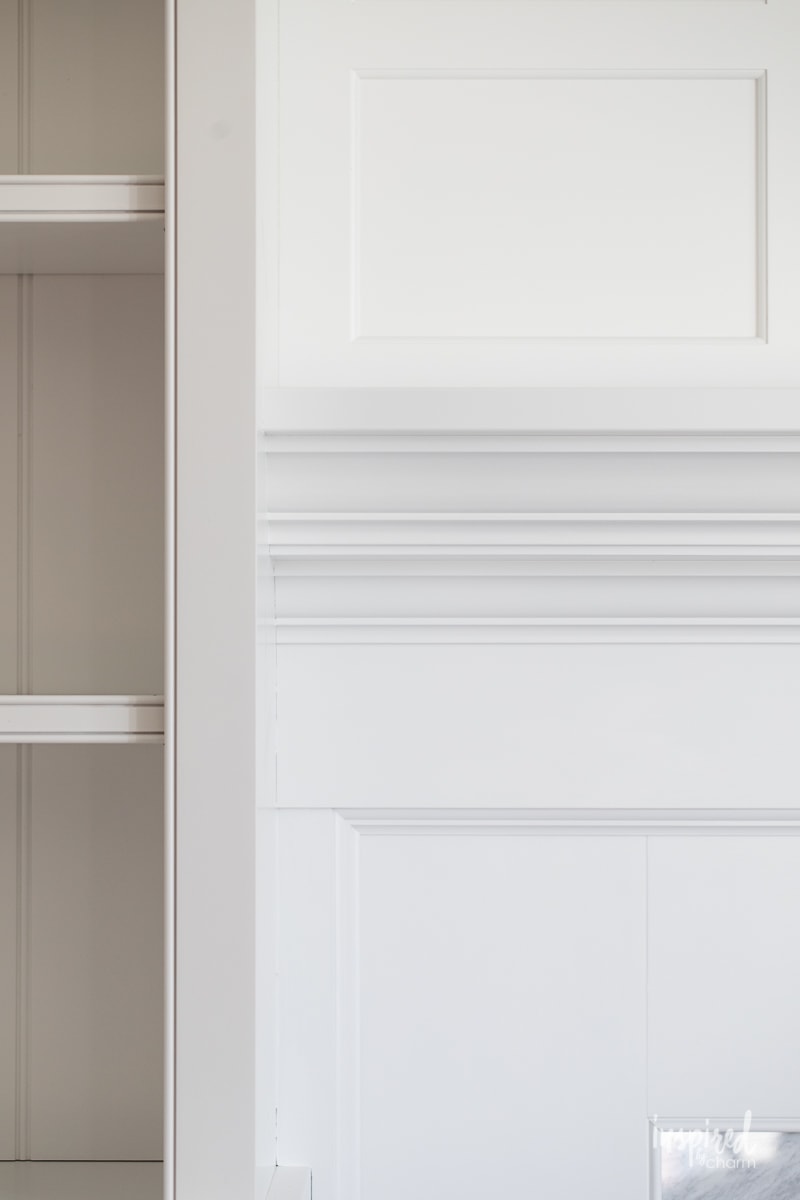
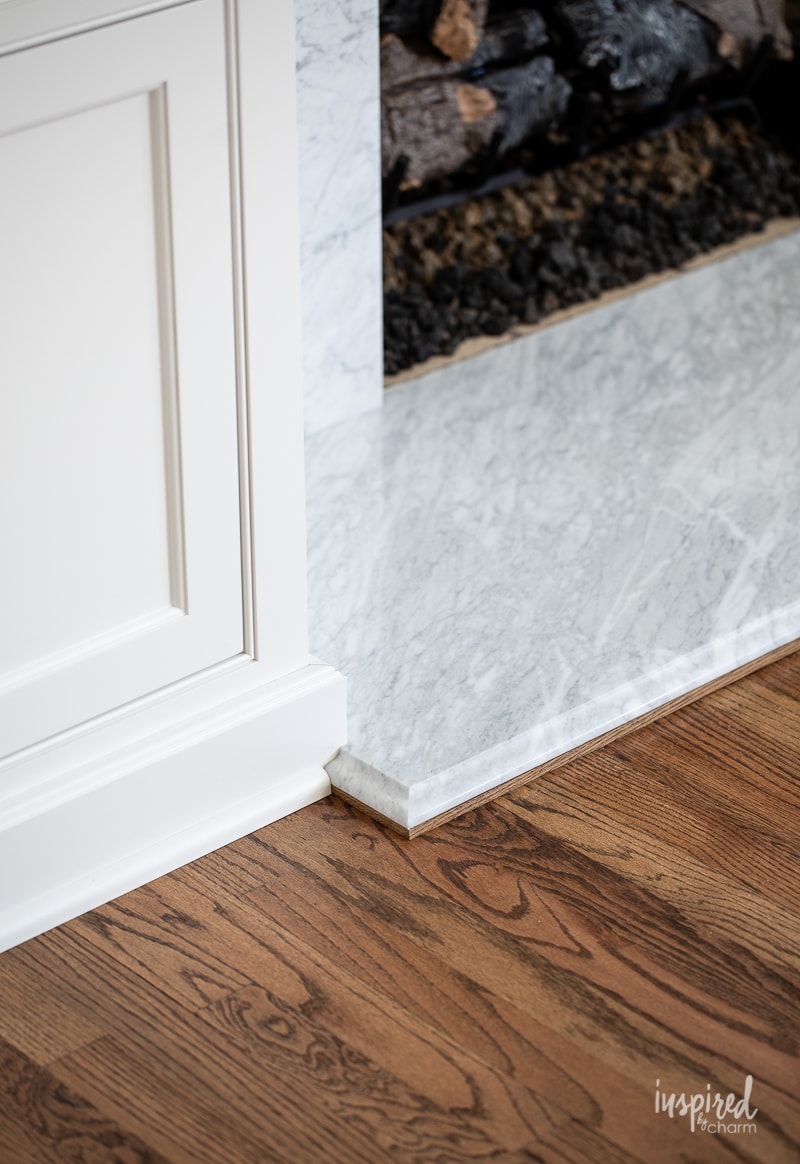
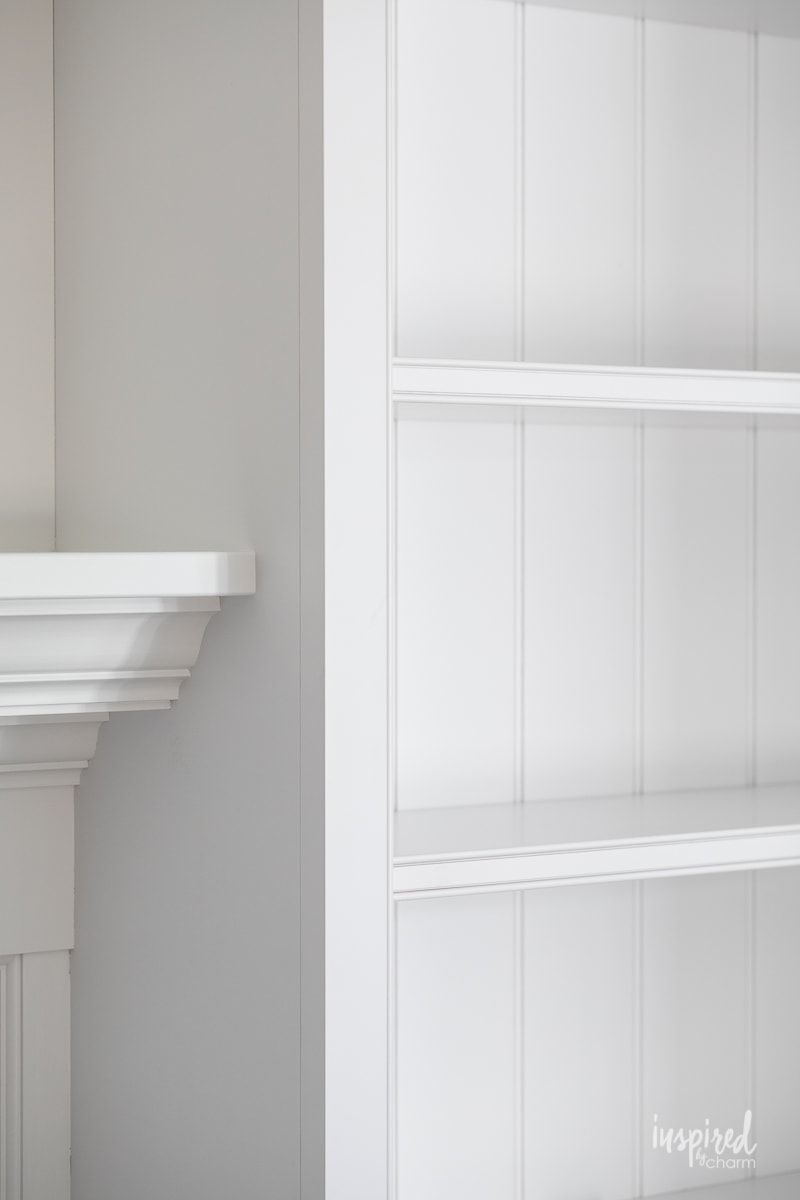
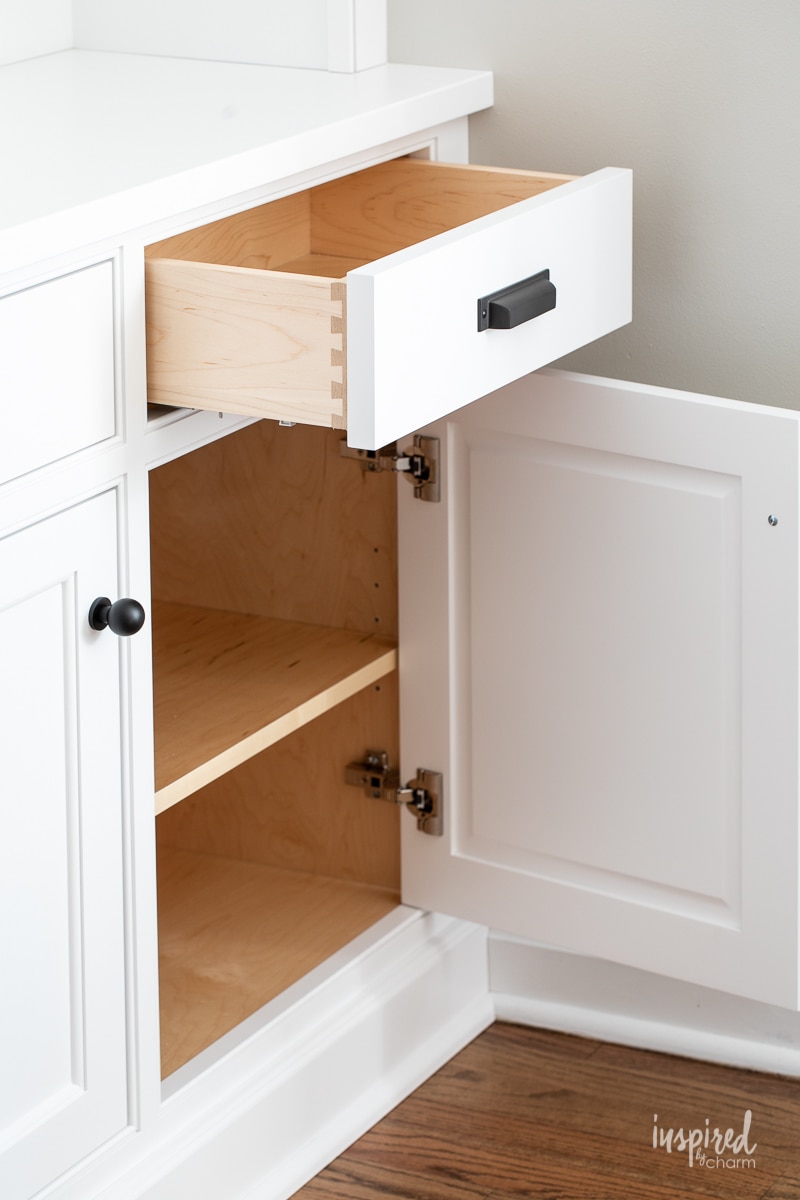
As you can see, all of the old cabinetry, mantel, and marble surround was removed to make room for this masterpiece. Everything was custom built and installed on site. I’ve tried to include lots of close-up photos so you can see all of the beautiful detail that went into this work. It’s exquisite.
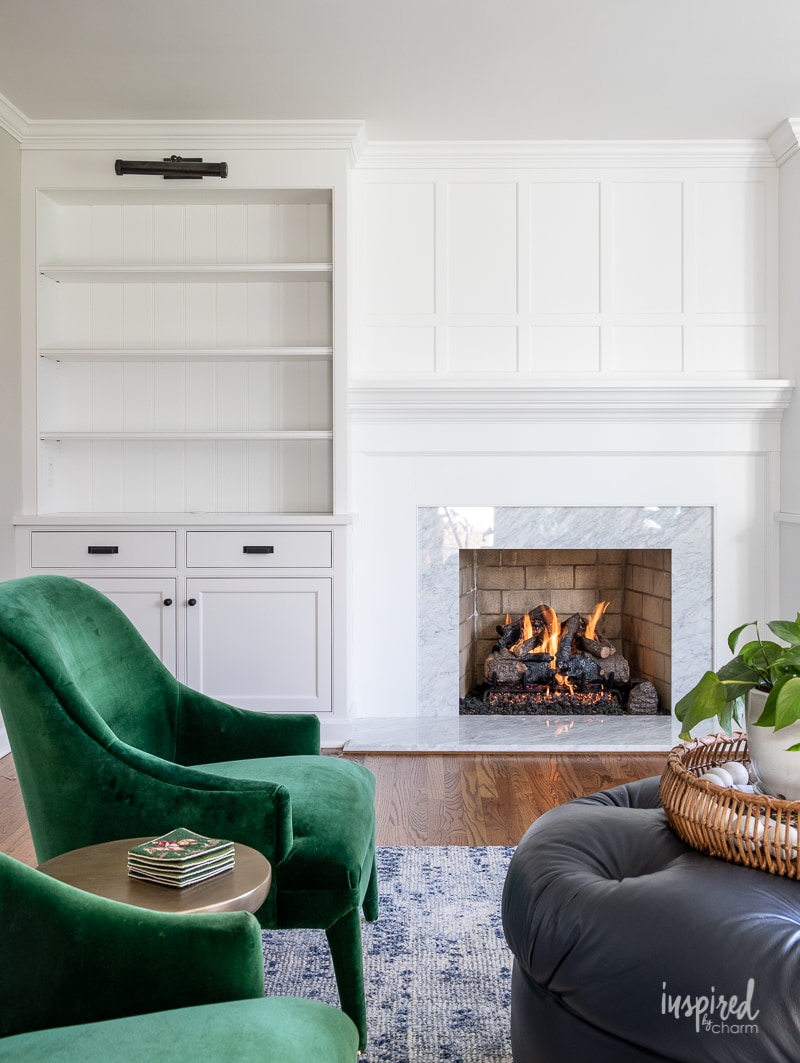
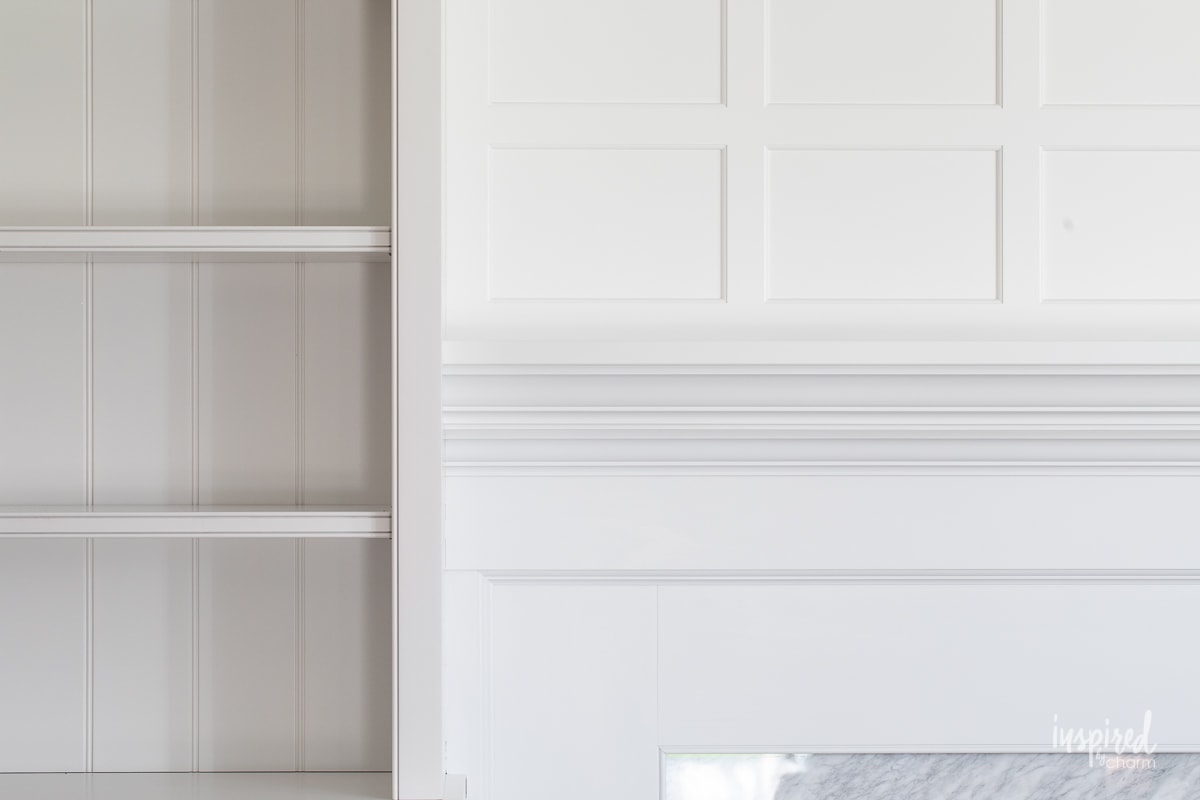
I mentioned this before, but I should mention it again: the fireplace does not sit in the center of this wall so the cabinetry on the left is larger than the cabinetry on the right. This is just one of those weird things you have to make work. Besides, symmetry is overrated, right? To be honest, I love “odd” details likes this. It gives my home and this room character.
💌 SAVE THIS POST / RECIPE!
In addition to the new cabinetry, I also replaced the old marble with new Carrara marble. I was so excited to get this replaced as the previous hearth had a piece of quarter round trim that ran around the edge. It always bothered me. Now the marble has a nice finished edge.
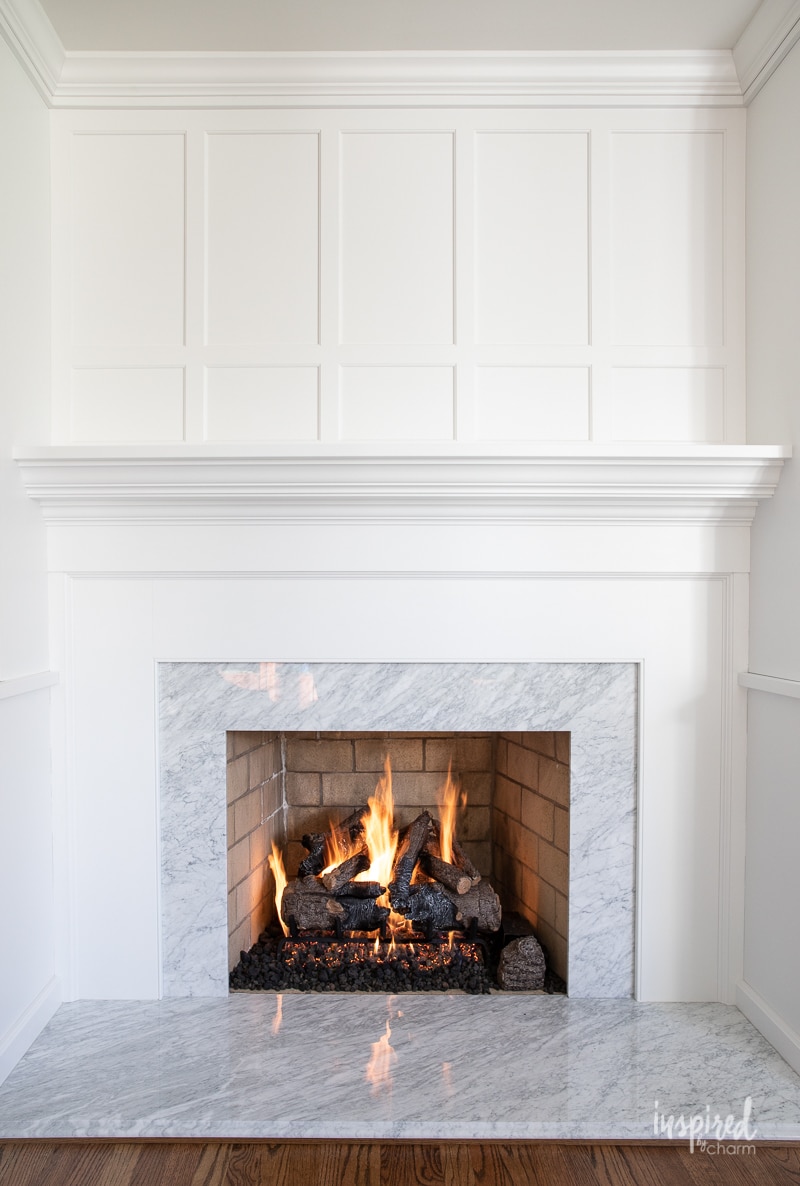
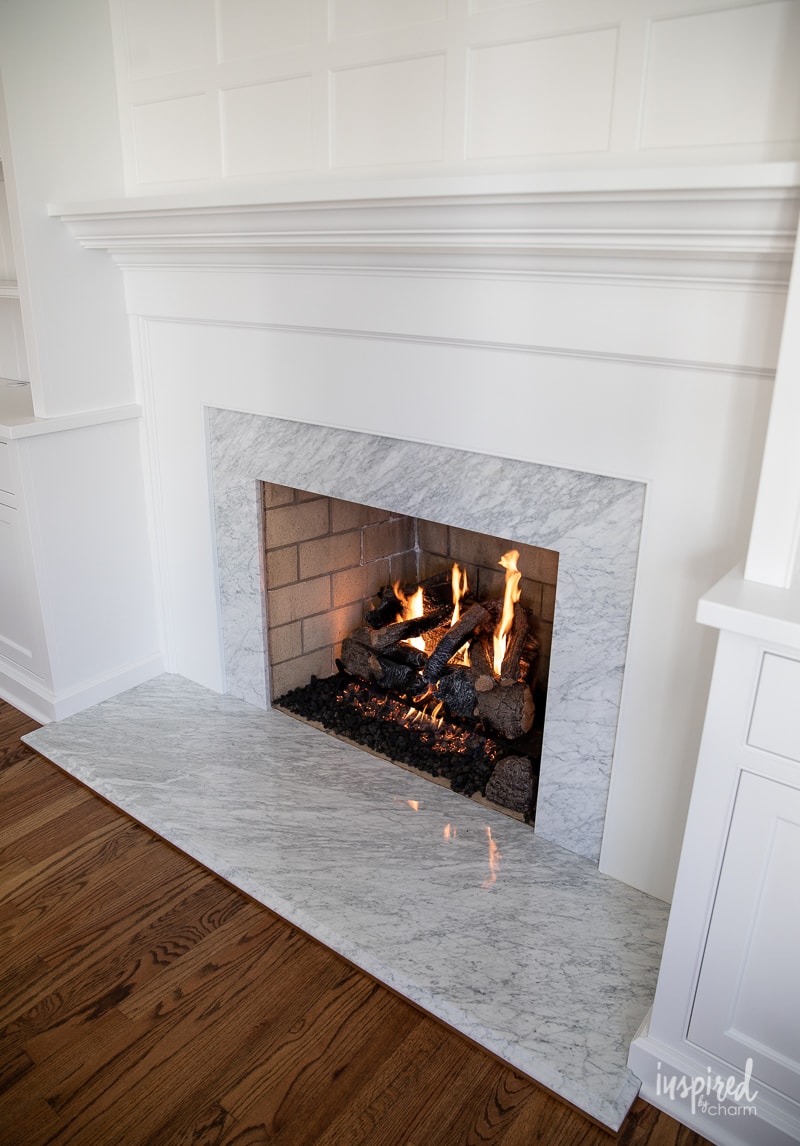
I also made the decision to switch this fireplace from wood-burning to gas. Since I have a wood-burning fireplace in my family room just across the entryway, I thought it would be nice to have the convenience, cleanliness, and low-maintenance of a gas burning fireplace in this room. I can turn it on and off with the touch of a button. Plus, it looks pretty realistic too. I’ll be putting together a post all about this conversion, so stay tuned for that.
I do have one question for you! I don’t love the tan brick inside the fireplace. I was thinking about painting it black. Thoughts?
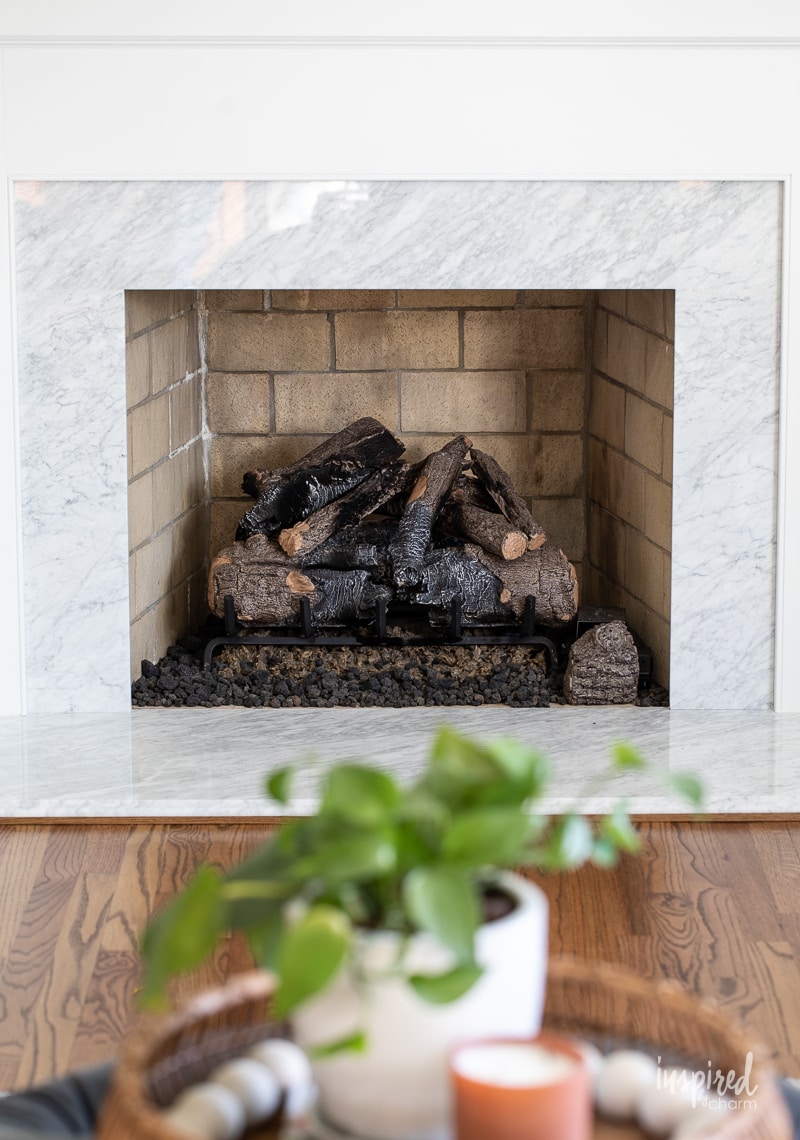
I did order a screen to keep my kitties out, so maybe the screen will hide the brick. It just sticks out like a sore thumb to me. I’d love to hear your thoughts in the comments below.
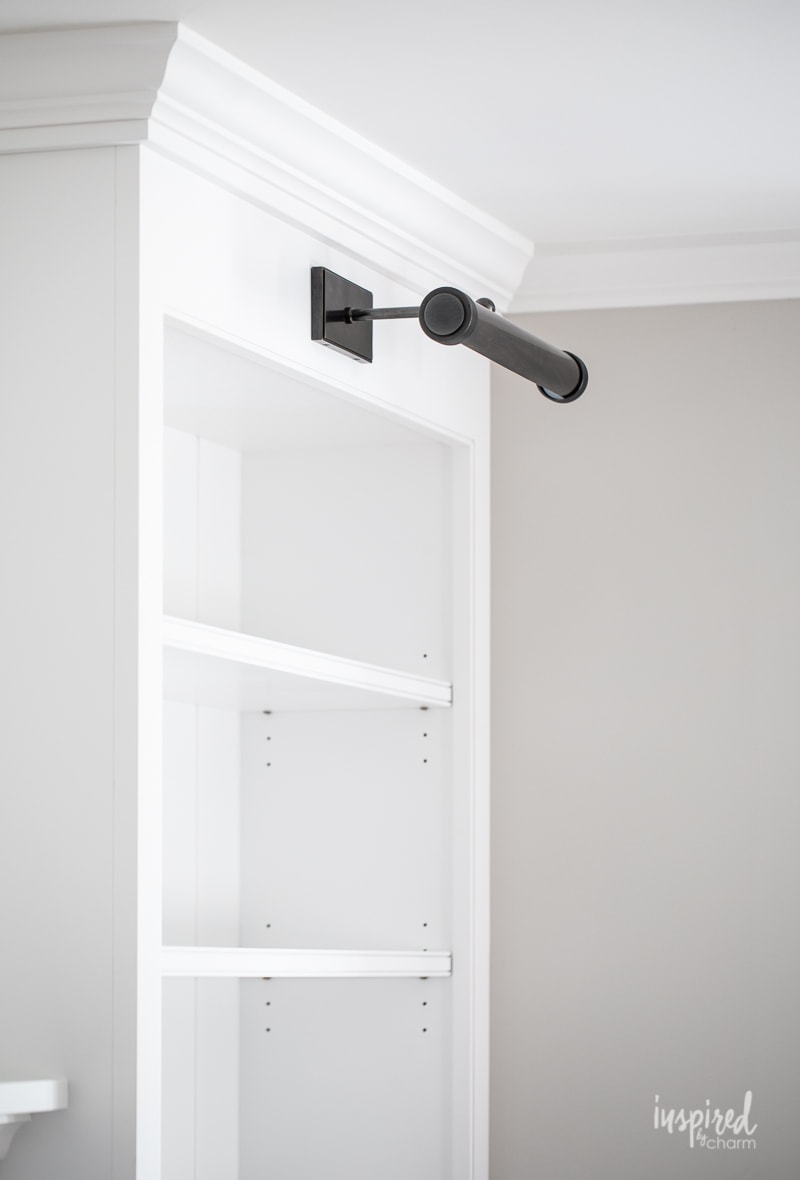
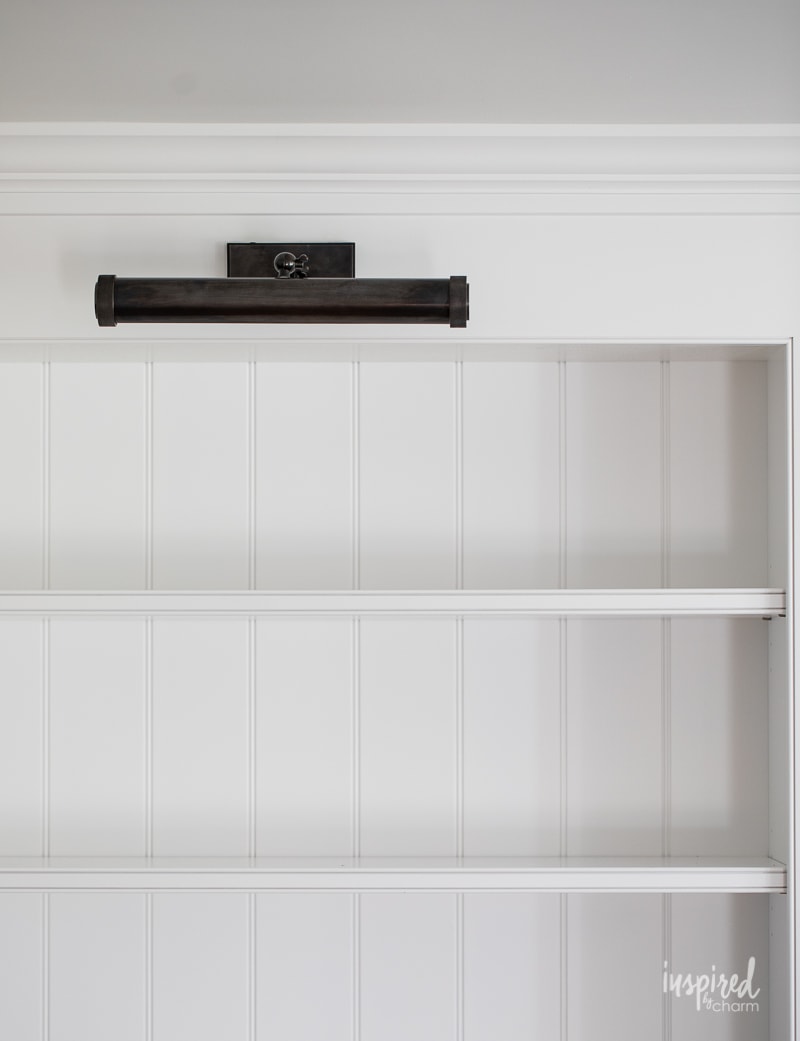
The beautiful picture lights are from Husdon Valley Light. They are their 18″ Ridgewood in Distressed Bronze. It’s wonderful to have these light here as the lighting in this room so limited. I only have one other lamp so it always feels super dark. (Which reminds me I should get another lamp or two.)
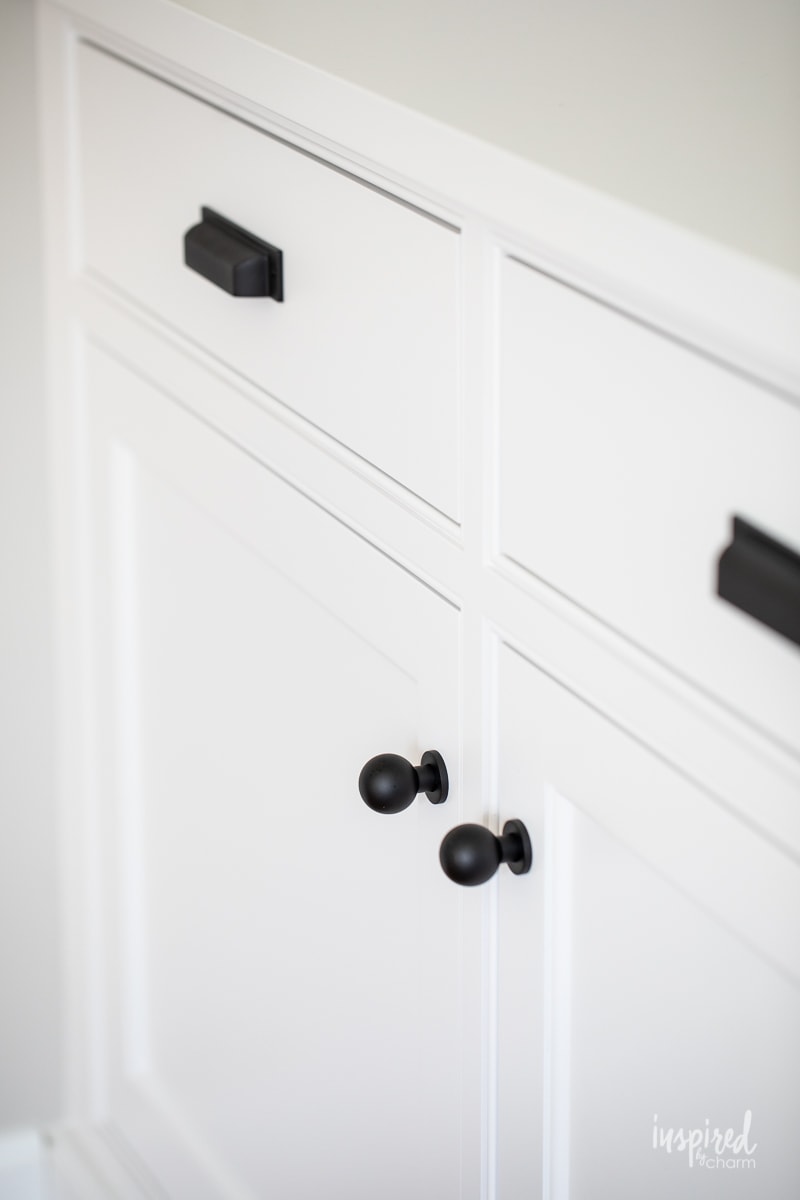
I did slightly change the hardware I originally selected. You can find the knobs I selected for the drawers HERE and the pulls HERE. (The pulls are the same pulls I used in my kitchen remodel. I LOVE them.)
I am just so insanely pleased with the results. This is everything I wanted and then some. I’m so happy to finally be able to share it with you. Let’s take a look at a few more pictures.
And that’s a wrap on another Bayberry House renovation! Now I’m off to another project because my Christmas decor is calling me and these shelves are just begging to be styled. I can’t wait to show you how they look all dressed up.
Until then……..!
Hello. Did you ever post the depth of the lower cabinets and upper shelves ?
Good morning,
Love your fireplace surround. I realize it was finished years back but I am just renovating our den w/ fireplace so I am very interested in copying your design. Would you be willing to share the shelf dimensions ? I notice others have asked , maybr I’m just not looking in the right place on your site.
I realize you are super busy but I would be thankful for your reply.
Chris Coulombe
I love your fireplace and built-ins! It’s the inspiration for my makeover that’s soon to be in progress. I’m curious to know how deep your cabinets are (upper and lower). I love the clean, slim look. I don’t want mine to be bulky. Thanks for the inspo!
Gorgeous!
Please can you advise how high the two side cabinets are? Both to the bench height, and the full height. Thank you
Hi, I just showed my contractor your exact cabinets. What baseboard and crown molding did you use? I want to use the same ones!
Love the look. Beautiful details. We especially like the picture lights above the bookcases.
Would you mind sharing your source?
Many thanks
Thank you. And yes – the lights are already listed and linked in the post above.
Thanks!
Michael
What a beautiful transformation- it is just rhe inspiration I need for our fireplace upgrade! I am wondering what color stain you have on your hardwood floors? We are having ours refinished and finding just the right color has been a chore!
The best advice I can give you is to have your refinisher test colors on your floor to see what you like best. The direction your house faces, the color of your walls, the type of wood, etc. all makes a huge difference on how the color will look. Test until you find one you love for you home. Even if that annoys your installer. Ha.
xo Michael
Paint the inside of the fireplace BLACK! The new cabinetry is lovely, but I do love those green chairs too. Gas logs are the way to go – especially in TEXAS.
I would love to know which gas logs those are. So realistic. I have been looking and want to buy now. LoL. I don’t think I can wait for your post – unless I’ve missed it. Can you share with me now??
I love your new makeover!!! Many thanks!
What color of stain did you use on your floors? Are the floors Red Oak or white oak
Love the cabinetry! Definitely paint the firebox black…or maybe dark gray.
Your cabinetry is exquisite.The fireplace redo is also! I always recommended to my interior design clients to have the firebox interiors painted in a high heat black paint, matte or something similar. It takes that new construction look away and when the logs are lit, they are the focus. Enjoy your new project. It’s gorgeous!
Cabinetry is so beautiful! I believe black would be too harsh a color for inside of fireplace. Use a mock up of both colors to see what you like best. I think gray would blend in better with all the colors in your room. Can’t wait to see your Xmas decor for your room. Just love your classic sense of timeless style.
ALL fireplace boxes should be painted black, IMHO. It’s much more attractive than ugly, sooty brick. And, the flames and logs are showcased against the black background. Heat resistant BBQ black has always worked for me. It doesn’t flake or peel. You’ll be happy you did!
I think black would go well especially since the handles on cabinets are black.
Gorgeous!
I agree regarding the fireplace interior. I too had this same issue, I had it painted black and I felt it much improved the look of the entire fireplace.
Slow and steady wins the race! Every reveal shows your style and exquisite taste. Waiting for the styled shelves; another of your talents. Yes to the black and yes to more lamps. Enjoy the process of making Bayberry House all yours.
Soot not spot