Framed Vintage Christmas Card Ornament
This Post May Contain Affiliate Links. Please Read Our Disclosure Policy
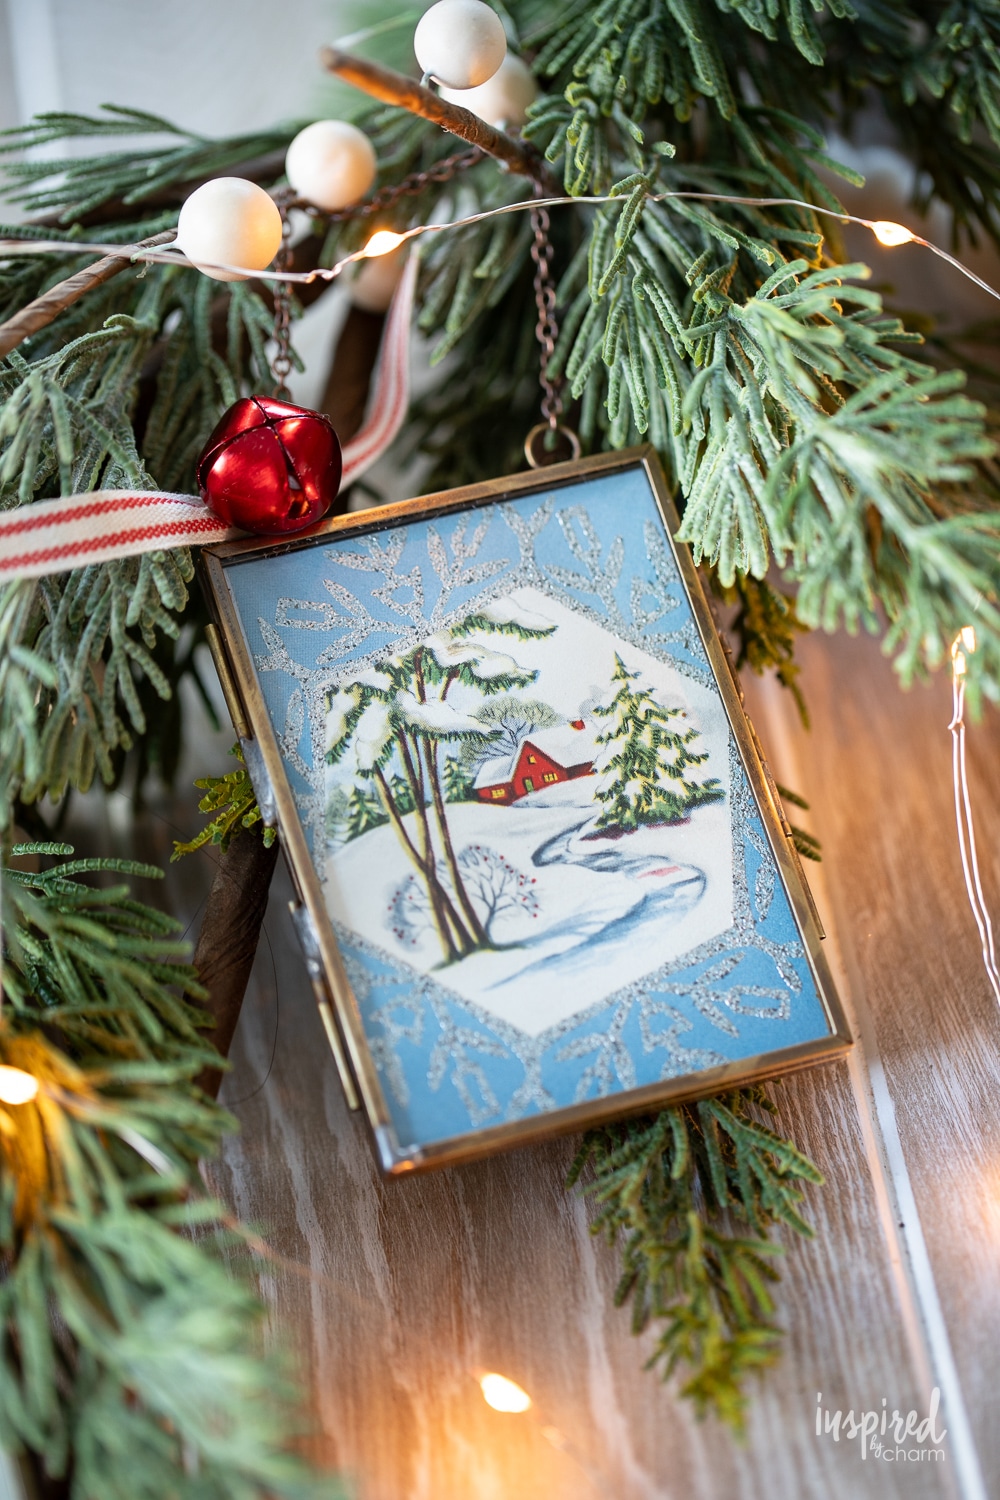
Discover the charm of vintage Christmas with this DIY Framed Vintage Christmas Card Ornament project. Perfect for craft lovers, these easy-to-make ornaments transform old Christmas cards into unique holiday decor. They are ideal for adding a personal touch to your Christmas tree, for giving as a homemade gift, or for using as a special gift topper.
Have you ever stumbled upon something so charming that it just sparks a burst of creativity? Well, that’s exactly what happened to me! I recently found a box of vintage Christmas cards on Facebook Marketplace for $20. There must be over 100 of them.

Having a love for all things vintage Christmas (see my top vintage picks and how to style them), I wanted to take those cards and give them new life. In a recent post, I showed how I turned them into art using some vintage frames that I thrifted. Now today I’m going to show you how I turn these cards into ornaments to hang on your tree or attach to a gift.

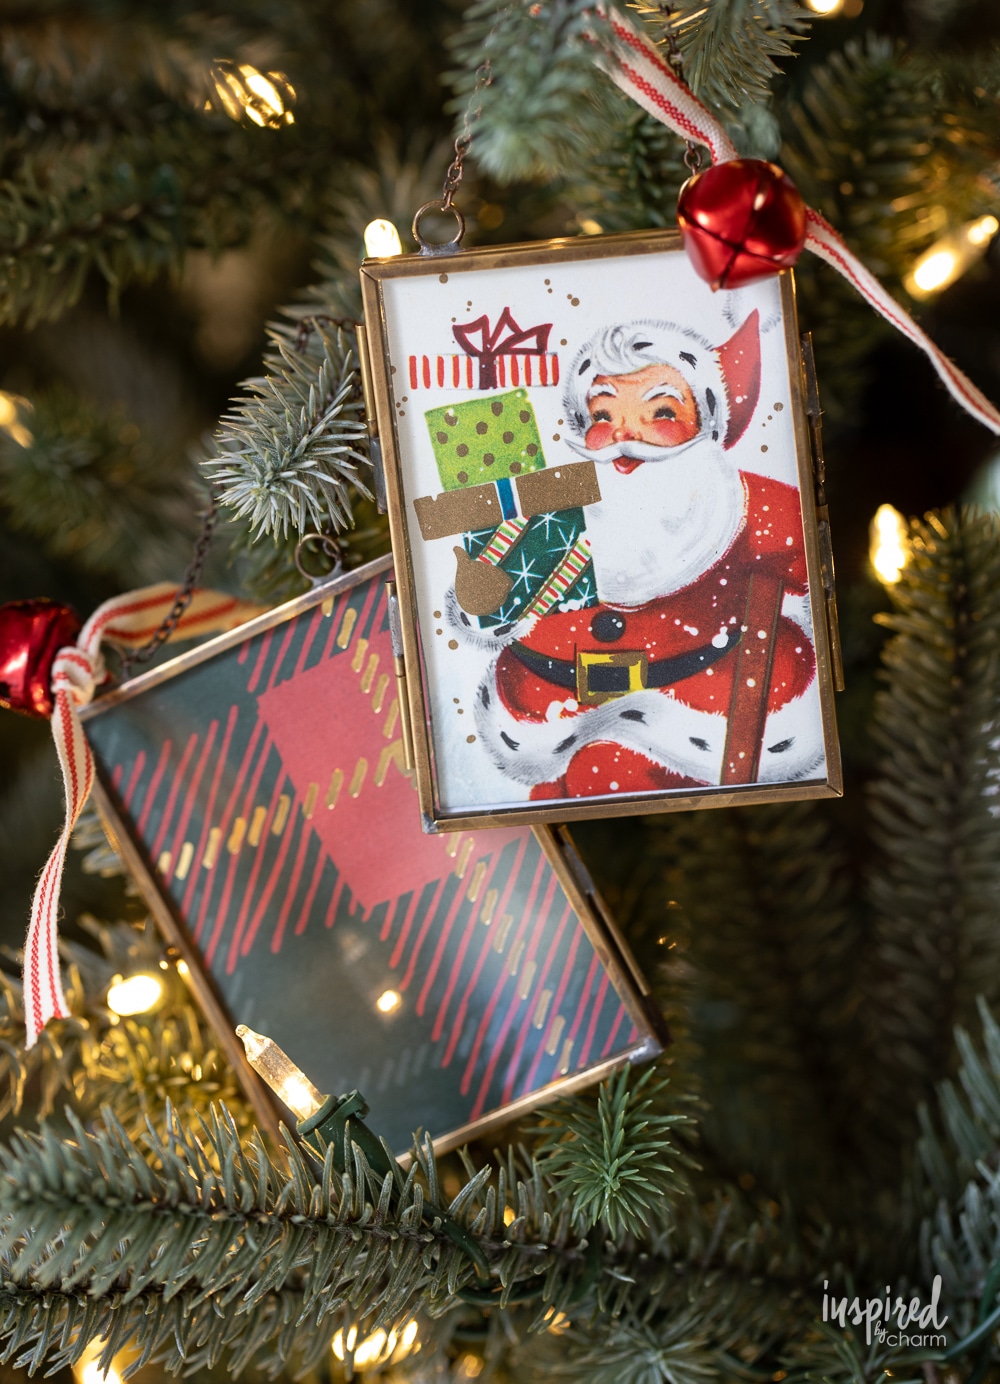
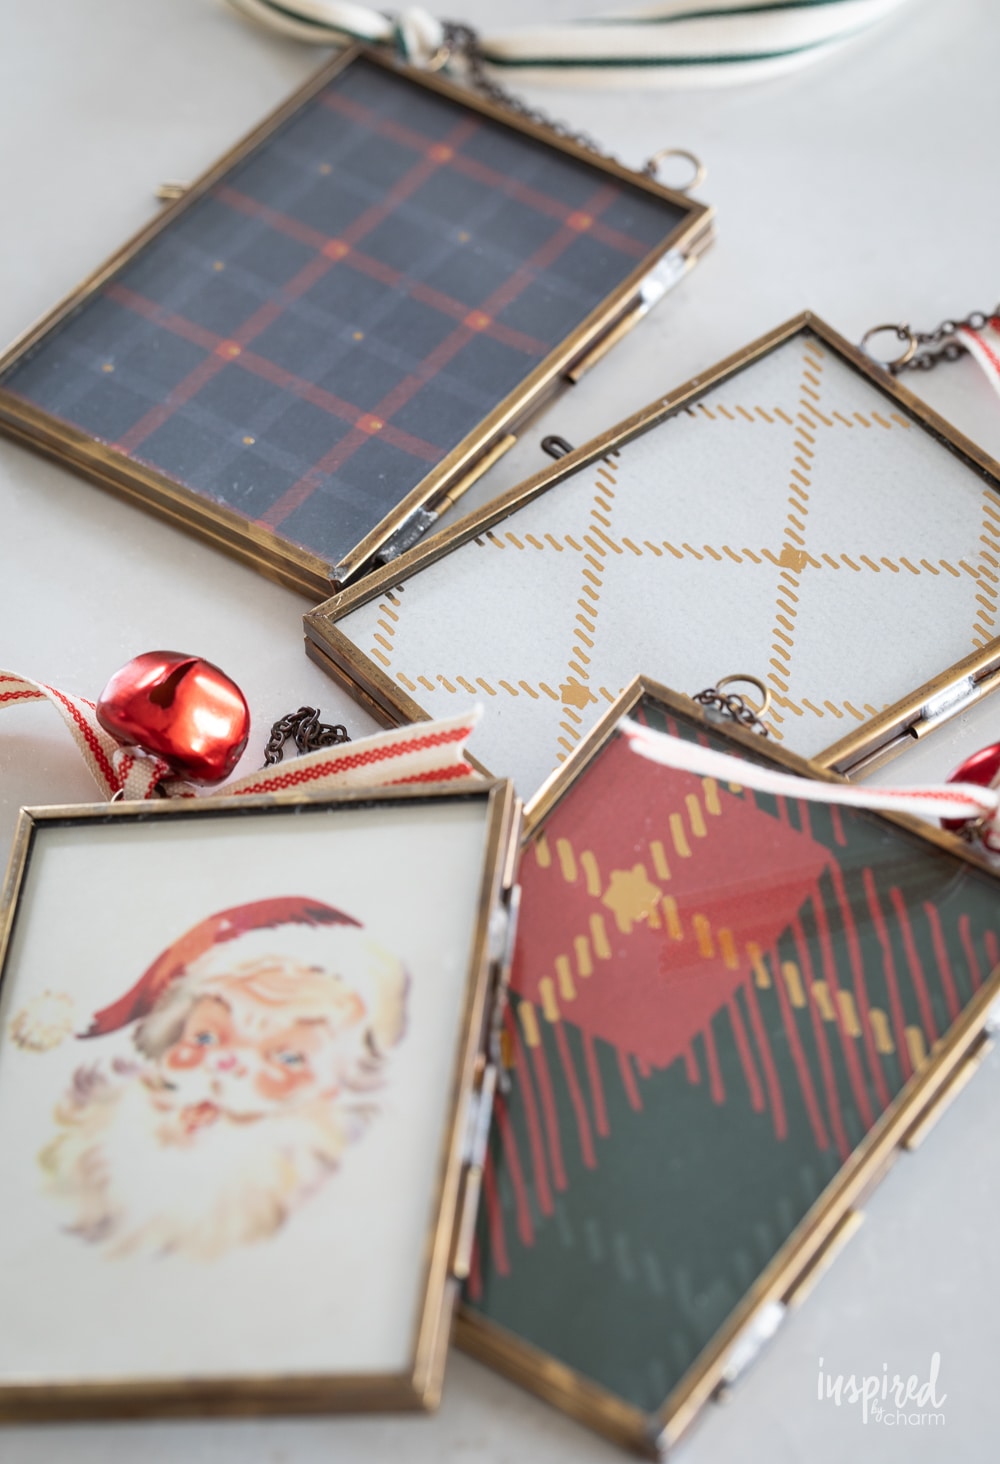
These ornaments are made using glass photo frames. These frames have two pieces of glass with a hinge on one side and a clasp on the other. Most even come with a chain attached at the top for easy hanging.
If you’re looking for a quick and easy holiday project that’s completely customizable and filled with tons of holiday charm, then this is for you! I know you’re going to love it!
Why You’ll Love This Project:
- You’ll love how quickly these ornaments come together and offer endless possibilities for customization to match your holiday theme or color scheme.
- With simple steps and no need for expert skills, you’ll enjoy creating unique, handmade ornaments that bring a nostalgic and personal touch to your holiday decor.
- These ornaments aren’t just for your tree; they also make delightful gift toppers or thoughtful presents. As a bonus, the use of thrifted items makes this an affordable and eco-friendly craft.
- By combining the charm of vintage Christmas cards with the joy of crafting, this project is like a delightful trip down memory lane and will add a bit of nostalgia to your celebrations.
Love crafting Christmas decor? Me too! I have an entire post dedicated to my favorite handmade Christmas decorations. There are so many projects I know you’re going to love!
Materials
- Vintage Christmas cards
- Small glass photo frames
- Scrapbooking paper
- Pencil
- paper cutter or scissors
- Glue stick (acid free and photo safe)
- Ribbons and jingle bells (optional)
Most of these supplies are pretty self-explanatory, but I wanted to comment briefly on the photo frames. The ones I’m using here I found at Target, but they sold out almost instantly. However, these frames are readily available and come in several metal finishes. The size I used for this project is 2×3 inches. I’ve linked a few recommended frames below. If you decide to shop off of my list, just pay attention to the size you’re ordering, as they can get fairly big or pretty small.
Here are a few options similar to the one I’m using:
- 2×3 vertical photo frames – same size and style I used
- 2.5 x 3.5 horizontal photo frames
- 2.4 x 3.6 verictal photo frames
- 2.4 x 2.4 square photo frames

How to Make
These Framed Vintage Christmas Card Ornaments are so easy to make, but I’ll walk you through the steps below. There’s also a printable materials list and project instructions in the how-to card at the end of this post.
💌 SAVE THIS POST / RECIPE!
- Start by creating a template for your photo frame. Cut a square/rectangular piece of paper that fits perfectly into the frame. (I made my template out of the same paper I used for the backing. You’ll see it below.)
- Next, use your photo frame to determine which part of your card you want to frame.
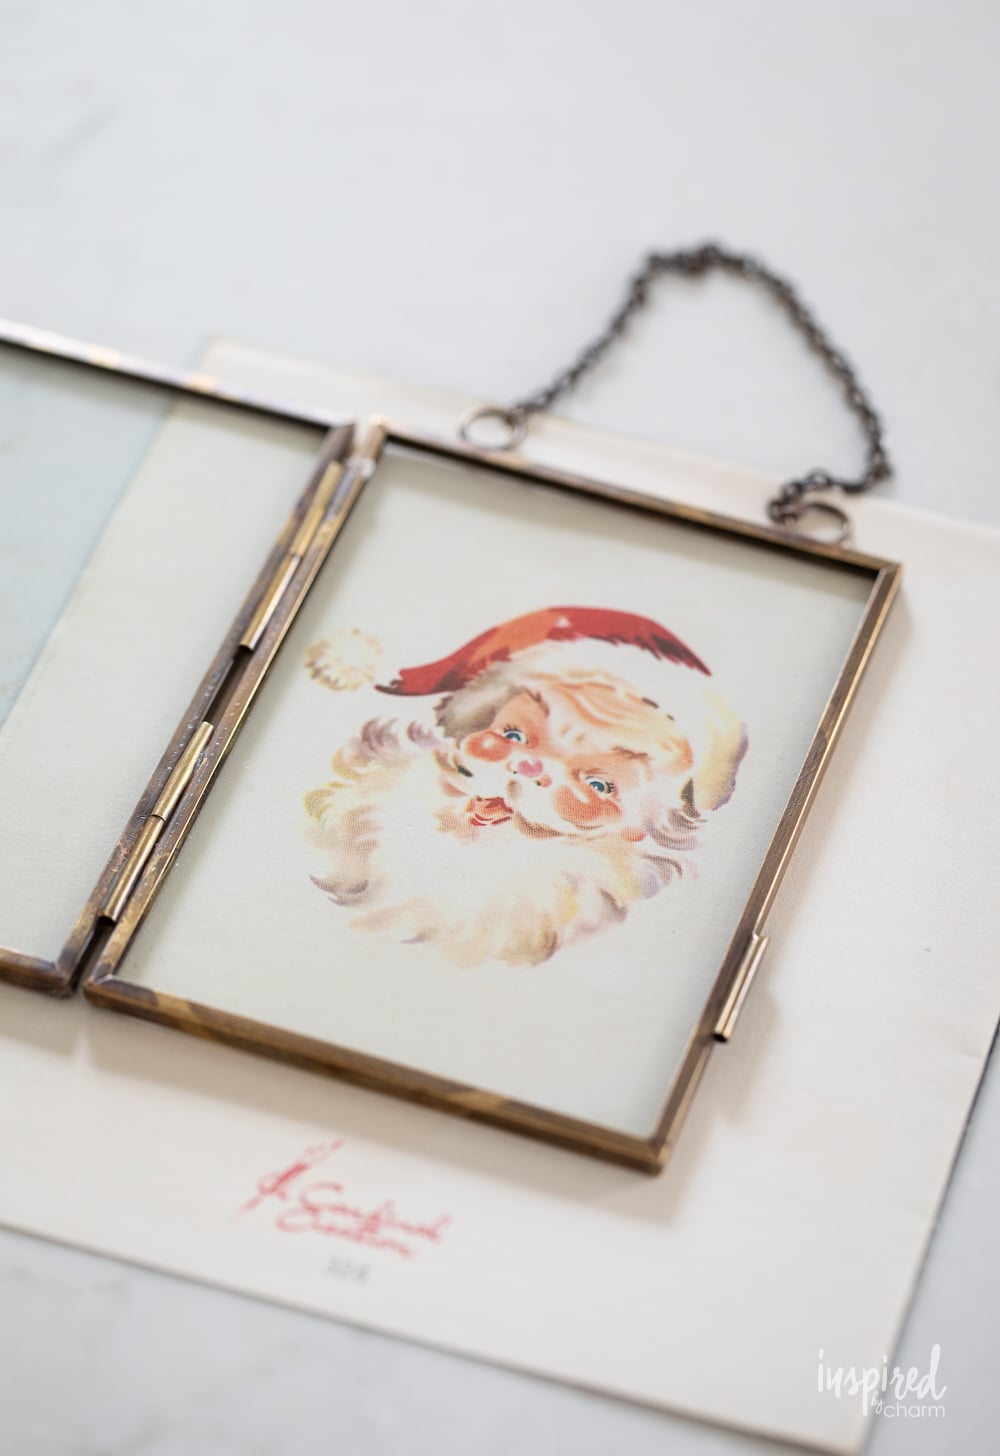
- Place your template over this area and trace around it with a pencil.
- Use your scissors or a paper cutter to cut out the chosen vintage card image.
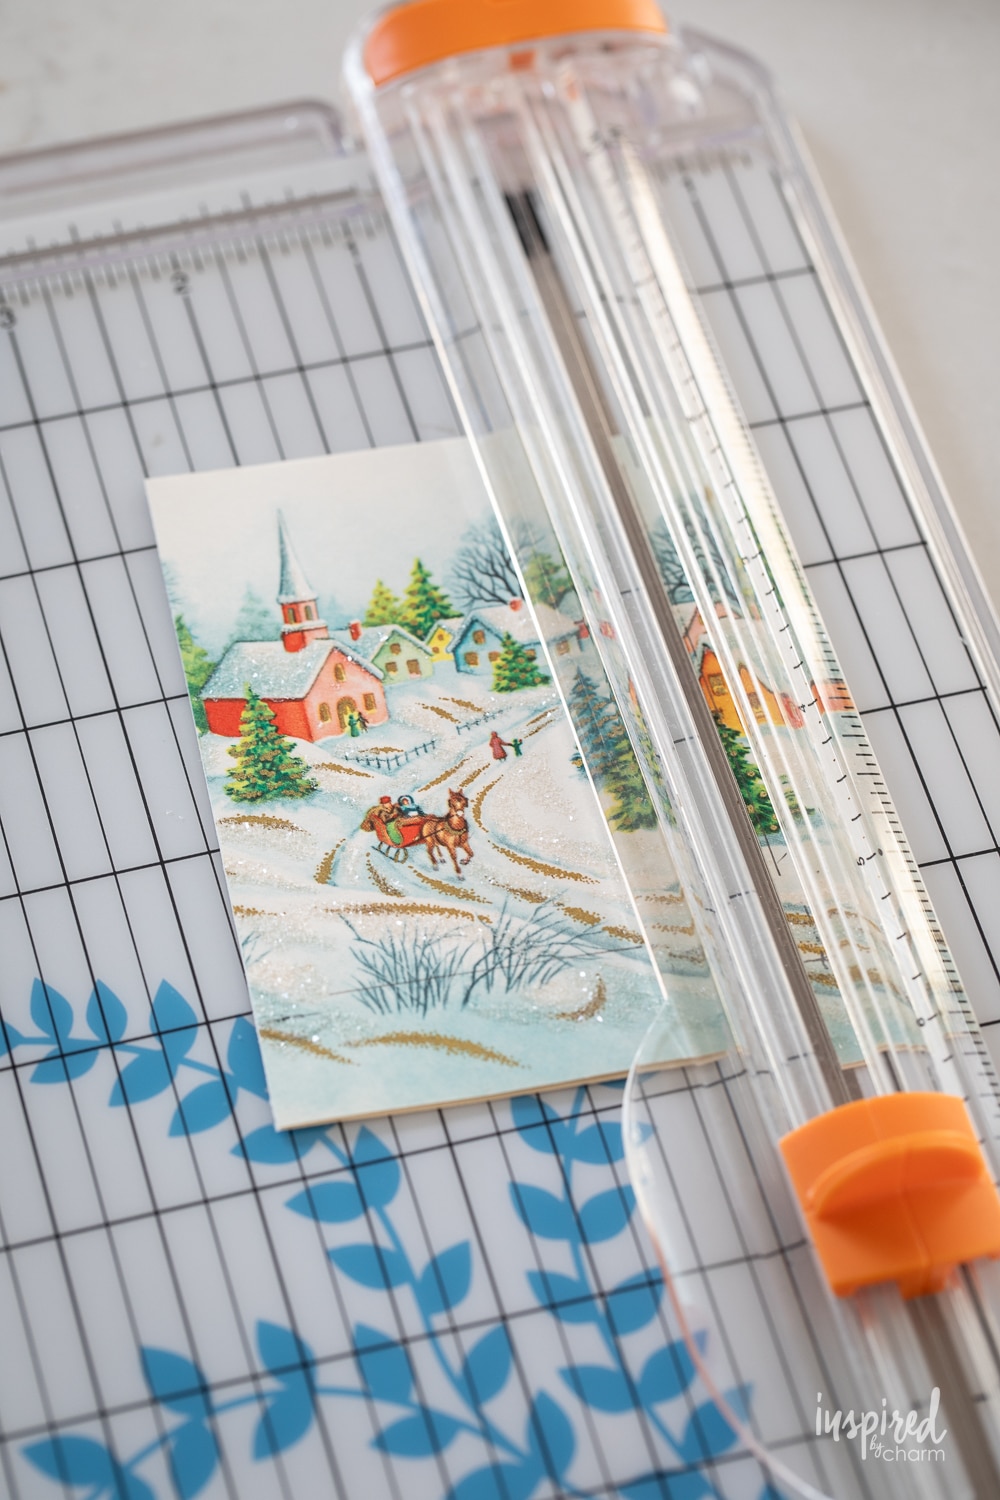
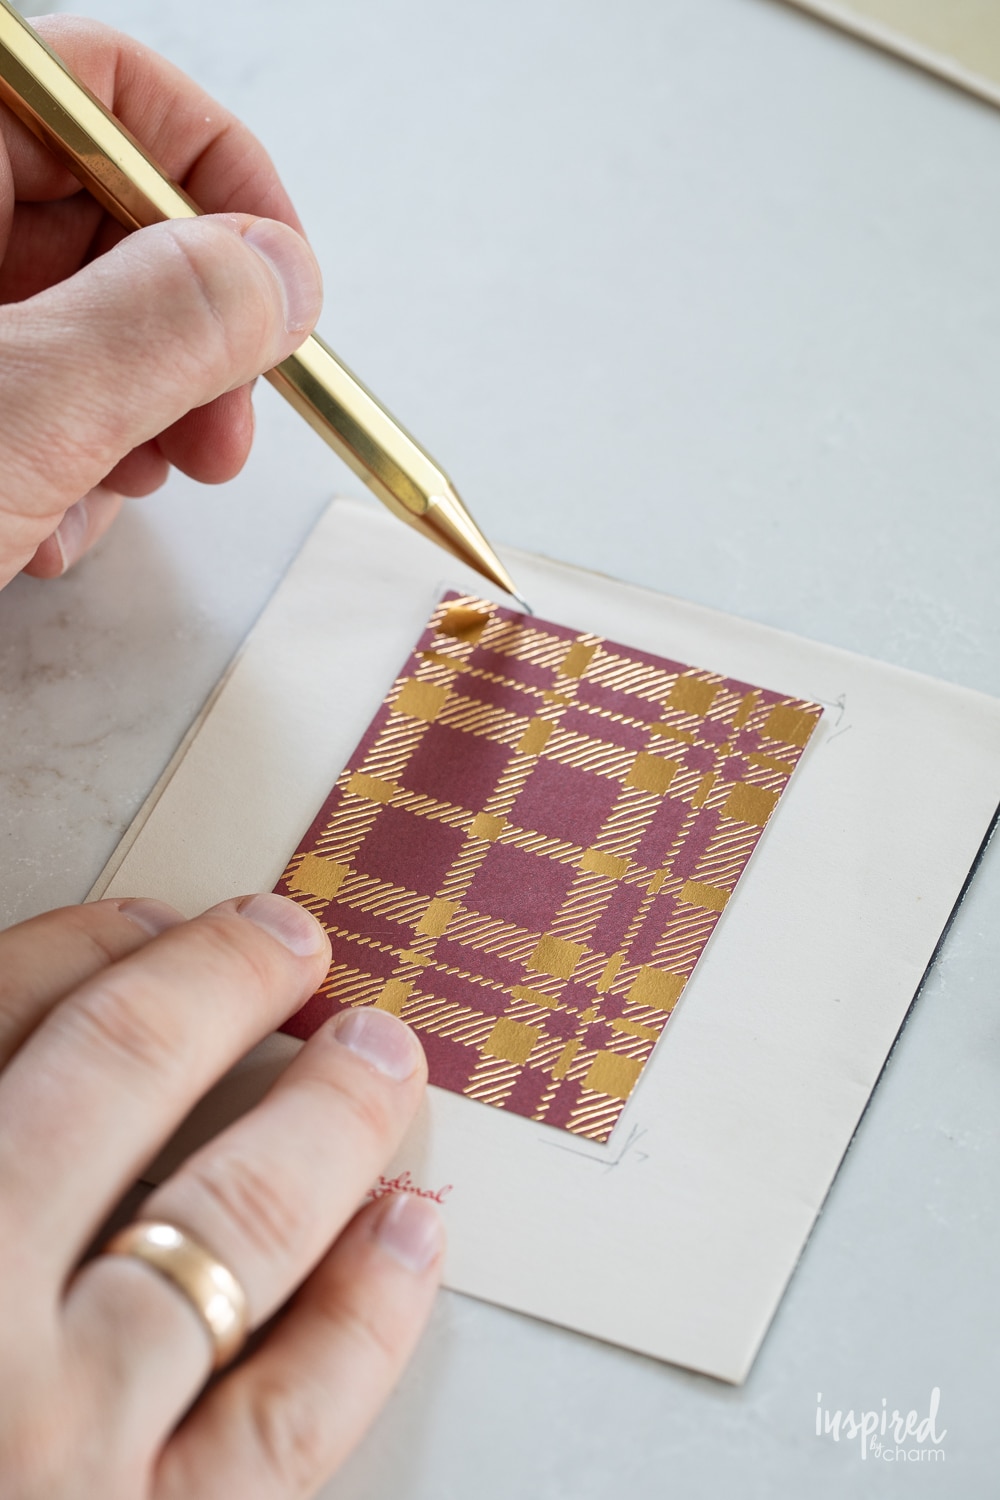
- Then, use your template again to trace a square/rectangle out of coordinating scrapbook paper. (You could also use another part of the given card or another Christmas card.)
- Cut this out with scissors.
- Use your glue stick to glue the two wrong sides together.
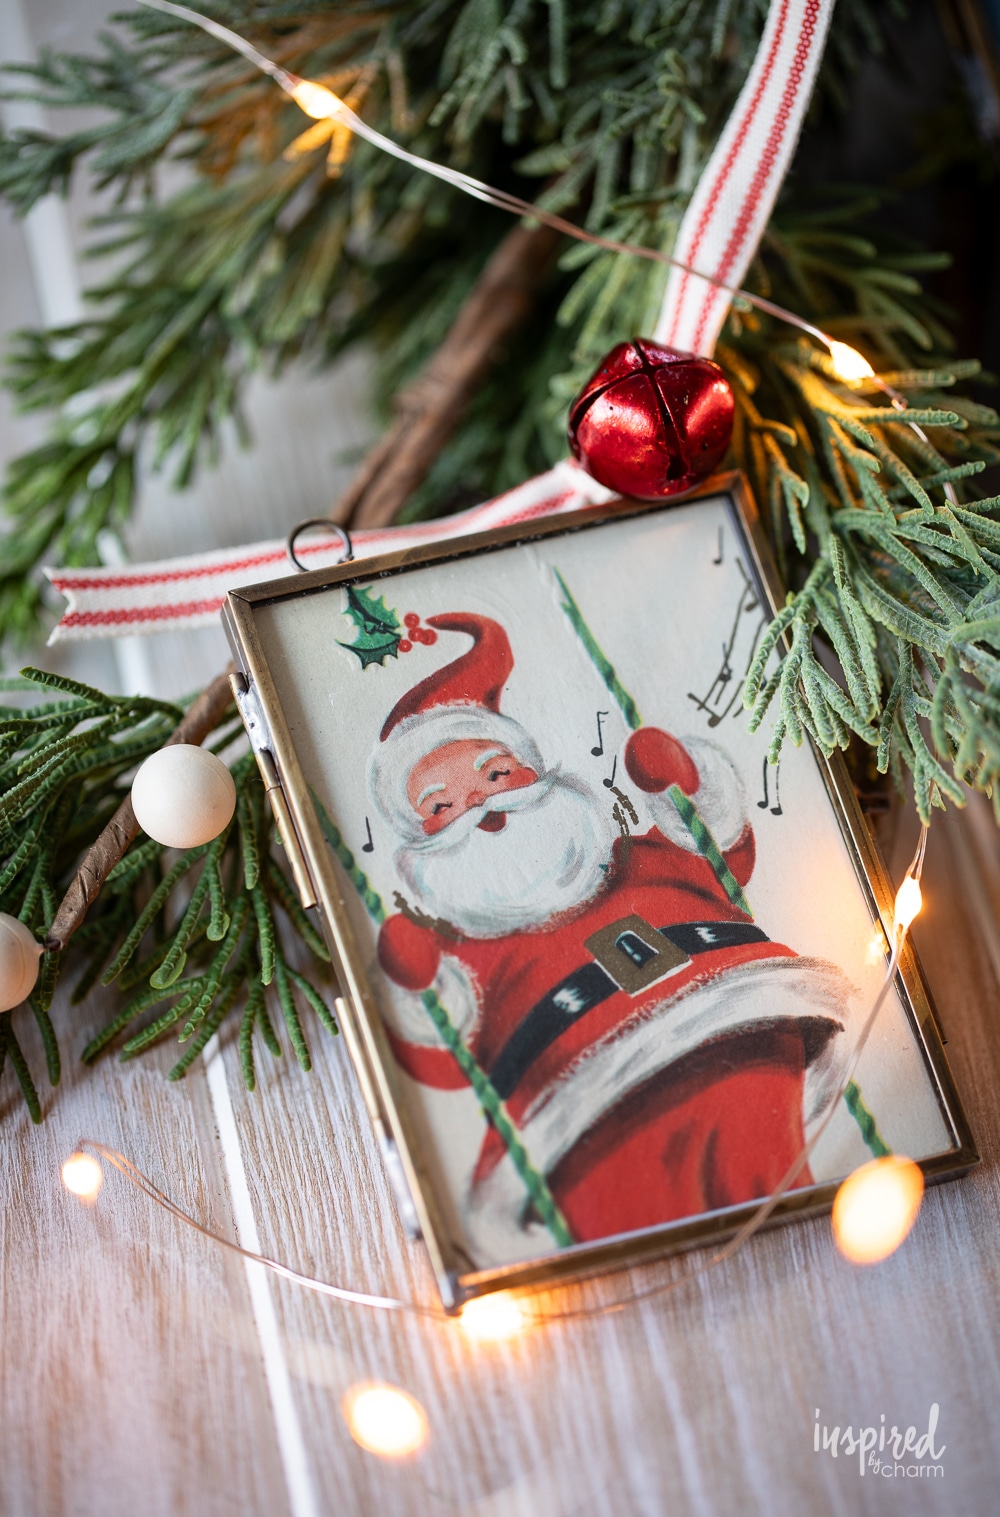
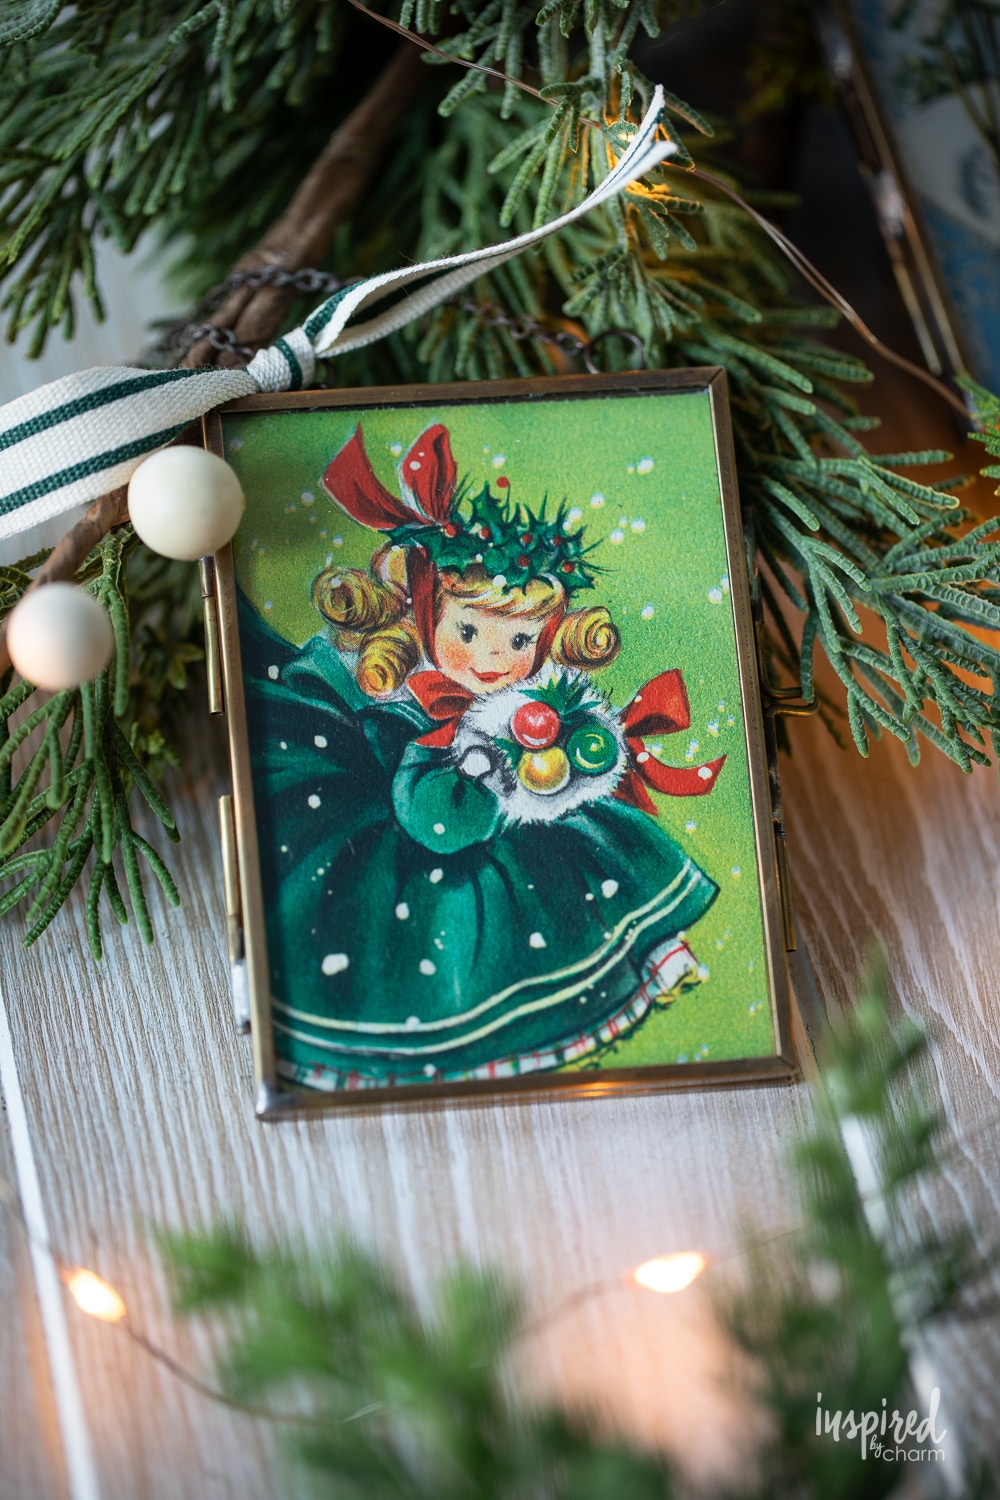
- Open up your photo frame and place the image inside. Close the frame and secure the clasp on the side.
- If you’d like, you can embellish your ornament with a ribbon and/or a jingle bell.
And that’s it! Hang it on your tree, wrap it up as a gift, or use it as an embellishment with your holiday wrapping.
It’s that simple, my friend!
Now it’s time to transform some vintage cards into adorable, unique ornaments that can grace your tree or add a personal touch to your gifts. Whether you’re a seasoned crafter or just looking for a fun holiday activity, this project is for everyone. So grab your glue sticks, and turn some old cards into new treasures!
More Holiday DIY Projects You’ll Love
- Vintage-Inspired Christmas Gift Bags
- DIY Christmas Cookie Bags
- DIY Vintage Bobbin Christmas Garland
- Handmade Marshmallow Wreath
- DIY Wood Stockings
- Handmade Clay Christmas Ornaments
If you give this project a try, please stop back and tell me all about it. I’d also love it if you left a five-star review in the comment section below. Thanks in advance!
Want more from Inspired by Charm? Join the IBC Mailing List for inspiration in your inbox! Follow along on Instagram and TikTok for daily updates and behind-the-scenes looks at my processes. There’s even more inspiration on Facebook and Pinterest!

DIY Framed Vintage Christmas Card Ornament
Ingredients
- Vintage Christmas cards
- Small glass photo frames
- Scrapbooking paper
- Pencil
- Scissors
- Glue stick
- Ribbons and jingle bells optional
Instructions
- Start by creating a template for your photo frame. Cut a square/rectangular piece of paper that fits perfectly into the frame.
- Next, use your photo frame to determine which part of your card you want to frame.
- Place your template over this area and trace around it with a pencil.
- Use your scissors to cut pit the chosen vintage card image.
- Then, use your template again to trace a square/rectangle out of coordinating scrapbook paper. (You could also use another part of the given card or another Christmas card.)
- Cut this out with scissors.
- Use your glue stick to glue the two wrong sides together.
- Open up your photo frame and place the image inside. Close the frame and secure the clasp on the side.
- If you’d like, you can embellish your ornament with a ribbon and/or a jingle bell.
Where to get the frames?
In the post, under Materials, I’ve shared links to several sources for the frames.
xo Michael
Michael always has the most fun & simple crafts, but his Christmas stuff is off the charts! Loved doing this one!
So happy to hear that Lisbeth! Thank you!!
xo Michael
So many ways you could do these! Thanks
You’re so welcome!
xo Michael
This is such a great idea! I have vintage Christmas cards from when my Dad, who has passed, was a child. They are from the early 1940’s. I usually just put them out as decorations at Christmas, now I can hang them on the tree and they won’t get destroyed.
Yes! Totally. Love that idea!
xo Michael
I love vintage Christmas cards and postcards! I recently got a collection of 10 Vintage Christmas postcards dating back to early 1900’s for $3 at a local thrift shop. I also like to frame some of the prettier cards I get and use them to decorate. I’ll have to be on the lookout for those same frames! Love the idea! Merry Christmas Michael!
What an amazing find! Merry Christmas!!
xo Michael
You really have the best unique ideas for decorating. I can see using these mini frames for lots of celebrations too! Genius!!
Thank you so much!
xo Michael
The cutest idea.
Thank you Judy!
xo Michael
So creative and fun for our tree and as gifts!!🎄. Can’t wait to start this project!!
Thank you! Thank you!
xo Michael
I knew there was a reason I’ve been saving the Christmas cards I’d received for the past 19 years! While not all of them are vintage style, I love this DIY! Thank you!
I hope you’re able to put those cards to use. Thank you!
xo Michael
These are wonderful and such a perfect idea for adding a lovely touch to Christmas! Thank you!
These are adorable!! Can’t wait to make some of my own!
Thank you so much! Happy Crafting!!
xo Michael
I love these! Vintage cards have the best graphics and I can’t wait to make these. It will add such a personal touch to our tree. You always have such amazing ideas, thanks for sharing.
Thank you! Happy Crafting!
xo Michael