DIY Colorful Wood Trees
This Post May Contain Affiliate Links. Please Read Our Disclosure Policy
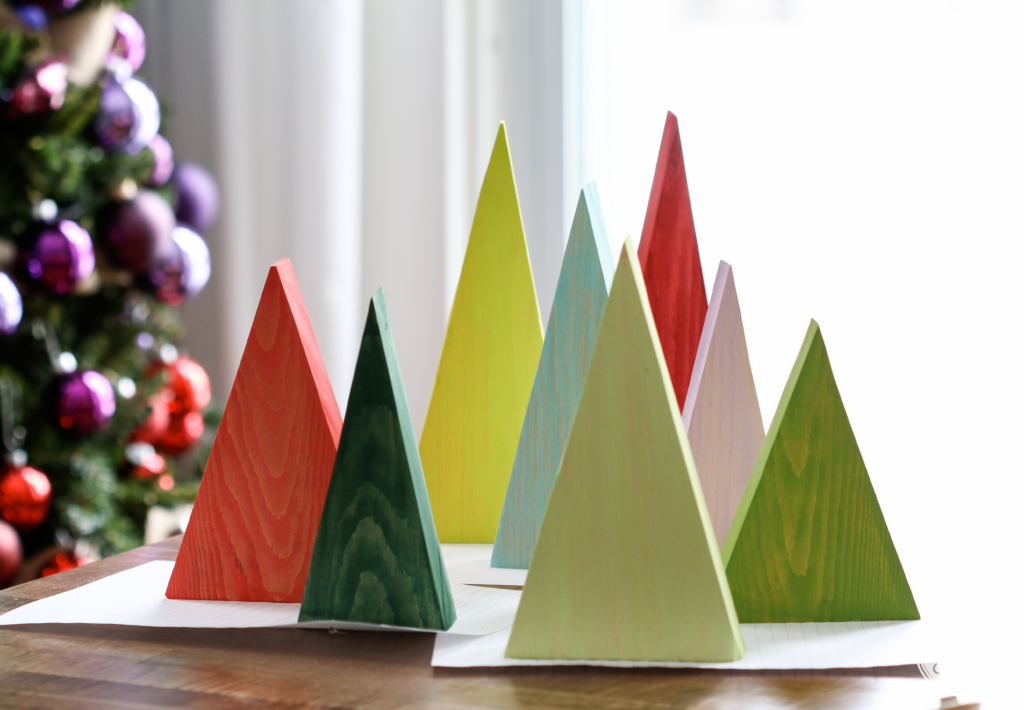
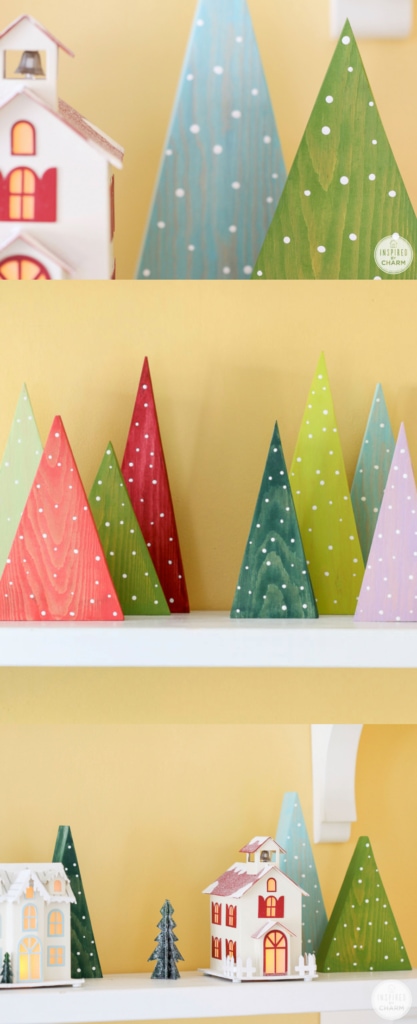
Bring handmade cheer to your holiday decorating with these Colorful Wood Trees. This easy DIY craft uses basic materials like wood, paint, and a little creativity to create something special. They’re perfect for adding a pop of color to your home or gifting to friends and family. Simple, stylish, and endlessly customizable.
There’s something special about handmade holiday decor. It’s personal, it’s meaningful, and it brings a certain warmth that store-bought pieces just can’t match. These DIY Colorful Wood Christmas Trees (Or, as I like to call them, my colorful little forest) have been a favorite project of mine for years, and even now, they make me smile every time I unpack them for the season. They’re cheerful, simple to create, and the kind of craft that makes your home feel instantly festive.
If you’re looking for a fun and easy project to add a splash of color to your holiday decor, this is the one. Once the triangles are cut, the rest is pure fun! Whether you stick to classic Christmas hues or go bold and bright, these little trees are a joyful way to celebrate the season and make something uniquely your own.

Why You’ll Love This Project
- It’s simple yet striking. These colorful wood Christmas trees come together with just a few supplies, but the finished result looks so cheerful and polished. Even beginners will find this project easy to tackle.
- Completely customizable. Choose colors that complement your holiday decor or go bright and playful for a modern twist. You can keep things minimal or add extra flair with glitter, sequins, or garlands.
- A fun group activity. This is a great craft to do with kids, friends, or at a holiday get-together. Everyone can paint their own “tree,” and no two will ever look alike.
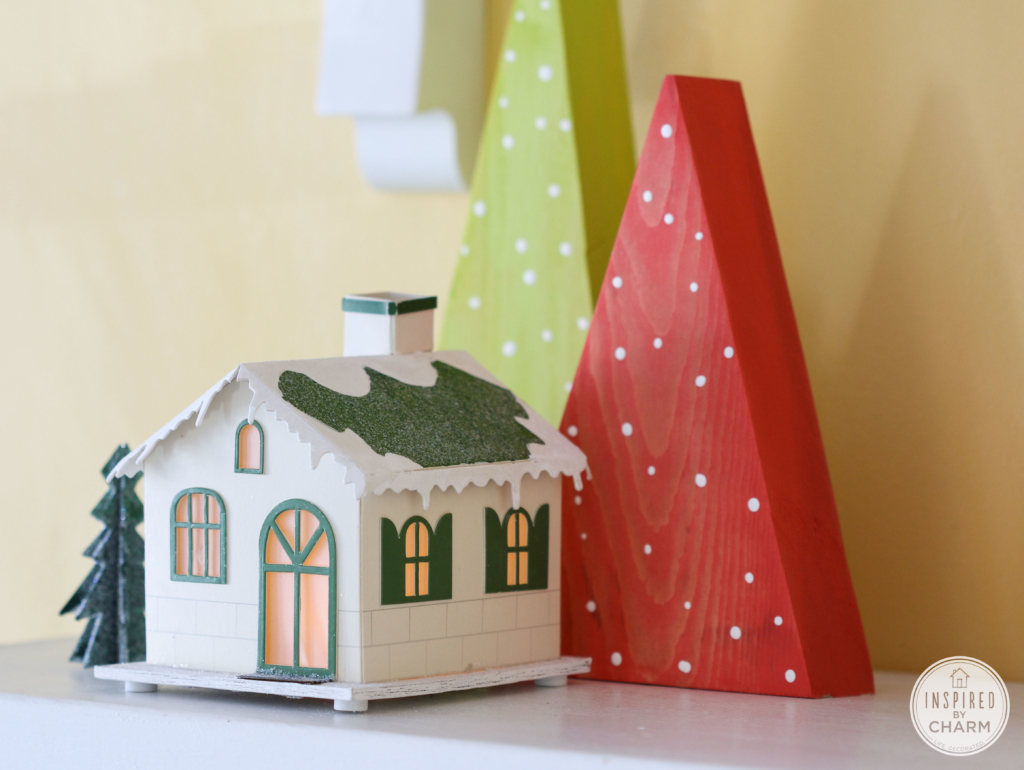
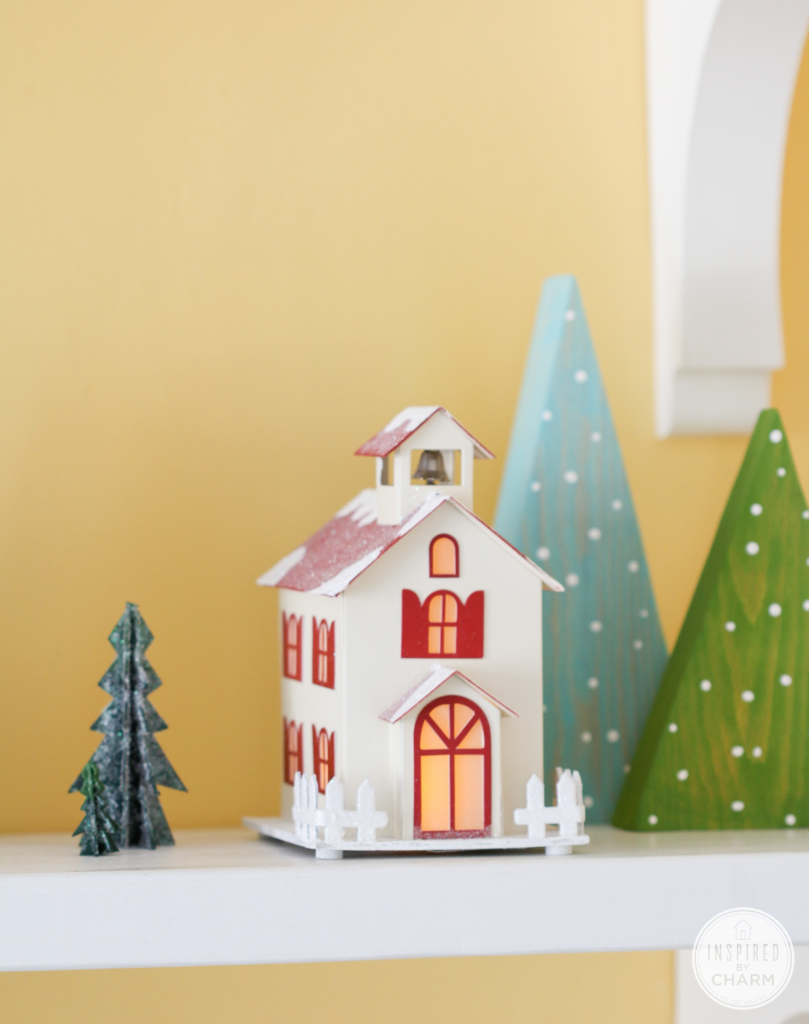
- Endless decorating possibilities. Display them on a mantel, tuck them into your Christmas village, or give them as handmade gifts. They add a pop of color and a personal touch wherever they go.
Love making your Christmas decor? Me too! In recent years it’s been one of the highlights of my holiday season. I have an entire post dedicated to all my favorite handmade Christmas decor that I’m sure you’ll love.

Materials
Let’s get into the materials list. You only need three things to make these colorful wood trees. Love that!
- Wood board(s) – A simple 2×6 board works perfectly for this project. Once cut into triangles, it becomes the base for your colorful little forest.
- Sandpaper – Used to smooth the edges and surfaces of the wood after cutting, giving each tree a clean, finished look.
- Craft or acrylic paint – Choose your favorite shades of craft or acrylic paint to bring your trees to life. Go for a mix of traditional Christmas colors or something a bit more modern and unexpected.
- Paintbrushes – You’ll need a few different brushes for painting and detailing. The back end of a small brush also comes in handy for adding the white dots.

How to Make
Okay, are you ready to start crafting? Let’s do it! I’ll still take you through the steps below. I’ve also provided a list of materials and detailed instructions in the printable how-to card below.
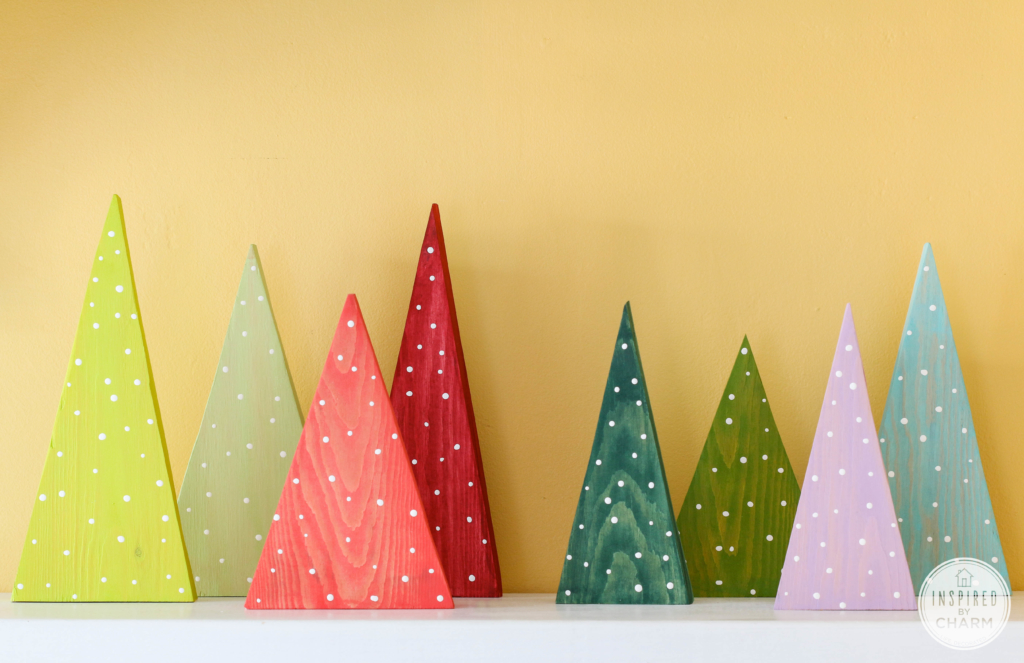
- To start, I used a 2×6-inch board and measured it into sections that could be cut into eight triangles to form the trees.

💌 SAVE THIS POST / RECIPE!

- Once the triangles were cut, I sanded each one to smooth out any rough edges.
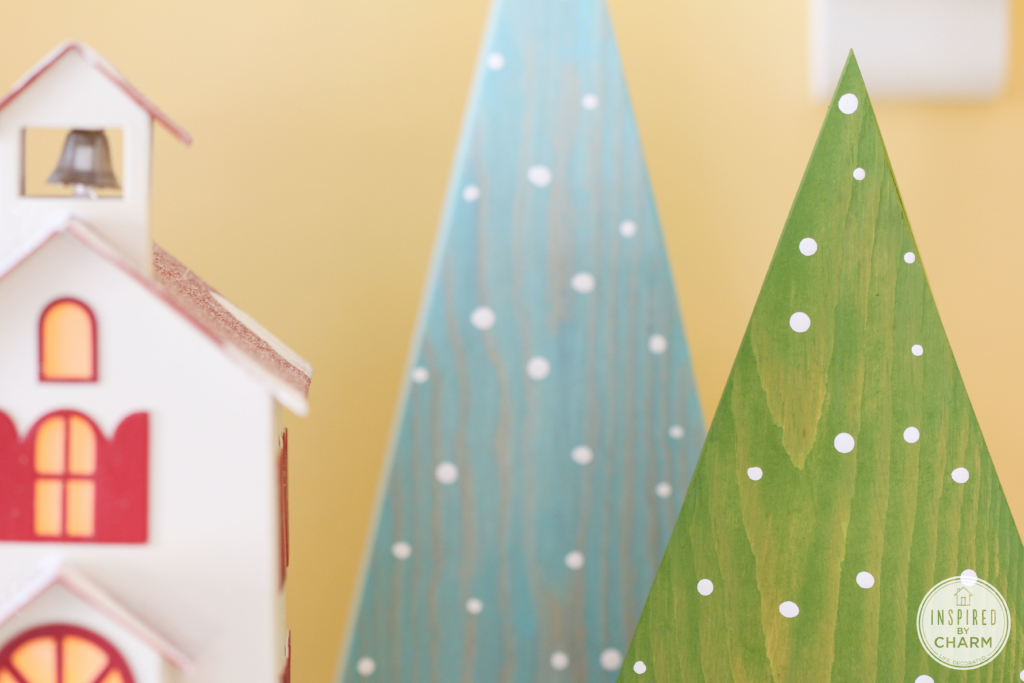
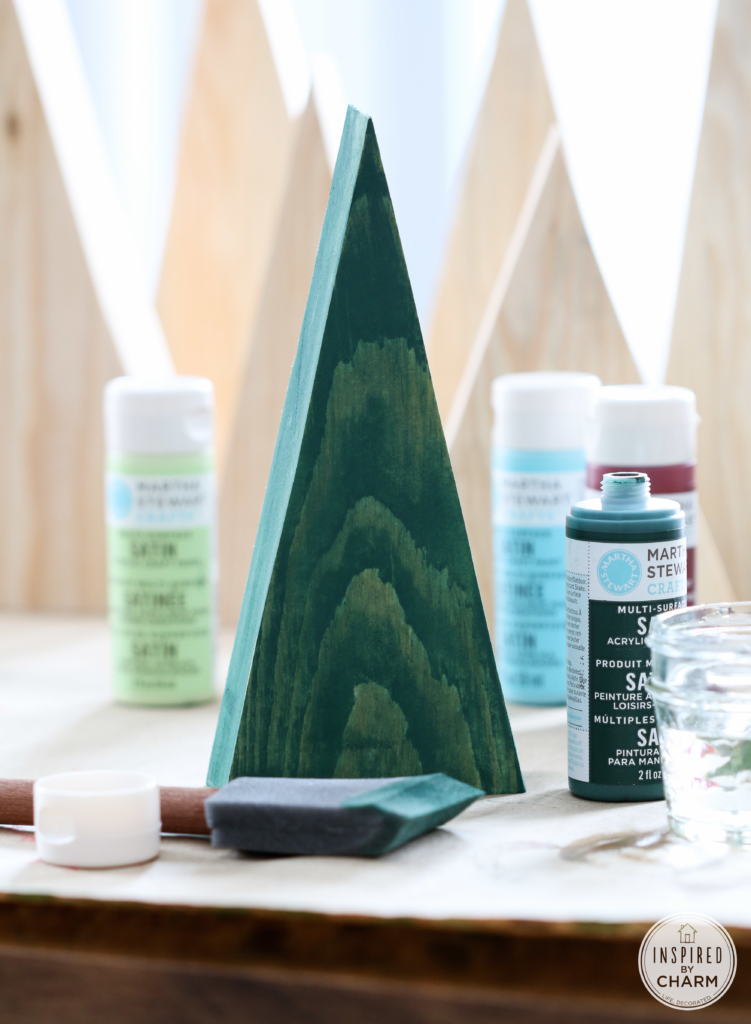
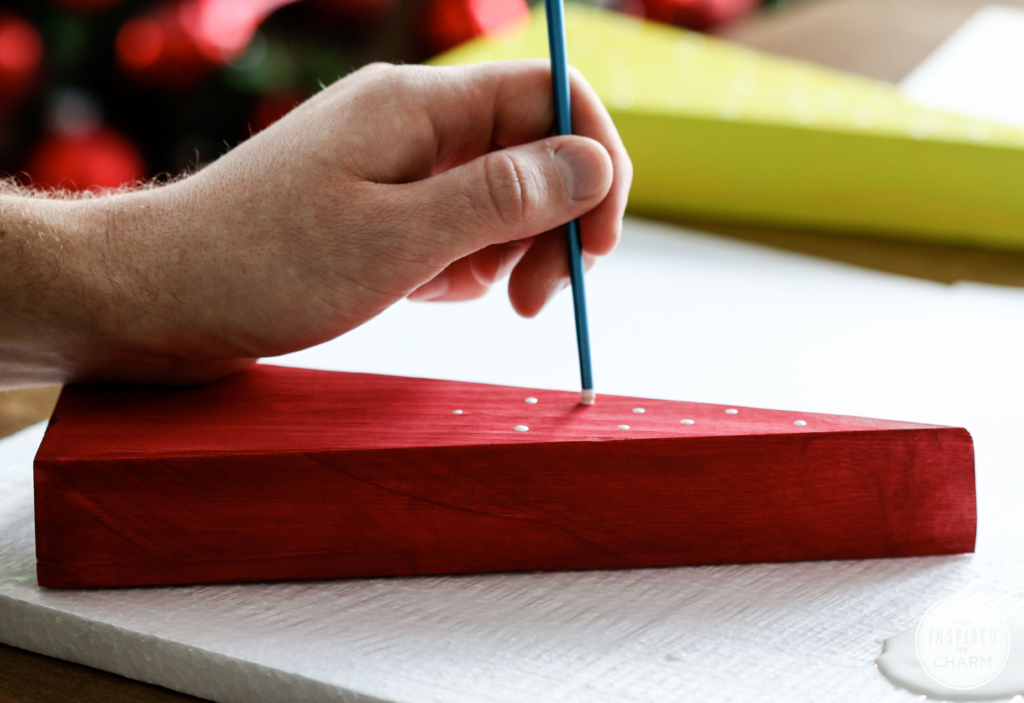
- Next, it was time to paint. I used acrylic craft paint in a satin finish, mixing in a bit of water to thin it slightly. This technique gives the paint a more translucent look and lets the natural wood grain show through.
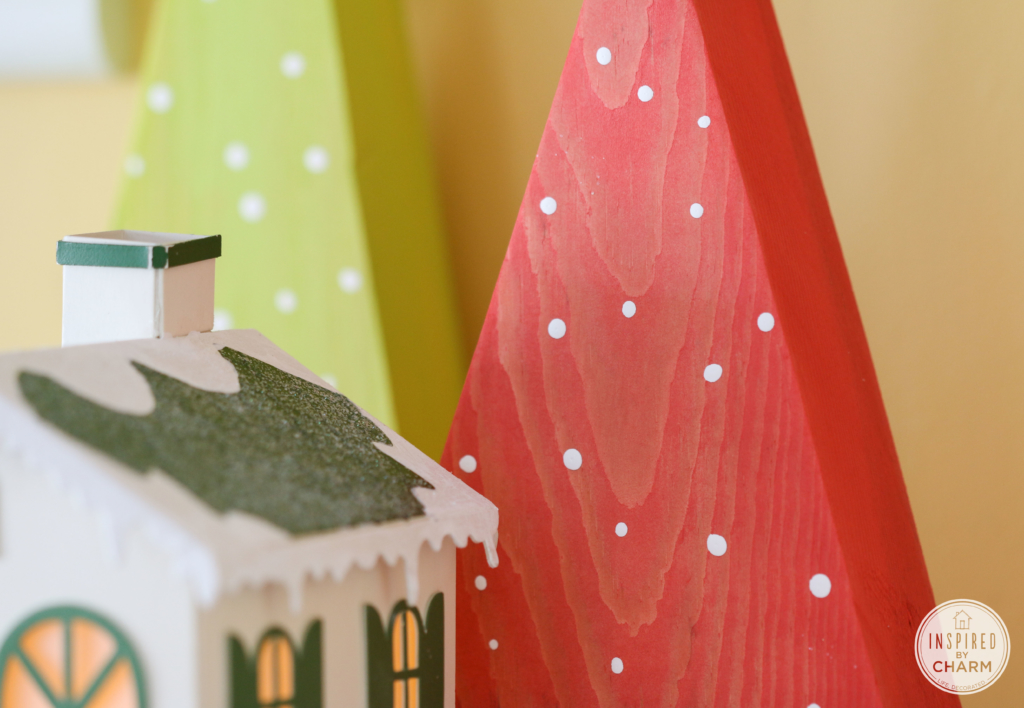
- After all of the trees were painted and dry, I added a finishing touch of “snow” or “lights,” depending on how you interpret the look.
- To do this, I used the back end of a paintbrush to dab on small white dots across each tree.
- And just like that, my colorful wood Christmas trees were complete. They are now a cheerful and creative addition to my holiday decor.
And with that, my colorful colorful wood Christmas tree decorations were complete.
Project Variations
Love this project but looking to switch it up a bit? Here are some project variations you may want to try.
- Add a Base
Attach each triangle to a small block of wood to create freestanding trees. You can even vary the base heights for a tiered look. - Play with Texture
Try staining the wood instead of painting it for a rustic, farmhouse-style version. Or experiment with chalk paint or metallic finishes for a different vibe. - Incorporate Patterns
Use a stencil or painter’s tape to create stripes, plaids, or geometric shapes. A little gold or silver detail adds a modern holiday touch. - Add Sparkle and Shine
For extra holiday magic, sprinkle on glitter while the paint is still wet or add a few sequins or gems once dry. - Personalize Them
Write names or short holiday phrases on the trees and use them as place cards, gift toppers, or handmade tags for wrapped presents.
More Handmade Holiday Decor You’ll Love
- Vintage Bobbin Christmas Garland
- DIY Christmas Cookie Bags
- Rustic Star Anise Christmas Wreath
- Bottle Brush Tree Drink Stirrers
- Cookie Cutter Wreath
These DIY Colorful Wood Trees turned out as I had envisioned! I’m loving the color combination, too. If you try this project and enjoy it, please leave a comment and a 5-star rating below.
Want more from Inspired by Charm? Join the IBC Mailing List for inspiration in your inbox! Follow along on Instagram and TikTok for daily updates and behind-the-scenes looks at my processes. There’s even more inspiration on Facebook and Pinterest!

DIY Colorful Wood Trees
Ingredients
- Wood board cut into triangles
- Sandpaper
- Craft or acrylic paint in various colors
- Paintbrushes
Instructions
- To start, I used a 2×6-inch board and measured it into sections that could be cut into eight triangles to form the trees.
- Once the triangles were cut, I sanded each one to smooth out any rough edges.
- Next, it was time to paint. I used acrylic craft paint in a satin finish, mixing in a bit of water to thin it slightly. This technique gives the paint a more translucent look and lets the natural wood grain show through.
- After all of the trees were painted and dry, I added a finishing touch of “snow” or “lights,” depending on how you interpret the look.
- To do this, I used the back end of a paintbrush to dab on small white dots across each tree.
- And just like that, my colorful wood Christmas trees were complete. They are now a cheerful and creative addition to my holiday decor.
I made these last year and EVERYbody loved them. I’m planning on making more this year, I will paint stripes on them. Next year, maybe a plaid design.
I’ve had these on my “do someday” list for ages. Now I have a new house, in a new state, and I’m decorating in a more casual country style. I’m going to ask one of the men at church to cut these for me, and then it’s painting time. They’ll look great on my fireplace mantel with other country type items. So excited! 🙂 Thanks for sharing. Love your site.
I can see I am a late comer! Just found you through Funky Junk. LOVE THES TREES!!!! (Sher shared similar trees and she gave you credit!) I am going to make a whole collection for next year. Just subscribed too! Happy to meet you!
Love! And adore your little houses. May I ask where they’re from?
I wondered the same thing. They’re very cute. Too bad he didn’t answer!
I saw your tweet to JoAnn about these the other day (they stole your idea!) and I figured I would give your blog a visit, it has been a while shame on me, to see this craft. My kids would love it. I am going to have my handy husband cut the wood so our girls and I can paint them. Such a cute Idea. I love different Christmas decorations. I am glad I saw your tweet. I also hope JoAnns rectifies the situation. So not cool of them to steal from you!
These are adorable! I made within a week after seeing this post which is super fast for me! Luckily I had my husband do all the cutting and sanding. Love these!
Love these trees! I’m making some with a group next week! I know this was almost 2 years ago when you first posted this, but do you remember what type of wood you used (the grain is awesome), and also, do you remember how large the bases of the triangles were? Or maybe just the biggest and/or the smallest? I would appreciate any and all help;) they are beautiful trees!
The wood was just basic pine lumber. Nothing fancy. These trees are still packed away, but I want to say the base sizes ranged from 5 1/2 – 2 1/2 inches. I didn’t really measure. Just cut. Haha!
Hope that helps.
xo Michael
Michael, I am getting ready to cut these and I was wondering if you could please tell me how tall these are? I see the varying heights are very appealing. Particularly the 5 1/2 inch wide ones I couldn’t figure out how tall to cut them. Thank you so much! I just love these! I will share my trees with you! I can’t wait!
I honestly didn’t measure them when I cut mine. They range in height from I’d say 4-9inches.
xo Michael
Your website is so addicting – I can’t wait to see what comes next! The polka dot trees are spectacular!
would the guys at Home Depot or Lowes be able to cut this shape
Michael, I just spotted these on Pinterest & followed the link to your site… my first time here. Love the modern trees. Wanted to leave a tip about cutting acute angles on a miter saw: you can easily build an acute-angle jig out of two short pieces of 2×4, and a square of hardboard (Masonite) or particle board as a base, and save your fingers. I used hard board for mine, & drilled a hole in it to hang from a hook on my pegboard. Just search “acute angle jig” for instructions.
wow. I love it! Pinning and sharing on facebook.. 🙂
I appreciate that! Thank you!
xo Michael
Wow. Totally beautiful. Thanks so much for sharing. I can see the kids and I totally getting into this and having the fruits of our labor on display for years to come. Thanks so much for the post!
I just discovered you thru a post on Mark Lipinski’s Fan Page….LOVE the trees!!!! It’s been eons since I’ve played with my paints….this really makes me want to dig out my brushes!!! Thanks for sharing!
I just discovered your site through Remodelaholic and the 12 Days of Christmas. I’ve come back here several times since then. You have such fun ideas, and I’m stealing this idea for the trees for next year. I already marked a weekend in October in my calendar for my husband to start cutting these little things. He laughed at me now, but he won’t be October 18. 🙂 So glad I found this site!
You’re one smart cookie! It’s always a good idea to plan ahead. I’m so glad you found me and happy to have you following along.
xo Michael
These are just darling! Lovely job 🙂
http://cafecraftea.blogspot.com/
LOVE it! I am pinning 🙂
Oh my- I love these sooo much! They would be perfect for the shelf behind my couch. I would love to link to your tutorial if you didn’t mind!
These are perfect! LOVE!! I can’t wait to make some… or have the hub do it! Ha