How to Polish Brass
This Post May Contain Affiliate Links. Please Read Our Disclosure PolicyOkay, it’s no secret that brass and gold are coming back in when it comes to home decor. Anyone who reads IBC knows that I have a tiny obsession with the trend. I really have been doing my best to control my urge to put gold and brass everywhere.
While gold and brass are trendy right now, they’ve obviously been around for years. A lot of our favorite home decor stores carry new brass accessories, but you can also pick up some fabulous antique / vintage items for a steal. Whether you’re shopping at a thrift store, antique shop, or online, keep your eyes open for all things brass. And when you are looking, don’t be dissuaded by a little tarnish. Most vintage pieces may appear weathered, dirty, and dull at first glance, but with a bit of elbow grease and polish they can look like a million bucks!
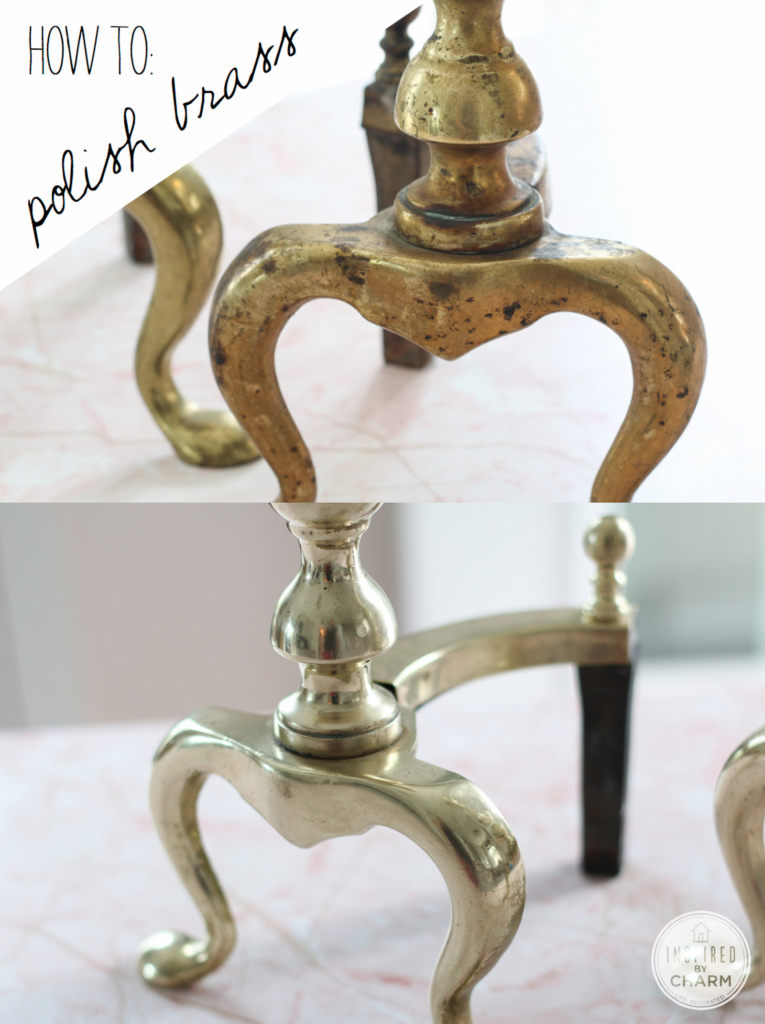
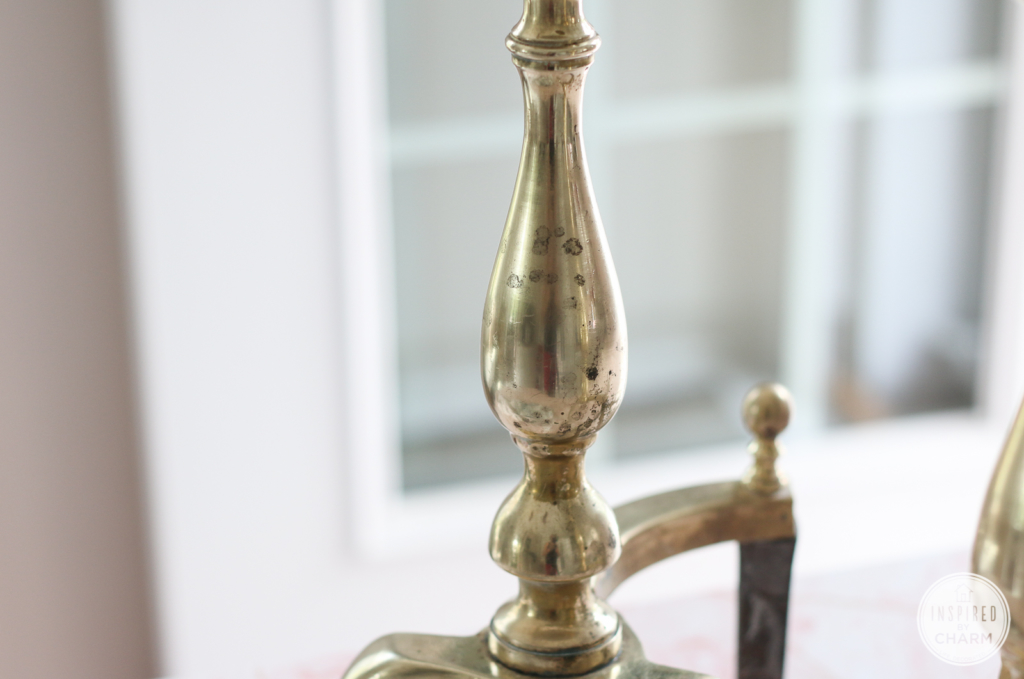
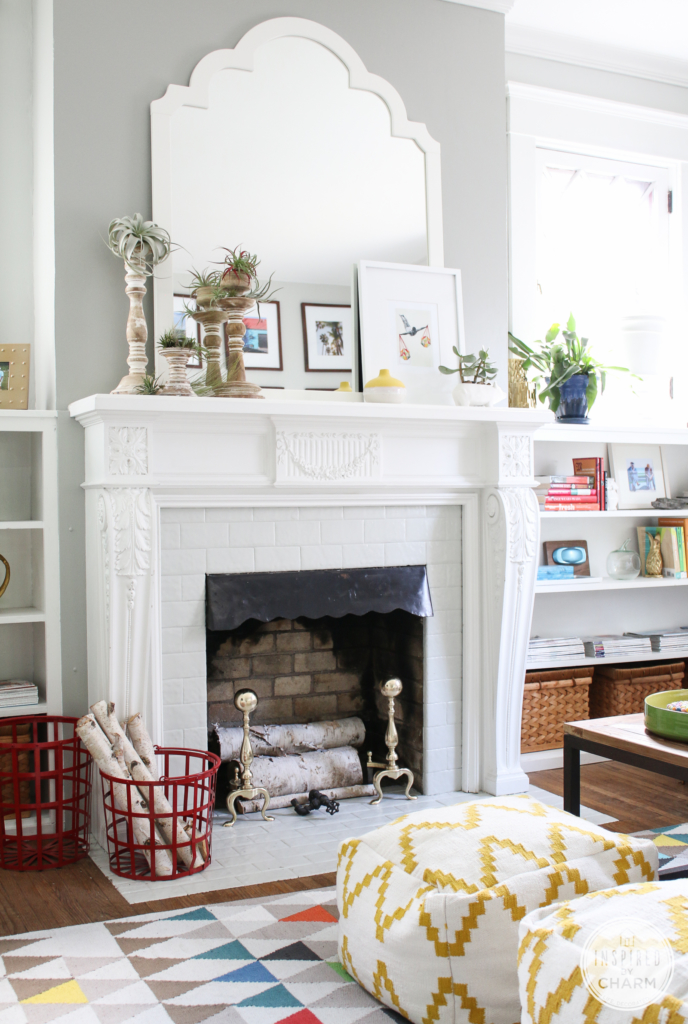
I recently found this set of brass andirons for my fireplace. I paid $25 for the set.
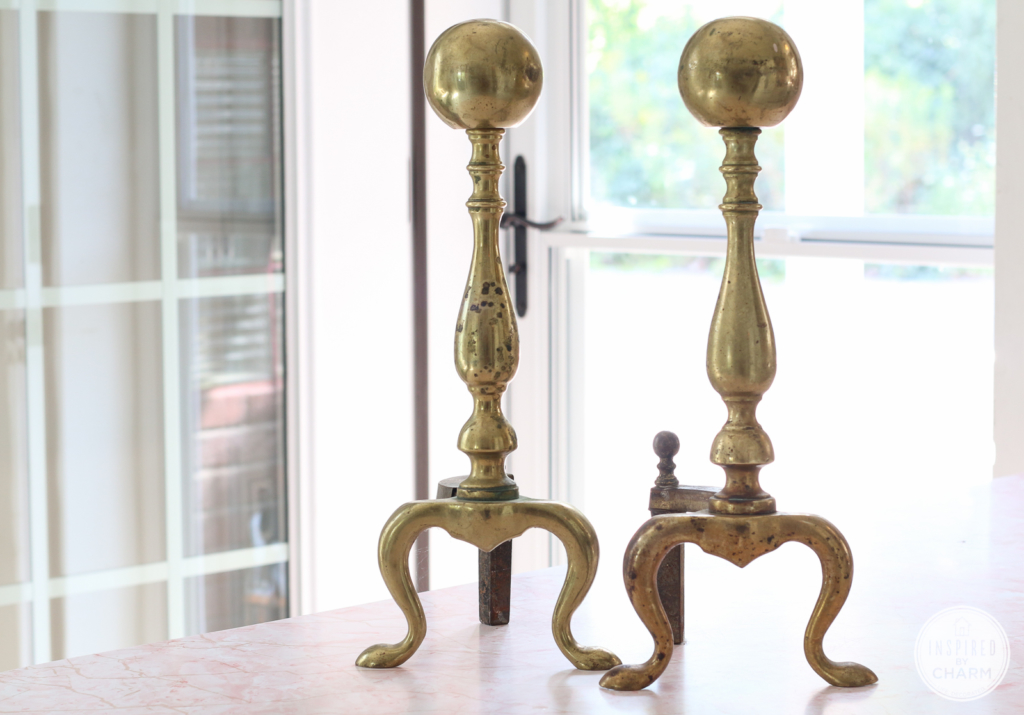
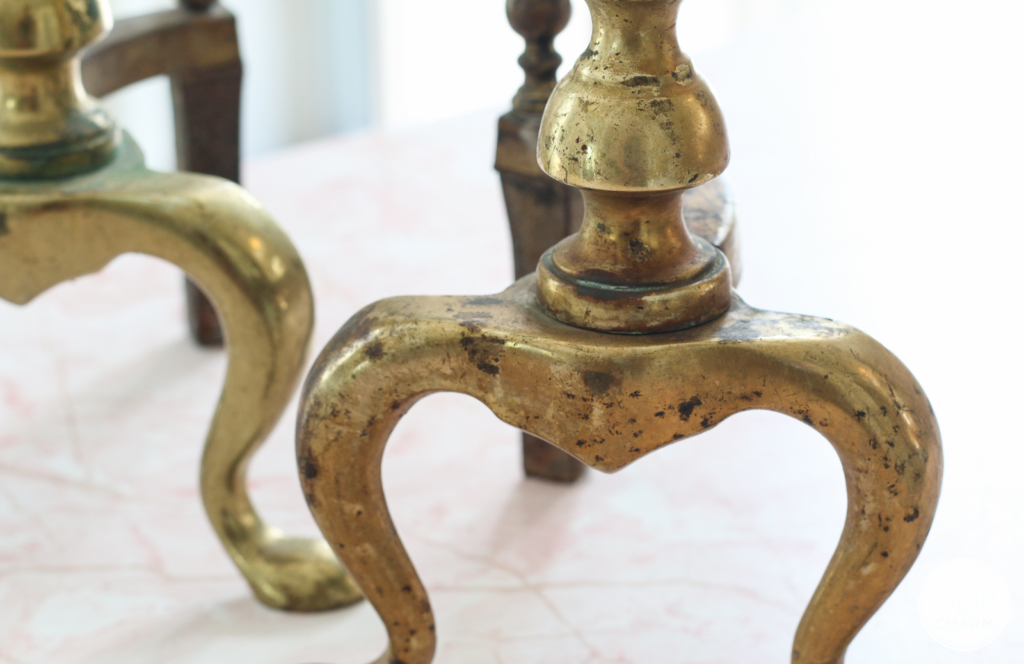
As you can see, they have been well-loved and used. I wanted to get them cleaned up, so I thought I’d take you through my process for polishing brass.
You’re going to need a few things:
Bar Keeper’s Friend
brass polish
rags
scratch-free sponge
tooth brush
a little muscle
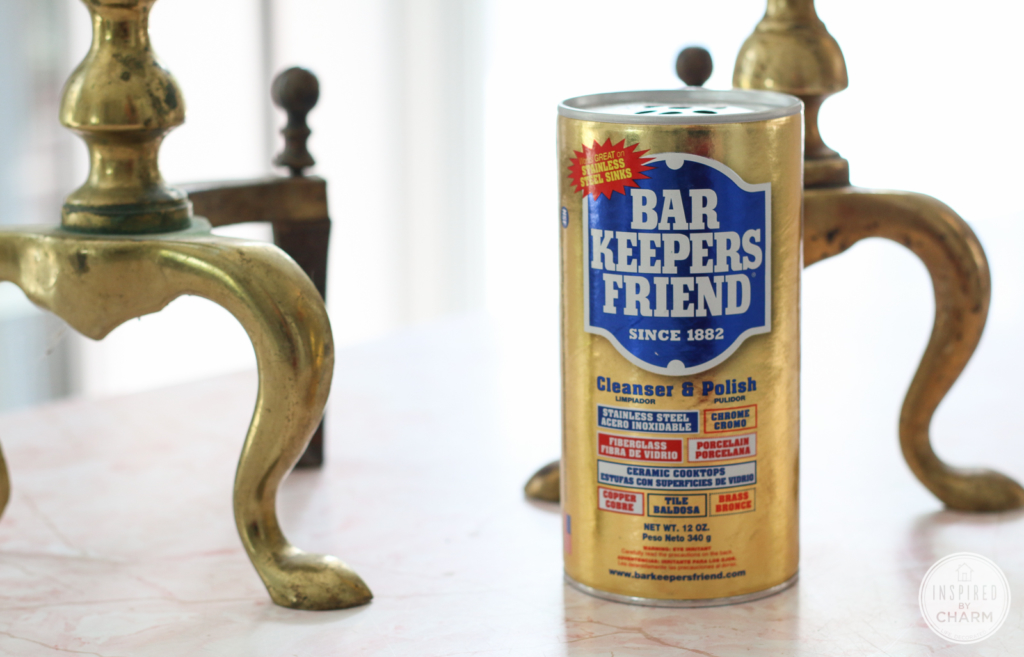
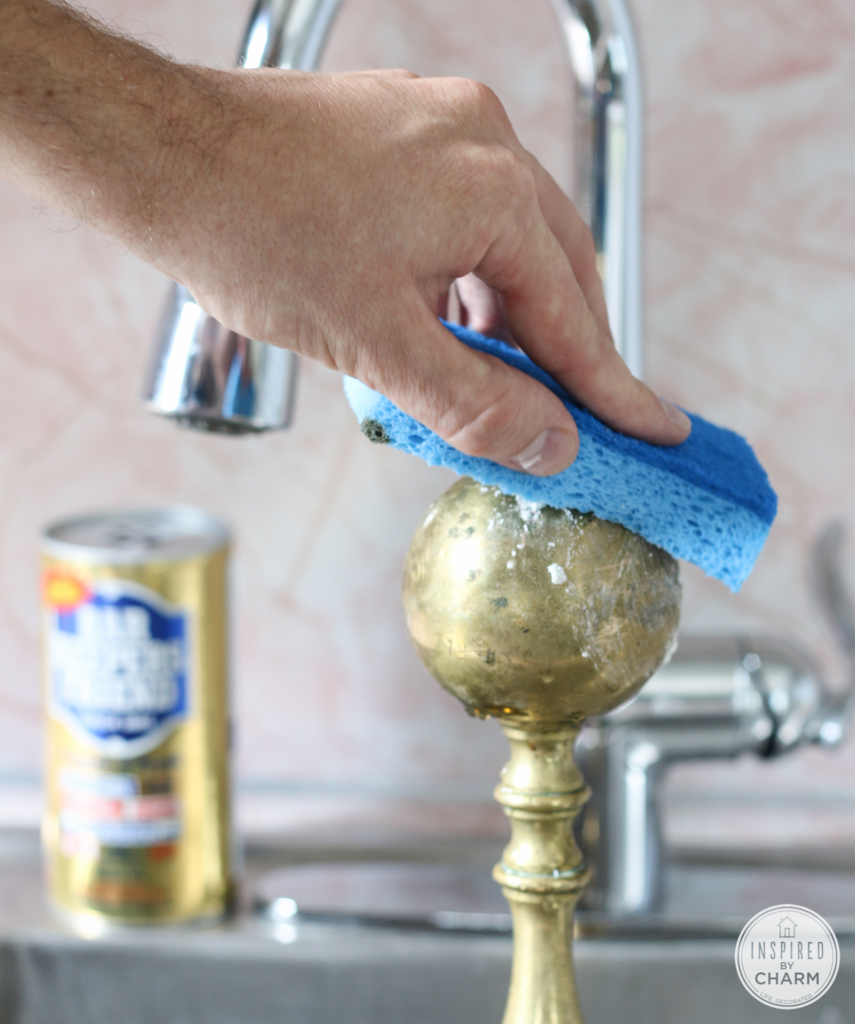
Before I start polishing, I like to clean the piece. Bar Keepers Friend is the best for this. As both a cleanser and a polisher, it’s a great way to start the polishing process. I use these scratch-free sponges from Scotch Bright with the Bar Keeper’s Friend. With a little water, just scrub away.
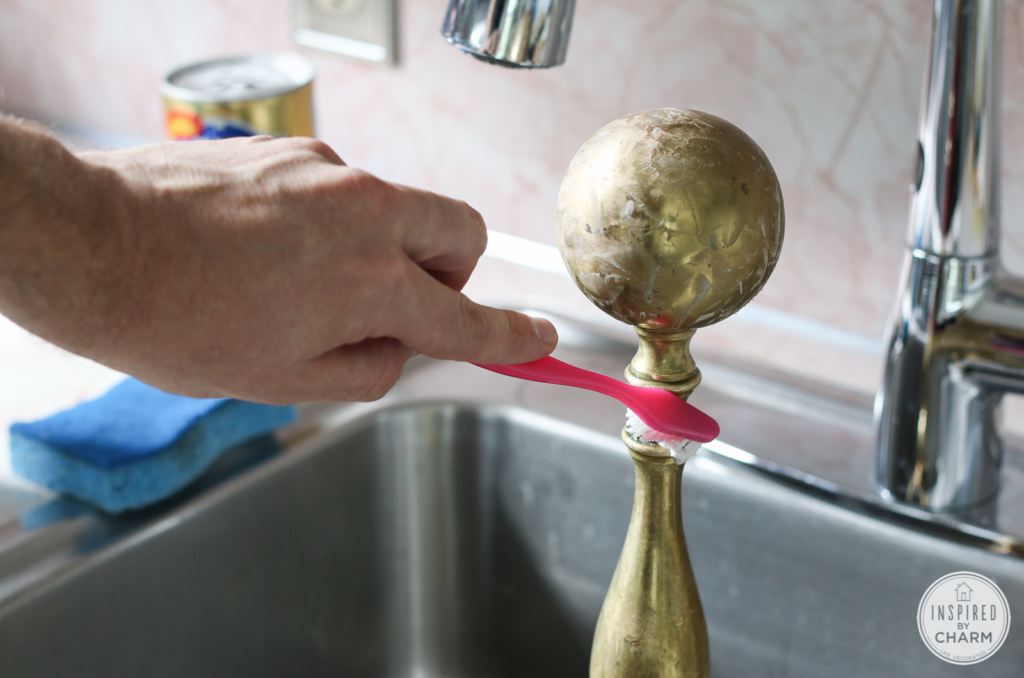
Keep in mind that neither the cleaner nor the polisher is a miracle worker. You’re going to need to put some muscle in to it to get your piece sparkling.
You can use a toothbrush to scrub any tight areas you can’t reach with a sponge.
Once, thoroughly cleaned, dry off your piece. Then, using a clean rag, apply the polish. Again, use some elbow grease. The more you polish the piece, the brighter it will shine. As before, use a toothbrush to get into any areas you can’t get into with your rag.

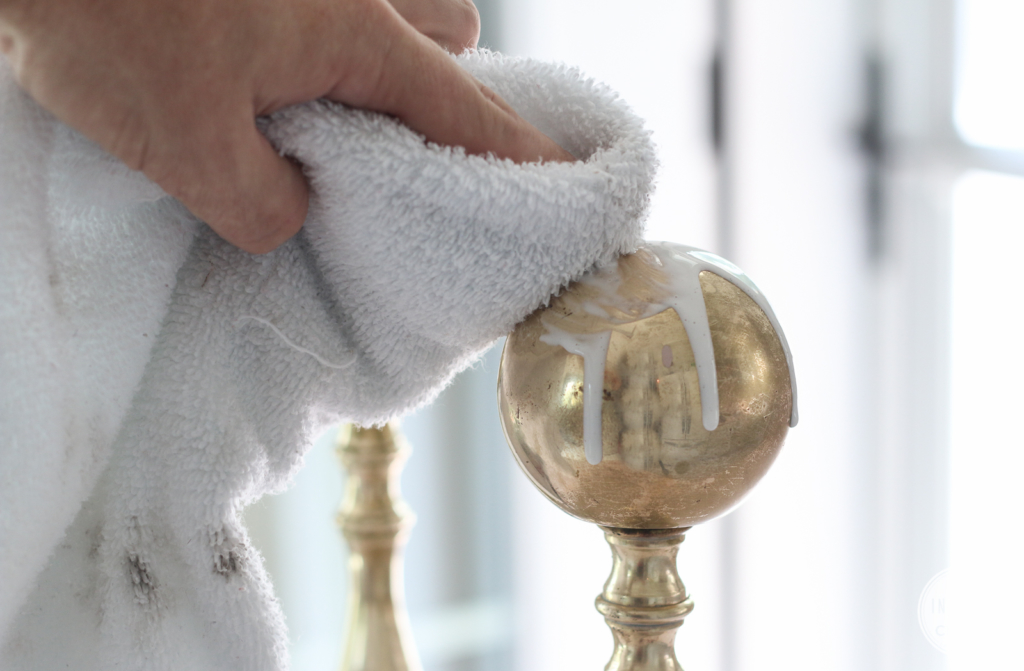
I like to leave the polish on the piece for a few minutes until it starts to dry. Then, using another rag, rub the polish off. After that, rinse your piece in water.
💌 SAVE THIS POST / RECIPE!
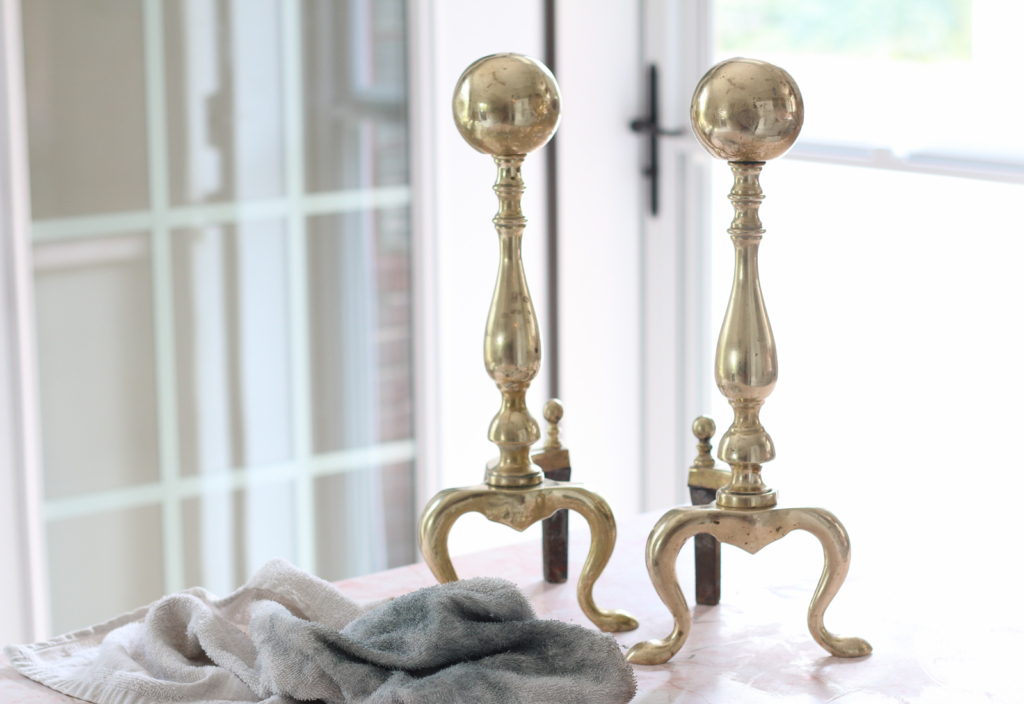
At this point, the brass probably won’t be perfect, but you should notice a huge difference. Depending on the amount of tarnish, you may may need to repeat this process a few times.
Again, the more muscle and time you give it, the better the results.
For these andirons, I went through this process two times.
As you can see, there’s a big improvement from where I started.
Now they look pretty incredible, right?
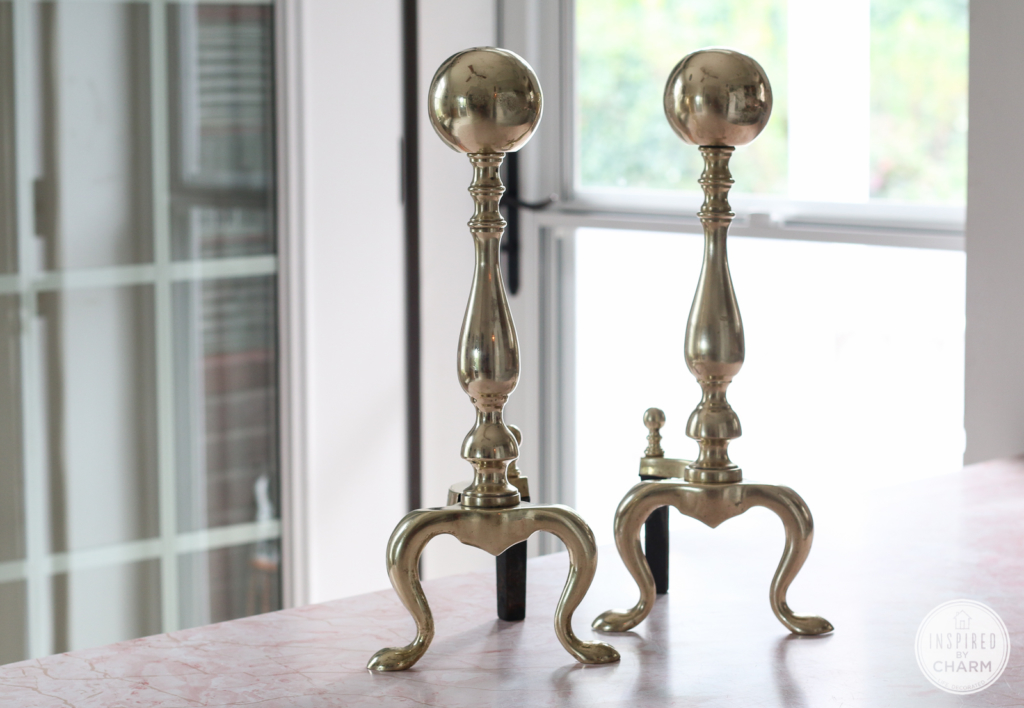
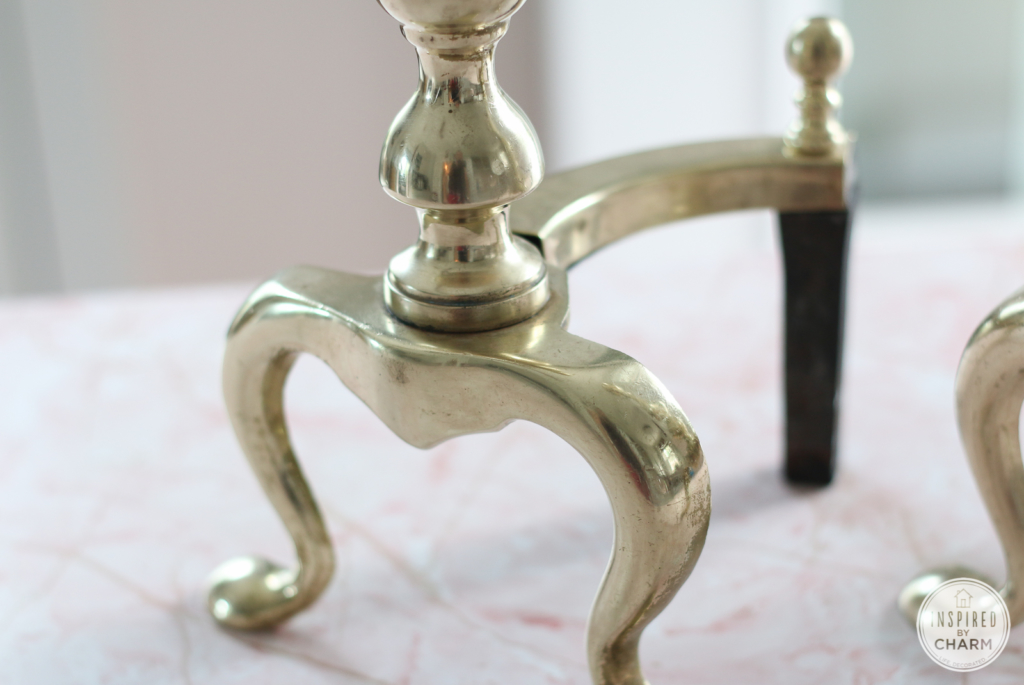
It probably wouldn’t hurt to polish them one more time; however I was happy with the results. As much as I love perfectly polished brass, I find that minor imperfections add character and charm.
Other things to keep in mind when polishing…
Sometimes brass pieces come apart to make polishing easier. Especially candlesticks.
When cleaning and polishing, turn your piece upside down, so you don’t miss anything.
It’s probably a good idea to wear gloves when using the polish. Also, make sure you’re in a well-ventilated area, and avoid touching your eyes.
You’ll probably need to polish your brass items annually. After the initial cleaning, future polishings should be much easier.
That’s it! I hope this little “how to” will encourage you to look for vintage brass items. You can get some fab deals if you’re wiling to give pieces a little love when you get them home.

If you liked this project, check out my Paint Dipped Brass Candlesticks:
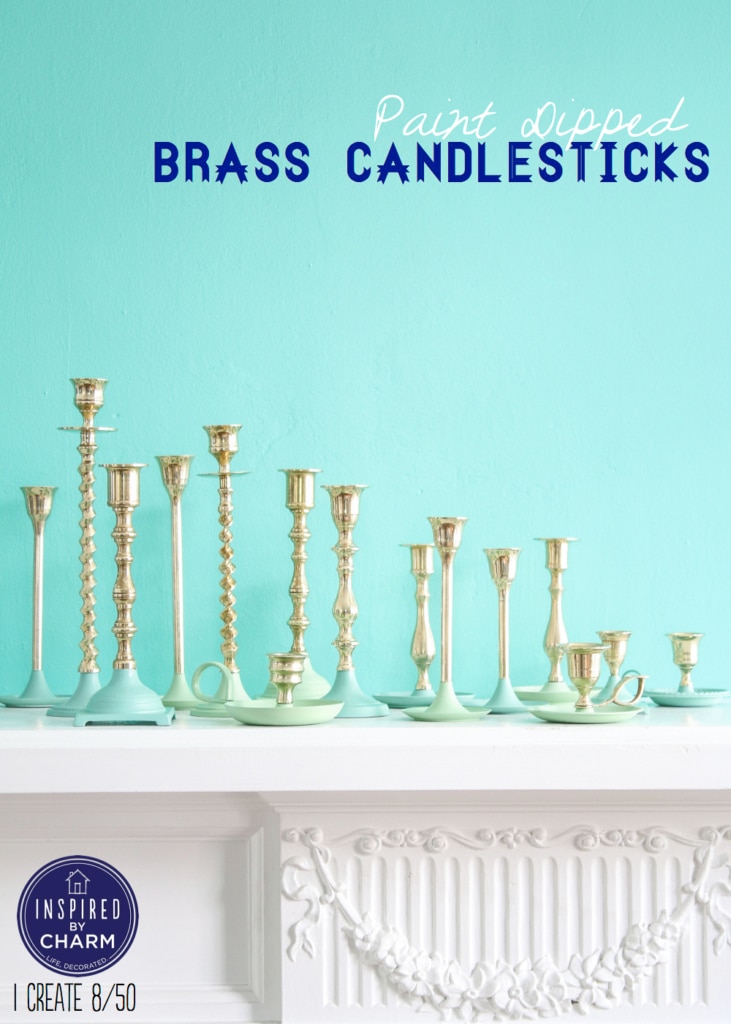
Click here for the tutorial!
I love brass too. Do you ever find that Bar Keepers Friend scratches your brass?
What a find!! They are beautiful!
What brand of brass polish do you use?
Oops! Thanks for bring that up. I forgot to include that picture. I like Weiman Brass Polish.
xo Michael
Great blog! We have an incredible amount of vintage brass pieces that we are cleaning up right now. You know you will want to check them out. Amazing finds. Thanks for all of your informative blog posts.