Halloween Gingerbread Cookies
This Post May Contain Affiliate Links. Please Read Our Disclosure Policy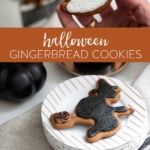
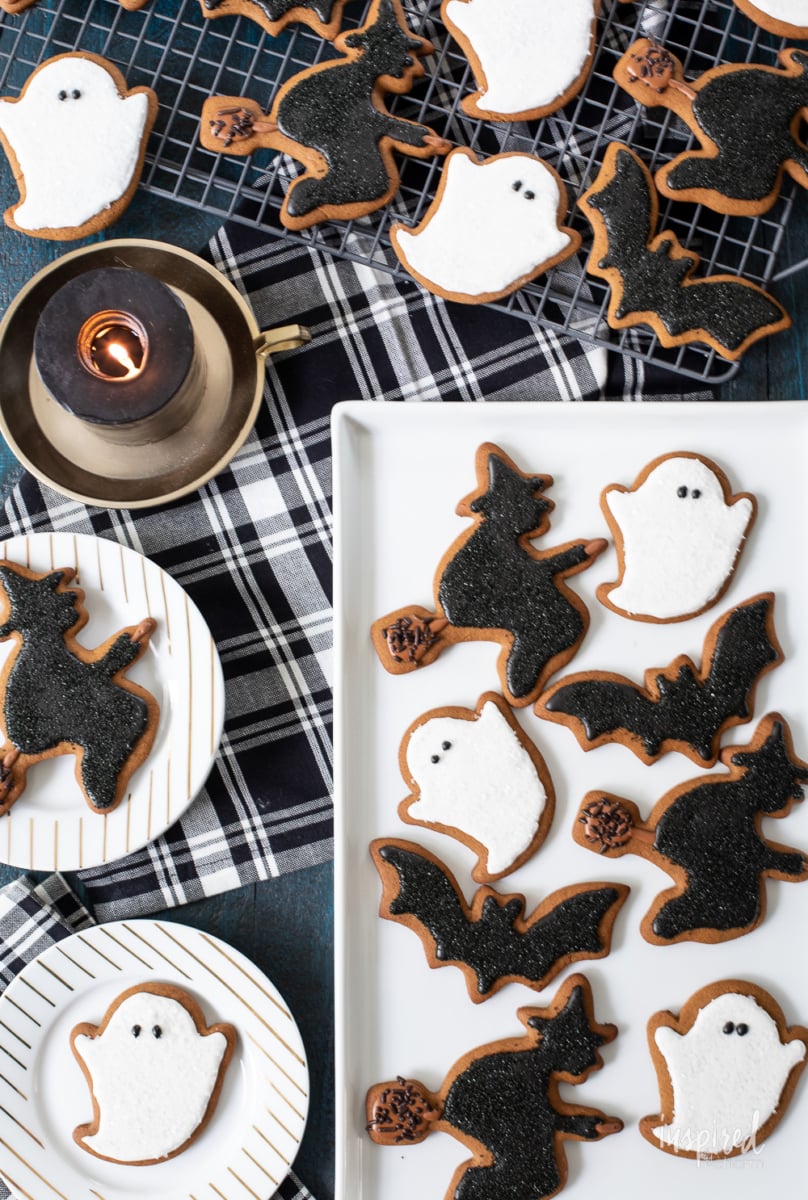
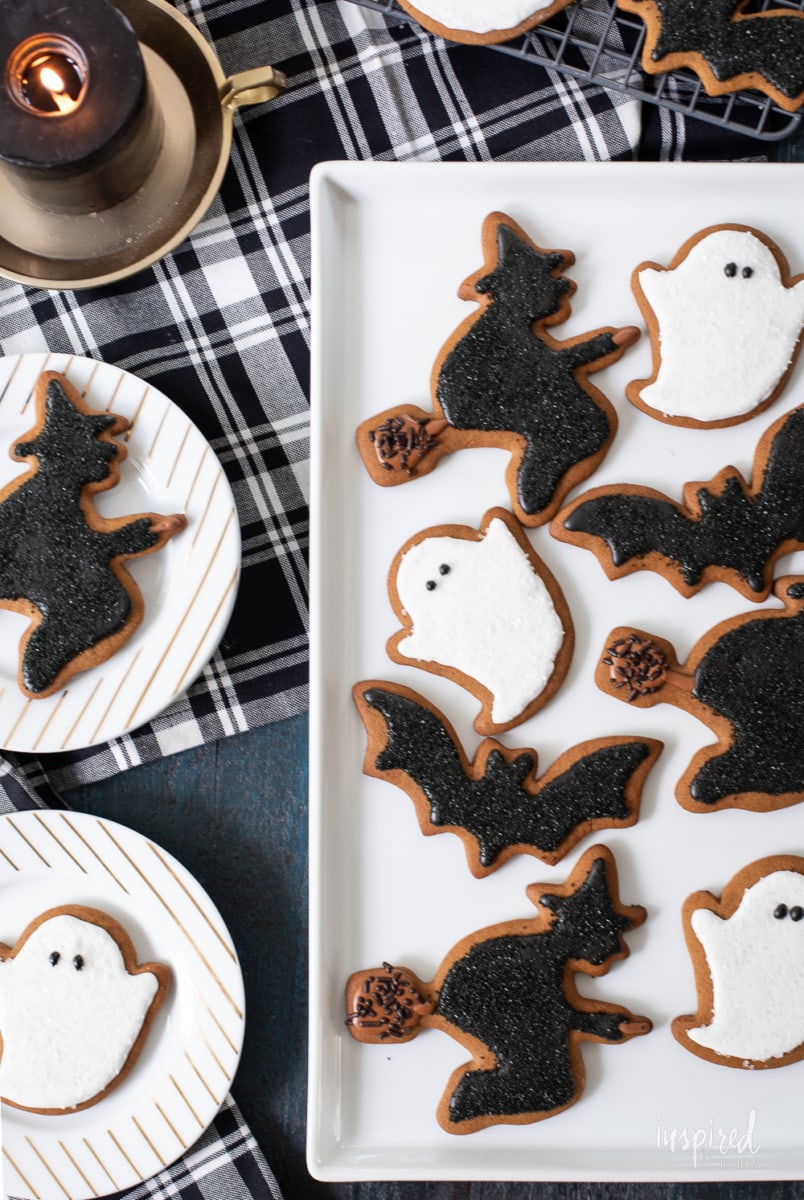
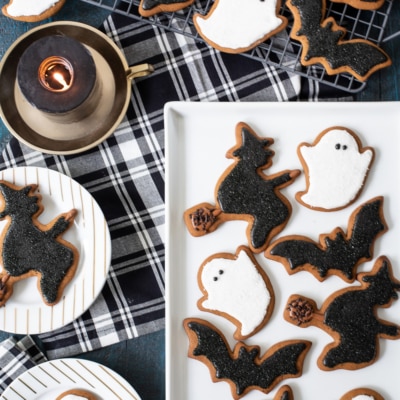
Celebrate Halloween in style with these charming gingerbread cookies shaped like bats, witches, and ghosts. The warm spices and molasses in the dough create a delicious base, while the icing adds a polished, festive look. These cookies are easy to decorate but look impressively detailed; a must-try recipe for your spooky celebrations.
A couple of years ago I discovered a hidden love for baking and decorating cut-out cookies. I’ve done trees, mushrooms, and mittens, and now I’m adding these gingerbread Halloween cookies to the list.
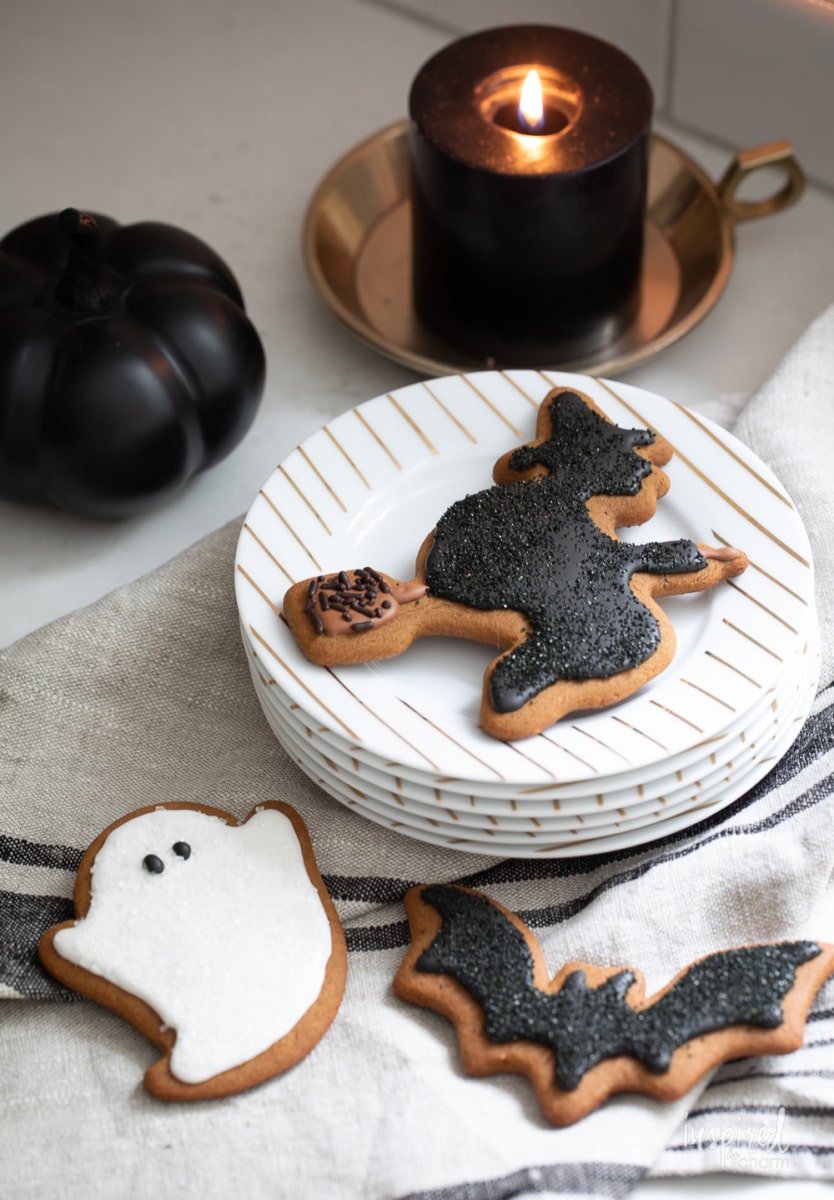
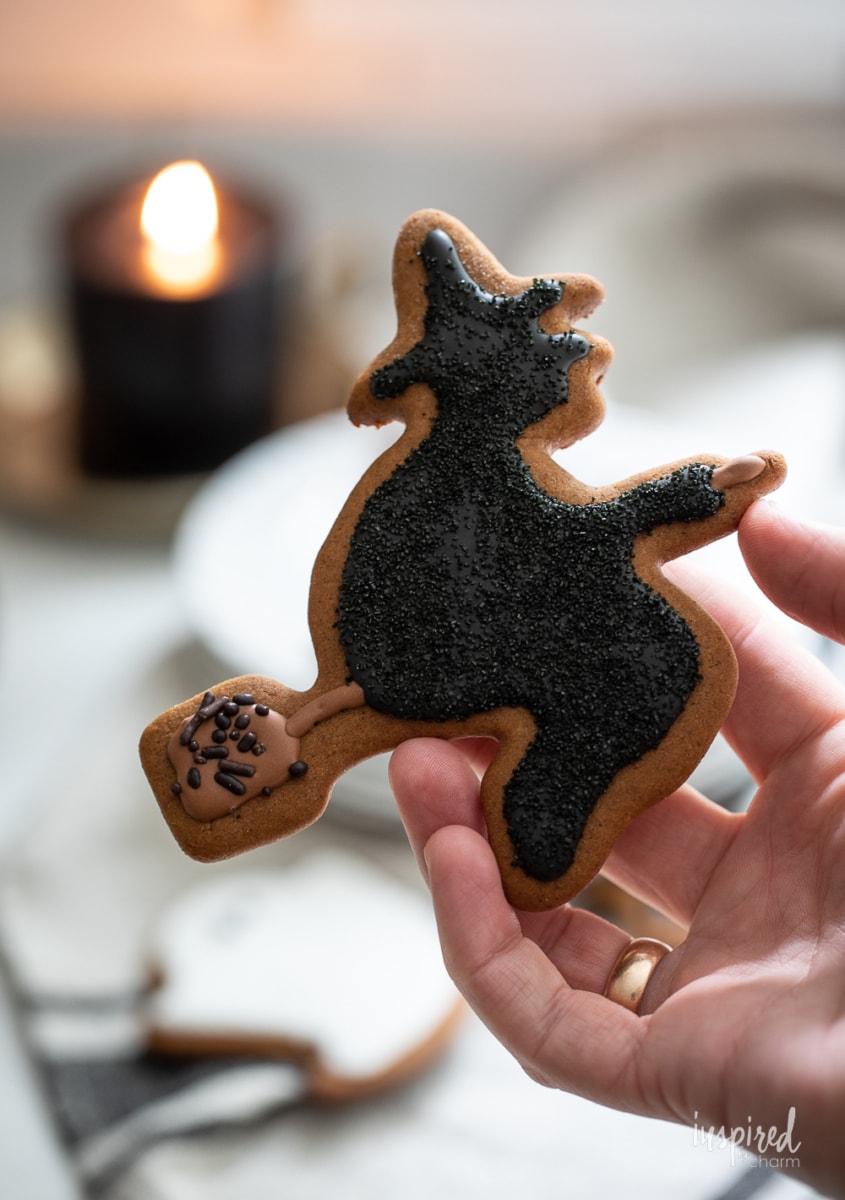
I stumbled upon this vintage witch cookie cutter and was inspired to try some cut-out cookies for a holiday other than Christmas. I’m so glad that I did because I couldn’t be more pleased with the way they turned out.
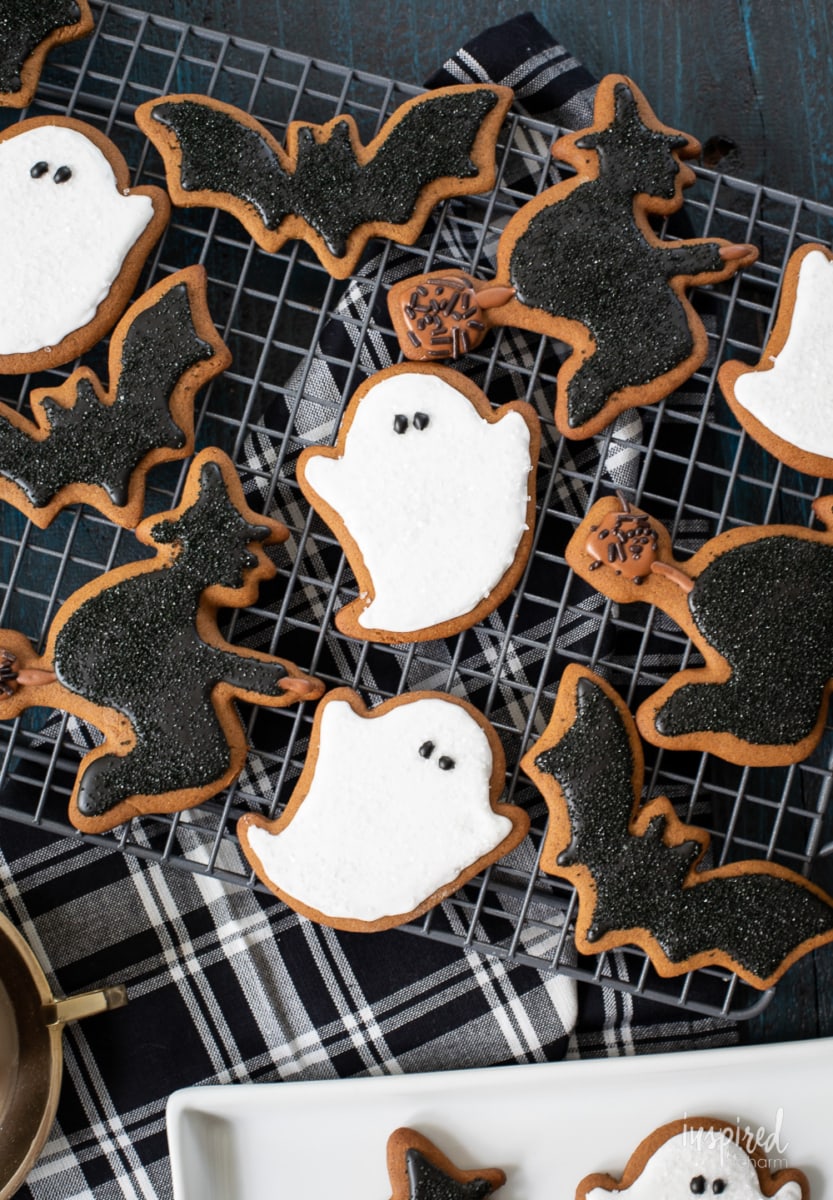
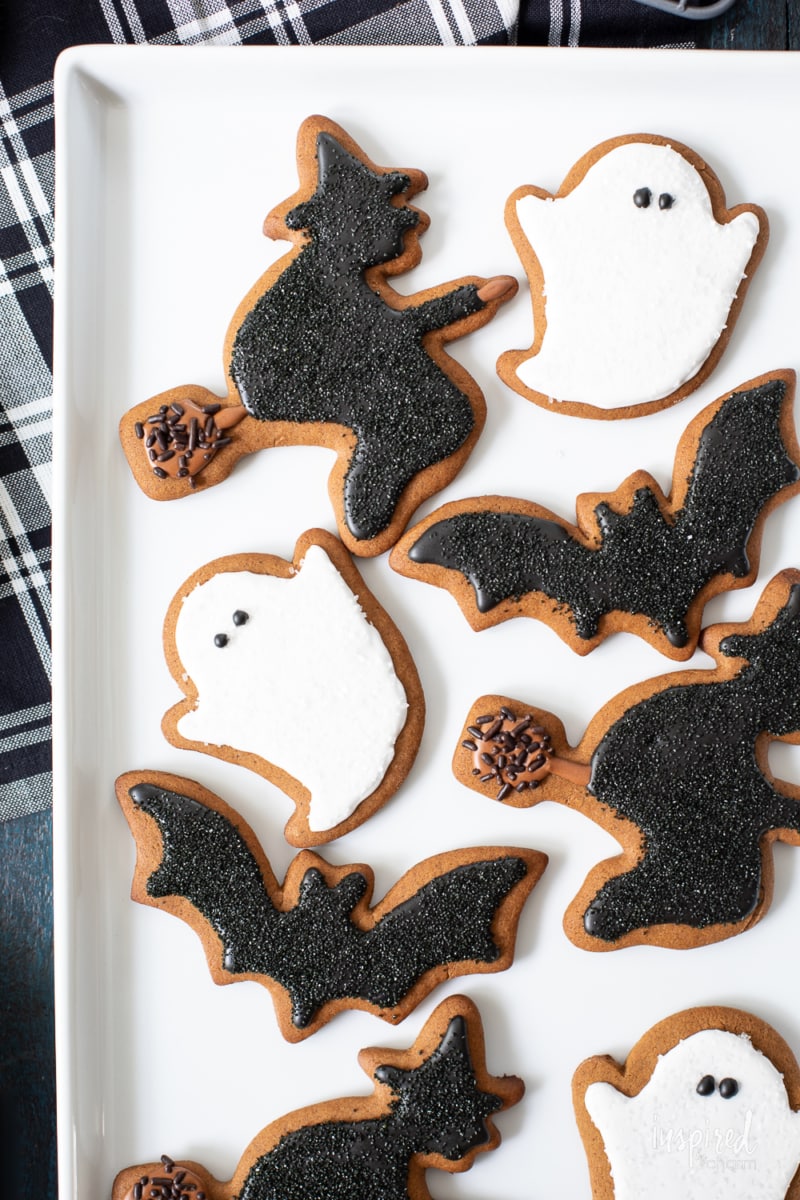
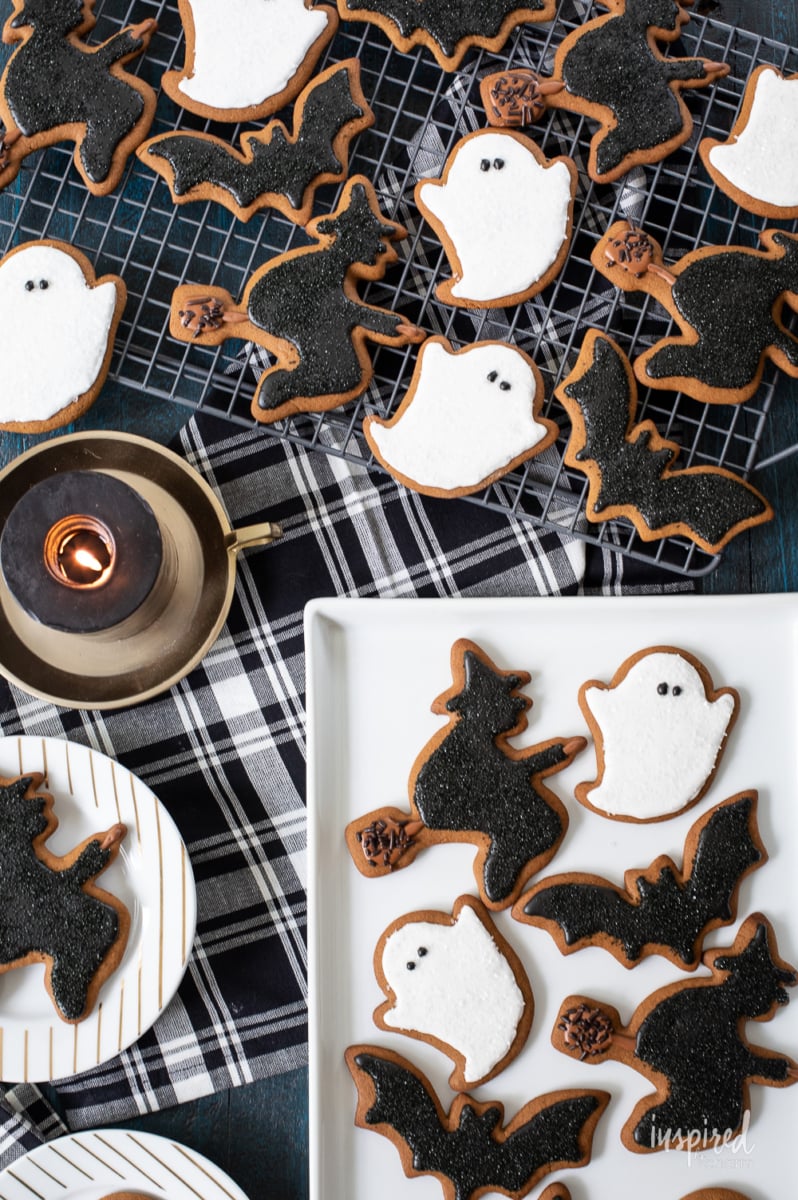
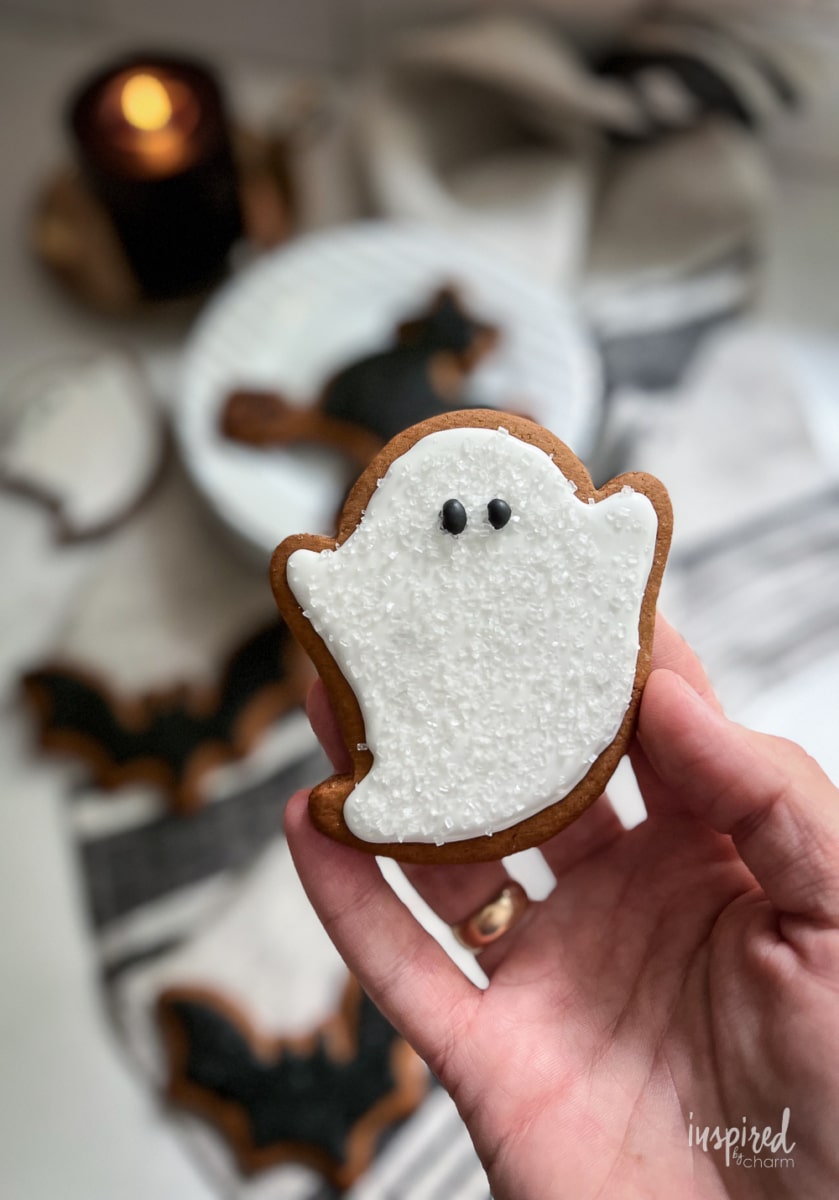
I decided to keep the cookies pretty simple. I only used three colors and didn’t do any fancy patterns or designs. And to be honest, these might be my favorite of the ones I’ve done. Simple can be beautiful.
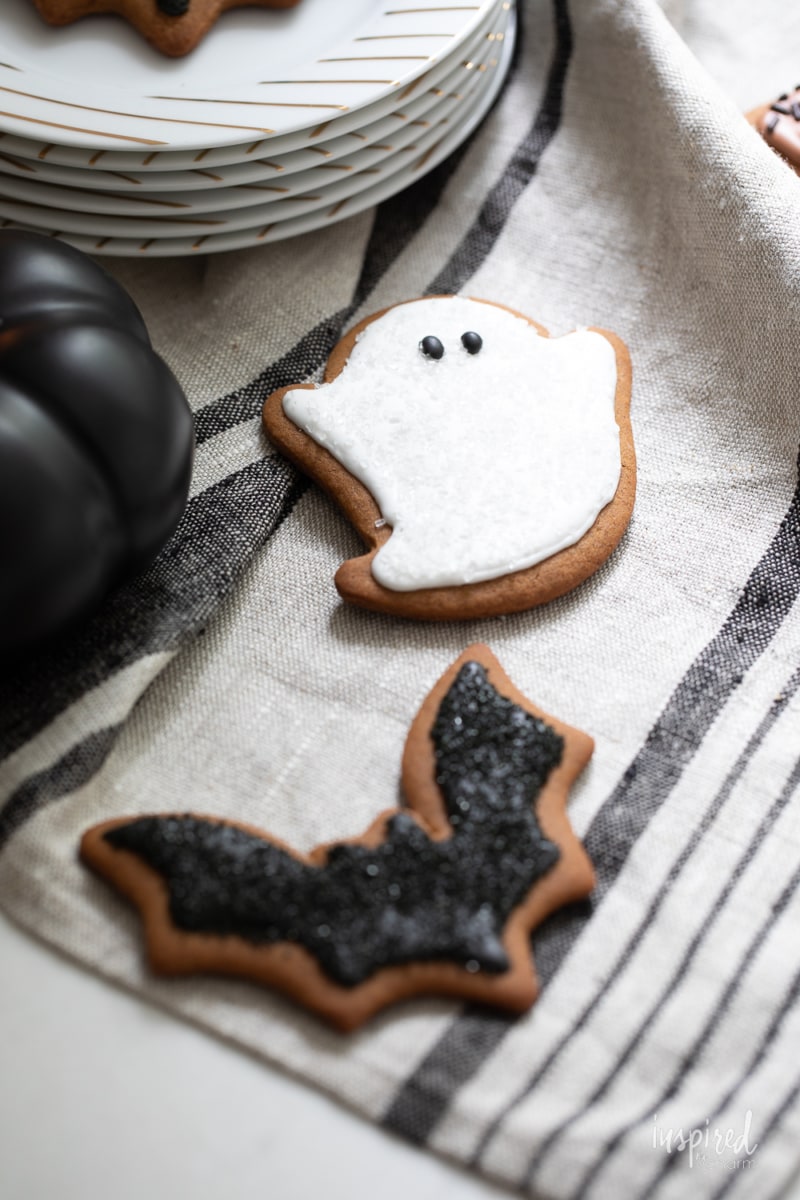
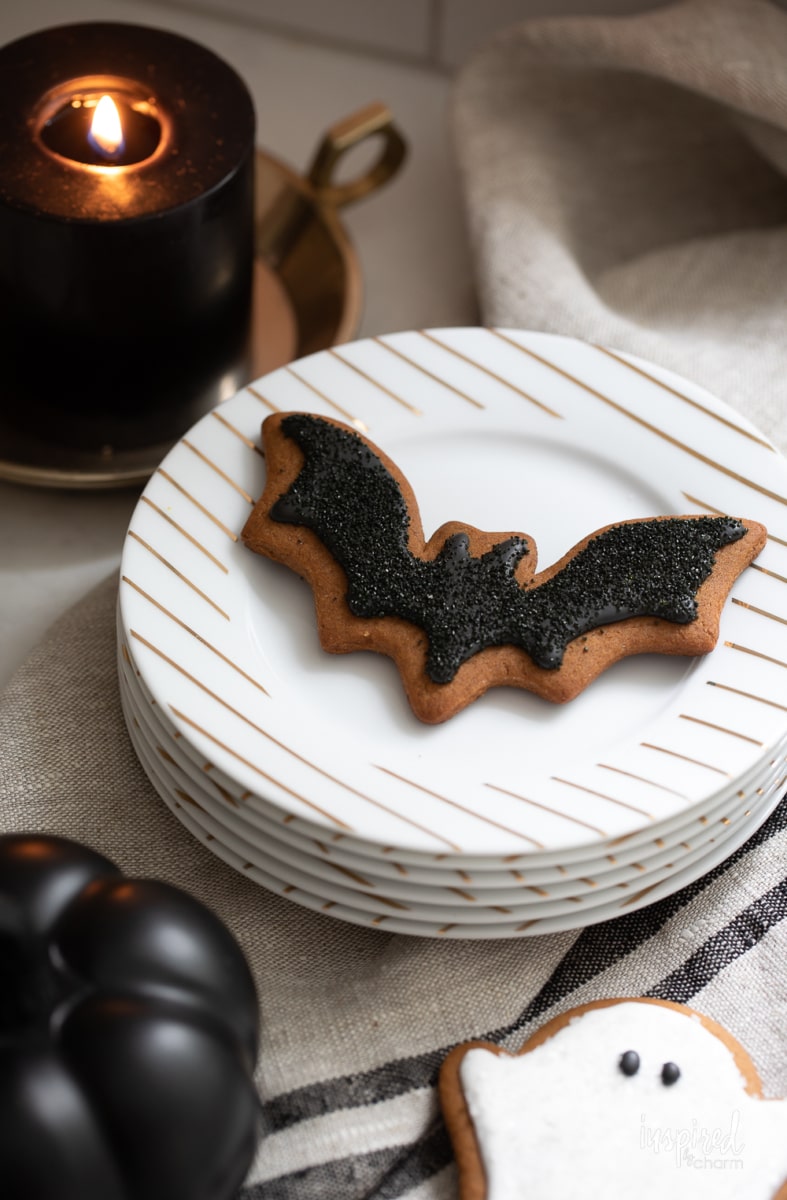
I also used some coarse sugar on these Halloween cookies to add a different texture and a little sparkle to the top. I really love how they came out. I’ll definitely be trying this technique again.
Where are the cookie cutters from?
I mentioned this above, but the witch cookie cutter is vintage and it’s what inspired this whole idea. I found it at a local antique store and knew immediately that I needed to make these gingerbread Halloween cookies.
The ghost and the bat are from a set which you can find HERE.
Okay, time to make and bake!
Why You’ll Love This Recipe
- These cookies are a perfect blend of spooky and sophisticated. The classic gingerbread flavor combined with the elegant decorations gives them a gourmet touch that’s sure to impress at any Halloween gathering. They look chic and stylish, yet remain true to the playful spirit of the holiday.
- The texture of the cookies, paired with the coarse sugar and sprinkles, adds an extra layer of fun and crunch. The mix of icing and sugar not only enhances the look but also offers a delightful contrast to the soft, spiced gingerbread base.
- This recipe is simple enough for beginners but still allows for creative expression. The minimalistic design with just three colors keeps the decorating process straightforward, making it a stress-free activity that results in beautiful, shareable treats.
- These cookies are perfect for gifting and sharing. Packaged in a festive box or cellophane bag, they make a thoughtful and delicious present. Whoever receives these will feel special, thanks to the unique and charming design that goes beyond the ordinary.
Looking for more halloween treats? I have them! Check out this collection of my best Spooktacular Halloween Snacks and Recipes!

Ingredients
Let’s gather up the ingredients you’ll need to make these Gingerbread Halloween Cookies. There are a few key ingredients that create the magic.
For the cookies:
- All-Purpose Flour: Provides the base for the cookie dough, giving the cookies their structure and a tender crumb.
- Ground Ginger: Adds a warm, slightly spicy flavor that’s essential for classic gingerbread.
- Cinnamon: Another warming spice that complements the ginger and enhances the overall flavor.
- Baking Soda: Helps the cookies rise slightly, keeping them soft and light.
- Ground Cloves: Adds a deeper, more complex spice note, rounding out the flavor of the gingerbread.
- Salt: Balances the sweetness and enhances the spices in the dough.
- Butter (Softened): Adds richness and helps create a tender texture in the cookies.
- Brown Sugar (Packed): Sweetens the cookies while adding a hint of molasses flavor, which pairs beautifully with the spices.
- Egg: Acts as a binding agent and helps provide structure to the dough.
- Molasses: The key ingredient for a true gingerbread taste, adding moisture and depth to the flavor.
- Vanilla Extract: Enhances the flavors of the other ingredients with a touch of sweetness.
For the royal icing:
- Confectioners’ Sugar: Creates the smooth, sweet base for the icing, perfect for decorating.
- Meringue Powder: Helps the icing harden, making it ideal for detailed designs that last.
- Warm Water: Used to achieve the right consistency for the icing, making it easier to pipe onto the cookies.
- Corn Syrup: Adds a subtle shine to the icing, giving the finished cookies a polished look.
- Gel Food Coloring (Black and Brown): Provides the perfect hues for a spooky, chic Halloween theme.
For decorations:
- Black Coarse Sugar: Adds sparkle and texture, making the cookies visually striking.
- Coarse Sugar: Gives the icing a little crunch while adding a touch of sparkle.
- Brown Chocolate Sprinkles: Perfect for adding extra detail and texture to the cookies.
💌 SAVE THIS POST / RECIPE!
How to Make
I’ll walk you through the basic steps here. I’ve provided a detailed ingredient list and instructions in the printable recipe card below. You’ll find everything you need there.
- Make and chill the dough. In a medium bowl, whisk together the flour, ginger, cinnamon, baking soda, cloves, and salt. Set aside. In the large bowl of an electric mixer, cream together the butter and brown sugar for three to four minutes or until light and fluffy.
- Add the egg, molasses, and vanilla. Mix to combine. Gradually add the dry ingredients to the wet ingredients. Mix to combine. Cover and refrigerate the dough overnight or for at least four hours.

- Cut out the cookies. Divide the chilled dough in two. On a lightly floured surface, roll out half of the dough so it is about one-fourth to one-half inch thick. Cut out desired shapes with cookie cutters.
- Place the shapes about one inch apart on a cookie sheet. Place the baking sheet of cookies into the freezer for about five minutes.
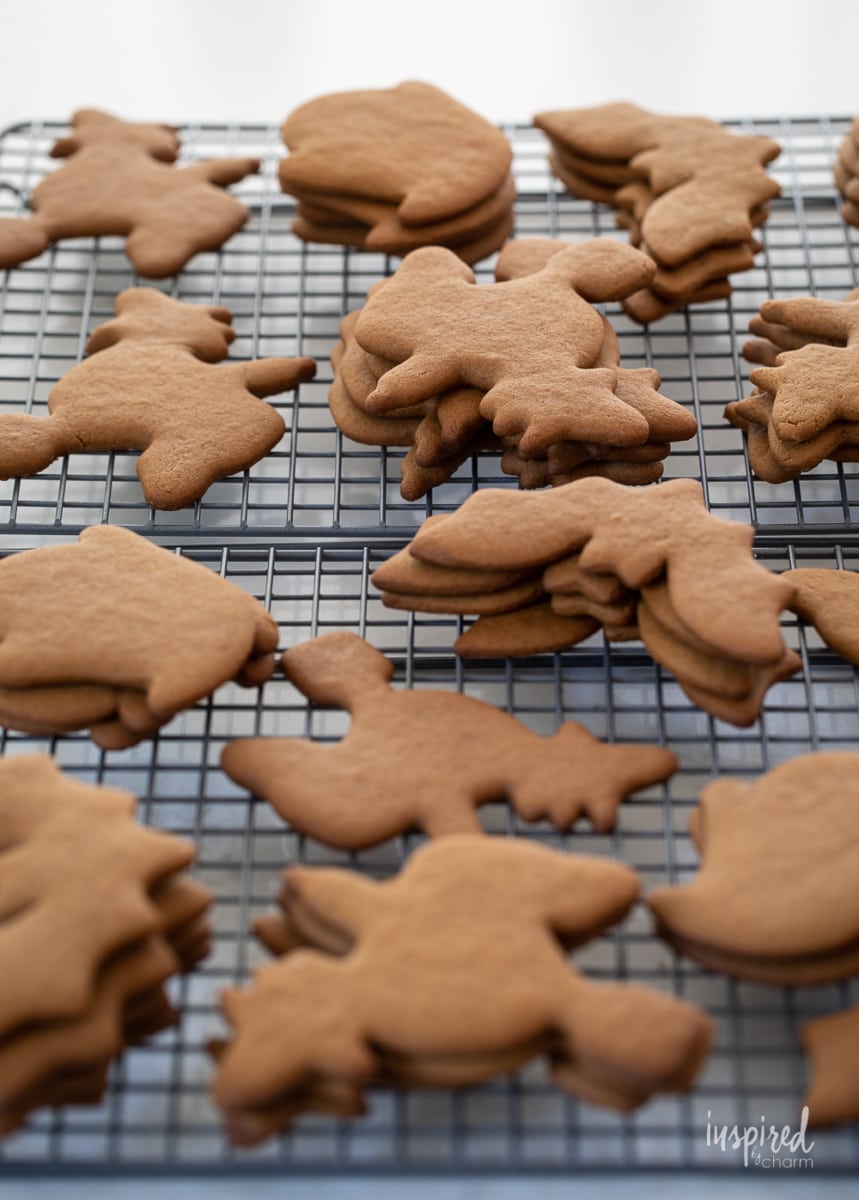
- Bake the cookies. Remove the cookies from the freezer and bake for 9-11 minutes at 350 degrees. Cool for 30-60 seconds on the cookie sheet. Then, transfer the cookies to cooling racks to cool completely.
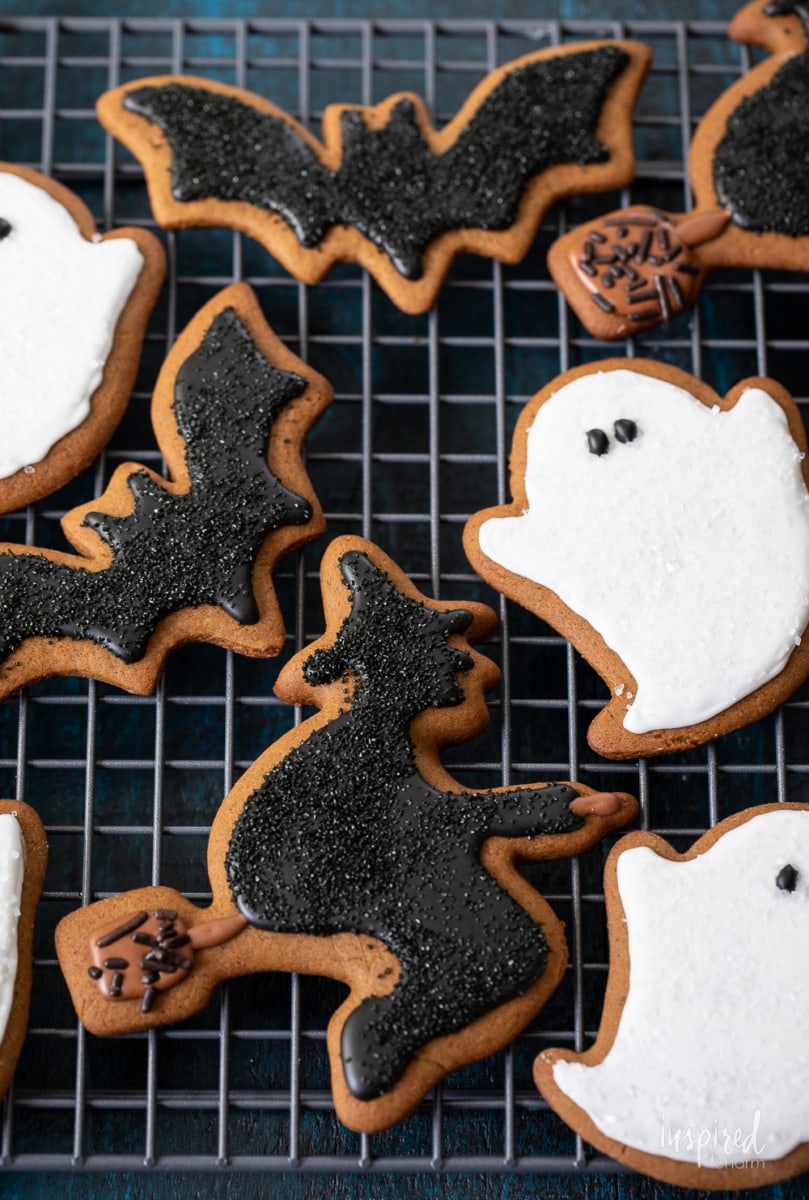
- Decorate the cookies. Prepare the royal icing, then transfer the icing to a piping bag or piping bottle. Pipe on the icing. I do one color at a time, let it sit, and proceed with the next. Add the coarse sugar and sprinkles immediately after applying the icing to ensure that they stick to it.
I think that about covers these gingerbread Halloween cookies. I’m certain that all the little (and big) ghouls and goblins in your life are going to LOVE them!
Frequently Asked Questions
Can I make the dough ahead of time?
Yes, absolutely! The dough can be made up to two days in advance. Simply wrap it tightly in plastic wrap and store it in the refrigerator. If it becomes too firm, allow it to sit at room temperature for about 10-15 minutes before rolling it out. You can also freeze the dough for up to three months; just thaw it in the fridge overnight before using.
How do I get the royal icing to the right consistency?
The ideal consistency for royal icing is slightly thicker than corn syrup. If it’s too thick, add a small amount of warm water, one tablespoon at a time, mixing thoroughly between each addition. If it’s too thin, add more confectioners’ sugar, one tablespoon at a time. You’re looking for the icing to hold its shape when piped, without being runny.
Why should I freeze the cookies before baking?
Freezing the cut-out cookies for about five minutes before baking helps them hold their shape. This prevents the edges from spreading and ensures that your bats, witches, and ghosts maintain their defined details after baking.
How should I store these cookies, and how long will they last?
Store the decorated cookies in an airtight container, separated by layers of wax or parchment paper, to keep the icing intact. They’ll stay fresh for up to a week at room temperature. For longer storage, you can freeze the decorated cookies. Just allow them to thaw at room temperature before enjoying.
More Halloween Treats You’ll Love
- Sweet and Salty Fall Snack Mix
- Creamy Pumpkin Dip
- Pumpkin Shaped Mini Cheese Balls
- Halloween Pretzels
- Vampire’s Kiss Halloween Shot
Whether you’re making these Halloween Gingerbread Cookies for a party, gifting them as a sweet surprise, or simply baking for the joy of it, they’re sure to add a touch of magic to your Halloween festivities. If you make them, please stop back and leave a comment and a 5-star rating below.
Want more from Inspired by Charm? Join the IBC Mailing List for inspiration in your inbox! Follow along on Instagram and TikTok for daily updates and behind-the-scenes looks at my processes. There’s even more inspiration on Facebook and Pinterest!
Gingerbread Halloween Cookies
Ingredients
- 4 cups all-purpose flour
- 2 teaspoons ground ginger
- 2 teaspoons cinnamon
- 1 1/2 teaspoon baking soda
- 1/2 teaspoon ground cloves
- 1/2 teaspoon salt
- 3/4 cup butter softened
- 1 cup packed brown sugar
- 1 egg
- 3/4 cup molasses
- 1/2 teaspoon vanilla extract
Royal Icing:
- 4 cups confectioners’ sugar
- 3 tablespoons meringue powder
- 6 tablespoons warm water (to start, plus 4-6 more)
- 1 tablespoon corn syrup
- brown and black gel food coloring
Decoration:
- black coarse sugar
- coarse sugar
- brown chocolate sprinkles
Instructions
- In a medium bowl, whisk together the flour, ginger, cinnamon, baking soda, cloves, and salt. Set aside.
- In the large bowl of an electric mixer, cream together the butter and brown sugar for three to four minutes or until light and fluffy. Add the egg, molasses, and vanilla. Mix to combine.
- Gradually add the dry ingredients to the wet ingredients. Mix to combine. Cover and refrigerate the dough overnight or for at least 4 hours.
- Preheat the oven to 350 degrees F. Divide the chilled dough in two. On a lightly floured surface, roll out half of the dough so it is about one-fourth to one-half inch thick. Cut out desired shapes with cookie cutters. Place the shapes about one inch apart on a cookie sheet. Place the baking sheet of cookies into the freezer for about five minutes.
- Remove the cookies from the freezer and bake for 9-11 minutes or until the edges of the cookies barely start to brown. Cool for 30-60 seconds on the cookie sheet. Then, transfer the cookies to cooling racks to cool completely.
- Repeat with the remaining dough.
- While the cookies cool, prepare the royal icing. Add the confectioners’ sugar and meringue powder to the bowl of a stand mixer. (You can also use a hand mixer.) Whisk to combine.
- With the mixer on low, add one tablespoon of warm water at a time. Once all six tablespoons have been added, add in the corn syrup.
- Continue to mix on low-medium speed adding more warm water, one tablespoon at a time, to achieve the desired consistency. The ideal consistency is something that is a bit thicker than corn syrup.*
- Divide the icing into three separate bowls. Add food coloring to each of the bowls (except for one) to achieve the desired color. I used black and brown.
- Transfer the icing to a piping bag or piping bottle. (I’ve linked the bottles I used in the notes section below.**)
- Then, pipe on the icing. I do one color at a time, let it sit, and proceed with the next. Add the coarse sugar and sprinkles immediately after applying the icing to ensure that they stick to it.
- Allow the icing to completely harden. Then, pack and store these cookies in an airtight container separating each layer with wax/parchment paper.
These are so cute, Michael. You always have the best recipes and creations 🖤
Thank you so much!!
xo Michael
I HAD to have this witch cookie cutter. Such a great gingerbread recipe. I made these for Christmas.
Cutest cookies ever. I love them!
Oh my goodness, the ghost cookies are SO cute! I totally want to eat them!