DIY Tassel Garland
This Post May Contain Affiliate Links. Please Read Our Disclosure Policy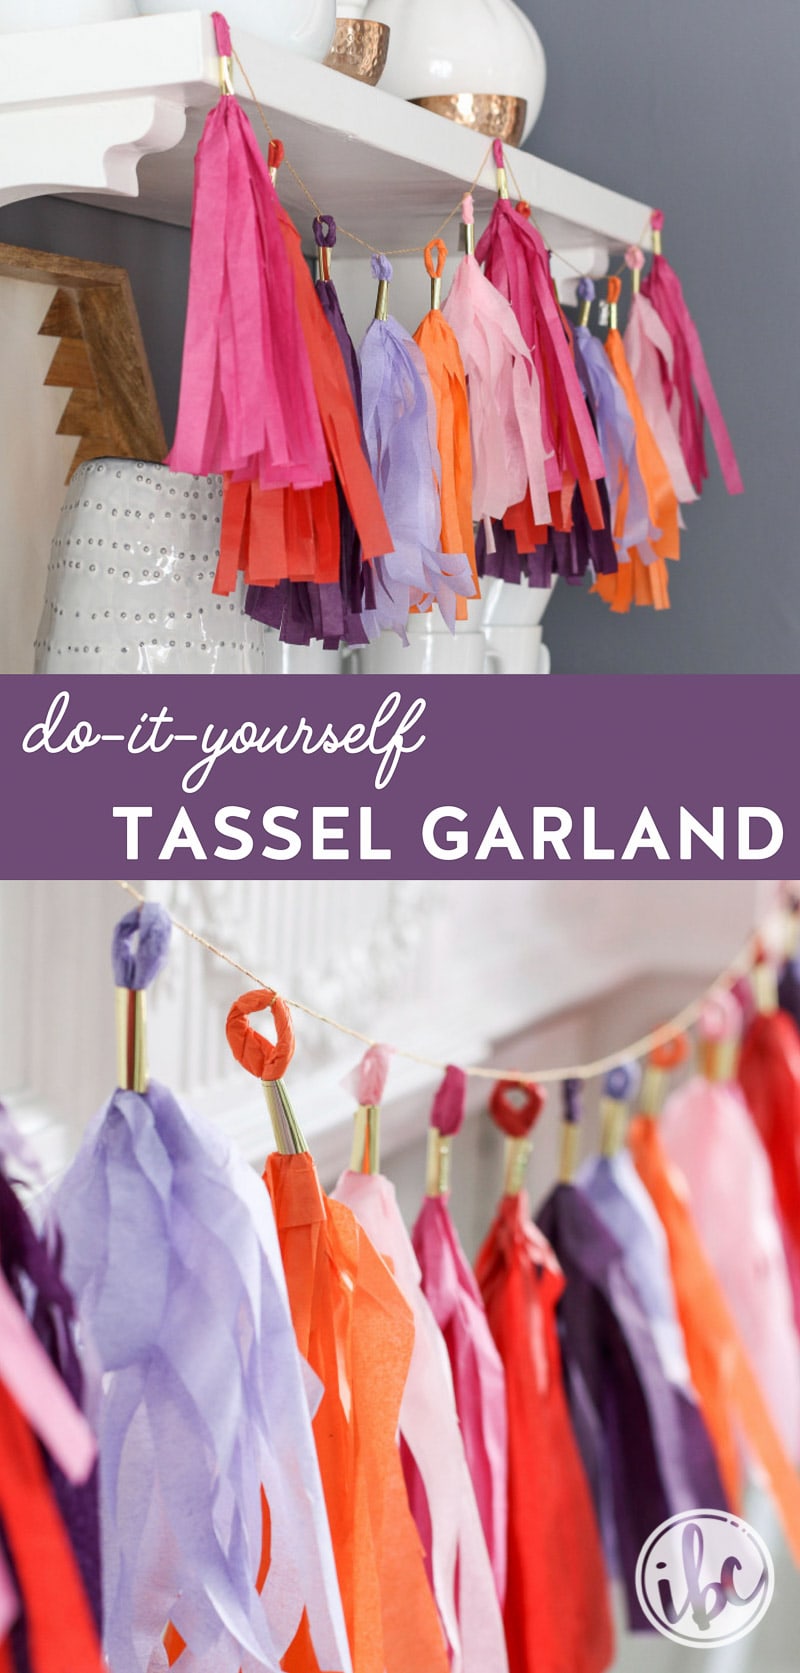
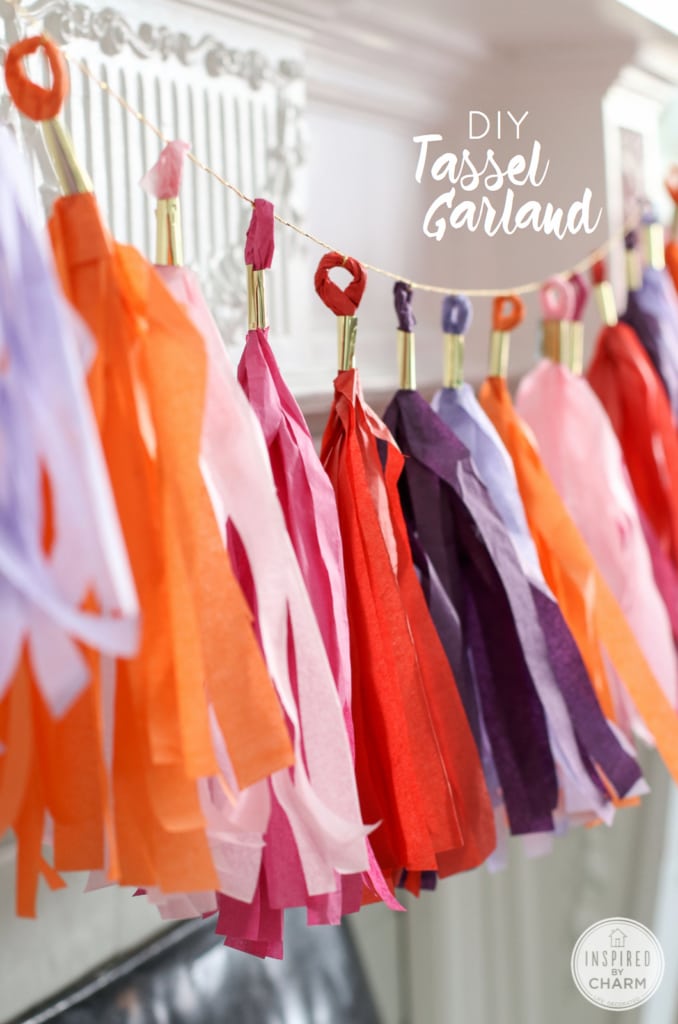
This DIY Tassel Garland is easy to make, inexpensive, and add a fun, colorful, and festive touch to any party or celebration!
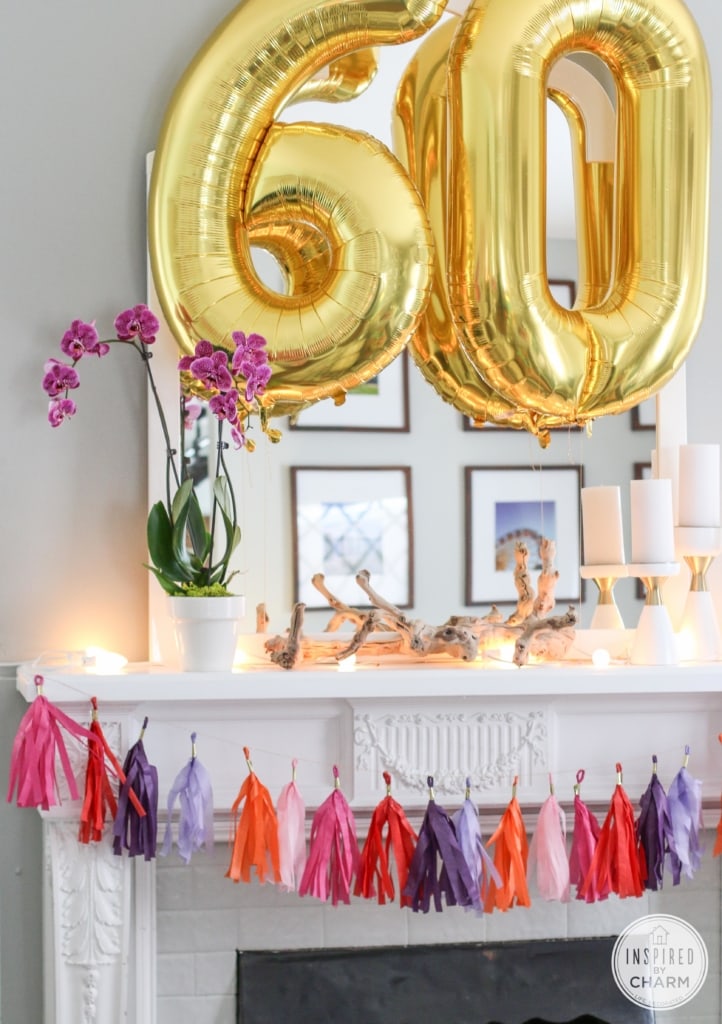
Today I’m going to tell you how I made the DIY Tassel Garland you saw in the photos from my mom’s 60th birthday party this past weekend.
Although this project will take some time, making a DIY tassel garland is very simple and cost effective. Plus, when your guests find out you actually made the garland, their response will be “What!?!” It’s pretty cool.
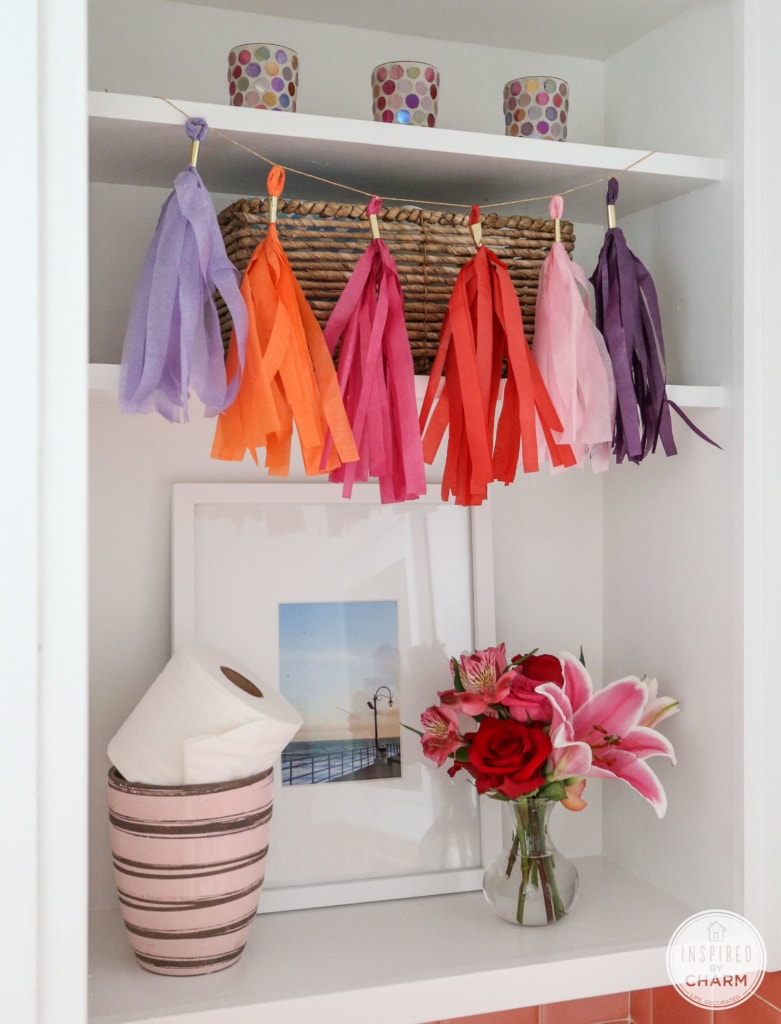
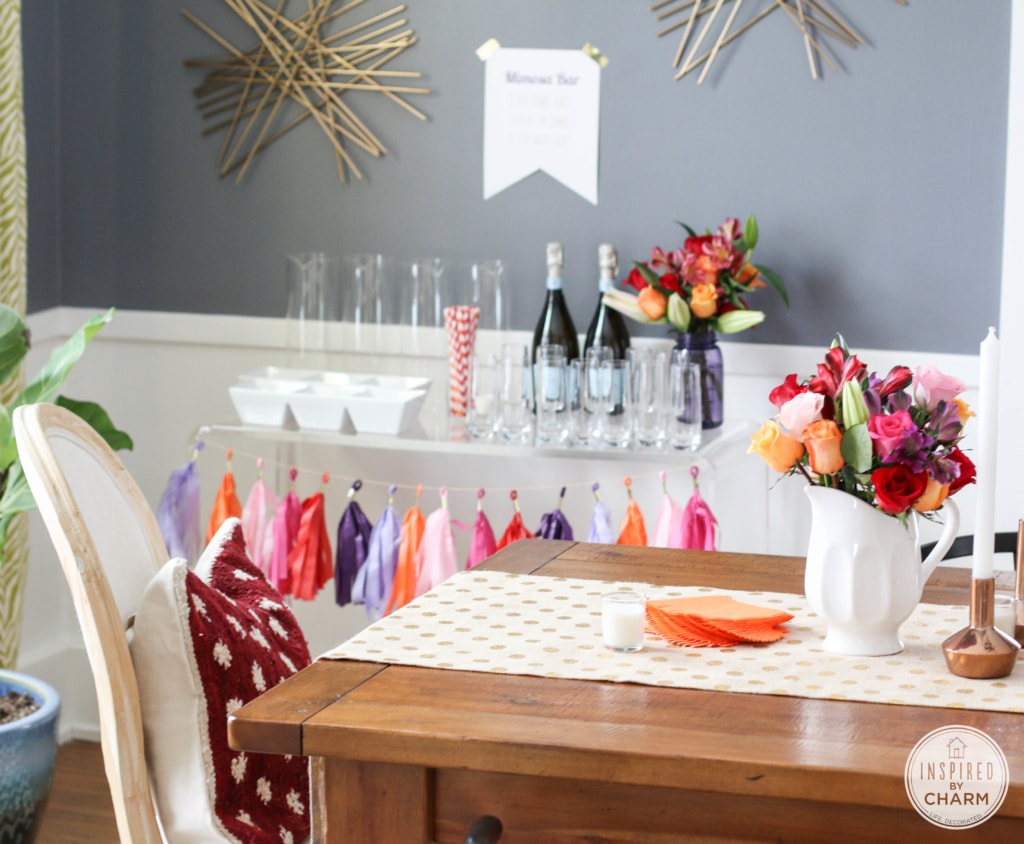
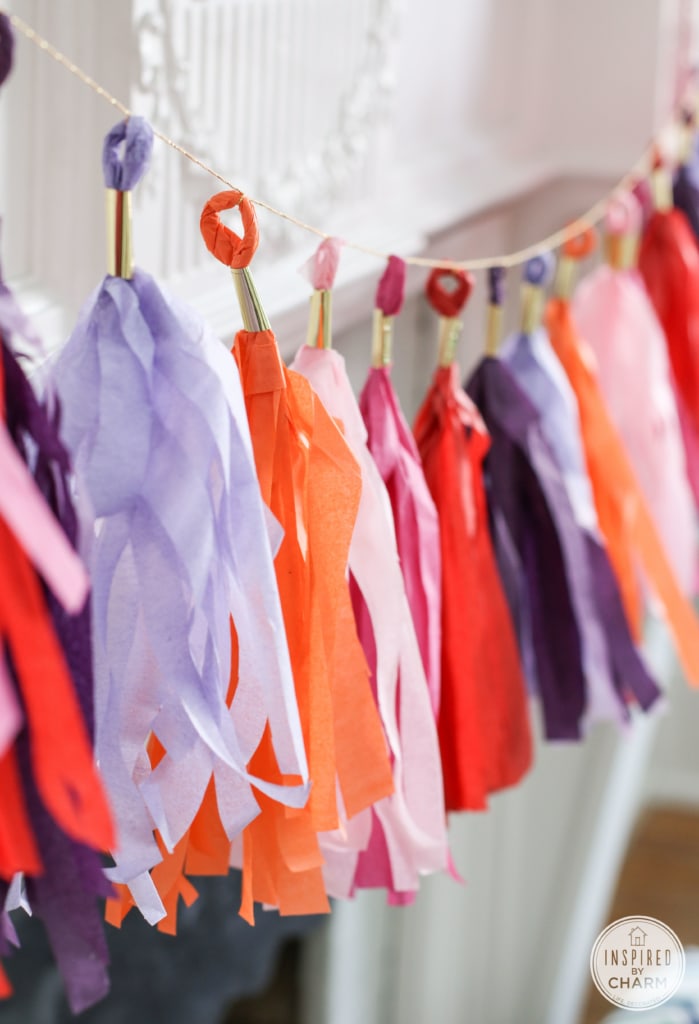
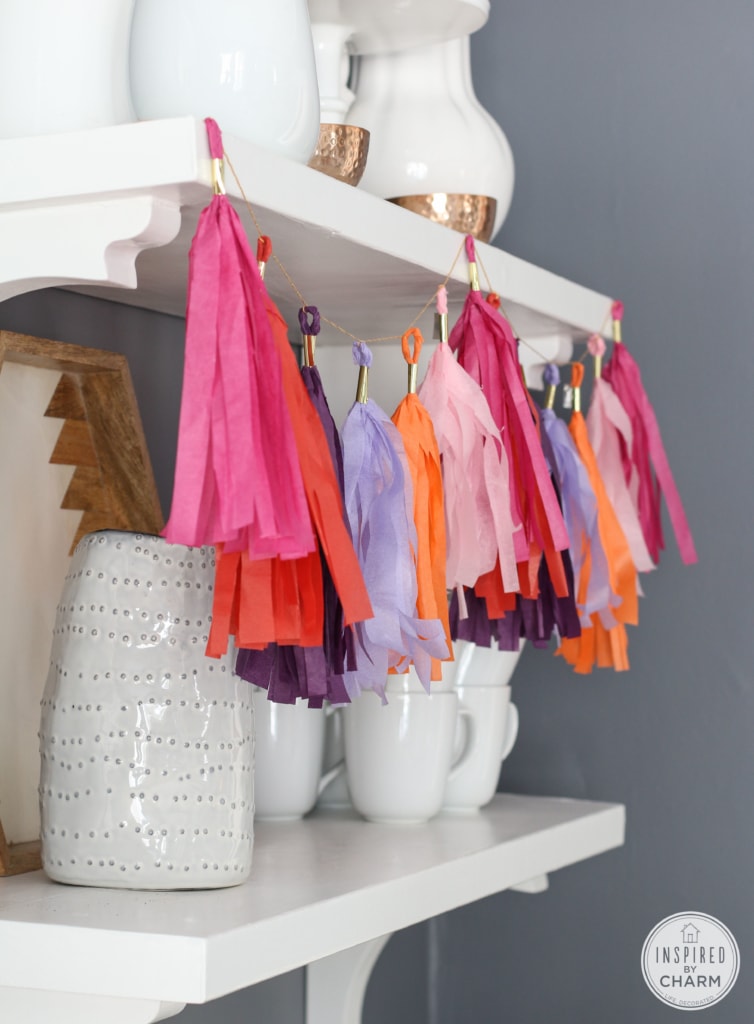
I ended up making four of these garlands and scattering them throughout the house to tie everything together. I even hung a mini one in the bathroom. Don’t forget to decorate the bathroom!
The base of these tassels is tissue paper, so you can do any combination of colors to match your event. I purchased most of my tissue paper on Amazon to get the colors I wanted. Be sure to get quality tissue paper. It will make the process much easier. You can also change up your string (I chose a string with a metallic thread from Jo-Ann Fabrics.) and your tape. This shiny gold tape is from Staples, but any sort of decorative washi-style tape would do the trick.
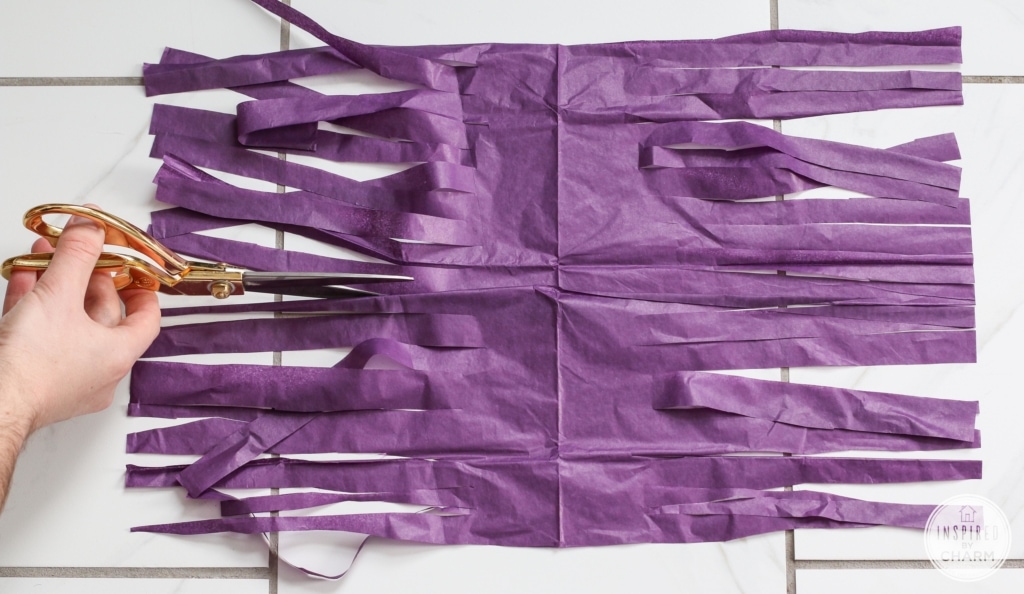
Also, be aware that there is a certain famous craftsy woman who sells a “fringe-cutter.” It’s kind of like a paper cutter, but it’s supposed to create fringe in tissue paper. I’ll save you some money. It doesn’t work. Stick with scissors.
Okay. Now, let’s get crafting.
How to Make a DIY Tassel Garland:
You will need:
tissue paper
scissors
decorative tape
string or twine
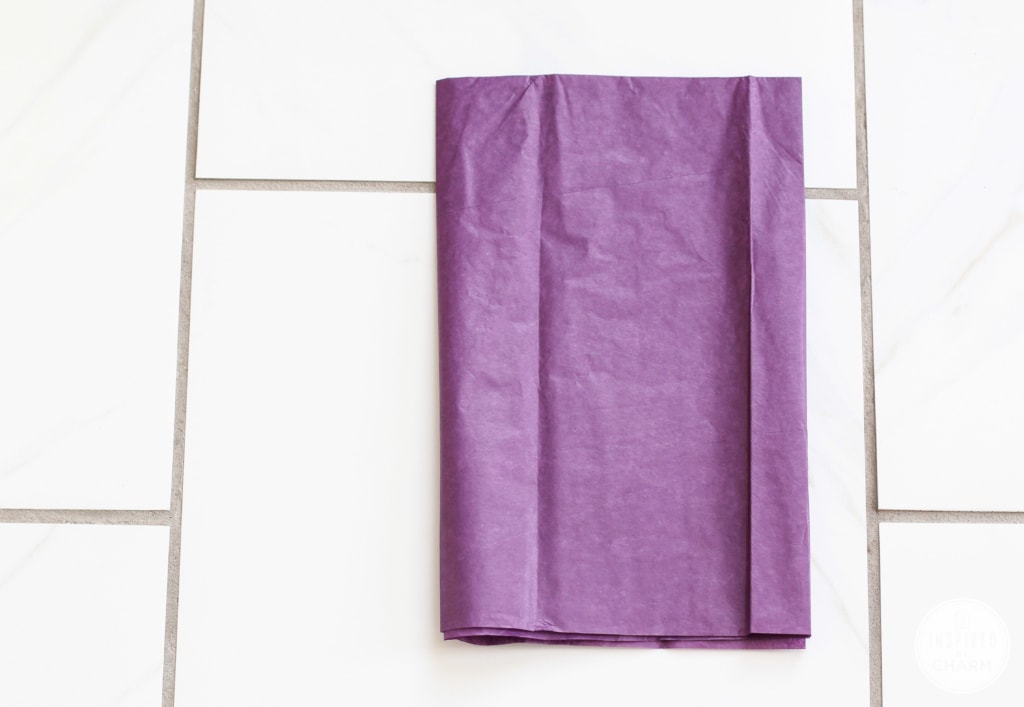
Begin with one piece of tissue paper. (One piece of tissue paper will make four tassels.)
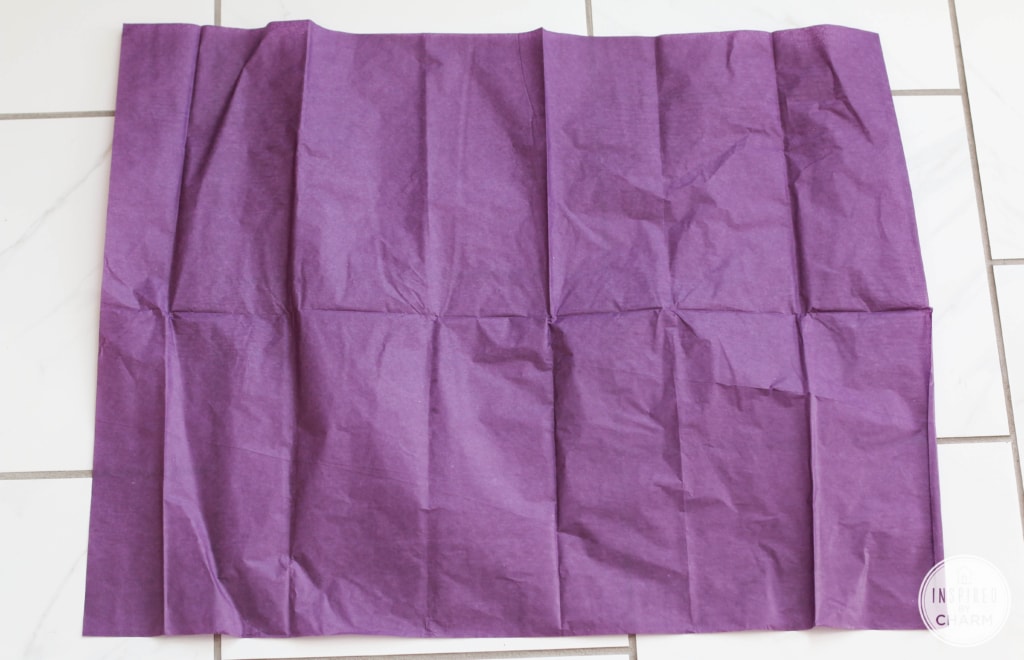
Fold it in half lengthwise.
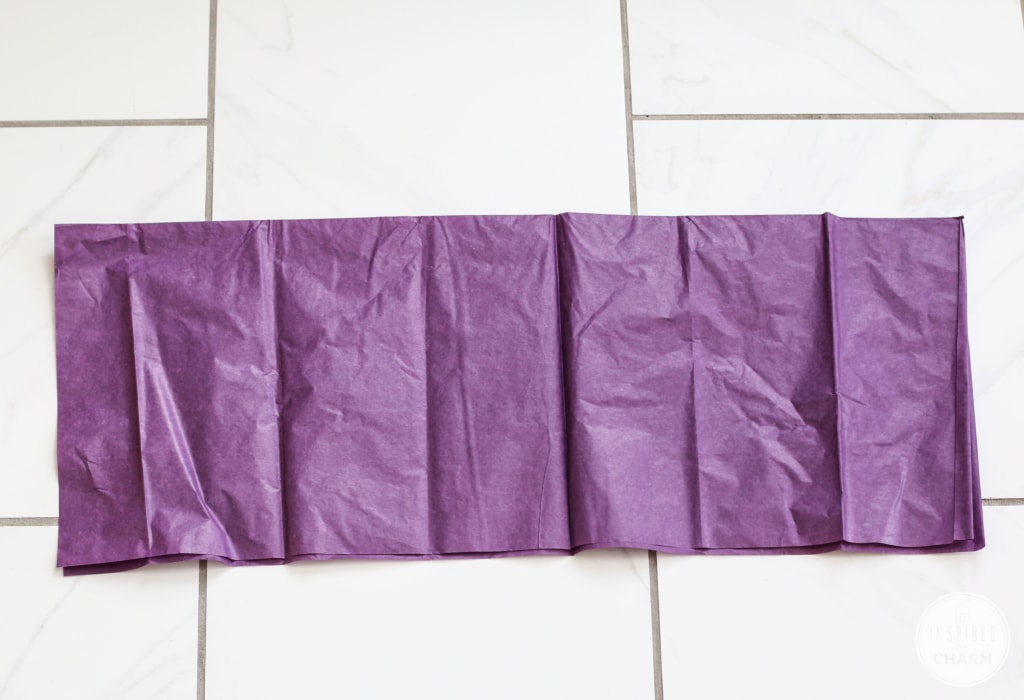
Then, fold in half widthwise.
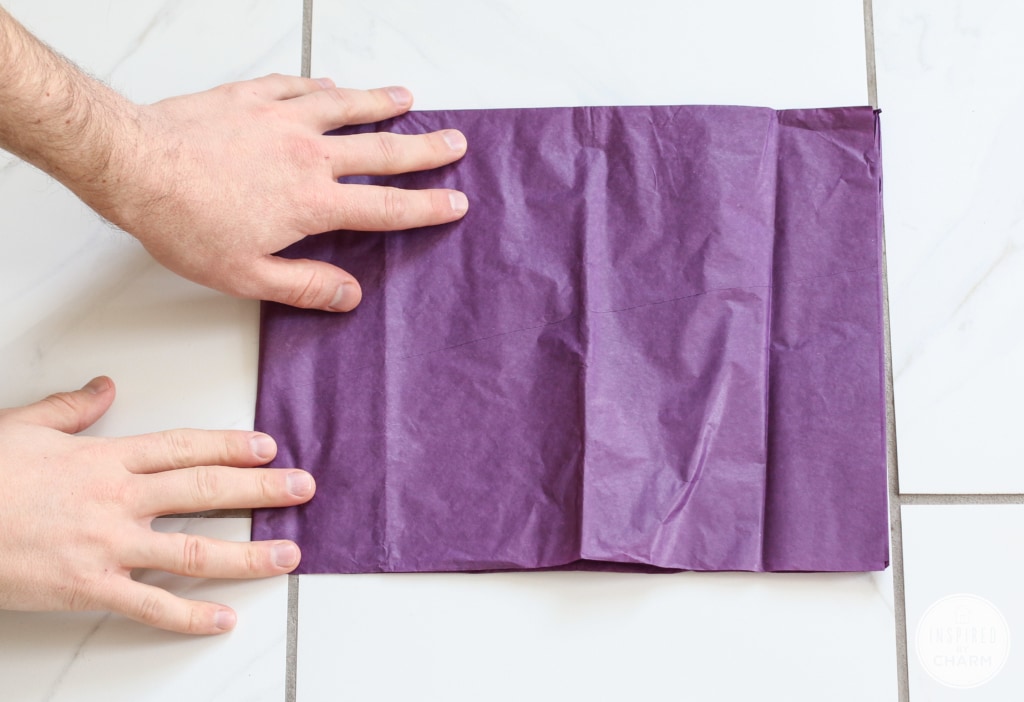
Fold again widthwise.
Next, cut your fringe starting from the bottom, unfolded side. Cut up to the top leaving about a two inch band that is uncut. Your strips can be as thin or as thick as you’d like.
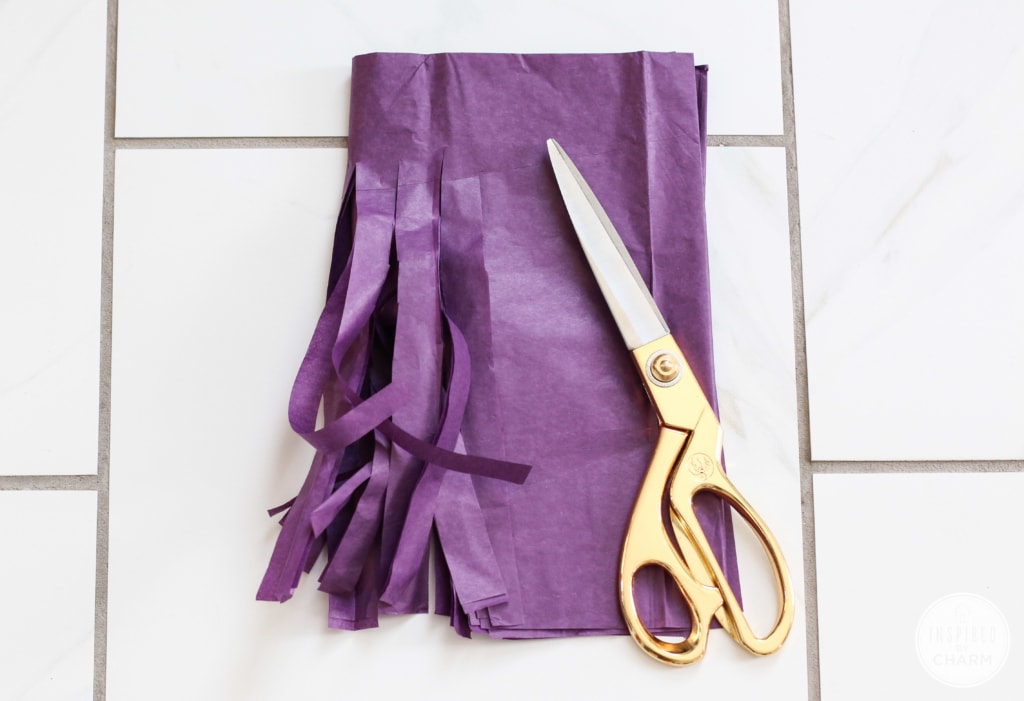
Unfold once and cut in half from the top of the fold to the end of the fringe.
💌 SAVE THIS POST / RECIPE!
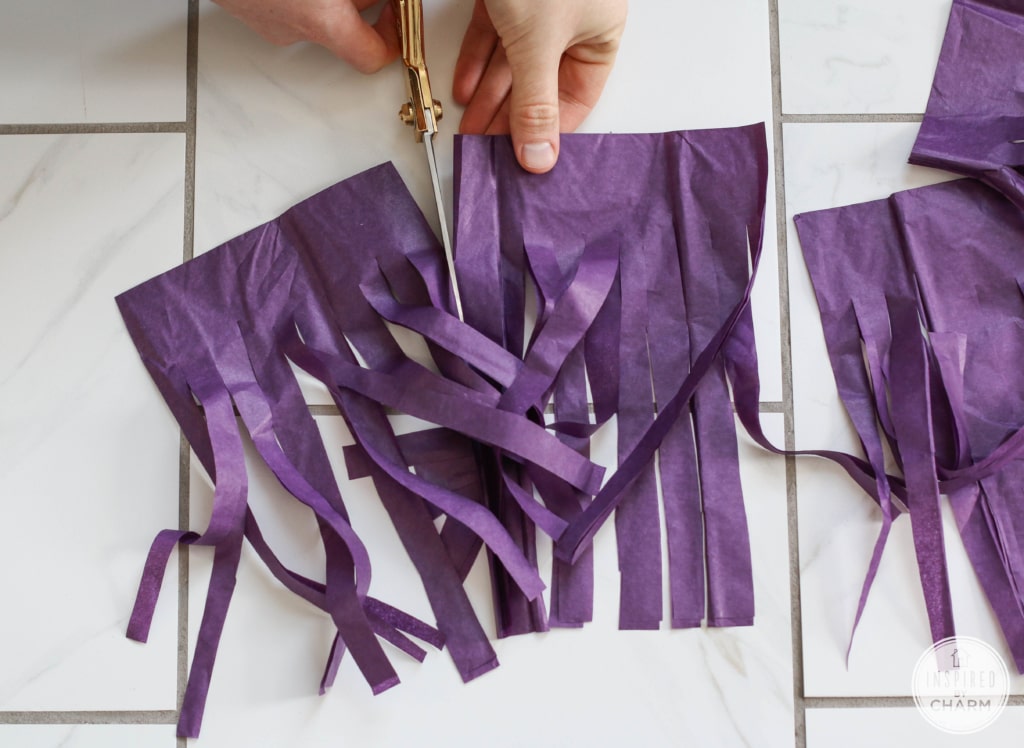
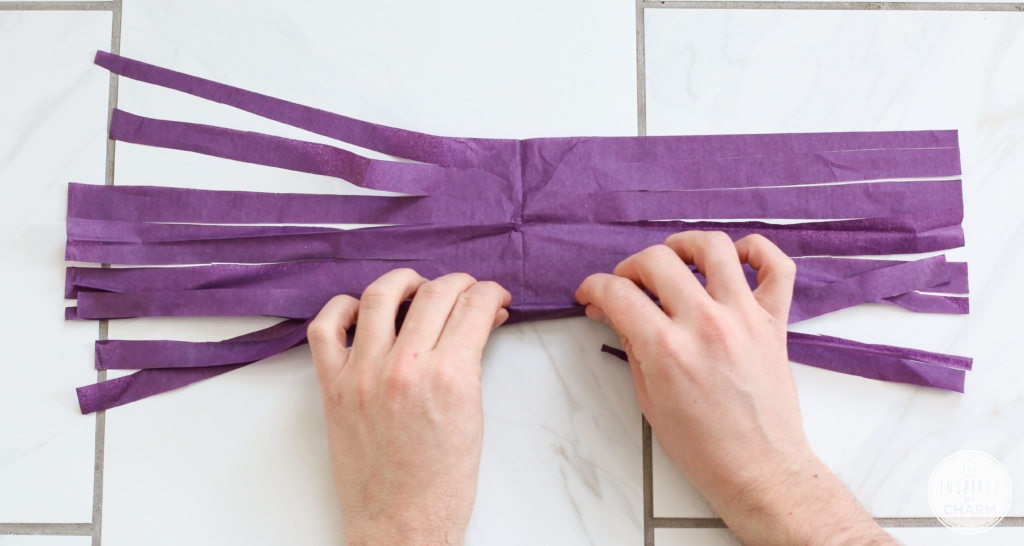
This will give you three pieces. Unfold them. Two will look like this, ready for the next step.
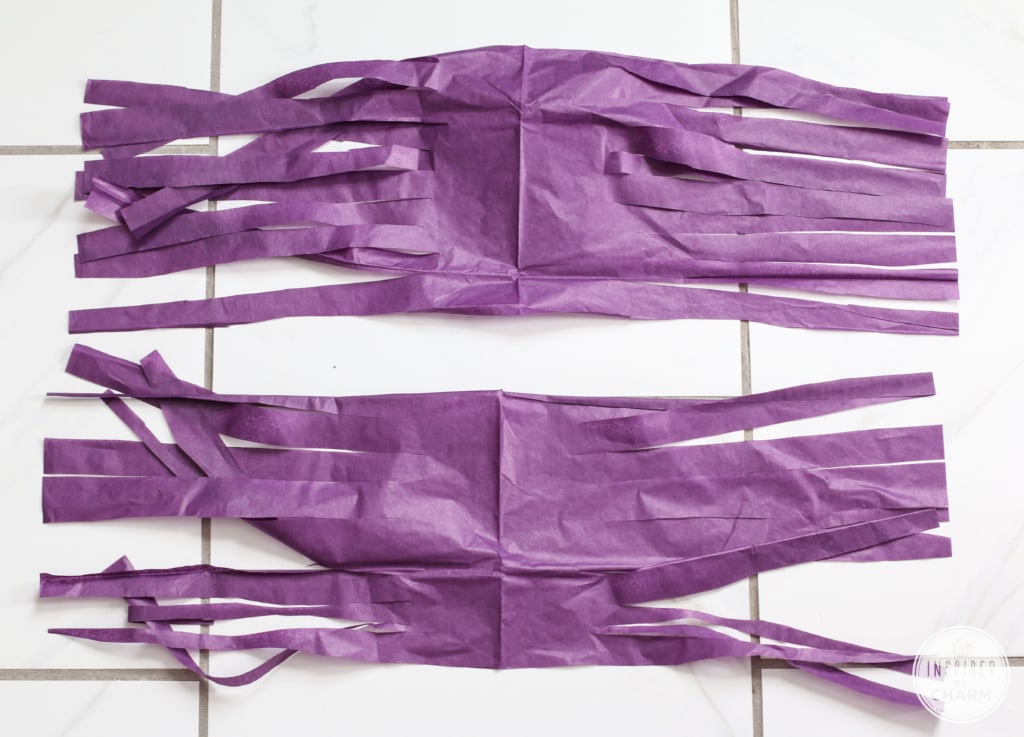
The other piece will be double the size of the two other pieces. Cut this in half lengthwise. You will now have four sections that are the same size.
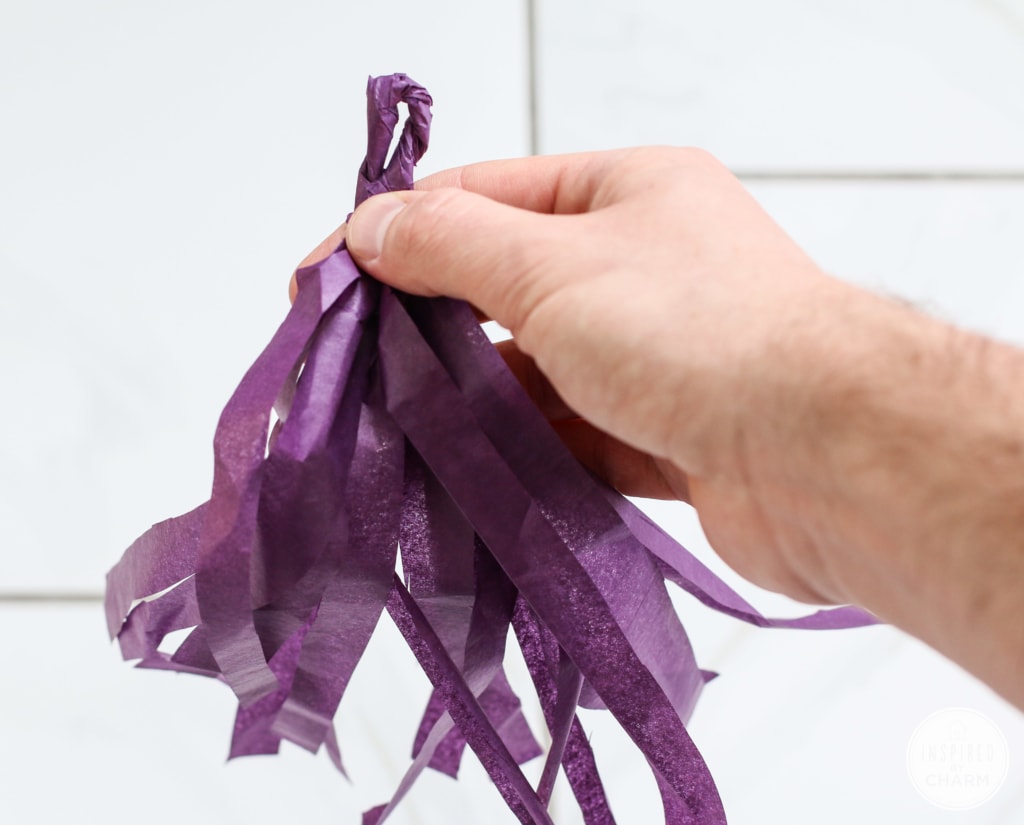
Now take one piece and start to roll the uncut center area lengthwise. As you roll, pay attention to the fringe so it doesn’t get tangled.
Once rolled, start to twist the center area until it’s tight. Then fold it in half twisting the side in opposite directions until it make a little loop at the top.

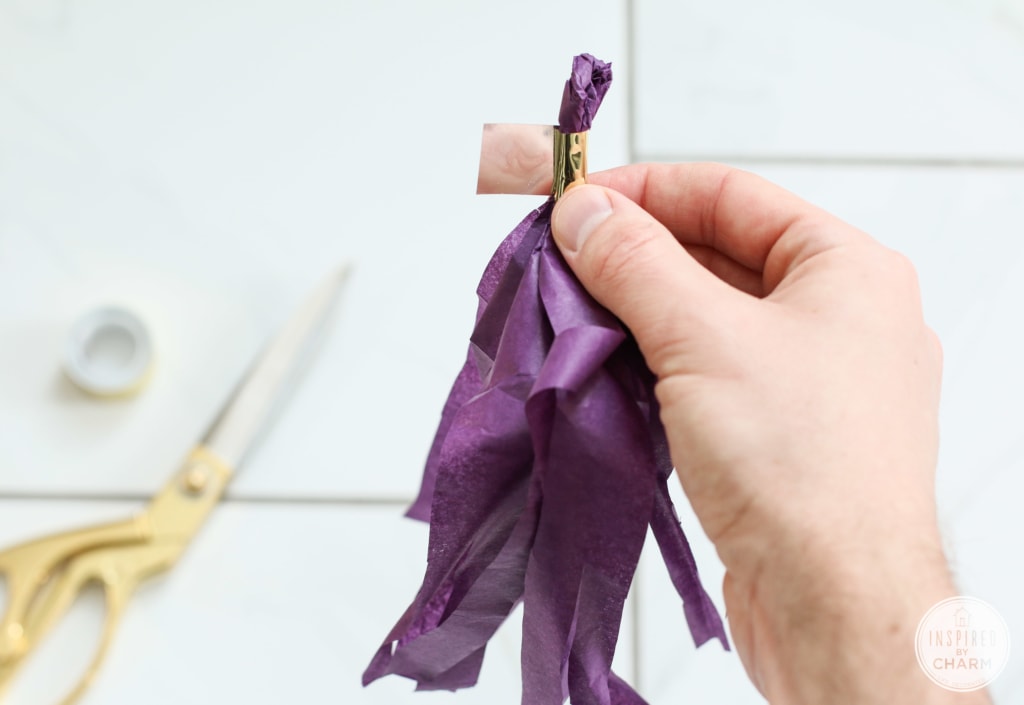
Next, cut a piece of tape (about 1.5 inches long) and wrap it around this section to secure.
Continue making tassels until you have as many as you will need.
You’re then ready to string them up. Cut the desired length of string. Add one tassel at a time and make a simple knot to attach.
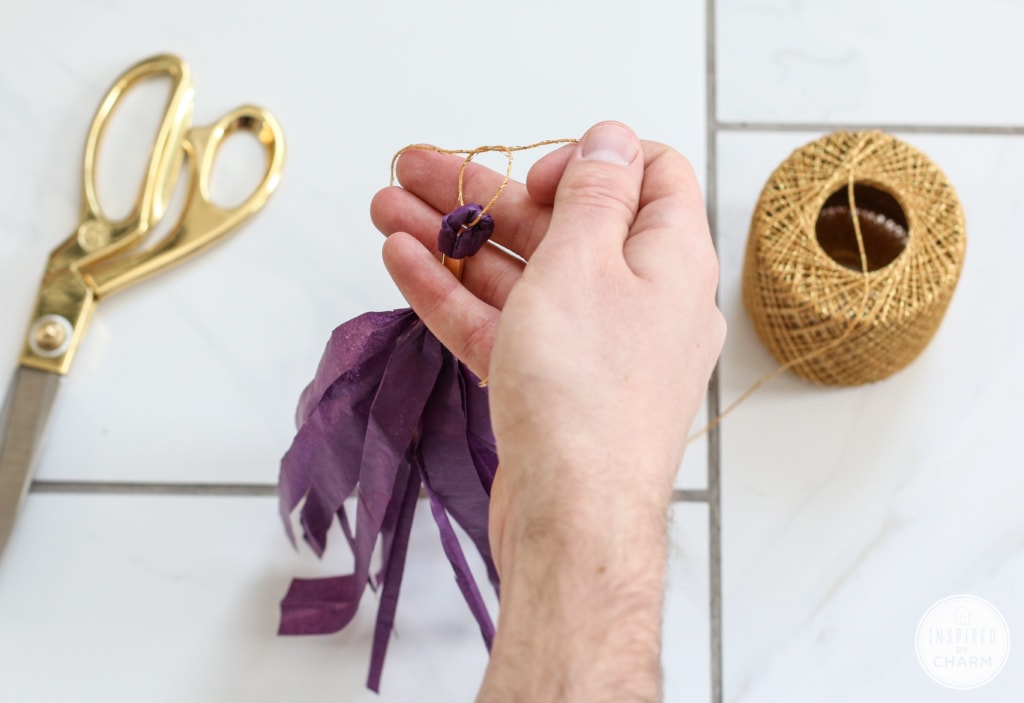
Continue adding tassels and knotting them in place. The distance between each tassel is up to you. I found that 3 inches worked well for the number of tassels I had.

After all of your tassels are attached to the string, you’re ready to hang up the garland!
DIY Tassel Garland
The process is a bit tedious, so give yourself plenty of time. However, once you get the hang of them, they come together easily.
Looking for more party decor ideas? Check out these:
- Tropical Party (Party in Paradise)
- DIY Football Party Ideas
- 60th Birthday Party Ideas
- Cheese Tasting Party
- Easy Dinner Party Ideas
I hope you found this DIY Tassel Garland tutorial helpful. Happy entertaining!
Really good tutorial that helped inspire new ideas for my brothers upcoming birthday party. Thanks for sharing!
I made these for my daughter’s first birthday and we all loved it! Thank you for the tutorial 😀
So happy they turned out for you! It’s a fun way to decorate. And Happy Birthday to your little girl!
xo Michael
very creative idea! thanks for the share.
Hi, I noticed that someone is using your photo form this on etsy maybe without your permission. It’s the second photo In the only tassel listing they have. The shop is prettygoodsatx. Just thought I’d give you a heads up.
Thank you SO much for making me aware of this. I appreciate it.
xo Michael
Excellent tutorial! The step by step is perfect. I have been experimenting with some tissue paper I have before making the “real deal” for a baby shower I’m hosting in August. I feel like my tissue is so thin. You mentioned a “quality” tissue paper being important in your post…do you have a specific brand you recommend? Thanks!
Hi Michael! I am actually currently making these! It is definitely tedious, but so much fun! One question though! I bought wash tape to secure them, but after a bit, the wash tape comes undone! Doesn’t matter how firm I press them together. 🙁 Any suggestions? I have even tried using a glue dot to try to secure it again with wash tape and even that comes undone.
Helpless and crafty,
Ashley
Hey Ashley! Sorry you’re having trouble. A couple of mine came undone too, but I was able to stick them back together. I would suggest trying a different tape. You could also trim of the part that’s coming unstuck.
Hope that helps!
xo Michael
I so want to do this in shades of pink for my soon to be 9 in September granddaughter!
I ran across this via pinterest – thanks so much! I love how bright and colorful your tassels are – the gold adds just the right touch. Thank you!
This is great! Do you remember the name of the colors you chose for the tissue paper? I would like to use the same color scheme…
Thx for the easy instructions on making the tassel garland, some people make it out to be way harder then it really is and im glad you mentioned the paper cutter because I was considering purchasing one but im not going to. Just more money to spend on diy projects! Thx again Michael!
Lovely but how did you hold the camera and take pictures of both of your hands? 🙂
Magic of the internet?
I pinned this! totally going to make this for my daughters graduation and 18th birthday this year….its a dual celebration 🙂 Thanks Michael!
LOVE the garland!
Can’t wait to try this! I’m going to make it for my daughter’s graduation,
which will be in peacock colors!
That sounds beautiful!
xo Michael
These are so fun! I can’t wait to try them for an event this summer. Thank you for the step by step tutorial. I know those can be time consuming but it gives me confidence that I’m still on track
I just love the tassel garland and what a perfect tutorial…can’t wait to try. It looked like a wonderful party!!
Super cute! I love that you don’t need anything fancy to make this, and that the fringe-scissors are just a gimmick. Great tutorial! 🙂
Hi Michael, always new ways to add interest to old ways of making items like these tassel garlands; so great job!!!! I am interested in the white vase w/ grey or green dots on the white floating shelf—the last picture. Would you share where you got this???
Thanks so much for the how to – perfect timing for a party I am giving next week. I never knew to knot each tassel to the string, and I love the gold tape.
i love this! the gold tape sure fancies them up!! thanks for sharing.
I know, right? It’s all in the details!
xo Michael