DIY Mounted Staghorn Fern
This Post May Contain Affiliate Links. Please Read Our Disclosure Policy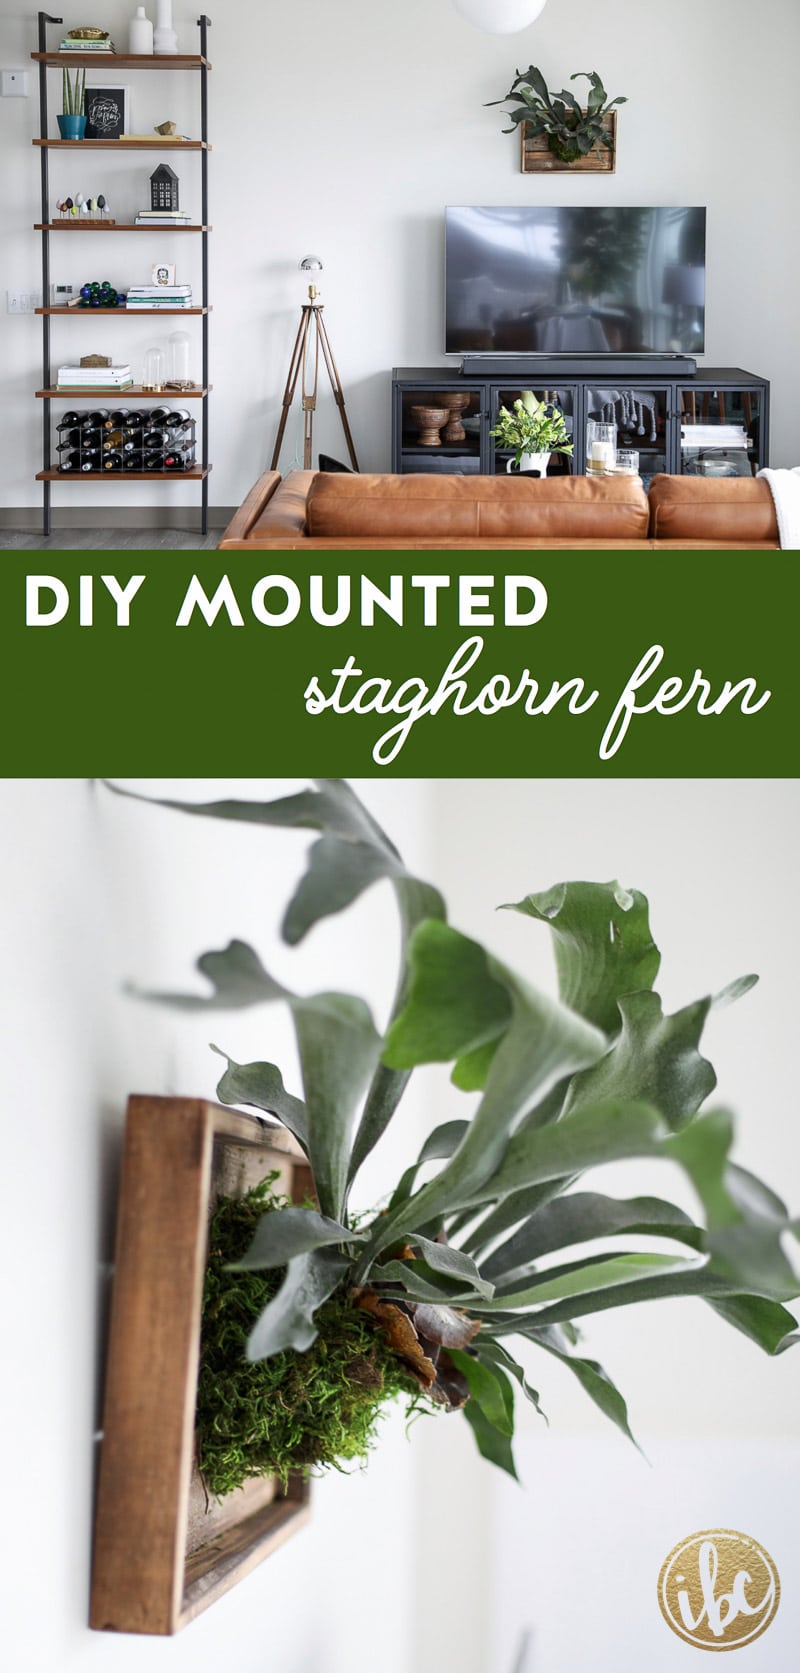
Spring is officially here! And today I’m celebrating by showing you how I made this DIY Mounted Staghorn Fern.
Mounted Staghorn Fern:
I know I’m a few years behind the mounted staghorn fern trend, but I still hope this tutorial is helpful. The reason I wanted to make and share this project with you is that I had signed up to take a class here in Pittsburgh to learn how to make one. Unfortunately, the class was canceled twice and never rescheduled. Whomp. Whomp. That’s why I decided to make a mounted staghorn fern on my own.

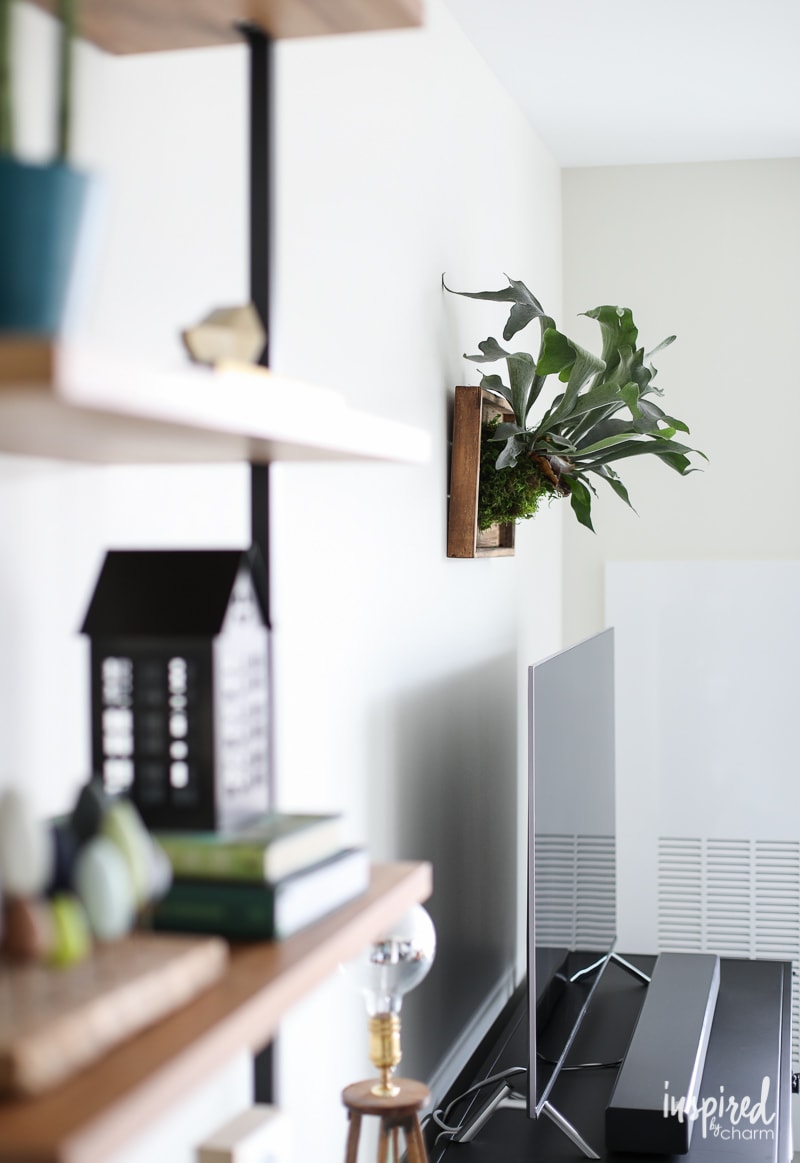
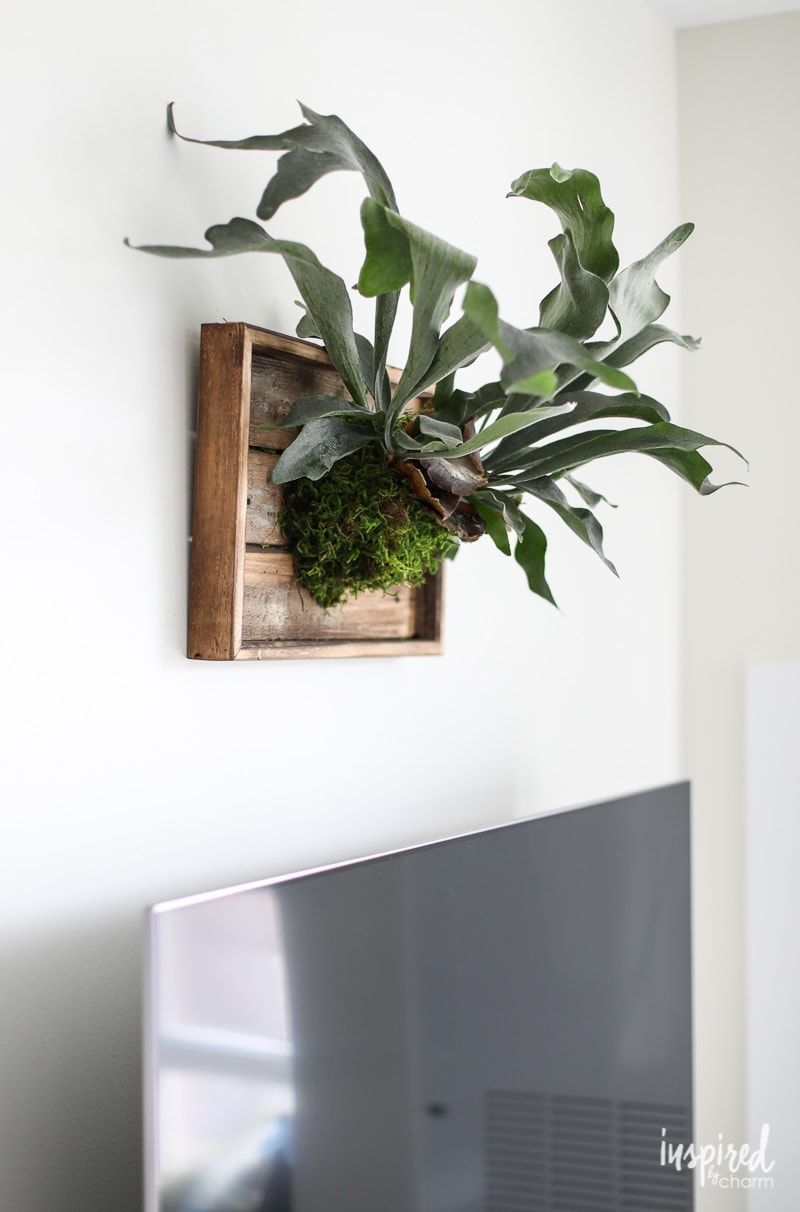
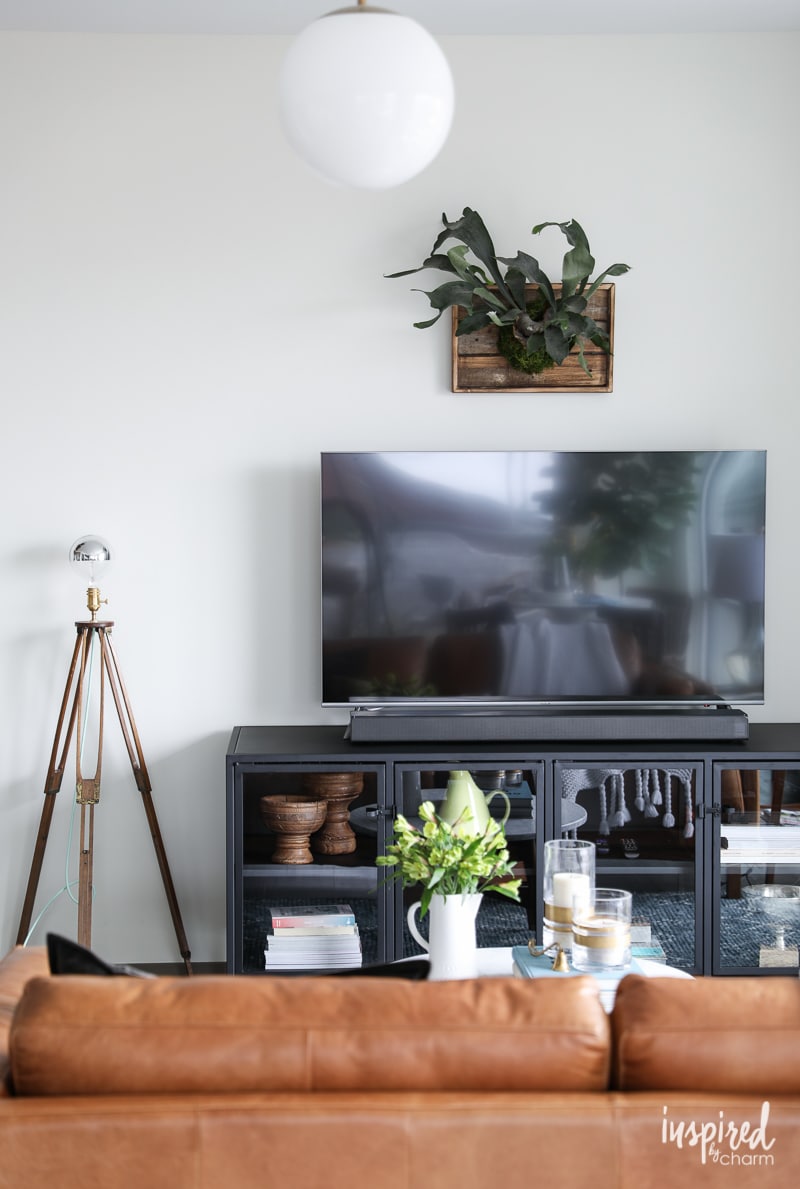
During the winter holidays, I hung a ceramic deer bust above the TV in my living room. I needed something to replace it, and this ended up being a fun solution. What do you think?

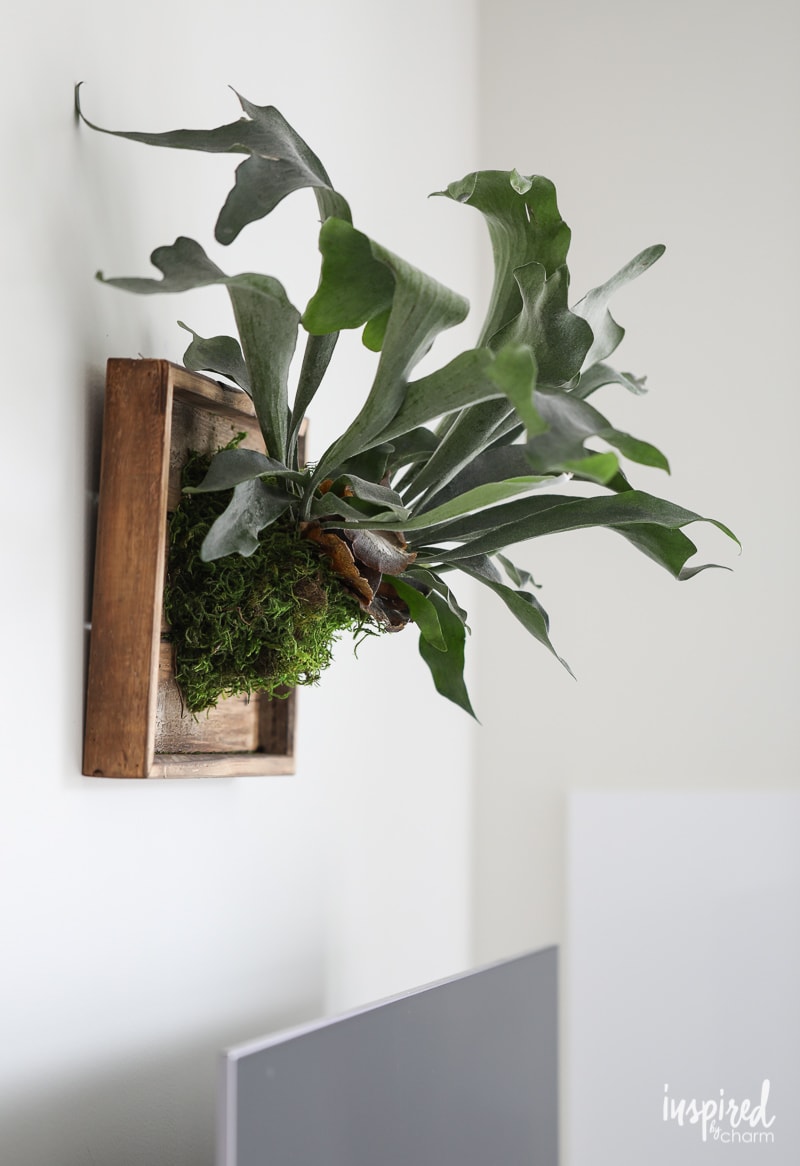
These staghorn ferns have gained popularity as a mounted plant because they look like horns. See what I mean?
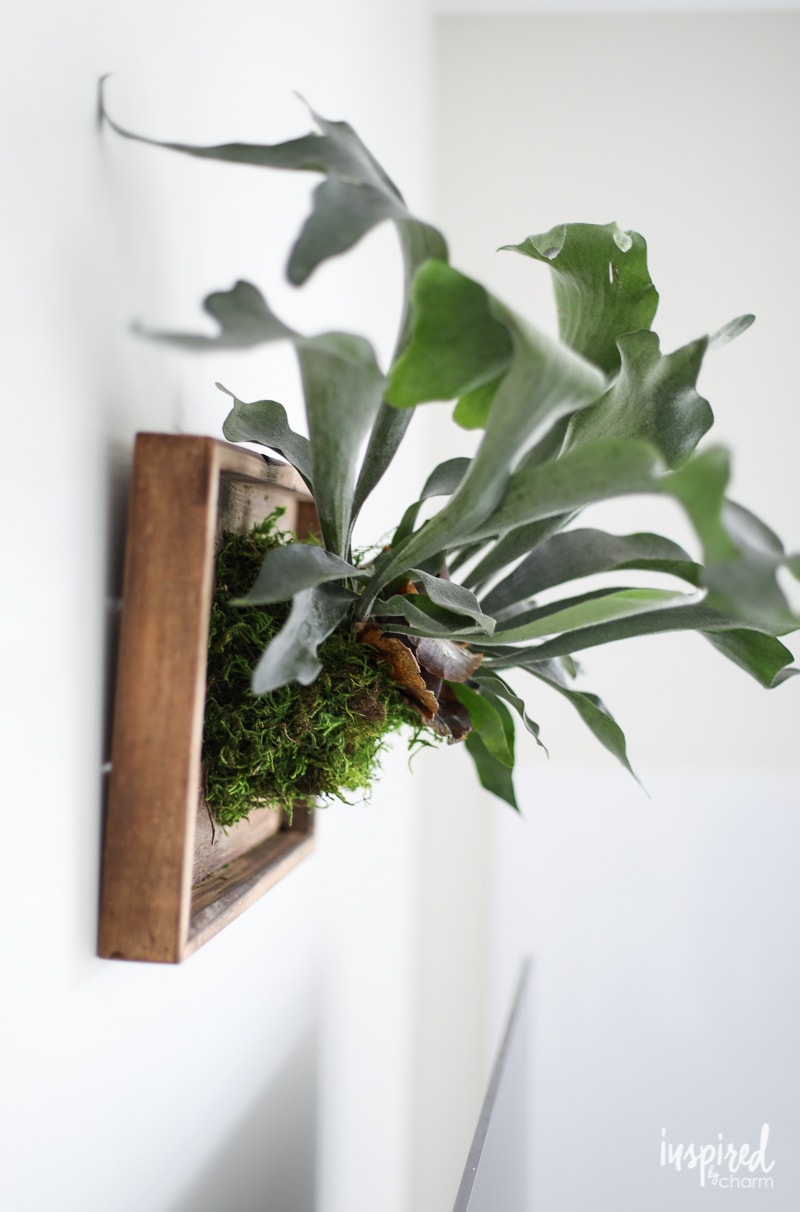
While it’s certainly enough on its own, I may tweak or add to the design down the road. As it is, this mounted staghorn fern is an unexpected way to enliven a space with greenery for spring.
How To Mounted Staghorn Fern:
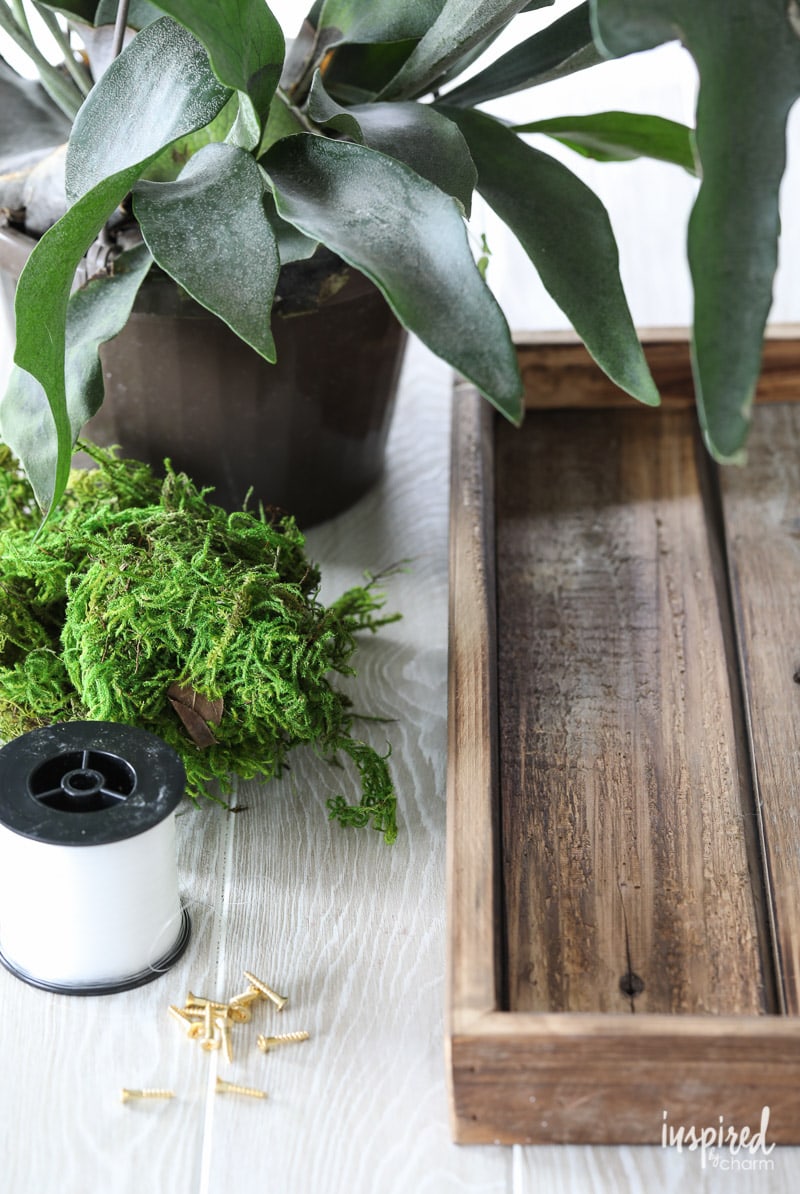
For this project you will need:
A piece of wood or a wood tray
Sawtooth hanger
8 screws or nails with a head
Fishing line
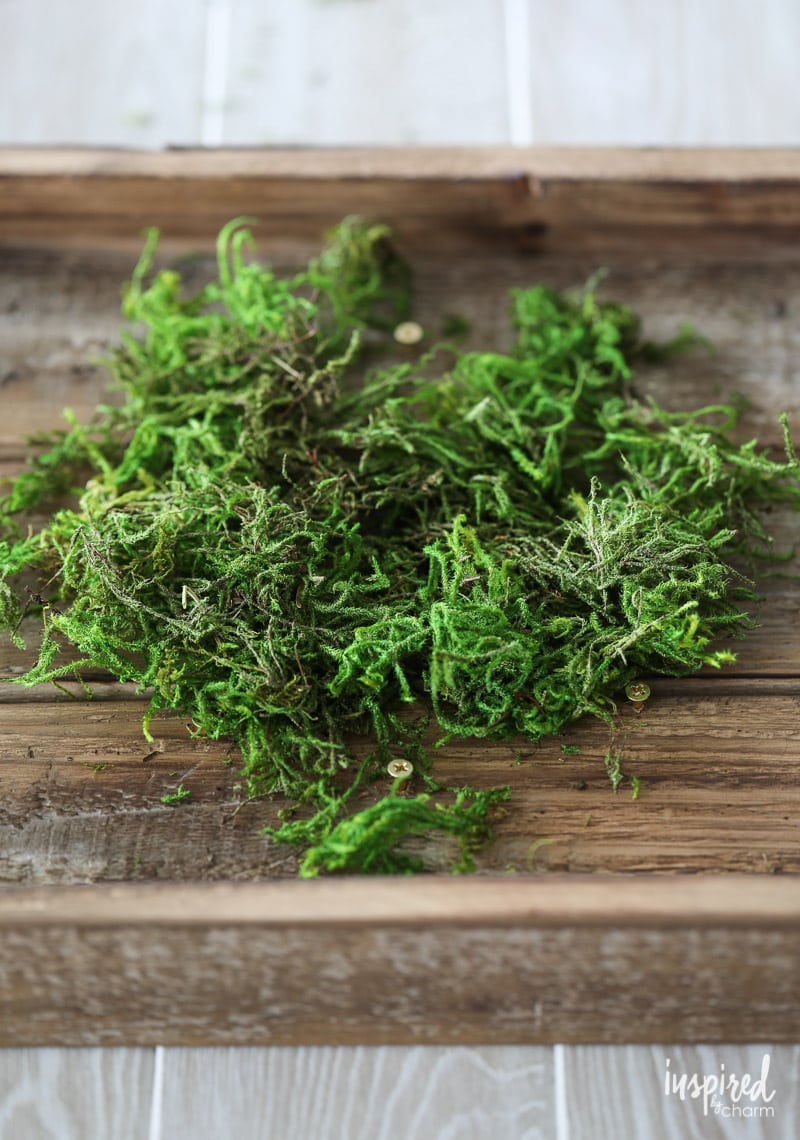
Sheet moss
Staghorn fern plant
Screwdriver
Hammer
To start the project, get a piece of wood on which to mount the plant. I used this tray I picked up at HomeGoods. However, you could use a scrap of lumber, old barn wood, a log slice, or even an old cabinet door.
On the back of the wood, attach a hanging device. I find a sawtooth-style hanger to be the easiest to work with, but anything that will allow you to attach your finished piece to the wall will work.
Next, attach eight screws (or nails) in a circular shape on the front side of the wood. The placement of the circle is up to you. Just be sure to consider your overall design and the final location of your mounted fern.
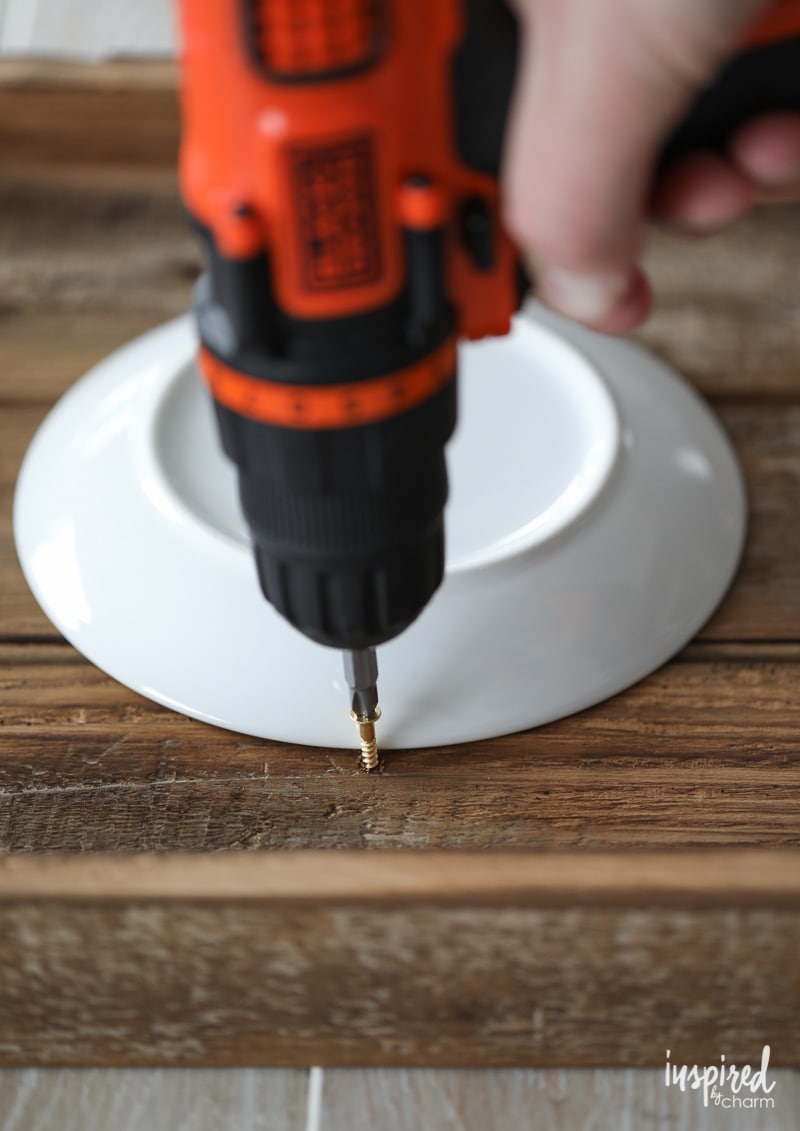
As a guide for adding the screws, I recommend using a plate, bowl, or circle pattern you have made. Since I was going to mount a larger fern, I used a 6-inch diameter plate for my guide.
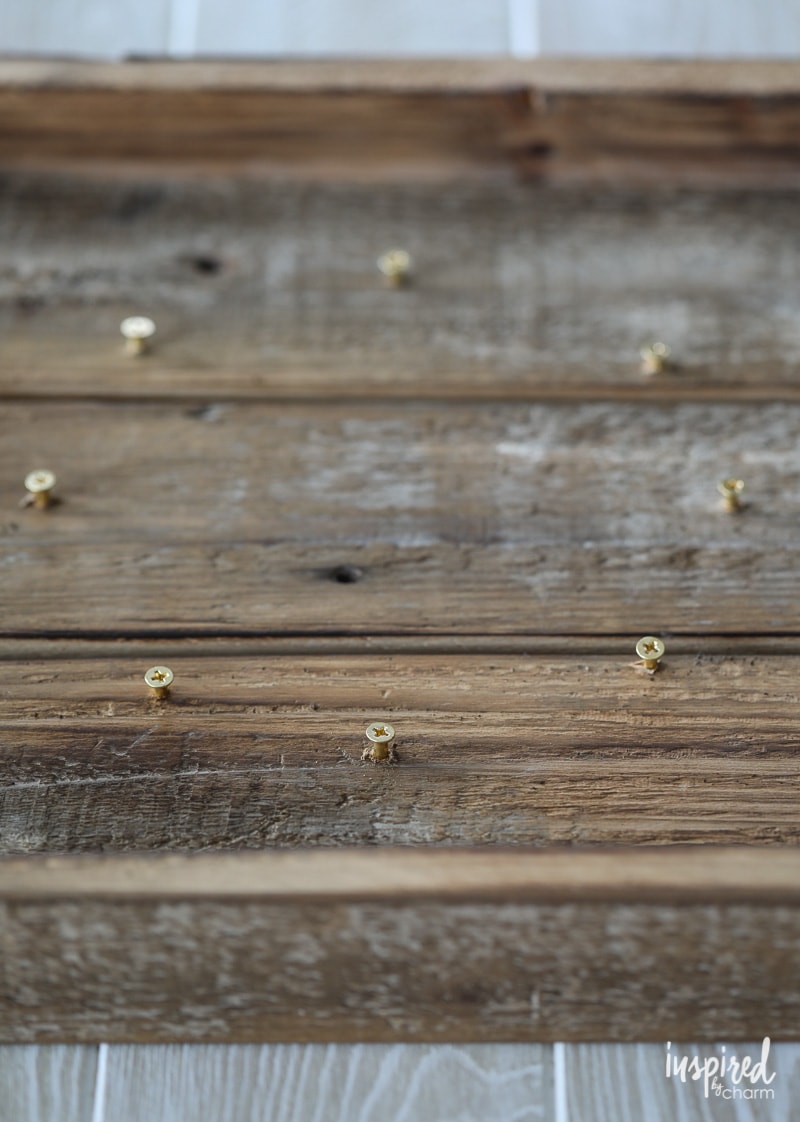
Space the eight screws evenly around your pattern. (As I mentioned, you can also use nails, but make sure they have a large flat head so the fishing line will not slip off.)
Once your board is prepared, you’ll want to get your plant ready. After you remove it from its container, use your hands to loosen the roots and break away any access soil. You can also trim the roots if needed.
💌 SAVE THIS POST / RECIPE!
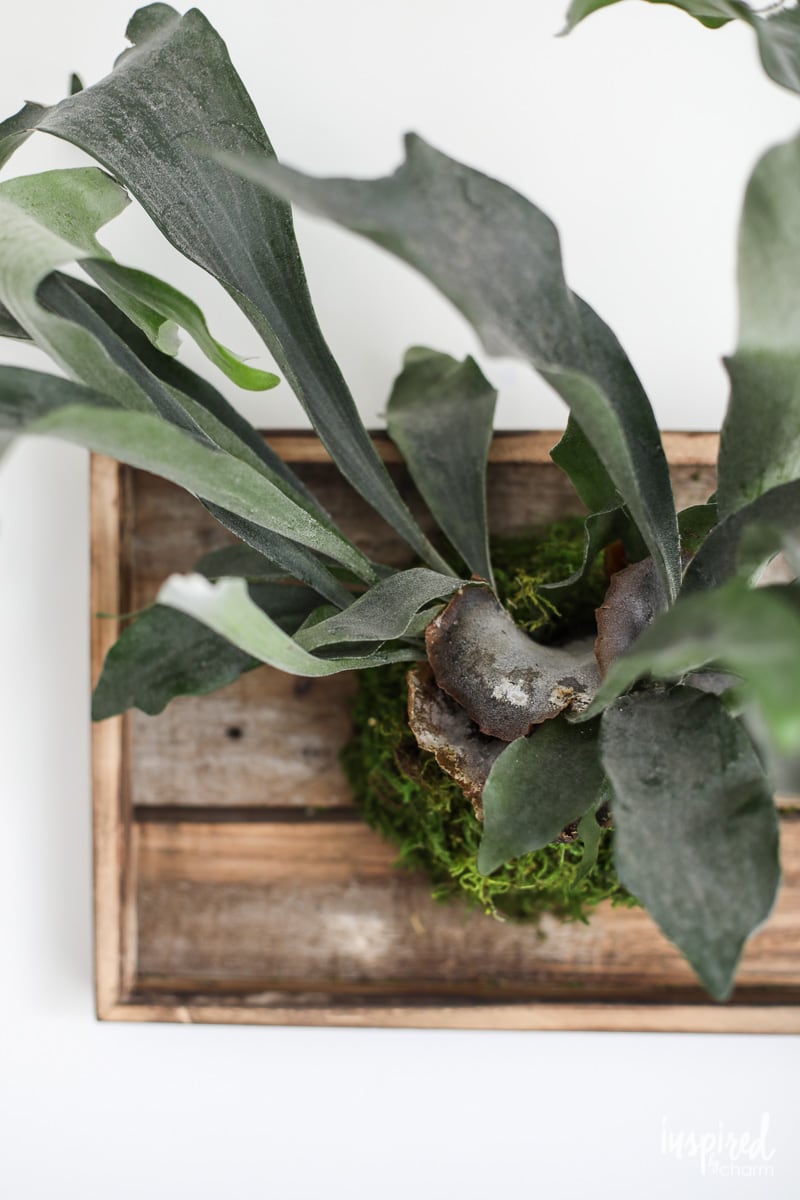
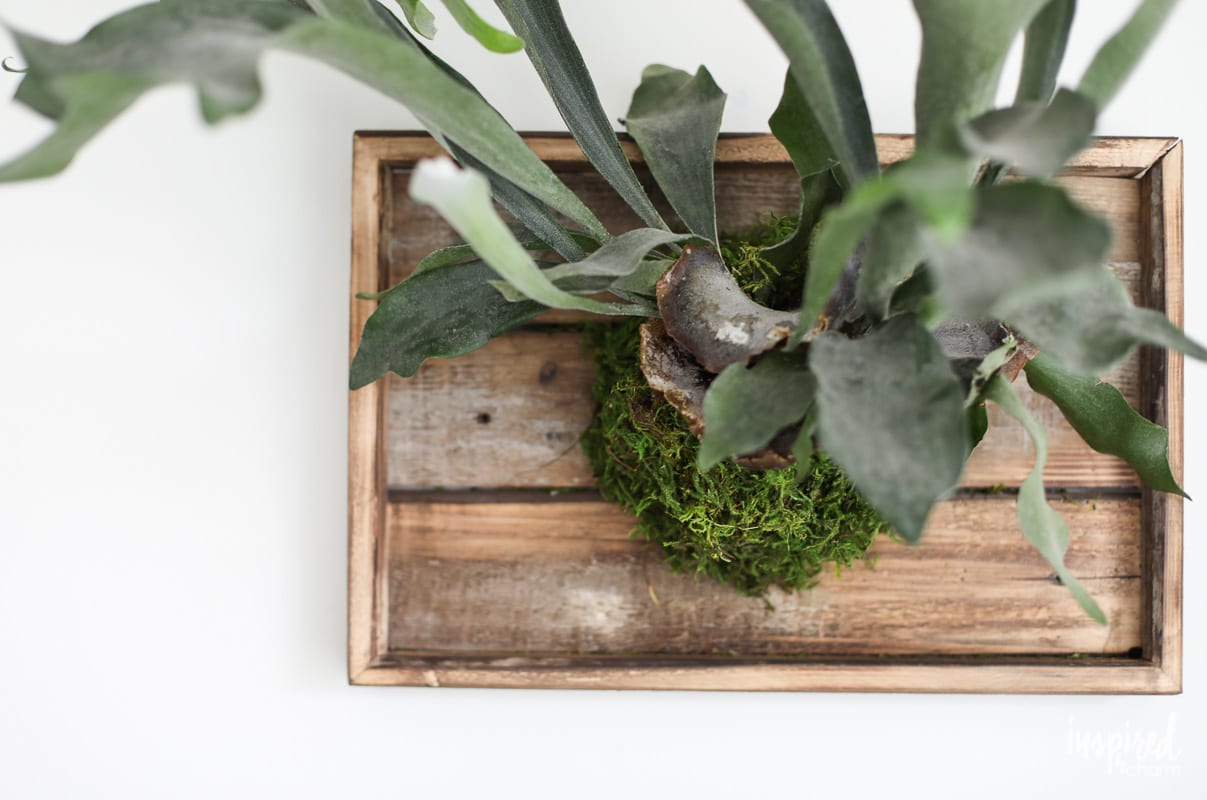
Now add a thin layer of moss to the inside of the circle shape you created with the screws. Place the fern on top of the moss. When you do this, take into account the direction of the leaves, the best side of the plant, and where your hanger is on the back. (You don’t want to plant your fern upside down.)
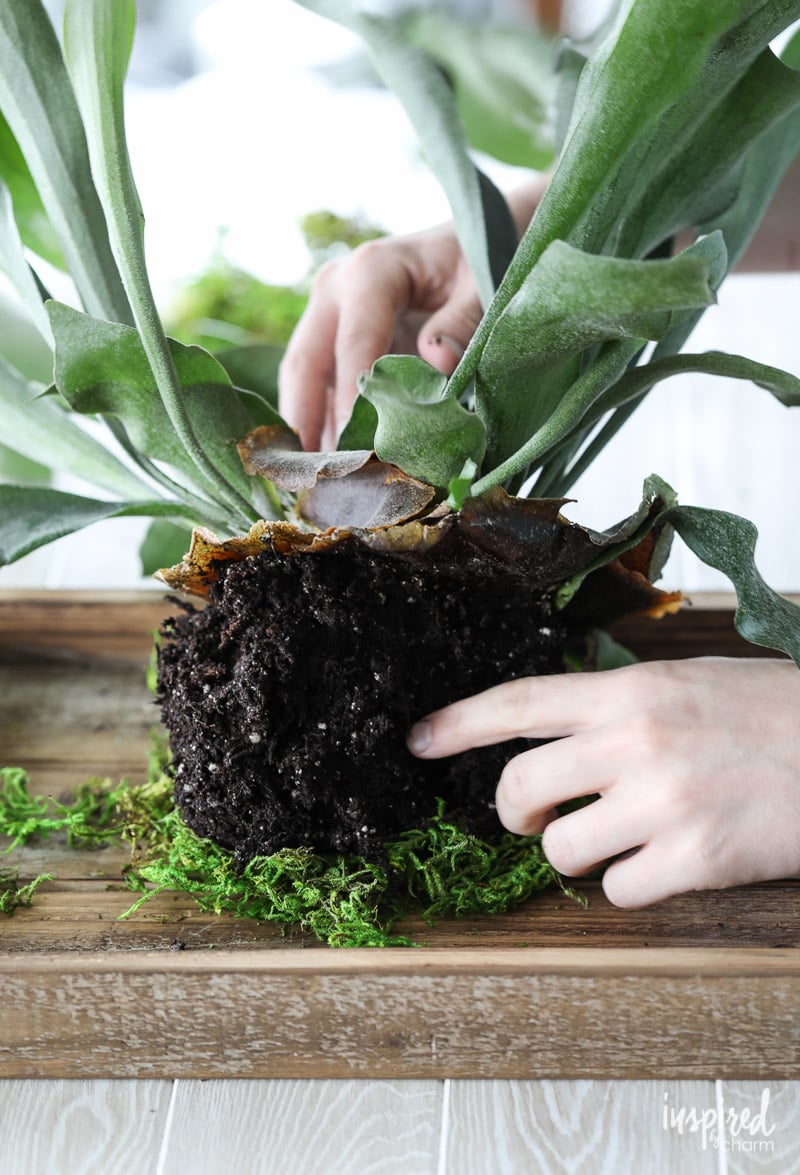
Then, start to wrap the moss around the roots of the plant. You’ll want to completely cover all the roots and soil.
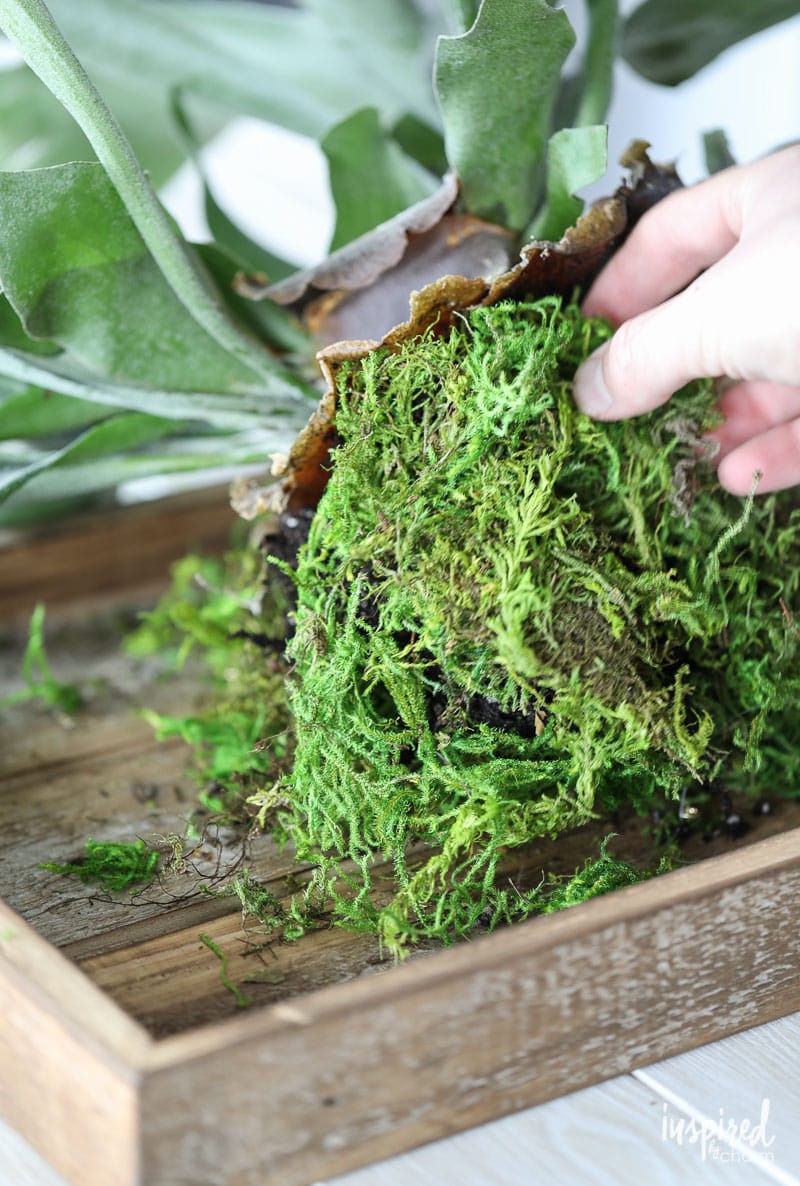
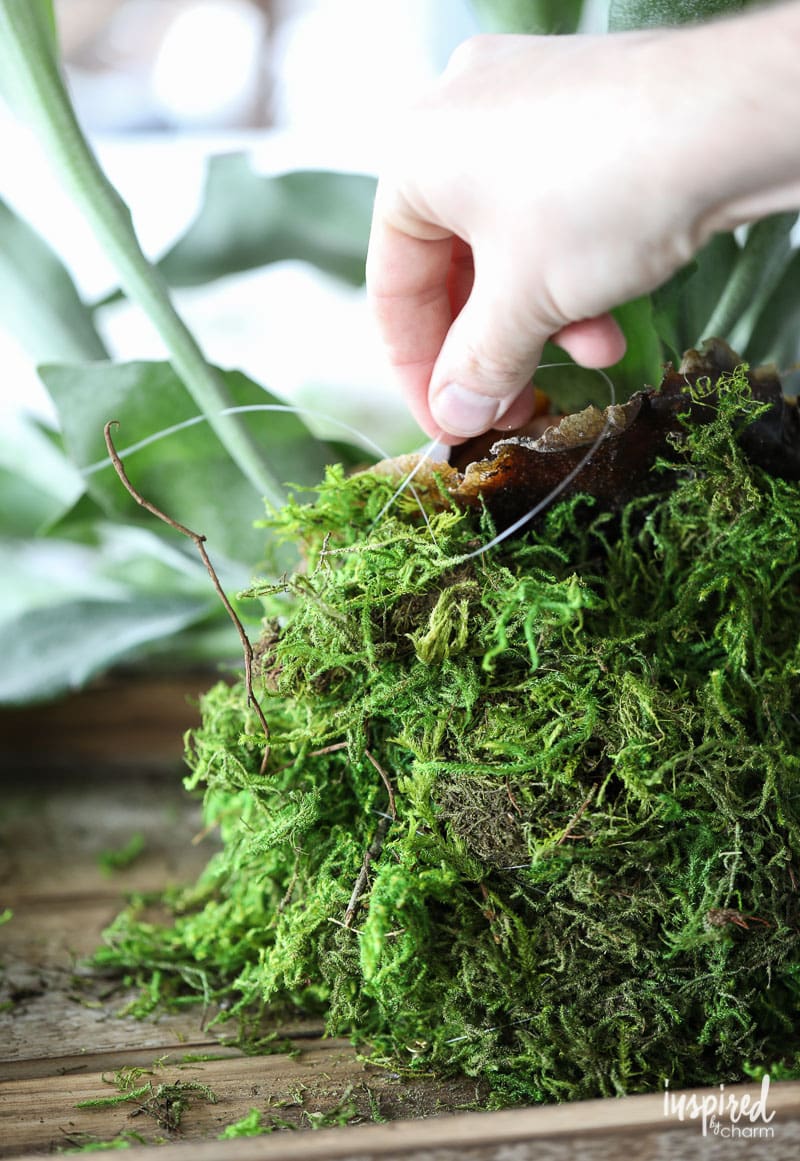
With everything covered, you’re ready to attach the fern to your board. To begin, secure one end of the fishing line onto one of the screws with a knot. Then work the line across the moss-covered roots, going from screw to screw to secure the plant to the wood. Continue to work back and forth in various directions between the screws.
Pull the line tight to ensure everything is held firmly in place. Once secure, knot the fishing line on one of the screws to finish things off. To ensure full coverage, add additional moss as you work.
At this point, your project is almost complete. All you need to do is fluff the moss to hide any signs of the fishing line.
I also recommend watering your plant before hanging it on the wall. Allow any excess moisture to drip off before hanging. In between waterings, mist the plant and root ball with water to keep it moist.
To prevent possible moisture damage to your wall, leave a small space between your wall and the wood board. You can do this by affixing a few plastic/acrylic furniture floor protectors to the back of the mount.

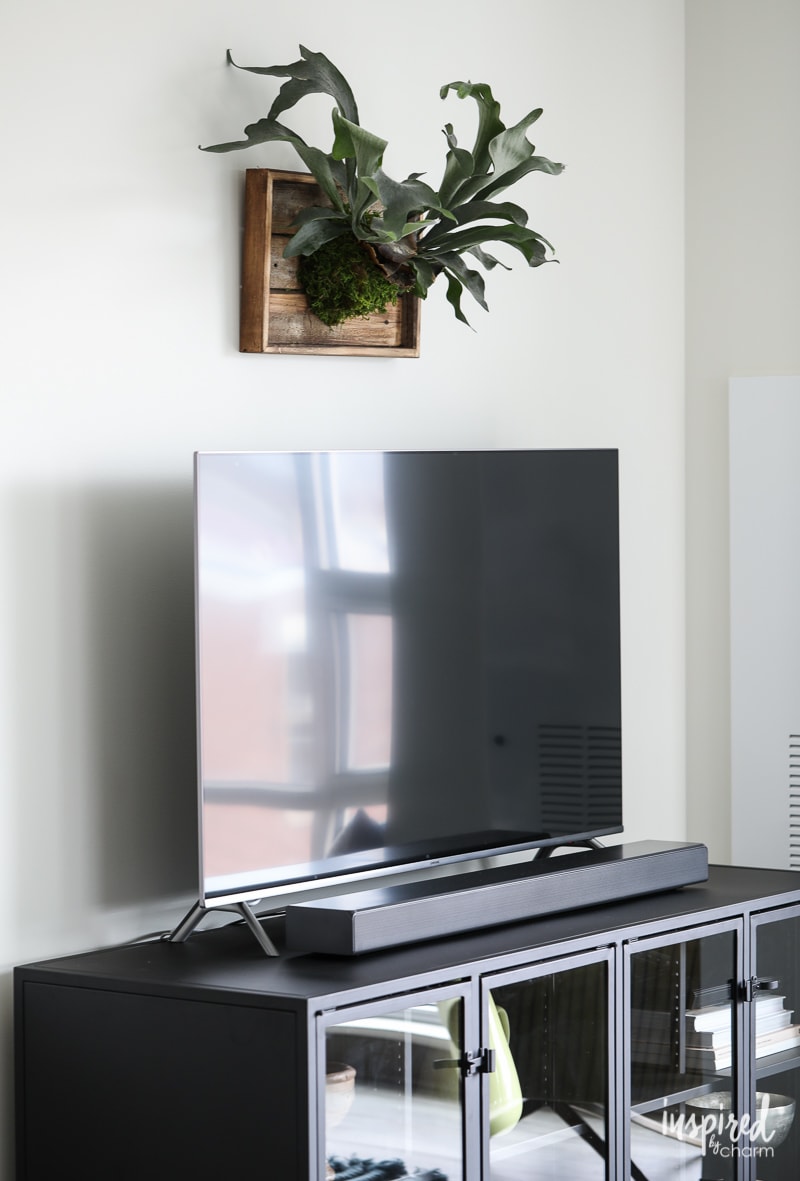
And with that, your DIY Mounted Staghorn Fern is complete! Cute, right?
If staghorn ferns are not your thing, experiment with other houseplants!

To purchase a staghorn fern, visit your local nursery or plant supply store. I have occasionally seen these ferns at the home improvement store as well. You can even find them online!
If you liked this Staghorn fern project, you might love these too:
- DIY Terrarium
- Kitchen Herb Garden
- Succulent Garden Bowl
- Tabletop Cactus Garden
- DIY Vertical Herb Garden
I hope you enjoyed this DIY project. If you tackle this project or something similar, please share it on social media and tag @inspiredbycharm and use the hashtag #myIBC. I love seeing your creations.
Happy Planting!
Can you update how this is going now. It looks great but I feel like it might be upside down. Did the fern shift? How do you water it?
Thanks for sharing this again on FB today. I’ve got two staghorns that are quite old. Every set of directions I see for mounting sounded so complicated but with your advice to use a tray, that simplifies it so much.
Yay! I’m all for making things easier!
xo Michael
Can’t wait to try this! I’ve wanted one of these forever, but buying them already mounted is pricey! Thanks for the tutorial!
Michael – just love this project – so NEW and FRESH! I was just wondering if you could use a cocomat (or coconut mat?) or bowl and attach that to the board and then nestle the staghorn fern in that. I am thinking of the mat that is a circle and you fold it so that it has a back (attach to wood) and the front part would be the “planter part”. Just a thought. Thinking then could cover the cocomat with moss. Thoughts?
I LOVE this project. Super cool and you’ve made it seem doable. Can’t wait to give it a go. Thanks so much.
So glad you enjoyed it! Thanks Kimberly!
xo Michael