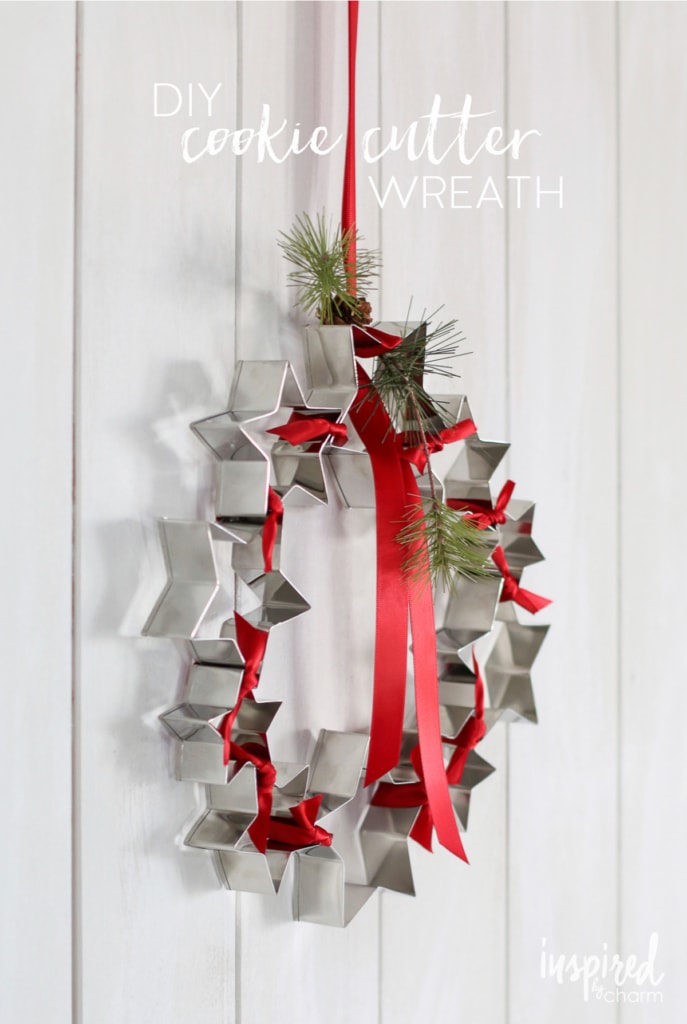
DIY Cookie Cutter Wreath
This Post May Contain Affiliate Links. Please Read Our Disclosure Policy
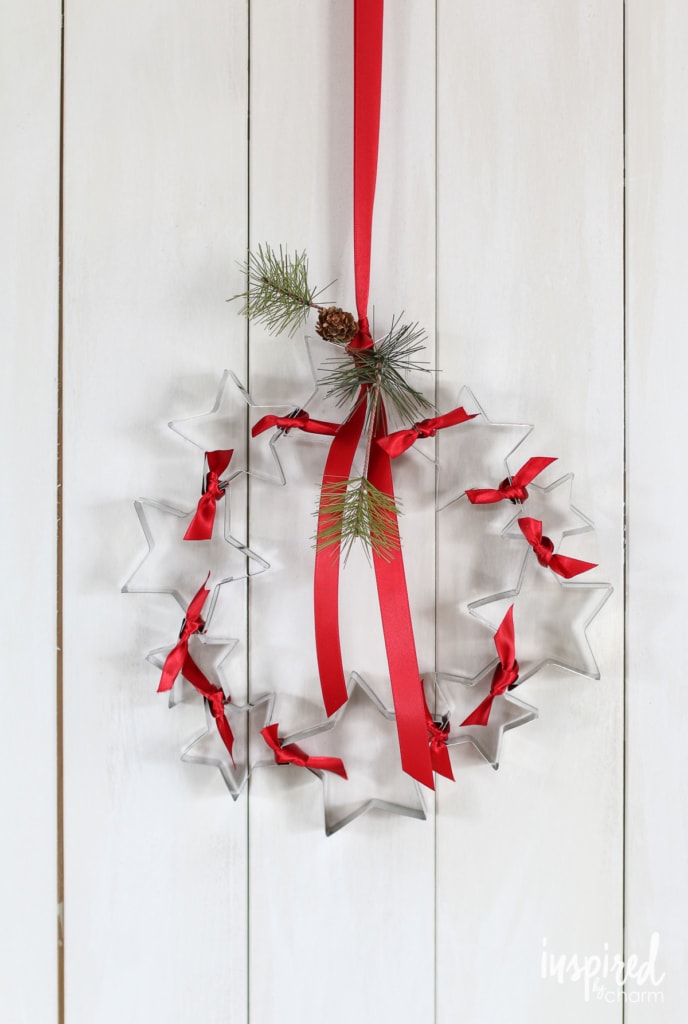
If you’re looking for a quick holiday craft that looks handmade and heartfelt, this DIY Cookie Cutter Wreath is for you. It’s a creative way to repurpose cookie cutters into beautiful holiday décor. Add ribbon, greenery, and your own personal flair for a wreath that feels merry, bright, and completely your own.
Every year when the holidays roll around, I find myself drawn to projects that are simple to make but still have that handmade magic. (Well, let’s be honest I love any handmade holiday decor.) This DIY Cookie Cutter Wreath is exactly that. It’s one of those crafts that looks like you spent hours creating, but really, it comes together in no time at all. You only need a few supplies, and before you know it, you’ll have something that looks both festive and unique.
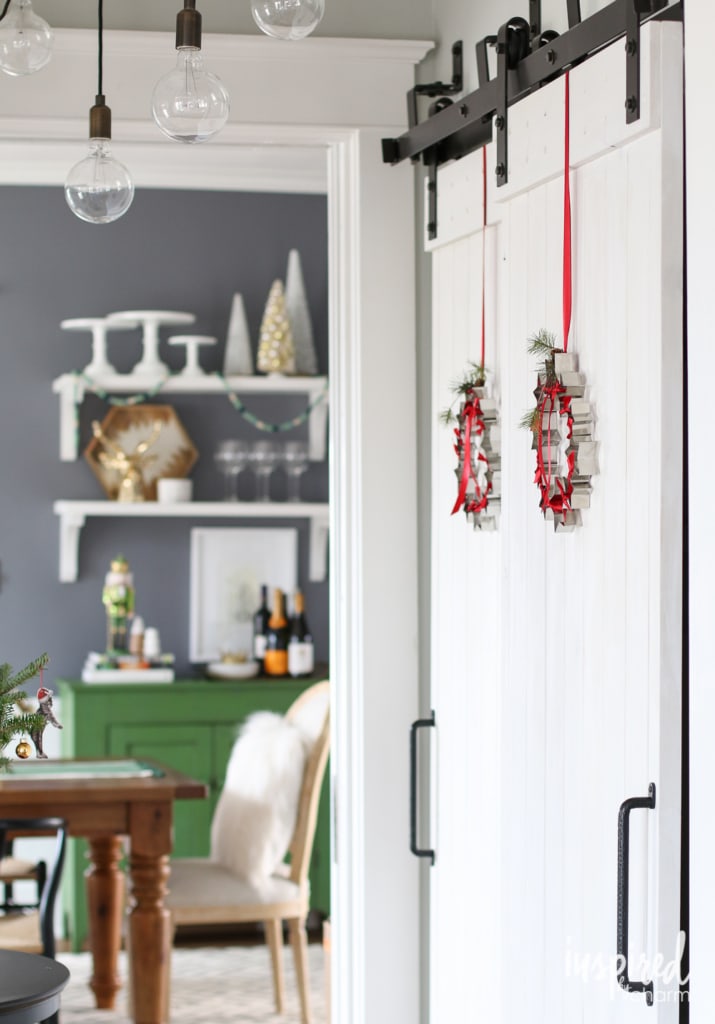
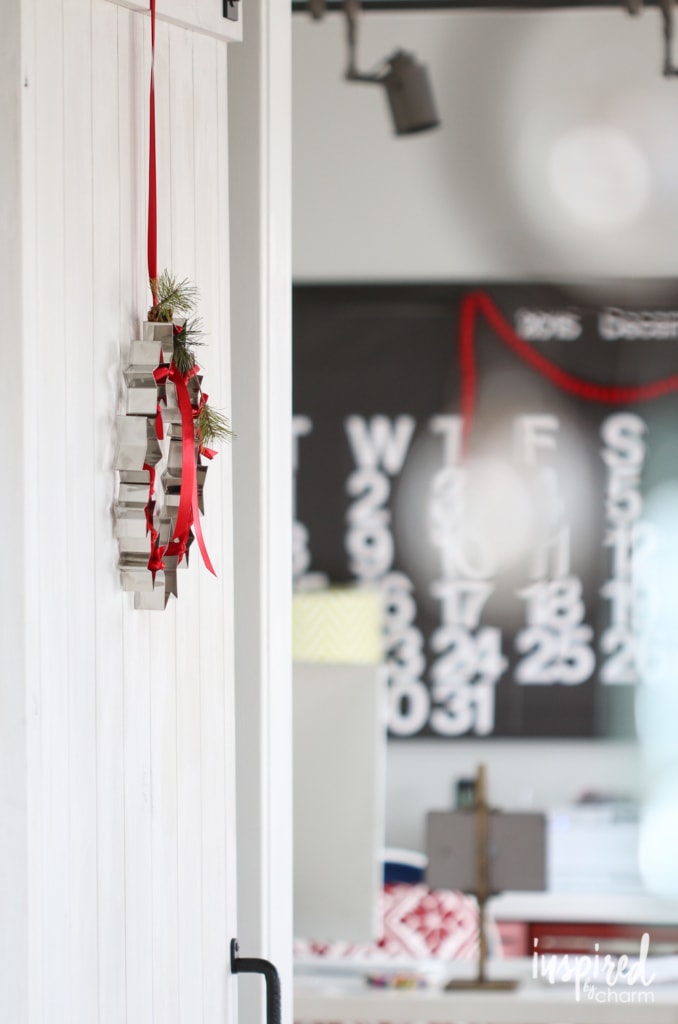
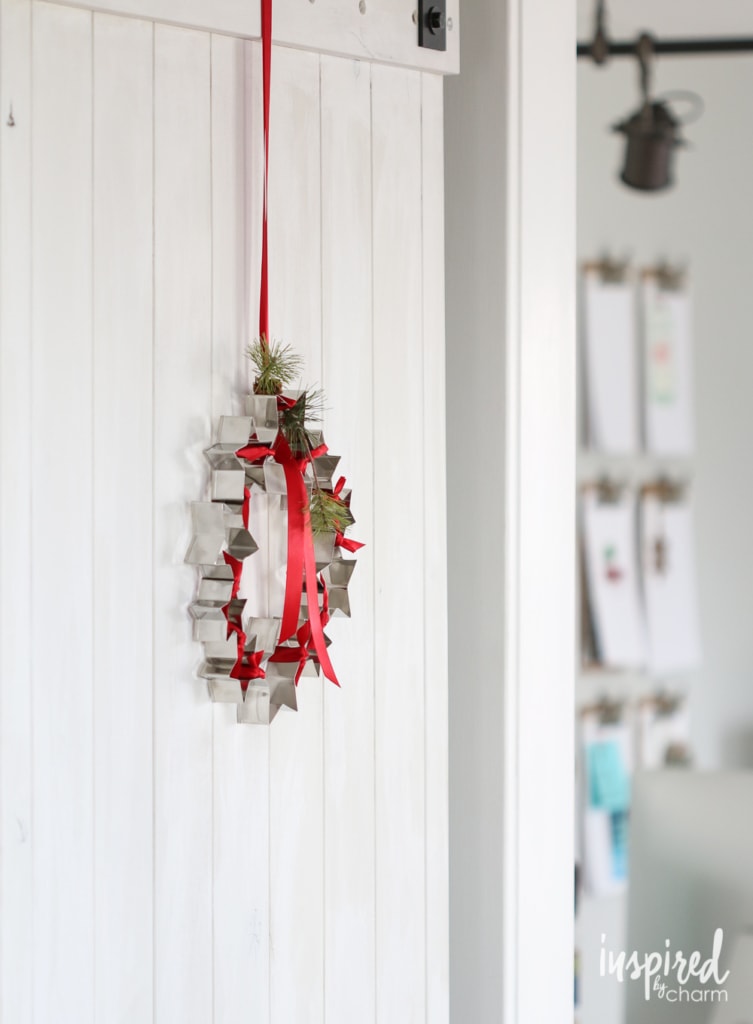
What I love most about this project is how versatile it is. Whether you hang it in your kitchen, on a pantry door, or even in a cozy nook, it brings just the right touch of holiday cheer. It’s the perfect mix of easy, fun, and beautiful, which is always my favorite combination. So grab your glue gun and a handful of cookie cutters, and let’s get creating together. (And while you’re at it maybe grab a cup of hot cocoa, maybe a Christmas cocktail, and turn on your favorite holiday tunes!)
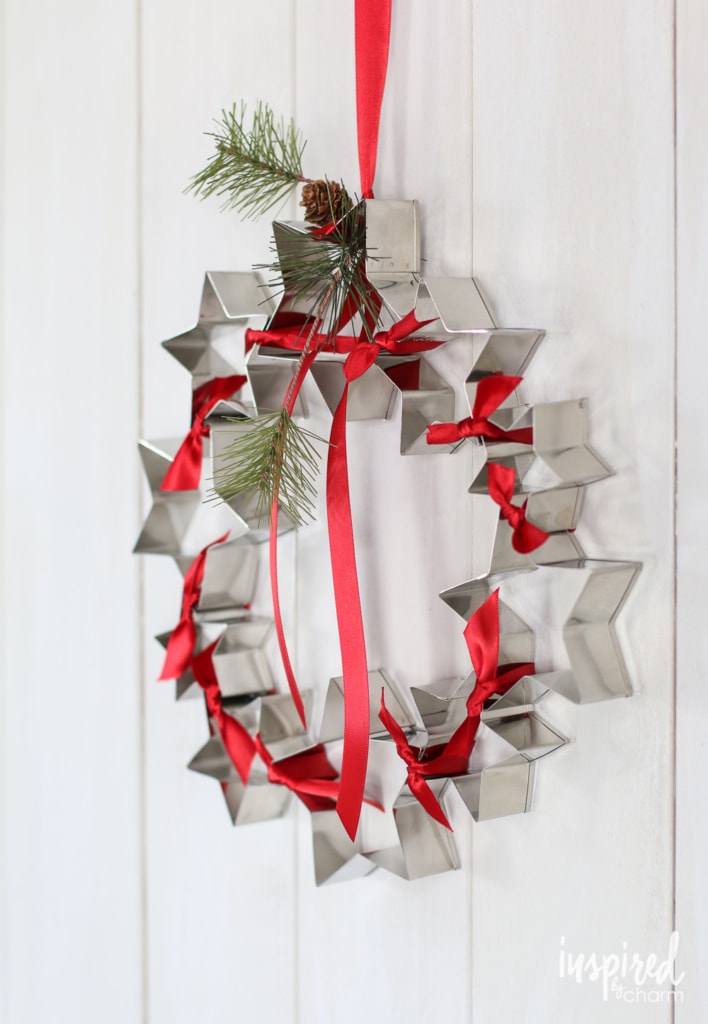
I found that the packs of cookie cutters with different sizes of the same shape come in handy for this DIY. I was thrilled when I came across the pack of star cookie cutters I’m using here. To create a wreath like mine, you’ll need two packs. You’ll use every cutter with the exception of the smallest one.
Okay, with all of that background out of the way, let me walk you through how to put this wreath together.

Why You’ll Love this Project
- It’s quick, simple, and stress-free. This is the kind of project you can start and finish in less than 30 minutes, and it doesn’t require any special tools or advanced crafting skills. If you can heat up a glue gun and tie a bow, you’re good to go.
- The results are festive and charming. The finished wreath is cheerful and unique with its metallic shine and pop of ribbon. It looks especially cute in a kitchen, but it adds a touch of holiday spirit anywhere you hang it.
- You can make it completely your own. Whether you use star-shaped cookie cutters like I did or swap in trees, hearts, or snowflakes, this wreath can fit any style. You can paint or distress the cookie cutters, change the ribbon color, or mix in other materials to create something that feels perfectly you.
- It’s a creative way to upcycle and decorate. If you’ve collected cookie cutters over the years or have extras sitting in a drawer, this is a wonderful way to give them new life. It’s a fun and resourceful project that turns everyday kitchen tools into meaningful, handmade decor.

Materials
Let’s get into the materials list for this charming wreath. Here’s what you’ll need:
- Star-shaped cookie cutters in various sizes – You’ll need a variety of star-shaped cookie cutters in different sizes to form the base of your wreath. Mixing shapes and sizes gives the design a more interesting and playful look.
- Hot glue gun and glue sticks – This is what holds everything together. A small dab of hot glue between each cookie cutter will keep your wreath sturdy while still looking seamless.
- Ribbon or twine – Ribbon adds color and warmth to the project while holding the cookie cutters together. Choose a shade that complements your holiday decor. In my opinion classic red always feels festive.
- Scissors – A simple pair of scissors will help you trim ribbon and greenery to the perfect length for a neat, polished finish.
- Small pine bough (real or faux) – A small sprig of pine or greenery adds a natural touch and completes the wreath with that fresh, holiday charm.

How to Make
Okay, ready to assemble this Cookie Cutter Wreath? Let’s do it! I’ll still take you through the steps below. I’ve also listed the materials needed and detailed instructions in the printable instructions card below.
- Start by arranging your cookie cutters in a circular shape to form the base of your wreath. Adjust their placement until you’re happy with the look, making sure each cookie cutter touches another at at least one point.


- Once you’re satisfied with the layout, use a small dab of hot glue where each cookie cutter meets the next to secure the shape. This will give your wreath some structure and stability.
- Next, tie short pieces of ribbon around each joint where the cookie cutters connect. Trim the ribbon tails to your preferred length. I like to keep mine fairly short for a neat, tidy look.
💌 SAVE THIS POST / RECIPE!


- After all the connections are wrapped, attach a longer length of ribbon to the top of the wreath for hanging. For a festive touch, tuck in a few small sprigs of pine or greenery near the top, and your wreath is ready to display.

Super cute, right? Isn’t it amazing how something as simple as a few cookie cutters and a ribbon can turn into a piece of holiday decor you’ll love for years to come?

Project Variations
As I mentioned above, this is a fun project you can make your own. Here are a few ideas for creative customizations.
- Change up the shapes. Try using tree, heart, or snowflake cookie cutters instead of stars for a completely different look. Mixing a few different shapes can make the wreath even more playful and unique.
- Add a splash of color. Spray paint your cookie cutters before assembling the wreath to coordinate with your holiday décor. Soft pastels, metallic gold, or vintage-inspired hues all work beautifully.
- Try different materials. Swap ribbon for twine, thin wire, or even strips of fabric for a more rustic or homespun feel. Each option gives the wreath a new personality.
- Incorporate small ornaments. Glue or tie on mini ornaments, jingle bells, or wooden beads between the cookie cutters for extra holiday charm.
- Go mini or go big. Make a smaller version to hang on a cupboard or use as a gift topper, or go larger by adding more cookie cutters and creating a statement piece for your front door.
- Add natural touches. Tuck in bits of pine, eucalyptus, or dried orange slices for a fresh, seasonal detail that makes the wreath feel warm and festive.
More Handmade Holiday Decor You’ll Love
- Handmade Clothespin Snowflakes
- Vintage Bobbin Christmas Garland
- DIY Christmas Cookie Bags
- Rustic Star Anise Christmas Wreath
- Bottle Brush Tree Drink Stirrers
- Cookie Cutter Wreath
There is just something about this wreath that I’m in love with. It’s simple, homemade, and super festive. There’s a comfort in that. And that’s part of what Christmas is all about.
If you give this project a try, I’d sure love to know what you think. Please stop back and leave a comment and a 5-star rating below.
Want more from Inspired by Charm? Join the IBC Mailing List for inspiration in your inbox! Follow along on Instagram and TikTok for daily updates and behind-the-scenes looks at my processes. There’s even more inspiration on Facebook and Pinterest!

DIY Cookie Cutter Wreath
Ingredients
- Star-shaped cookie cutters in various sizes
- Hot glue gun and glue sticks
- Ribbon or twine
- Scissors
- Small pine bough real or faux
Instructions
- Start by arranging your cookie cutters in a circular shape to form the base of your wreath. Adjust their placement until you’re happy with the look, making sure each cookie cutter touches another at at least one point.
- Once you’re satisfied with the layout, use a small dab of hot glue where each cookie cutter meets the next to secure the shape. This will give your wreath some structure and stability.
- Next, tie short pieces of ribbon around each joint where the cookie cutters connect. Trim the ribbon tails to your preferred length. I like to keep mine fairly short for a neat, tidy look.
- After all the connections are wrapped, attach a longer length of ribbon to the top of the wreath for hanging. For a festive touch, tuck in a few small sprigs of pine or greenery near the top, and your wreath is ready to display.
Thanks for sharing! Babe, you’re absolutely amazing! Every detail is just perfect, you’re my source of inspiration. http://www.cet.go.th
This is perfect for this time of year! We are hosting Thanksgiving this year and have been looking for quick and easy ways to decorate our house!
This is too cute! I can’t wait to make one for my pantry door!
Glad you like it! It would be snazzy on a pantry door!
xo Michael
These would make great teacher gifts, too! Thanks for the idea!
Yes – perfect Teacher gift idea!
xo Michael
These 10 minutes ideas on decorating a home or a room are just amazing. Last year, on Xmas, I decorated my walls with red and white ribbons hanging from up towards down with bells, trees, and fruits all around. Now, I would definitely try these cookie cutter decorating ideas this year. I can imagine from images that what creative and pleasing look it will gonna give to my home.
This is the cutest ever!!!! I love wreaths! If you have any more tutorials for 2016…be sure to share! 🙂 Merry Christmas to you!
I like your cookie cutter wreath; a person could add bells to each ribbon that attaches to @ cutter. Or a person could make a paper banner (small) and run the ribbon banner from one end to the other.
Ack! I need 4 of these little wreaths! Deck my back hall which gets little attention, but is high traffic! Love!
YOU are a star!! I have said all along that you need to have your OWN television show—PLEASE!! You are just the most awesome decorator ever!! Thank you!!
Love seeing all of these cute ideas you dream up! xoxo
ok, I LOVE this idea!!!!!
It’s so beautiful! I love this idea and can’t wait to recreate it next year.
Do you sleep at night?!!! You continue to come up with the most wonderful, creative and affordable ideas – over and over again! Thank you!
Adorable!! I love easy diy ideas for Christmas. With 2 kids that never stop I really love that this idea is so simple and quick! Thanks for sharing this awesome idea!!
Another BEAUTIFUL Christmas craft, Michael. Your creativity is so inspiring!!!
Michael-I love this! I was thinking that the simplicity is so comforting too. Yesterday, mom just gave me a small metal Bundt pan that was my great grandma’s- I decided that I HAD to use it. I put some red and white polka dot ribbon through the middle and hung it in the kitchen-instant wreath. I think I will have to add a cookie cutter one as well-so cute! Thanks for all your ideas-so fun! Cheers!
You’re killing me with all of your genius ideas this holiday season! I love this so, SO much!!
An idea so good it makes me wish I thought of it! Best Christmas 10 minute idea ever!!! Thanks for joining us!