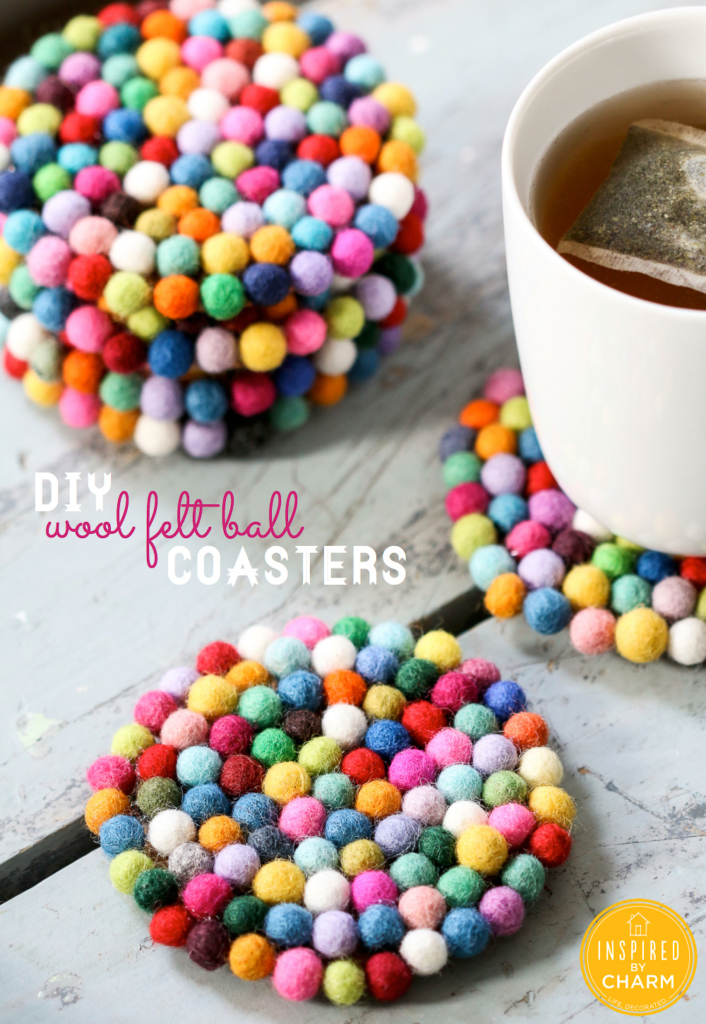
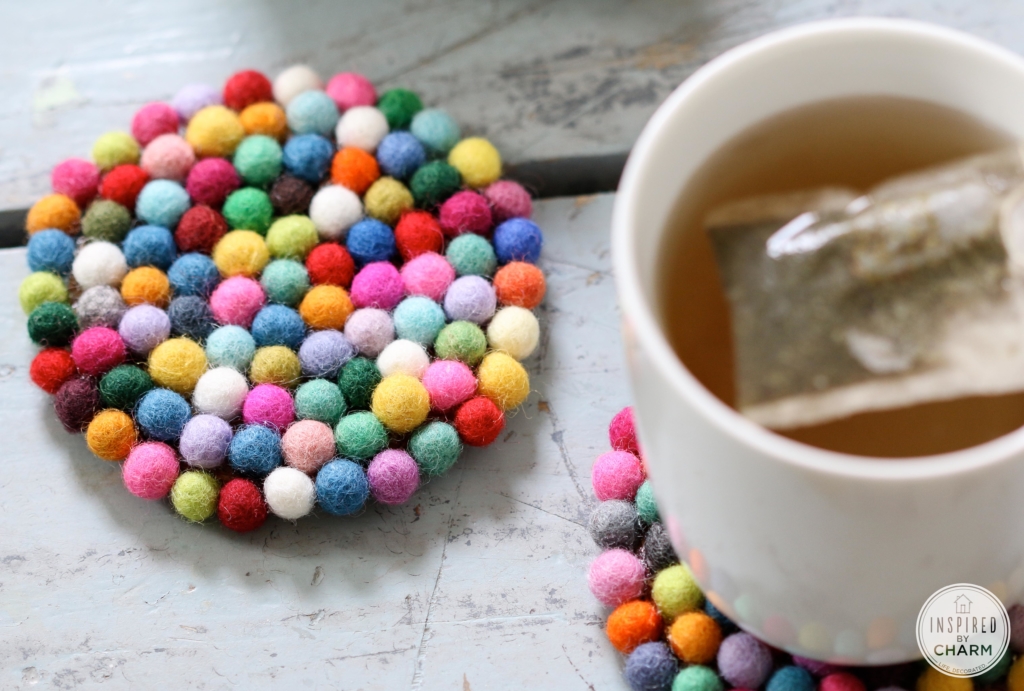
DIY Wool Felt Ball Coasters
This Post May Contain Affiliate Links. Please Read Our Disclosure PolicyHello, friends! Today I’m back with a fun little DIY. Right before the holidays I came across an image of felt ball coasters. You may have noticed that these little felt balls have been popping up all around craftland. I saw lots of them this past holiday season in garlands and ornaments. Wanting to get crafty with these little guys, I decided to make some colorful coasters for my new office space!
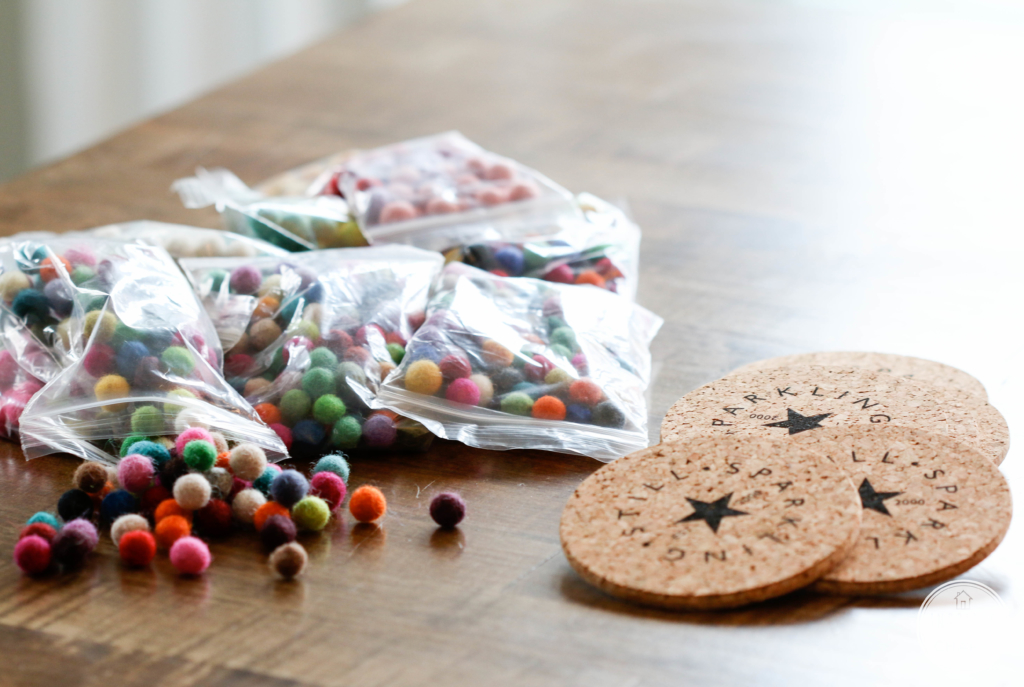
I ended up ordering felt balls from this fab Etsy shop. (The shop owner Claire is a delight!) You can buy the felt balls in multicolor packs or pick whatever combination of colors you like best. I did both. I used the 1cm size for this particular project.
As I’ll describe below, I basically glued the balls to some clearance cork coasters I found at TJ Maxx. After doing a little more research when writing this post, I realized that these felt balls could also be threaded onto string and then sewn together. This would eliminate the need for the cork coaster. This would also make the felt balls a bit closer together. I may try this method with a larger size ball. If I do, I’ll be sure to show you how.
I’m just super happy with how my coasters turned out. They appeared in this Instagram yesterday, and I was pleased to see that they received such a positive response!
Let me show you how I made them.
DIY Wool Felt Ball Coasters
Here’s what you’ll need:
1 cm wool felt balls (90-100 per coaster depending on the size)
cork coasters
E600 glue
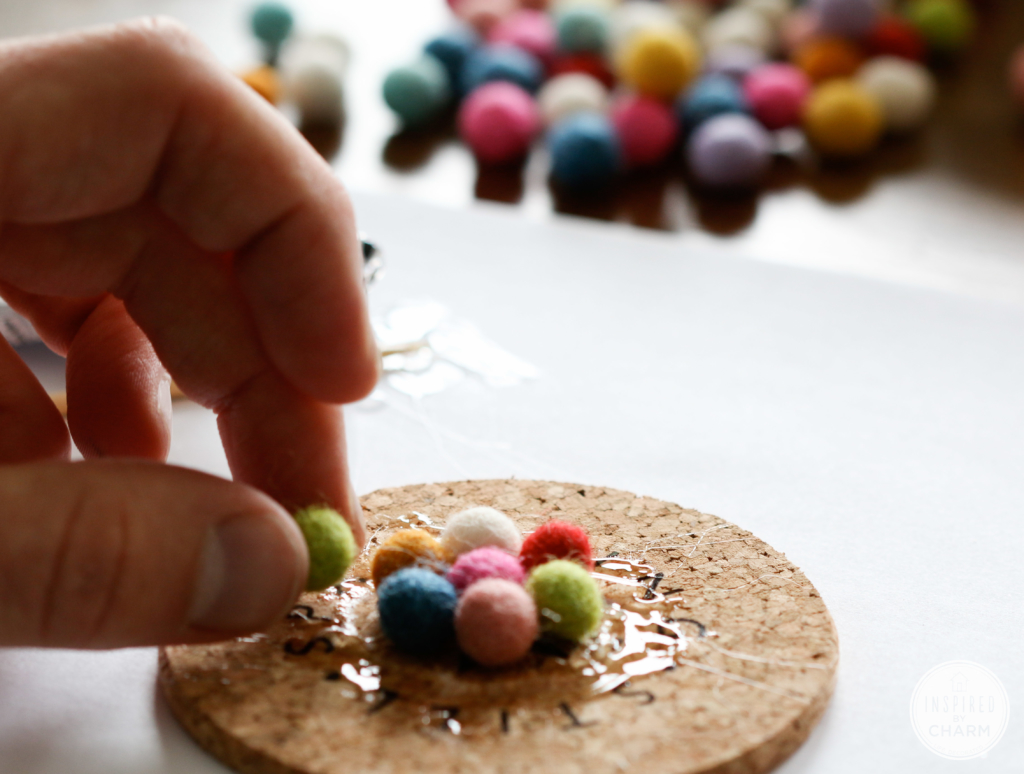
Begin by gluing one felt ball to the center of your coaster.
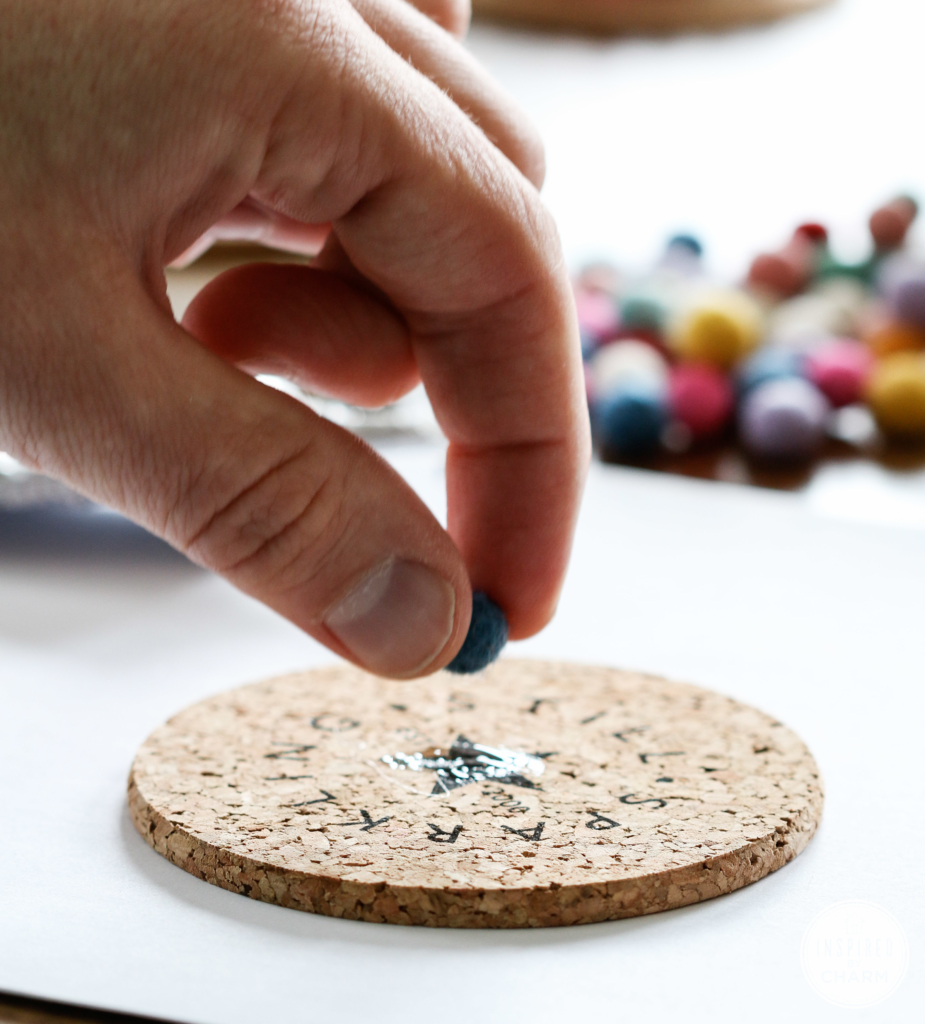
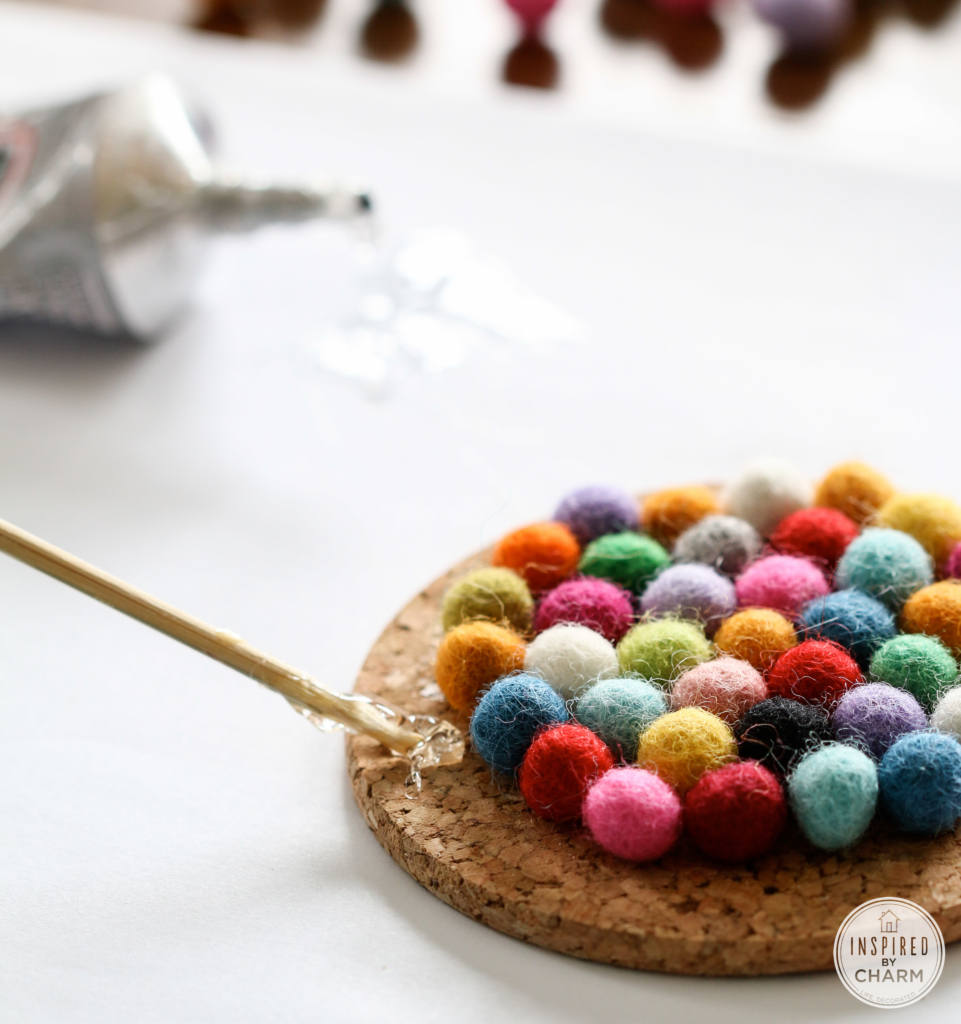
I used a long wood skewer to place the glue where I wanted it. When I got to the other rings, I just put the glue directly onto the cork.
💌 SAVE THIS POST / RECIPE!
To keep the felt balls as tight as possible, you’ll want to stop and allow the glue to dry every so often as you work around each coaster. I worked on my coasters off and on throughout the day.
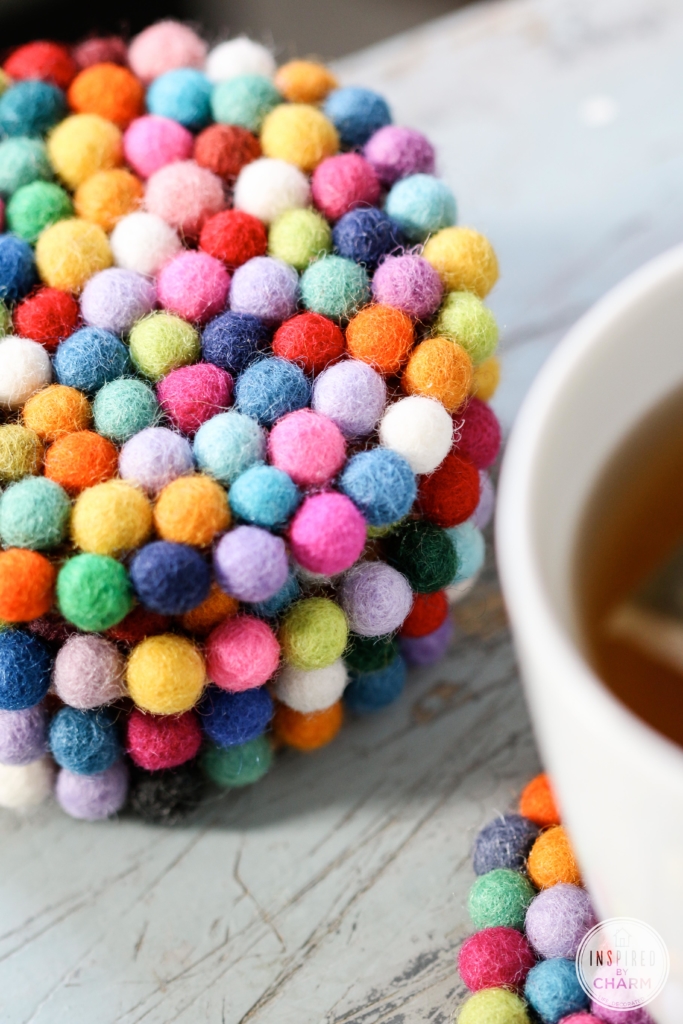
Continue working all the way around until your coaster is completely covered. For the last row, I had just enough space to glue each ball a little to the coaster and a little to the felt ball next to it. This made the cork coaster virtually disappear.
After everything is dry, your coasters are ready to use!

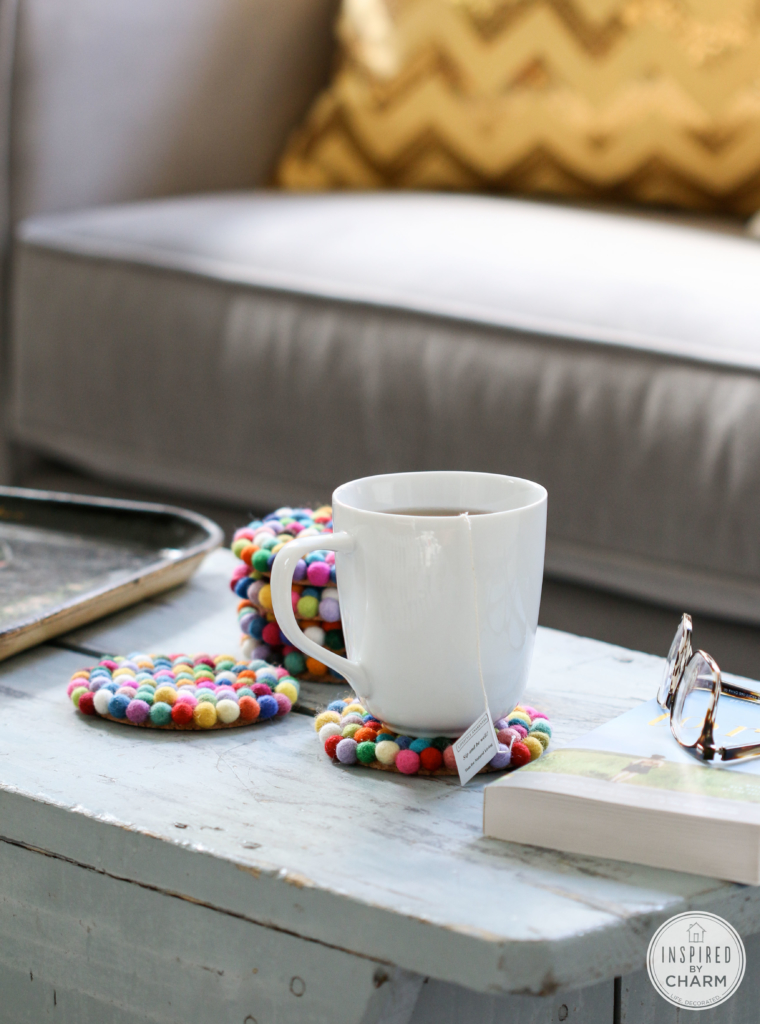
This is a super simple project, and I think the end product is really spectacular. The coasters are so unique and colorful, clearly a perfect addition to my space.
I also really love that they are customizable. The felt balls come in oodles of colors you could do varied shades of blue or a more neutral pallet with grays and whites. Either way, you will have a cozy spot for your favorite beverage.
How do you like my colorful coasters?
Whoa. I don’t have words to describe my total obsession with these! Felt dots? Colour pops? Can it get any better? Nope. Can’t wait to make these! x
These are the happiest coasters I’ve ever seen! They make me smile. Didn’t know that a little coaster could do that did you? 🙂
Beautiful and clever project!
Thanks! They were fun to put together.
xo Michael
Hey Michael
The Dollar store carries these little balls as well and cork sheets that you can cut into squares or circles. Also, I think instead of spending so much time placing them individually, just put the glue on the cork then put a pile of balls and then move around to fill cork but being careful not to get any glue on top of balls. I will try my idea first lol. Your idea is great but is very time consuming.
Debbie,
That’s great you found a way to make this project work for you. Love that!! The balls the Dollar store sells are not the traditional wool felted balls which I really like for this project. Also, taking time to allow the balls to dry in-between makes it possible to glue them tighter to each other so you can’t see the cork. But again, do that works for you.
xo Michael
Oh my goodness, these are so cute! I love the bright, happy colors. I’m ordering felt balls immediately!
Haha. Sounds like a plan!
xo Michael
I gotta order the felt balls ASAP before the etsy shop that sells them runs out of them after everyone who reads this post heads straight over there to order them 🙂 I love all of you projects, but this is simply fabulous on so many levels.
Good point Diane! I pretty much want to glue them to everything now! Haha.
xo Michael
The Dollar store has them as well, the little colourful balls. Would be alot cheaper. 🙂
I was also wondering where you bought the felt wool balls. I love this project!!
Leslie, there is a link in the post above where you can get them. Happy crafting! 🙂
xo Michael
These are so fun and cute!!
Thank you!
xo Michael
this is such a great idea! I love the look of the wool felt balls–I really like that they’re a bit more rustic looking than regular ole pompoms.
Oh yeah – these are so much nicer than the ones at the craft store. I just love them!
xo Michael
I love these, Michael! Where did you get/order the felt balls? They aren’t available at my local craft store. Thanks!
Tracy, there is a link in the post above where I ordered them. 🙂
xo Michael
Fabulous idea! The pops of color of perfect for you, but I love how the idea can be transformed for neutral people like me, too. I’m loving the distressed bench that you used in the pictures, too!
Yes – I love that these can be customized to suit anyone’s style. Isn’t that bench great!?
xo Michael
They are so cute, and I agree that the colors are perfect for your space! I’m loving pompoms right now – I really don’t want to take down the pompom tree centerpiece I made for Christmas 😉
Ooo! A pompom centerpiece. That sounds fun!
xo Michael
Wow! What a terrific idea, and so cheer-y and bright. Thanks for the great idea and directions.
They sure would make great little gifts in a basket, with mug and coffee/tea.
Thanks again…..
Totally! Everyone love something homemade. Perfect for a gift.
xo Michael
Love this! It reminds me of a pom pom wreath that I saw on Pinterest using large pom poms/felt balls. I am dying to make that one 🙂 I might have to make some of these to match!
Yes! I’ve seen those wreaths. They are so fabulous.
xo Michael
I Love them!!! And your pictures are perfect!
You’re so sweet Debbie! Thanks!
xo Michael
Love this idea. Adding these to my list of projects I would like to do in 2014.
Thanks Michelle!
xo Michael
These are fantastic! I love them!!
Thank you Emily!
xo Michael
You got great coverage! I didn’t realize there was a cork base there until I read the post.
Thanks! I know! They did cover so well.
xo Michael
I am making these asap! Love this idea.
Thank you Amy!! Happy Crafting!
xo Michael
Another great idea! Approximately how many balls did you use for your set of 4 coasters? I’m trying to get an idea of how many to order.
Great question! I updated the post. Somewhere between 90 – 100.
xo Michael
So you used 90-100 felt balls per coaster? That’s what you put in post, but Kim’s question was for how many balls per the 4 you did…just making sure before I order some felt balls…?
These are so colorful and cute! Does the glue stand up to a hot mug sitting on this?
Absolutely!! E600 wouldn’t be affected by heat from a mug. Thanks Amy!
xo Michael
Can you do it with hot glue gun? They cost about $14 per coaster? I love them. I am purchasing from Claire. Thank you.
I did the same 🙂 It works. Thank You Michael for inspiring us all 🙂