DIY Pendant Sconce
This Post May Contain Affiliate Links. Please Read Our Disclosure PolicyYesterday I showed you my freshly pained entryway. Among other things (welcome mat, coat hooks, and maybe a change in decor), I needed a light for this space. During the day the new door allows plenty of sunlight to shine in. However, in the evenings, this area is too shadowy to be welcoming.
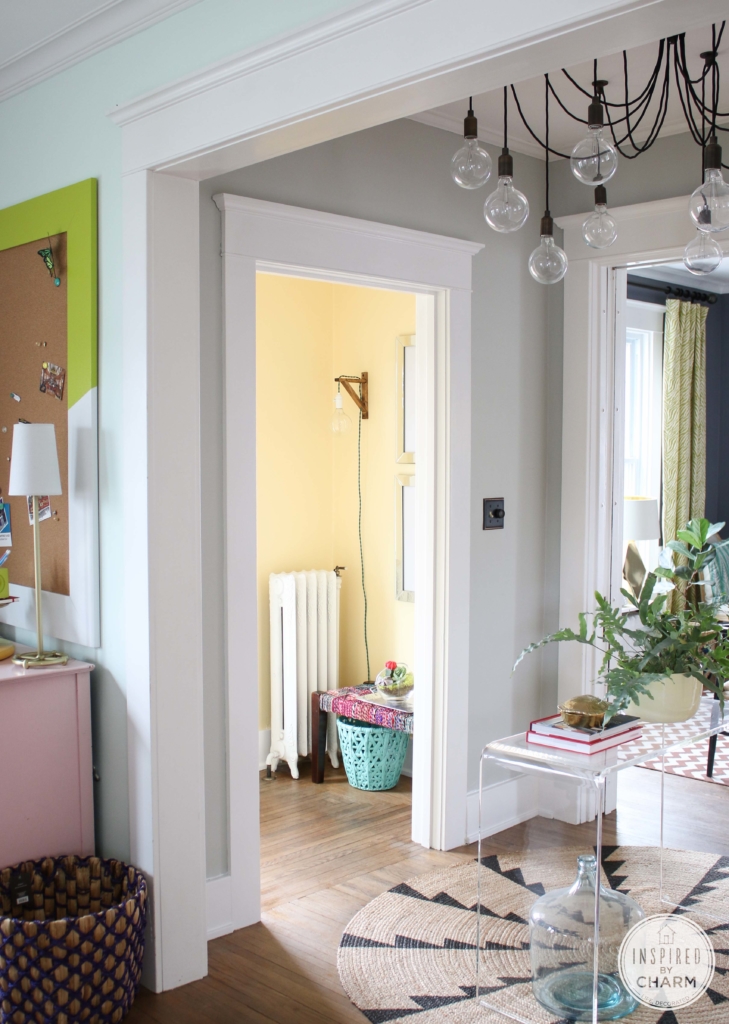
I searched online for a sconce that would work, but wasn’t loving what I found in my price range. (The ones I really liked were $300+). That’s when I decided this would be a fun DIY project! I’ve seen a few other fabulous bloggers create something like this so I thought I’d give it a go.
This is an insanely simple DIY project that I’m certain even a novice could tackle. Plus, the end results are totally cute.
DIY Pendant Sconce
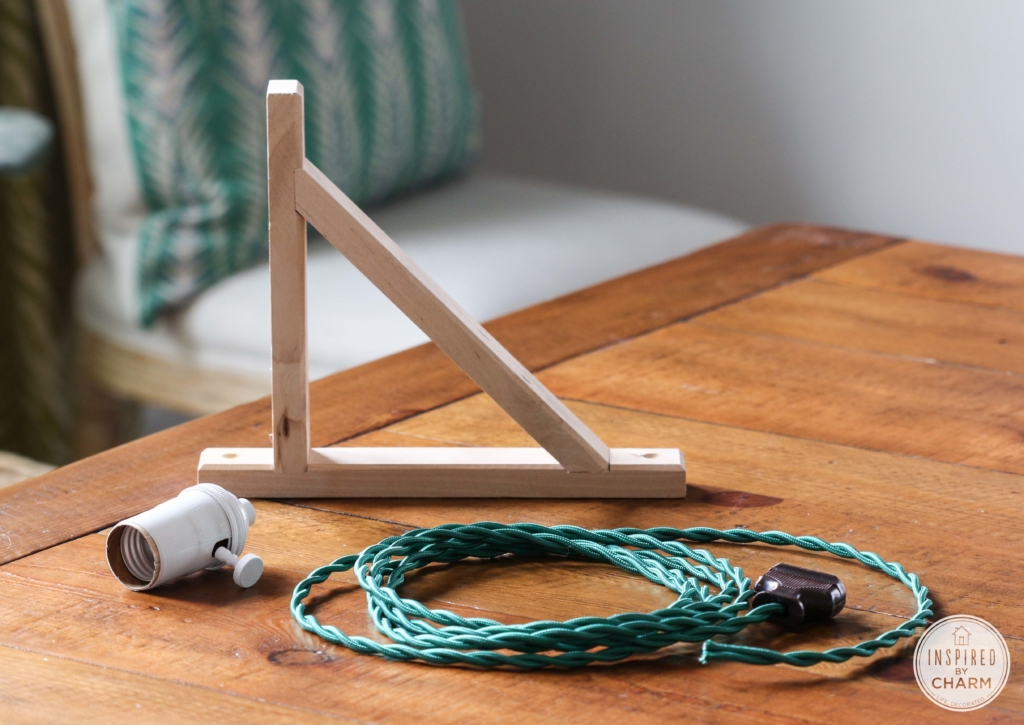
Here’s what you will need:
wire and socket (you can find similar ones here.)
wood bracket (Ikea)
wood stain (or paint) and sealer
drill and bit
two screws
light bulb
You’re going to begin with your wood bracket. The bracket comes drilled with two of the holes you need. You’ll need to drill one more hole at the bottom of the diagonal support bracket in order to run your wire through all of the holes.
I also had to make the other two holes a bit larger (just use a larger drill bit and re-drill the holes) to fit the wire through.
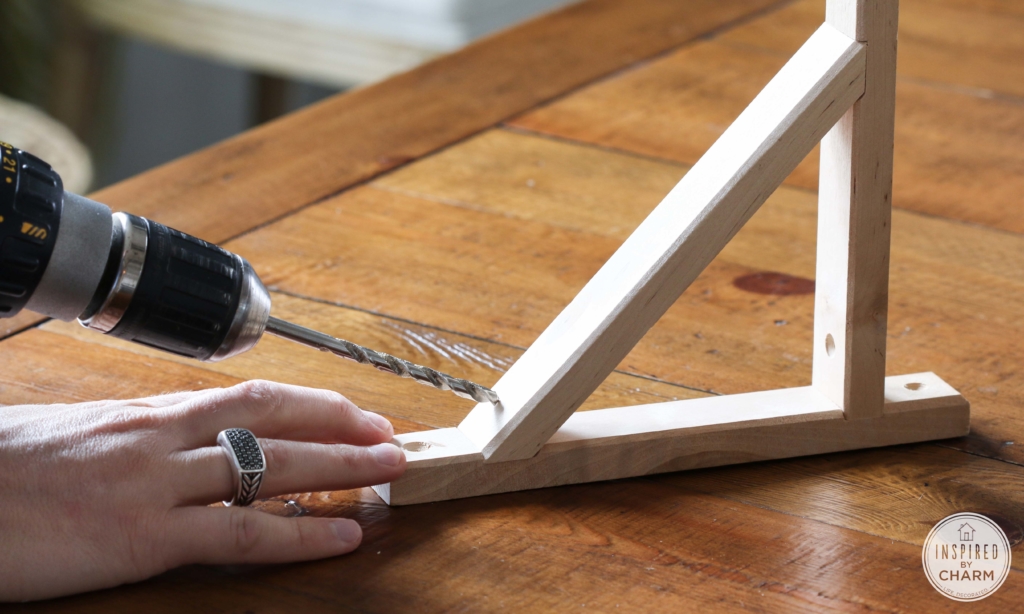
Once you have three holes that are the same size, paint or stain /seal your bracket. Use any color or stain you like.
💌 SAVE THIS POST / RECIPE!
When the paint / stain is dry, run your wire through the holes. Begin with the first hole you drilled, then work your way to the front.
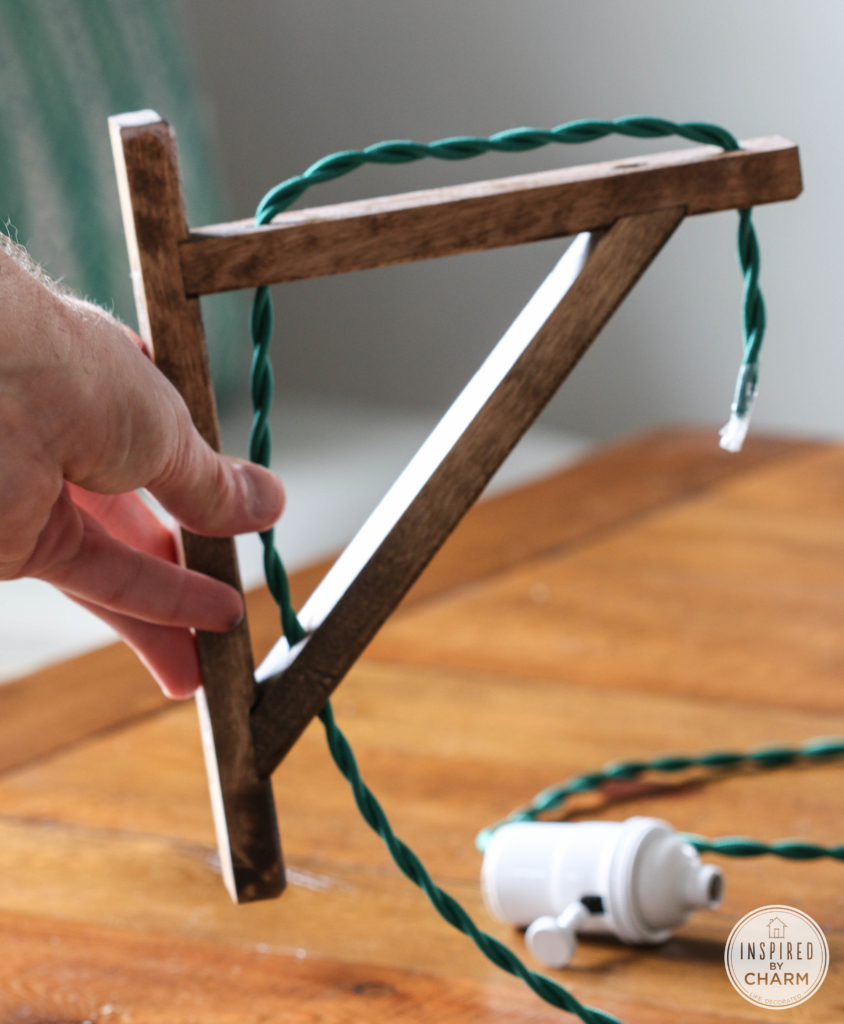
With the wire in place, attach the socket. (Since I’m not an electrician, I’m not going to give you the details on how to do this. It’s really simple, however. A quick Google search will show you how.)
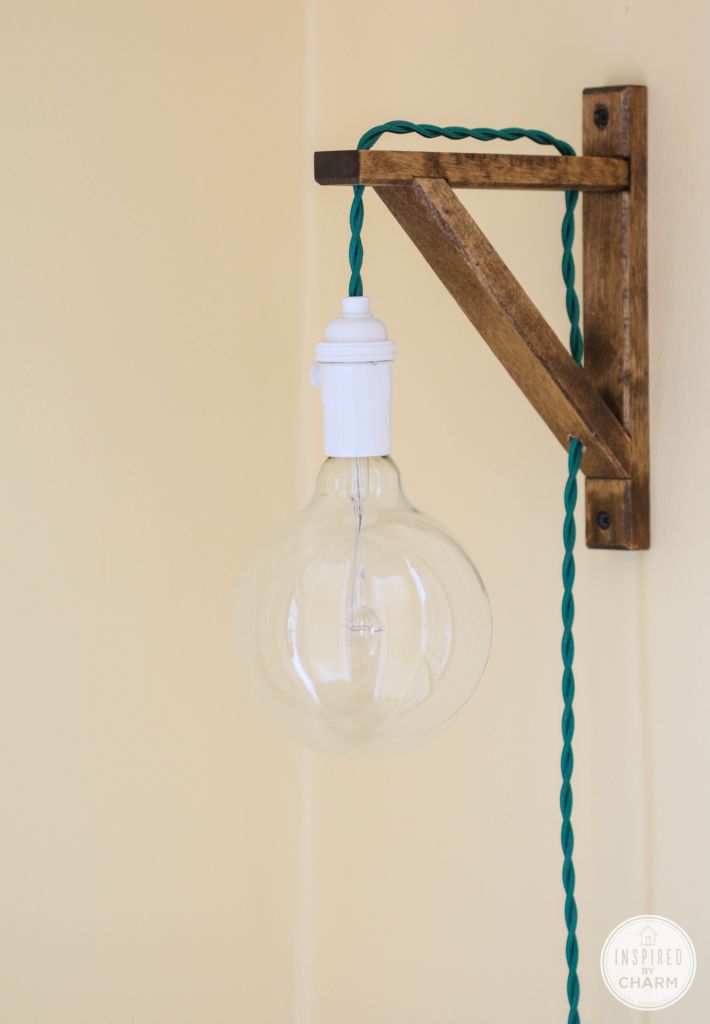
Then use the screws and a drill to mount the bracket to the wall.
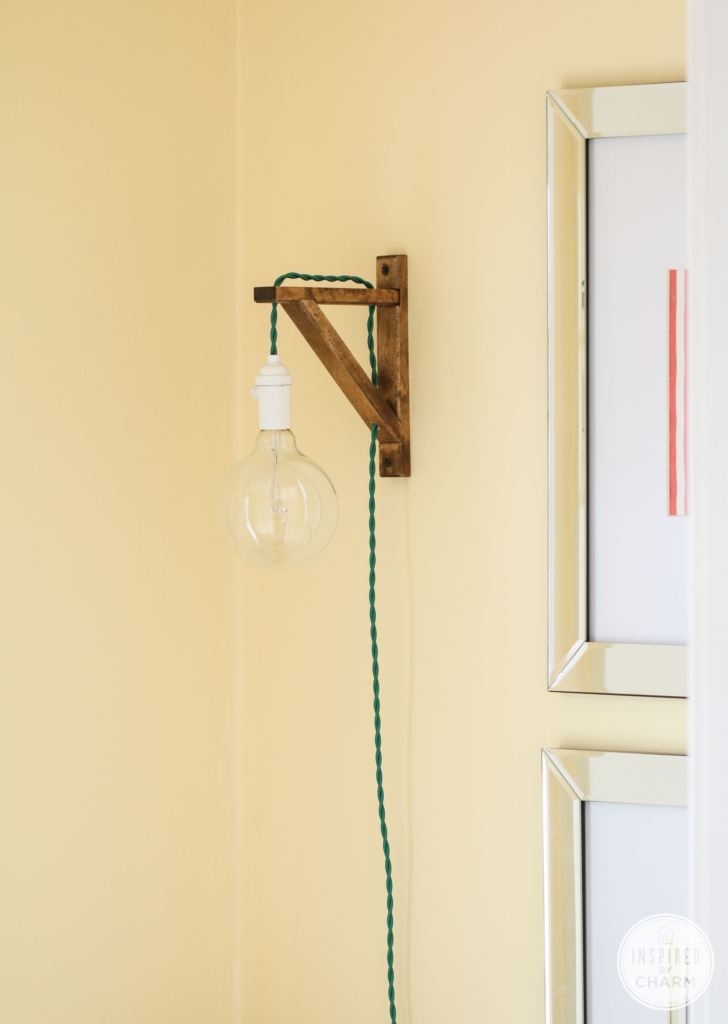
At this point you can adjust the cord to whatever length you’d like. Insert the bulb, plug in the wire cord, and flip the switch.

That’s it, friends. Your new DIY sconce is ready to light up your life!
I told you it was simple! And totally cute, right?
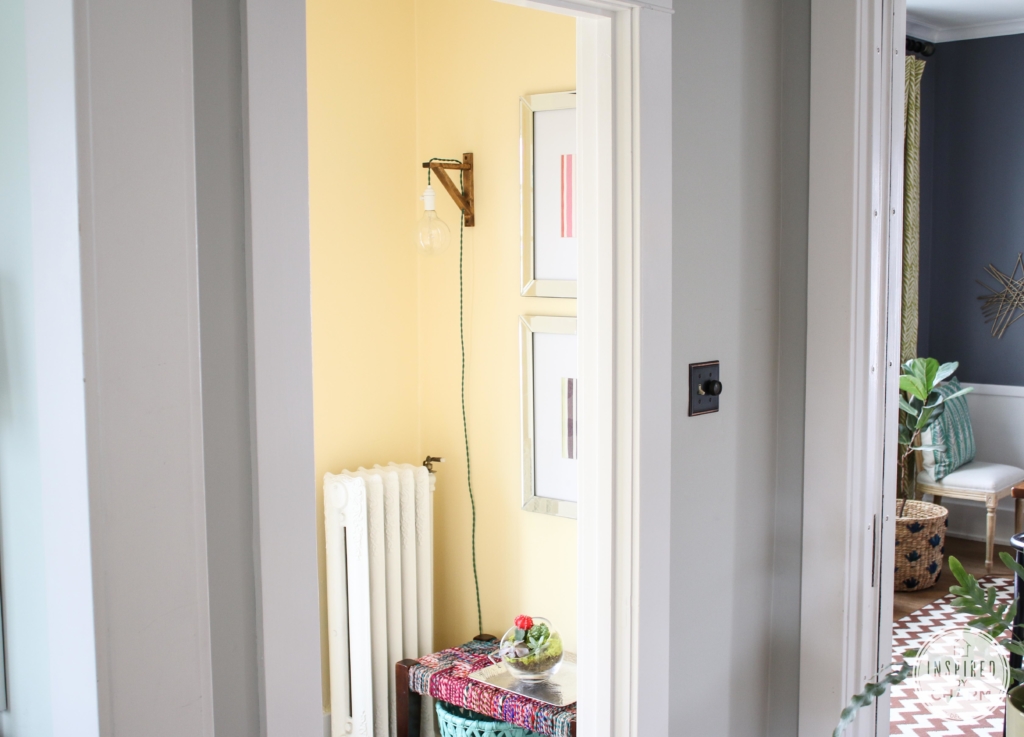
I’m so happy this little area is taking shape. It’s been driving me bananas for months. What fun DIY projects are you working on?

It’s so cool! Where’d you get the light bulb? I’ve never seen that shape..I love it! Also the Ebay link/source for the wiring kit, doesn’t work:(
You can find similar lightbulbs online. Search globe bulb and just pay attention to the size. Also, I made this a few years back. I wasn’t aware the eBay seller was no longer selling them. I’ve linked to a new seller, but any similar lighting kit should work.
xo Michael
Hi Michael,
I realize it’s been awhile since this post but I’m hoping you see this — I’m hoping to recreate this look and was curious if you used the 7 1/8″ wood bracket from IKEA or the 11″ one. I appreciate your help!
Regards,
Alison
I used the smaller of the two, but either would work.
xo Michael
This is genius.
I am currently revamping my master bedroom. I am so excited to finally be tackling this project!
I love projects like this that are simple and look great! I would love to try this in a bedroom!
This is the coolest pendant sconce tutorial I’ve seen! I think I can totally do this! And it looks so great!
looks so good! with your instructions, i think i could make one of these now…love the pics and step by step! thanks!
Can you describe the light? I love the look of the exposed bulb or a metal shade I’m just afraid the light will be too harsh. I would love your insight. Thanks!
I love it! I think it would be perfect for the bedroom also, on both sides of the bed! You continually inspire me! 🙂
The sconce is definitely your blend of modern meets tried-and-true. Love the cord!
I love it- so sweet and simple!