DIY Bath Bombs
This Post May Contain Affiliate Links. Please Read Our Disclosure Policy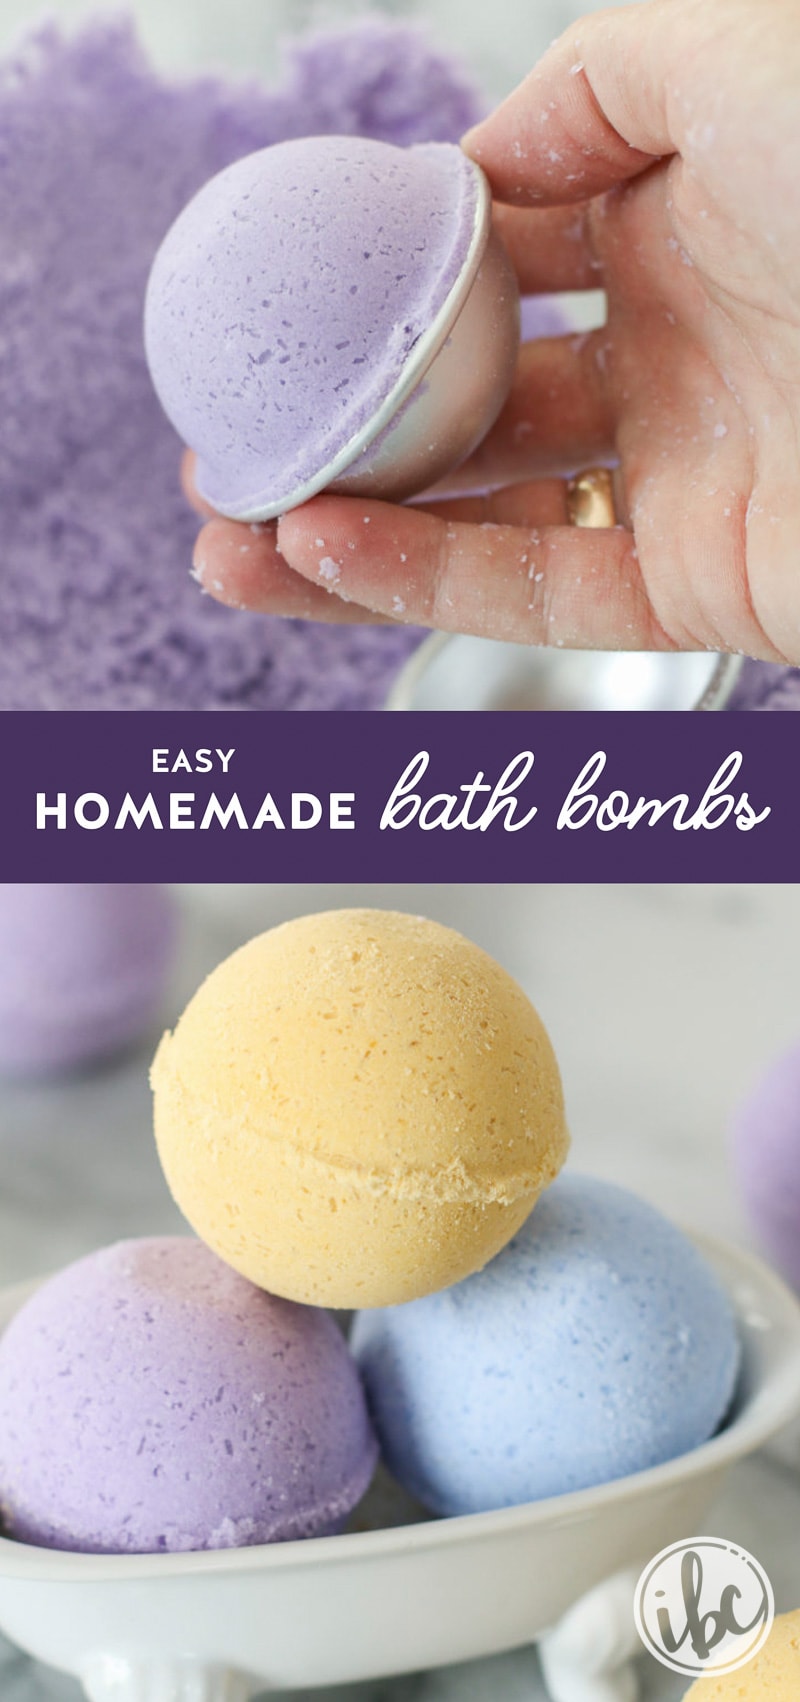
Luxurious and fragrant, make DIY bath bombs for any mood or season. This homemade bath bomb recipe never fails, and it’s super-easy to change it up with different scents.
Bath bombs DIY
Who else loves relaxing in a steamy bath with some fizzy bath bombs? There’s nothing like setting the mood with a glass of wine, some candles, and your favorite book or music.
To make the experience even more special, toss one of these DIY bath bombs into the water. The fizzy bubbles, essential oils, and beneficial minerals are a treat for the senses.
Today, I’m going to show you how you can create your own custom bath bombs at home. If you’re anything like me, maybe having these on hand will encourage you to decompress a bit more frequently.
Bring some relaxation into your home and create a spa-like experience whenever you need it. I’ll show you how to make your own DIY bath bombs with this easy tutorial.
If you’re feeling intimidated by this process, don’t be. These are so simple to make and really easy to customize. Let me show you.
Ingredients
First, gather all of your ingredients. I found everything online and linked things up below to make it easy for you. (This post contains affiliate links.)
- Baking soda: This helps add the fizz. Make sure it’s baking soda, not baking powder.
- Citric acid: It works with the baking soda (they neutralize each other) to create an incredible fizz.
- Epsom salt: There are powerfully relaxing properties in Epsom salts.
- Cornstarch: This helps all the ingredients stick together.
- Coloring pigment: Just for fun, colo can give you a visual clue about the scents.
- Almond oil: Incredibly beneficial for your skin, almond oil can help moisturize your entire body as you soak.
- Essential oils: Each oil has different properties. Choose the oils that match your needs, whether it’s relaxation, improved focus, or renewed energy.
- Bath bomb molds: Totally essential to give them the classic round shape!
How to make DIY bath bombs
You will find a full ingredient list and detailed instructions for these homemade bath bombs in a printable recipe card at the bottom of this post.
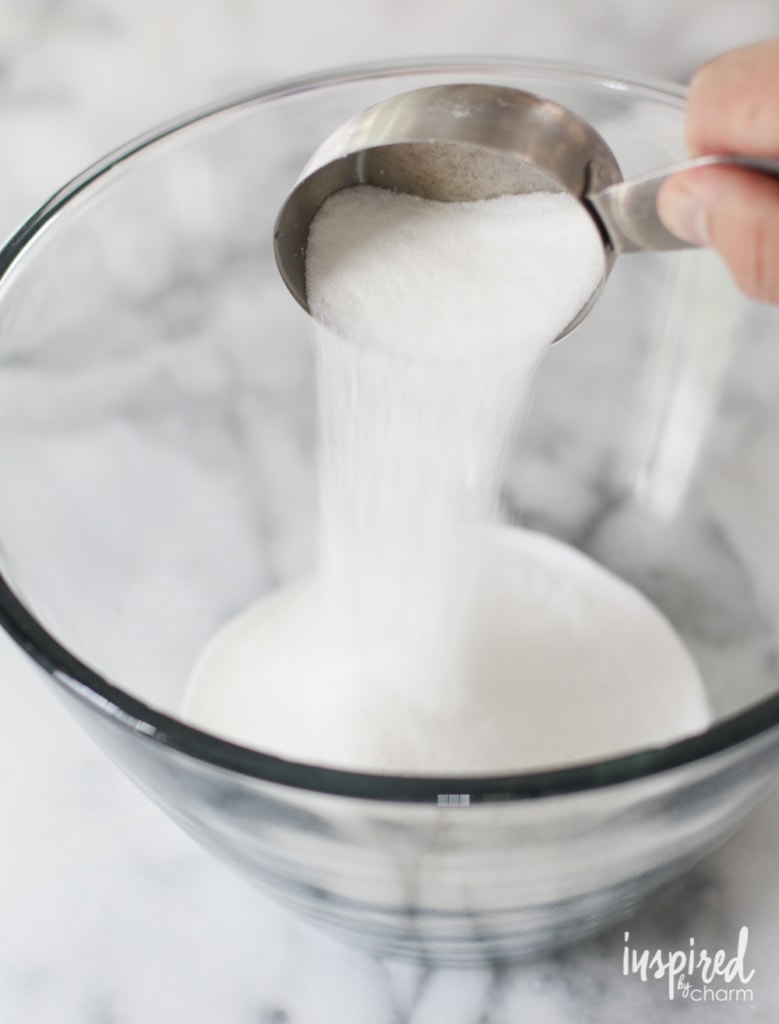
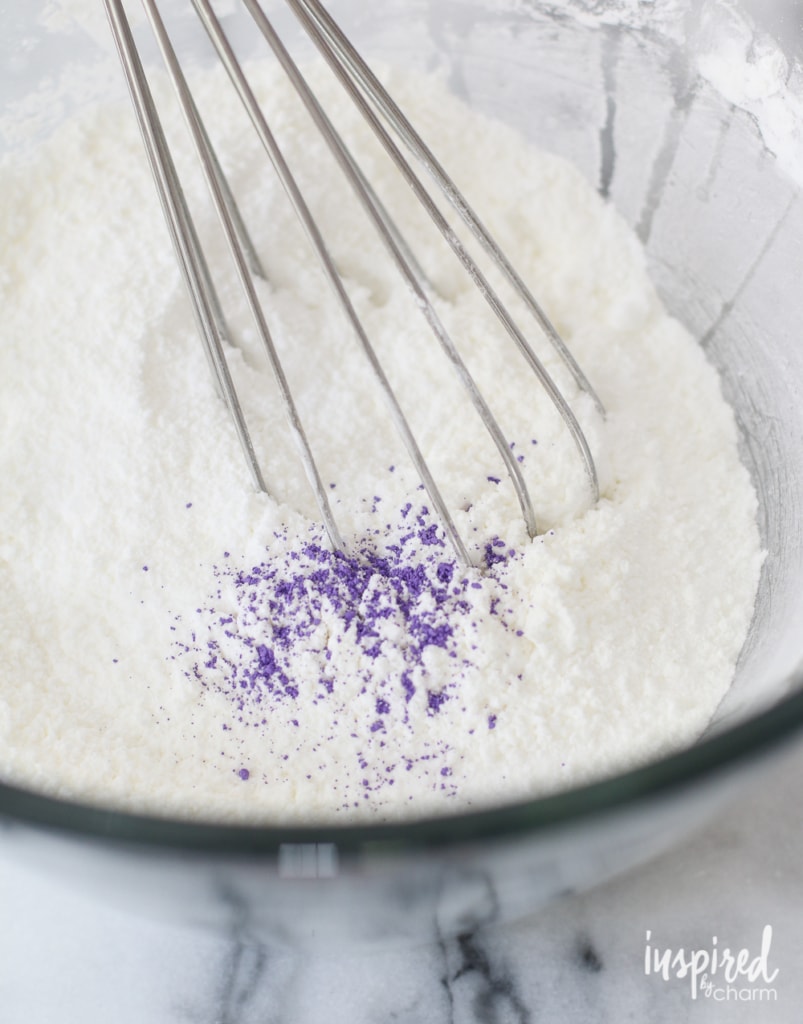
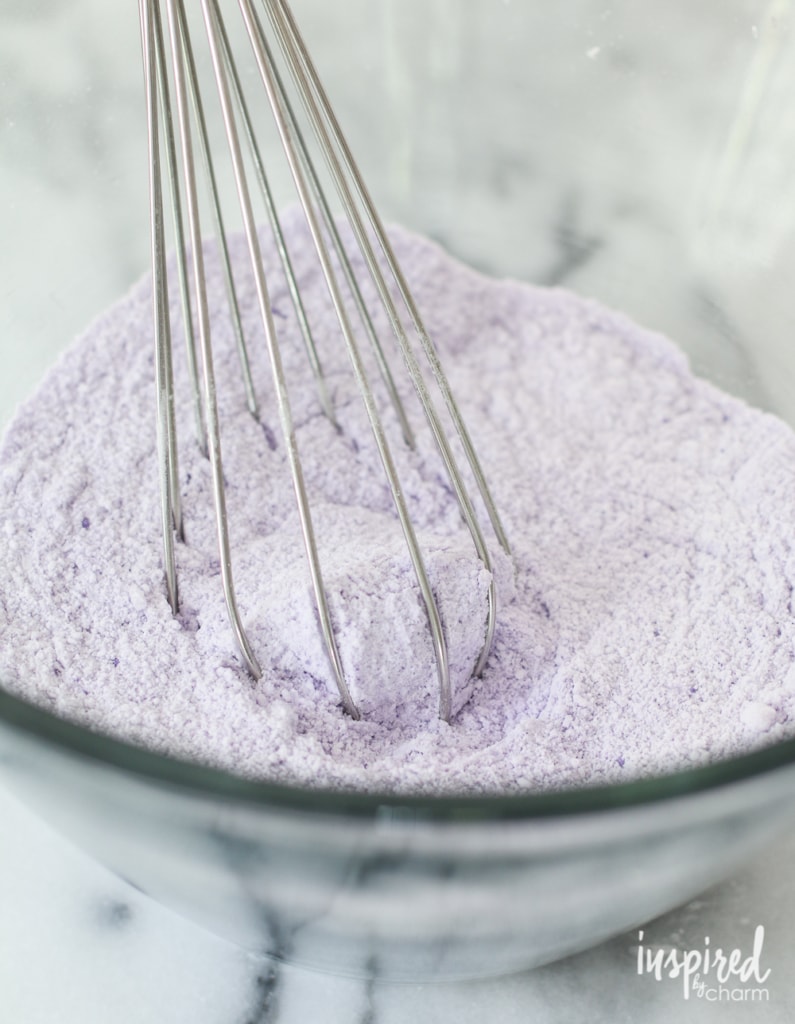
First, measure and whisk the dry ingredients in a large bowl.
I used a coloring pigment for my DIY bath bombs. Since it’s a dry pigment, you’ll want to include that in this step. Add as little or as much as you’d like to achieve the color you prefer.
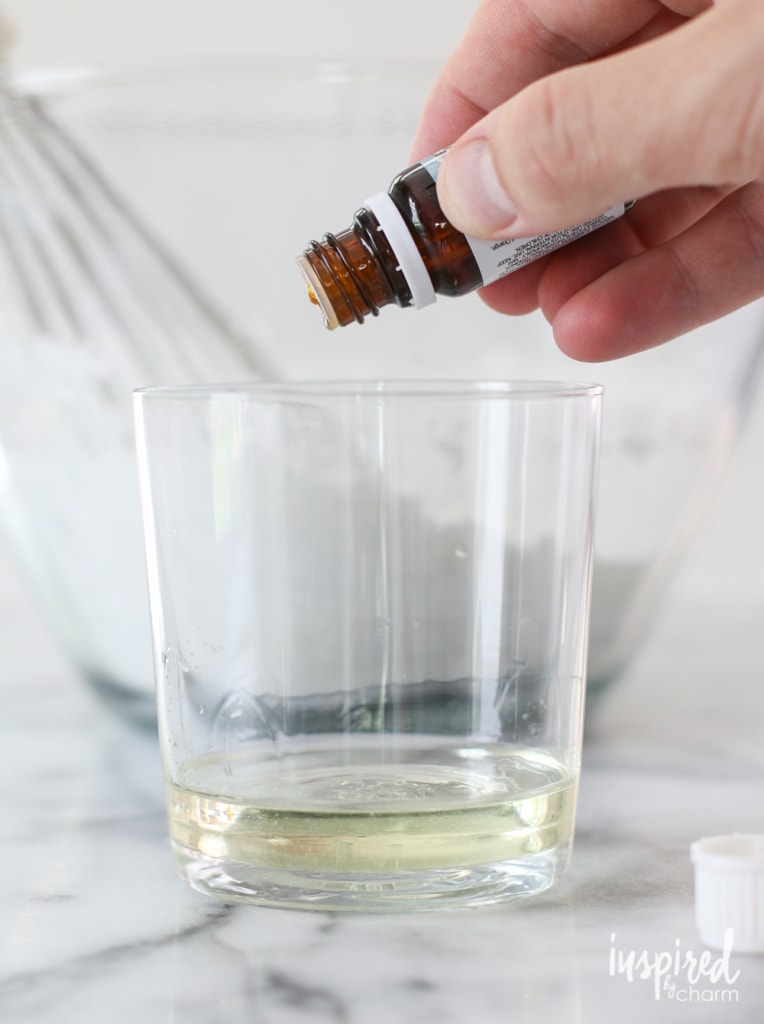
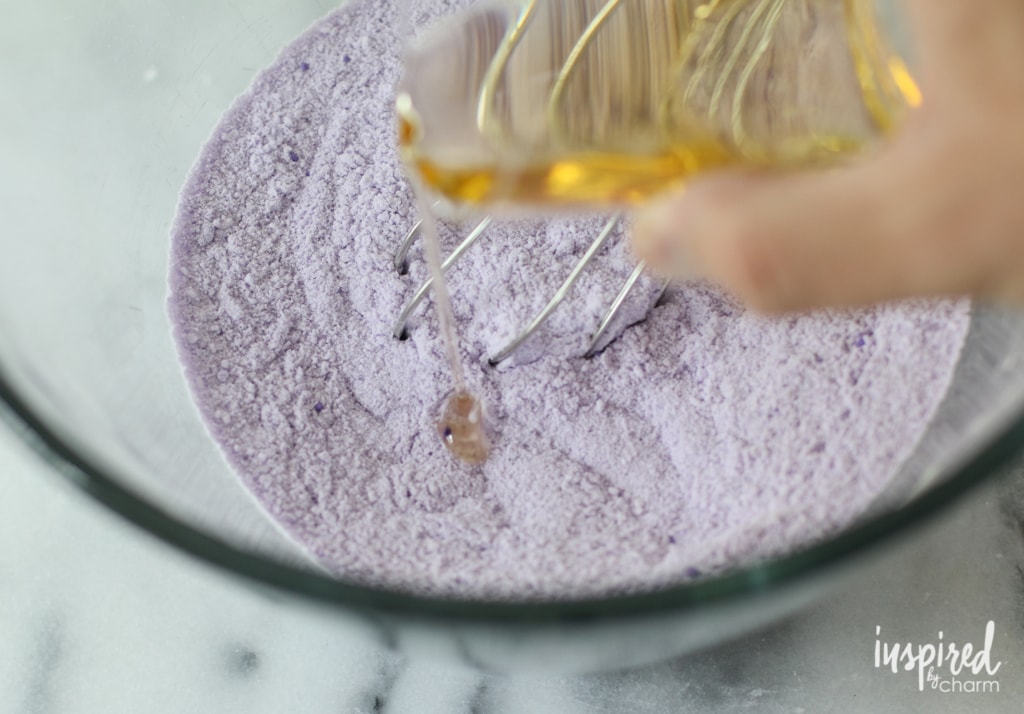
Next, in a small cup, mix together the wet ingredients. This is also where you’ll add the essential oils.
You can get essential oils almost anywhere these days. I recommend shopping for these in person so you can find a scent you like.
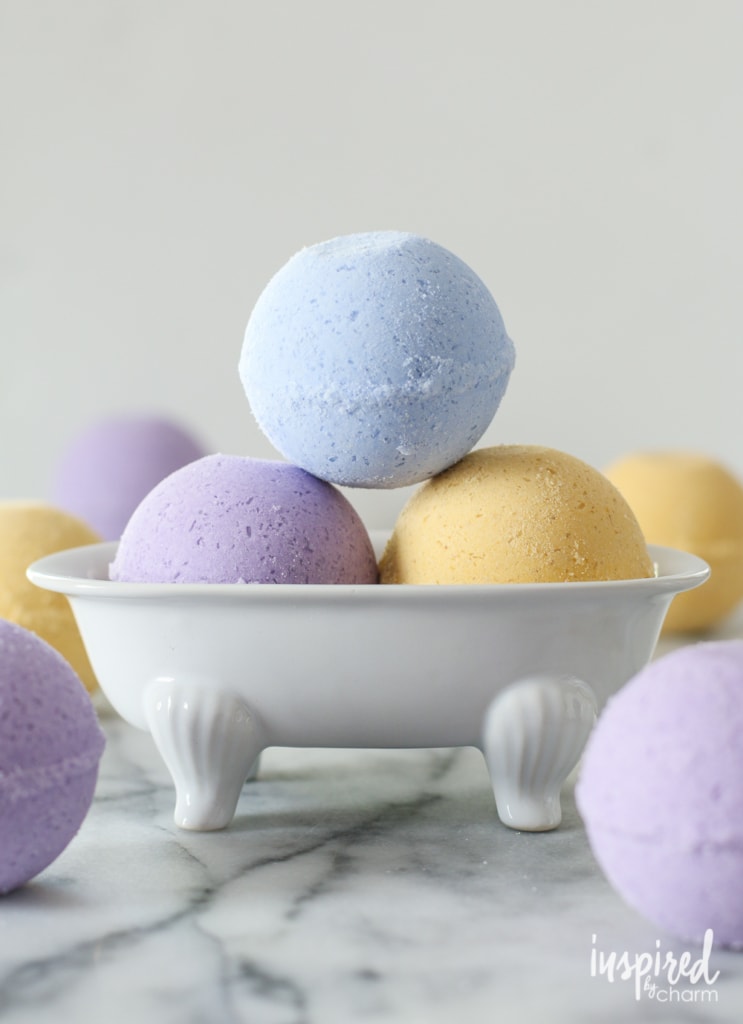
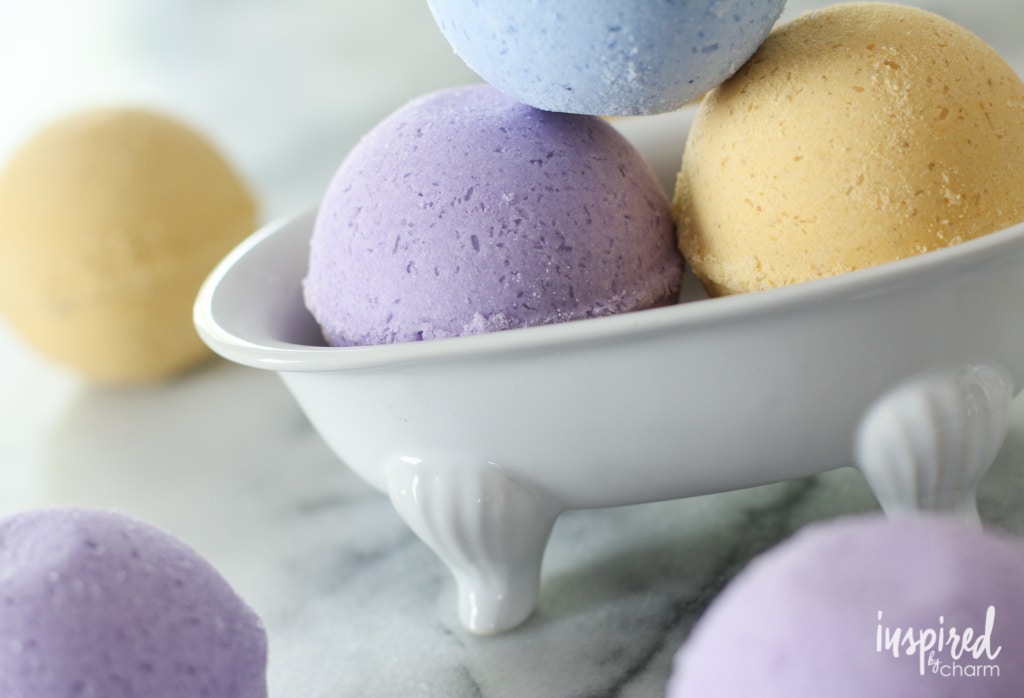
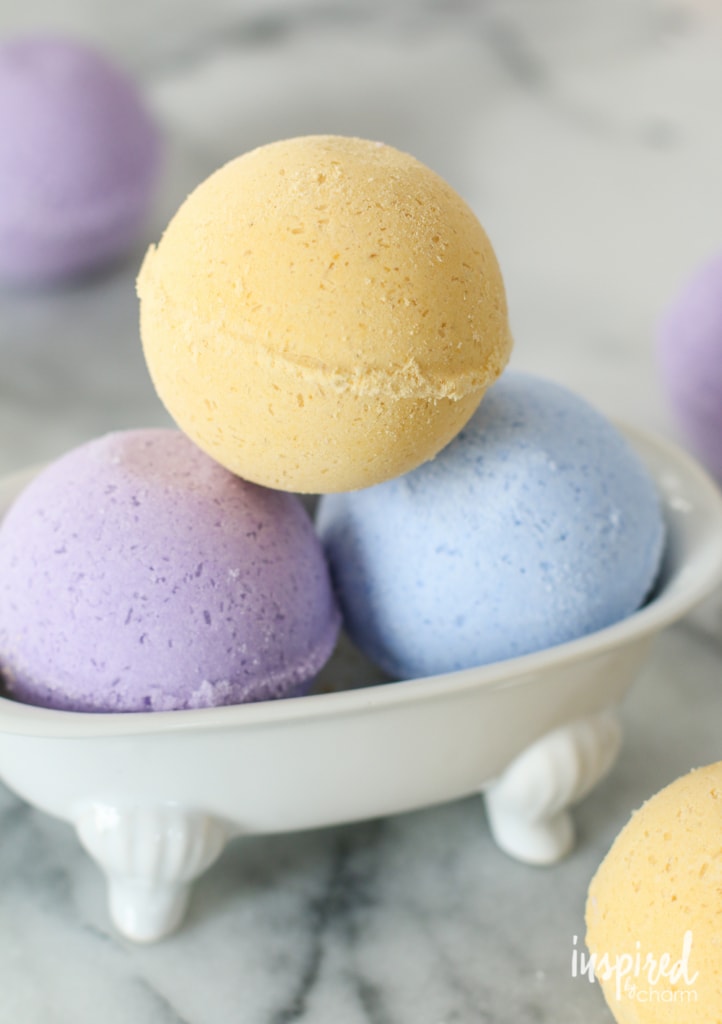
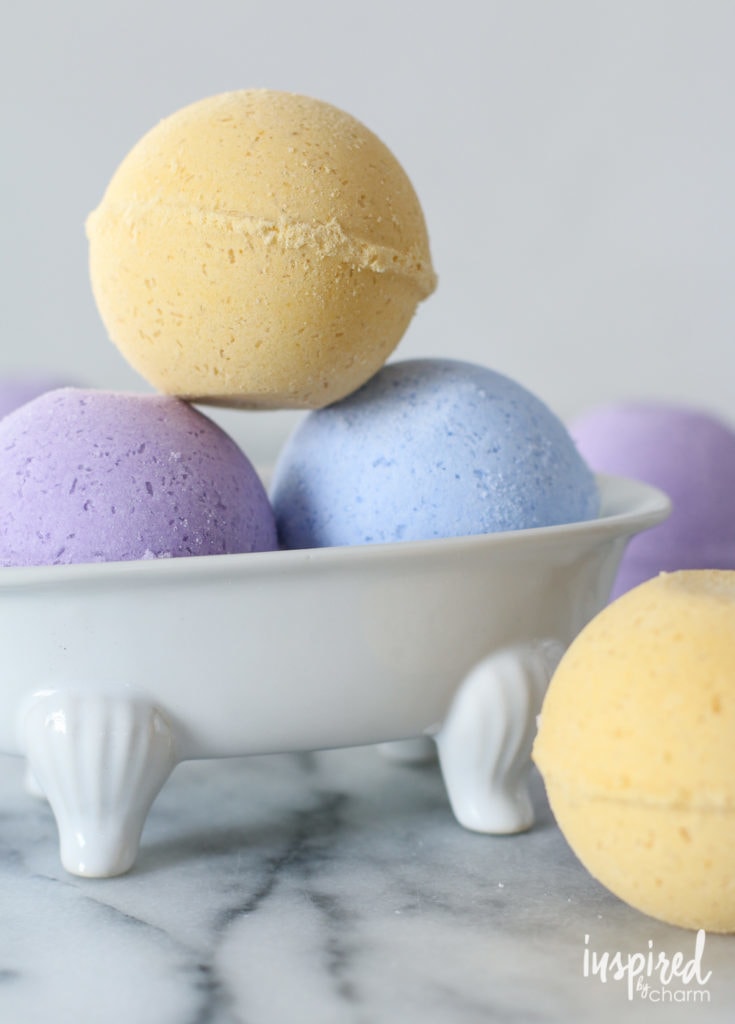
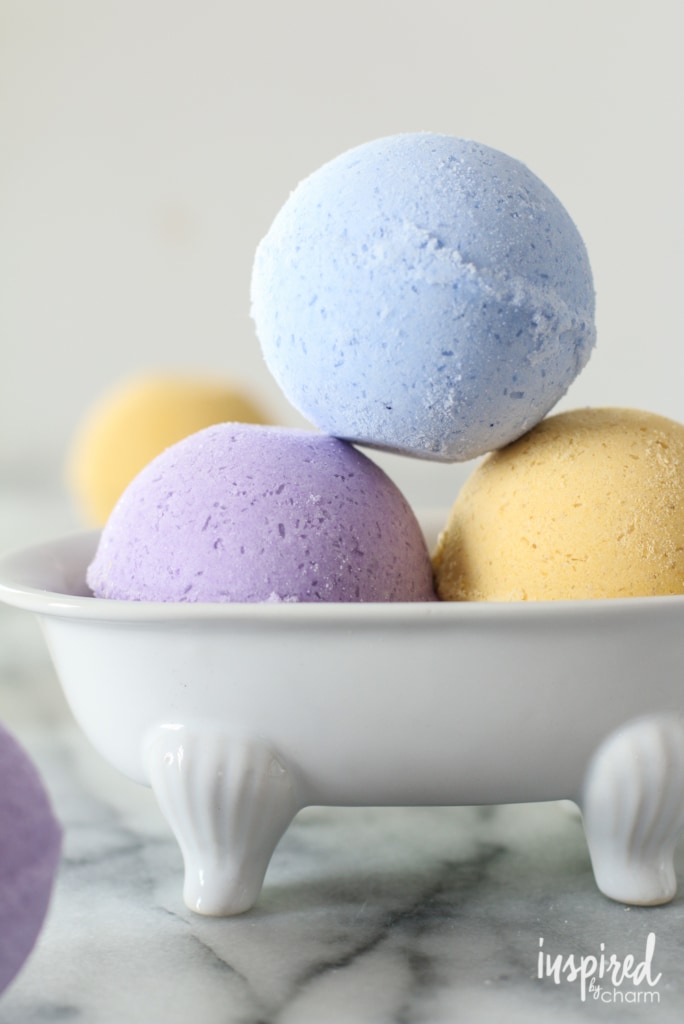
Also, pay attention to the benefit each oil offers. I made three different varieties. The purple bath bomb has an oil for stress relief, the blue prompts sleep, and the yellow promotes joy.
The next step is very important. You need to add the wet ingredients to the dry ingredients. You’ll want to do this very slowly, adding a few drops at a time while mixing.
The citric acid is what causes the bath bombs to fizz when it comes into contact with water. Adding the wet ingredients slowly minimizes this effect, allowing you to create the ball.
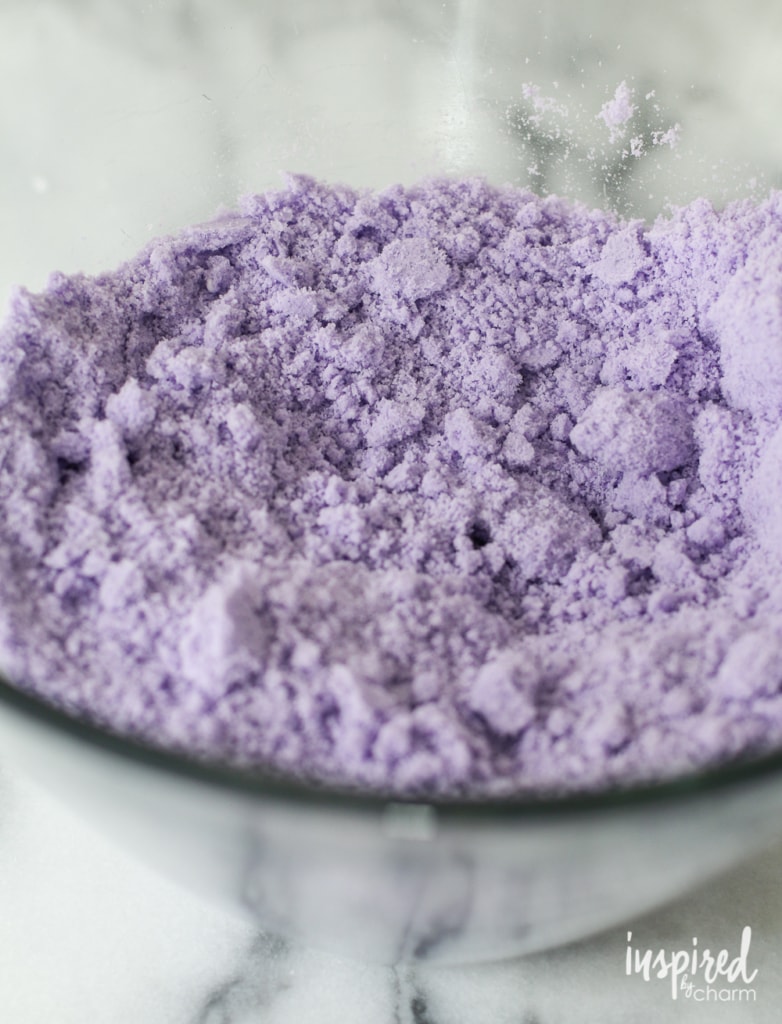
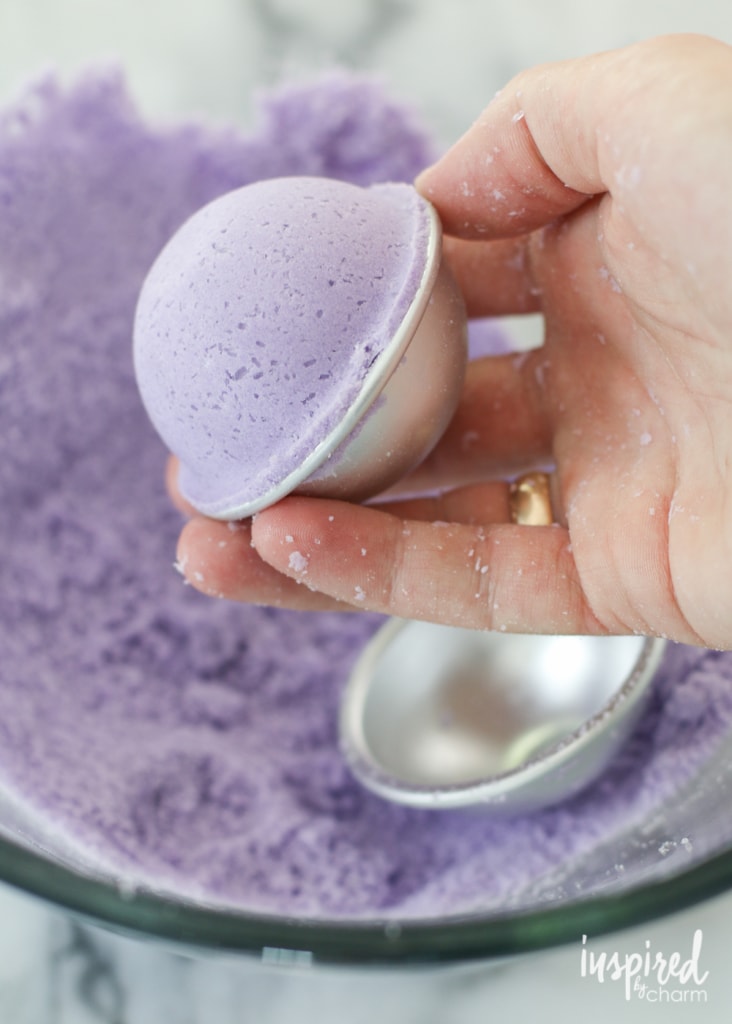
Once mixed, you’re ready to mold. I picked up these bath bomb molds to create a ball shape. However, you can use things like a cupcake pan or silicon mold to achieve different shapes and sizes.
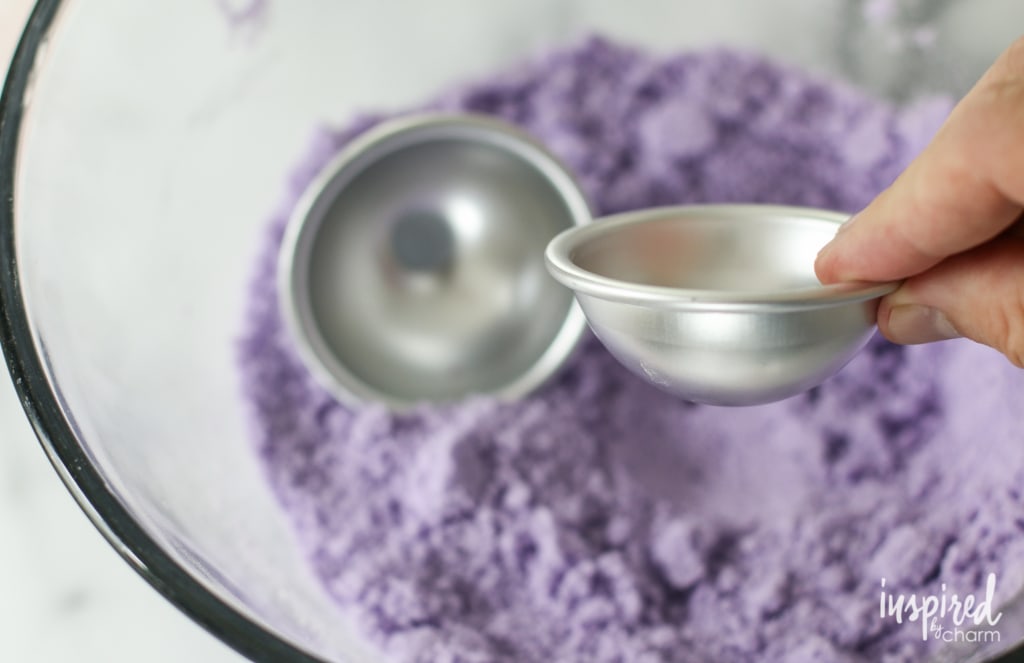

For this round mold, fill each half, packing it in slightly until it’s overflowing. Then, firmly press the halves together. Let the mold sit for one minute. Once set, tap the mold and pull it apart.
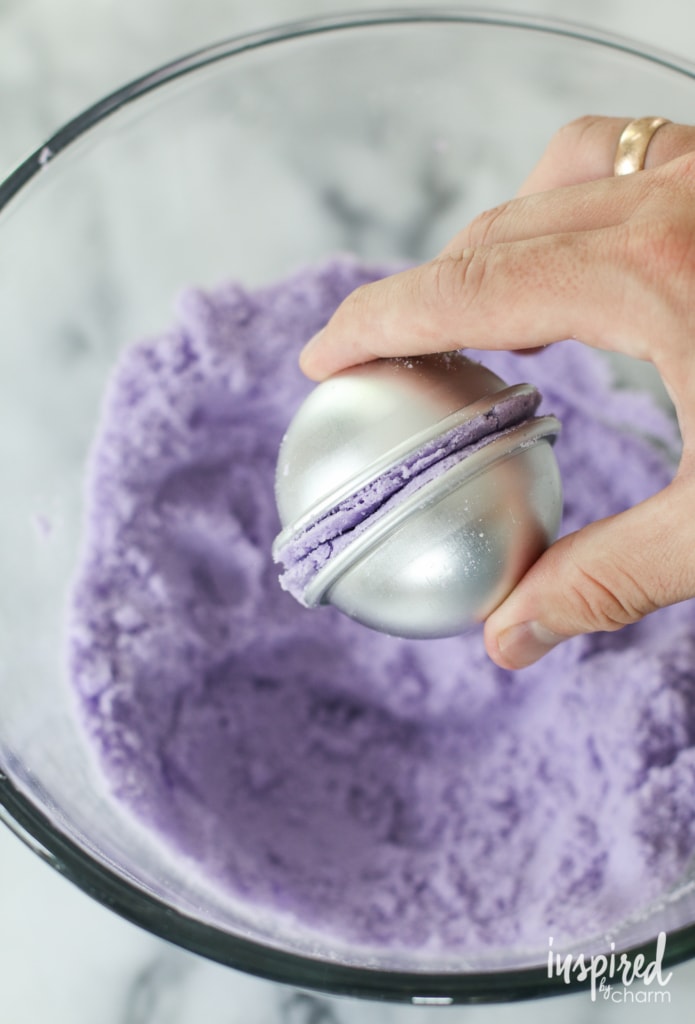
You’ll want to let the bath bombs dry for at least 24 hours before you create your own mini spa in your tub.
It’s that easy!
Frequently asked questions about making DIY bath bombs
Before we get to the printable recipe card, here are some questions people often ask about DIY bath bomb recipes. If you don’t see your question in this list, please leave it in the comments.
💌 SAVE THIS POST / RECIPE!
How long do homemade bath bombs Last?
I’d say you’d want to use these DIY Bath bombs within about 6 months. I liked to keep mine stored in a moisture-free clear glass jar. You’ll need to be very careful to not get moisture or water on them, as that will start the fizzing process!
Is it cheaper to make or buy bath bombs?
This depends on who you are buying them from and what ingredients you use. If you use pure essential oils, it might be more expensive to make your own if you compare them to bombs with artificial fragrances.
The real reason to make your own bath bombs is to control the ingredients to make body-nourishing and safe bath products you can trust. Plus, it’s fun!
Can bath bombs grow mold?
Yes, bath bombs can grow mold if they are exposed to moisture. Wrap your unused bath bombs tightly in tinfoil or keep them in an airtight container, and they will last longer.
That’s a wrap on DIY bath bombs!
If you have yet to make or even experience a bath bomb, I definitely recommend giving it a try. I know some people get intimated by making homemade bath bombs, and they might take a little practice.
A few of them might fall apart at first, but once you nail it, you’ll see how fun they are to make!
DIY bath bombs make thoughtful gifts too. Add them to a homemade spa gift basket with a bottle of wine and a couple of candles for the ultimate treat. Give someone the gift of relaxation – they’ll love it!
If you like this DIY project, you may enjoy these too:
- DIY Beeswax Candles
- Homemade Felt Ball Coasters
- Tassel Garland DIY
- No-Sew Burlap Table Runner
- DIY Vertical Herb Garden
DIY Bath Bomb Recipe:

DIY Bath Bombs
Ingredients
- 1 cup baking soda
- 1/2 cup citric acid
- 1/2 cup epsom salt
- 1/2 cup cornstarch
- coloring pigment optional
- 2 1/2 tablespoons almond oil or melted coconut oil
- 3/4 tablespoon water
- 12-15 drops essential oil
- Bath bomb molds
Instructions
- In a medium bowl, mix together all of the dry ingredients. Add as much or as little color pigment to achieve desired look. Whisk to combine.
- In a separate small bowl, mix together the wet ingredients.
- Add the wet ingredients to the dry ones very slowly. (This is very important; otherwise you will activate the citric acid which is used to create the fizzing affect.) Mix until combined, and the ingredients look like wet sand.
- Fill each half of the mold, packing the mixture in slightly until it’s overflowing. Press the halves together firmly. Let the filled mold sit for one minute. Lightly tap the mold and gently pull it apart to remove the bath bomb. Let the bath bombs dry for 24 hours before enjoying in the tub.
Where did you get the bathtub holder at?
It was from a store called Fishs Eddy in New York City.
xo Michael
Hi. I molded them in clear plastic molds. Took them out and laid them to dry. They started to sink down and crumble after a couple hours. Any tip?
That typically means you used to much liquid.
xo Michael
Don’t add any water. Substitute water in recipe with additional oil. It will prevent bath bomb from crumbling. And make sure to leave the bathbomb to dry in the mold for 24 hrs before removing it
Where did you get the bomb molds???
Hi there! You can click on the word “bath bomb” in the recipe. It’s a link to the source.
xo Michael
My bath bombs wouldn’t stop expanding… not sure what went wrong?
I know this is a little late but i had the same problem when using this recipe and then some of them would start to react while they was drying.. i wasted a ton of money having to redo them and it was frustrating cause i had some that wanted to stick to the molds or both halves didnt want to stick together. The mixture is so wet that it’s fizzing, which causes it to expand. Use witch hazel instead of water, and avoid any colors or fragrances with water.
Amazing post. Loved it 🙂 Surely gonna try it in the weekend!
will thefoodcoloring stain the tub?
I’ve had no issues with staining. If you’re worried, just use a very small amount for a hint of color.
xo Michael
what is a pigment?
It’s what gives the bath bombs their color.
xo Michael
Does the oil in these make a greasy film at the waterline on the tub or when draining out? HATE scrubbing bath oils off the tub! Thanks!
Not that I really noticed. There’s such a small amount in each ball there might be a tiny bit, but nothing bothersome.
xo Michael
Thank you very much, Michael – your beautiful photos and enthusiasm is really inspirational for me.
I have (and use) bath salts and sugar scrubs and have ALWAYS wanted to make bath bombs. I buy them occassionally at Lush (love me some Lush!) but they’re so expensive!
I am excited to give this a try, thanks again.
What size mold did you use to yield 4 bath bombs?
Hey, to Whitney above! For some reason the page won’t let me reply to you directly, but I wanted to let you know that I’ve tried food coloring in a similar recipe and it worked out just fine. If you know you want it lighter in color, just keep an eye on how many drops you’re using, because 1) you’ll need to mix it in like crazy to see how bright the color ends up being, and 2) it’s likely going to be a more intense shade more quickly than with powder pigments.
Also, keep in mind that most food coloring is water-based, so don’t add all of it in one spot without whisking it quickly. Otherwise, you’ll end up with a lot of foaming in that area, because chemistry!
We used liquid food coloring & added it to the epsom salts before mixing them into the rest of the dry mix. It worked great and we ended up with a soft colored bath bomb. It was much easier than trying to mix it directly into the entire dry mixture. I had looked at soap dye but found that it was basically food coloring so why buy something else, right?
For the recipe provided, how many bath bombs of your size mold, will this yield?
Would it work to use liquid food colouring instead of the dry colouring pigment?
I haven’t tried it with liquid food coloring. You could try, but I can’t guarantee any specific results.
xo Michael
I did…..didnt mix well at all
If you mix the liquid food colouring with the wet ingredient it works well. Otherwise it takes a lot and needs a lot of work.
I mixed liquid food colouring with my water. Worked great!
Mine kept expanding with food coloring, I think this maybe is what went wrong…
Did you use liquid food color? You need to use the dry pigment. Liquid food coloring will not work.
xo Michael
Liquid food coloring works just fine. I have never used anything beside that. mix all your dry ingredients except the citric acid add liquid color mix let it set for about an hour add citric acid mix and slowly add coconut oil. Ill add more coconut oil rather than water if its too dry this avoids activating the citric acid and ruining an entire batch of bath bombs.
In theory food colouring would work (if you mix it with the liquid ingredients), though you need to consider that food colouring isn’t necessarily skin safe. you can purchase skin-safe, liquid colourants from soapmaking suppliers. if you plan on making these on a regular basis, i would definitely consider those!
I’d love to make these for Christmas gifts and maybe one or two for myself. Having never used one, do they need to be used in a certain amount of time, or are they good for a long time? Do they need to be wrapped or can I leave them sitting out?
Great questions! I would try to use them within a year. I have mine sitting out because they are pretty, but realize that the scent may dissipate overtime. It’s probably best to store them in a contain with a lid. Hope that helps! 🙂
xo Michael
They’re good for about 6 months. But remember as all ingredients have expiration dates, it’s best to keep them in air tight bags to prevent them from losing the fizz. 🙂
Hi, thank you for the bath bomb recipe. I’m a little confused by the “3/4 tablespoon” of water measurement. Will you please clarify? Thanks!
The recipe is very sensitive to water. Too much will make the ingredients activate and your bombs won’t sent. So only use 3/4ths of a tablespoon. How that helps.
xo Michael
Hi, You probably long ago got your own answer to this, but in case you never did and it’s stopping you from making these–there are 3 teaspoons in 1 tablespoon. One-fourth of 3 tsp. is 3/4 of a teaspoon. So, 3/4 of a tablespoon (equaling 3 teaspoons) is 2 1/4 teaspoons. You could do two tsp. + one 1/4 tsp. I had to stop and figure too.
To make things even simpler, depending on where you are in the world, 1 tbsp can equal 3 or 4 teaspoons (15 or 20 ml). Have fun with that little fact!!
It’s better to use rubbing alcohol instead of the water, as it won’t activate the ingredients, and will actually help the bombs to dry out a bit faster (24 hours)
Great tip, Tom! I’ll give this a try!
xo Michael
I wonder if witch hazel could be another alternative?
Yes I have used witch hazel and it works fine, just use a spray bottle and add a little bit at a time until you get the texture soft enough to mold, but not mushy. I don’t think it matters much if you use alcohol or witch hazel as long as you add it slowly enough so it doesn’t start to fizz. I completely omitted water from my recipe, too. I live in Portland and it takes two full days for them to dry before they can be moved or touched. So keep in mind humidity plays a big role in how quickly they dry and if you touch them before they are totally cured, they will fall apart.
what’s the measurements with the rubbing alcohol is it the same as it would be with water? and what percentage alcohol?
Great post, ? This is definitely one I’ll be trying this week. I love bath bombs but never thought I could make my own ones. I usually just buy but this has inspired me to get cracking!
The best part about making them is that you can customize them to your liking. Have fun crafting!
xo Michael
Uhhhh. What are the measurements?
Does this recipe make the bath water turn the color of the pigment, or does it just make the bath bomb a pretty color?
Hey there! Yes, it will change the color of the bath water. The intensity of the color will depend on how much pigment you put into the mix.
xo Michael
I followed all directions and measurements to the dot Nd they looked great when we took them out of the molds to dry but after a few minutes they started slowlt bubbling and expanding! How do we prevent this??
This means that the citric acid is reacting to the liquid too fast. What i always do is mix the dry ingredients minus the citric acid, mix in the liquid, and then after its all mixed together perfectly i add the citric acid. That way no liquid is activating the citirc acid.
You should definitely re write the recipe and directions that includes this tip because I just ruined a huge batch of bath bombs for an event simply because I didn’t see this tip until I scrolled through the comments.
I write cookbooks as well so I understand the process of writing each little step that you do, it’s tedious but when I’m sharing a recipe with someone else I want to ensure that they do it correctly the first time to avoid wasting ingredients, time, and money.
Help. I added the citric acid after the wet ingredients like the comments suggested and yet my mixture is STILL foaming up. Is there a way to save it? If I start over… what do I do?
The humidity might be too high. Check it. I live in the Pacific Northwest, and I must use a dehumidifier to keep my mix dry.
I could totally imagine a bath bomb inspired by Carnivals Kiss on the Lips or Miami Vice cocktail. I’ll have to try your recipe with the tips from the tutorial at https://gospaces.com/blog/how-to-make-bath-bombs to make something special. Great post!
I got the liquid color instead of the powder on will it still work
hey ashley! yes it should still wrk, just maybe mix it with your wet ingredients and add a bit less than you would with the powder. its all up to you though.
xo
Where do I find the dry color pigment ingredients?
There’s a link to the pigments I used in the post above.
xo Michael
Hi there–I can’t get the link for pigments to work on either my old Chrome laptop or my brand new Edge one. Could you please just name the exact pigment you use here with enough details I can find it–brand, type, size, etc? Not sure why neither computer can get to it. It just says: “Sorry, we couldn’t find that page (with a dog illustration). Try searching or go to Amazon’s home page”. Thanks very much–I want to get the right kind the first time as yours are so nice & just what I want! Thanks!
Hi Barb! Thanks so much for bringing this to my attention. It looks like Amazon no longer sells the specific ones I used. However, I did find a substitution. (Basically the same thing just a different brand / seller.) The link above has been updated.
xo Michael
How many bombs does this recipe make? Thanks
So cute! I love baths and I had no idea these were so easy to make. I’ll definitely try this out for myself and as gifts. Thanks Michael!
My boyfriend and I made some bath bombs when I was at his this summer. We tried one and we loved it. It’s really easy to make, and really not expensive. And I agree with you: it makes a wonderful gift.
xx
Renaud | http://xxmuchlove.blogspot.com
Roughly how many bath bombs does this make?
We just finished making some of these, amazing by the way! We used a number 2 mould and it made approx 5 per batch.
Do you put the bath bombs in the freezer