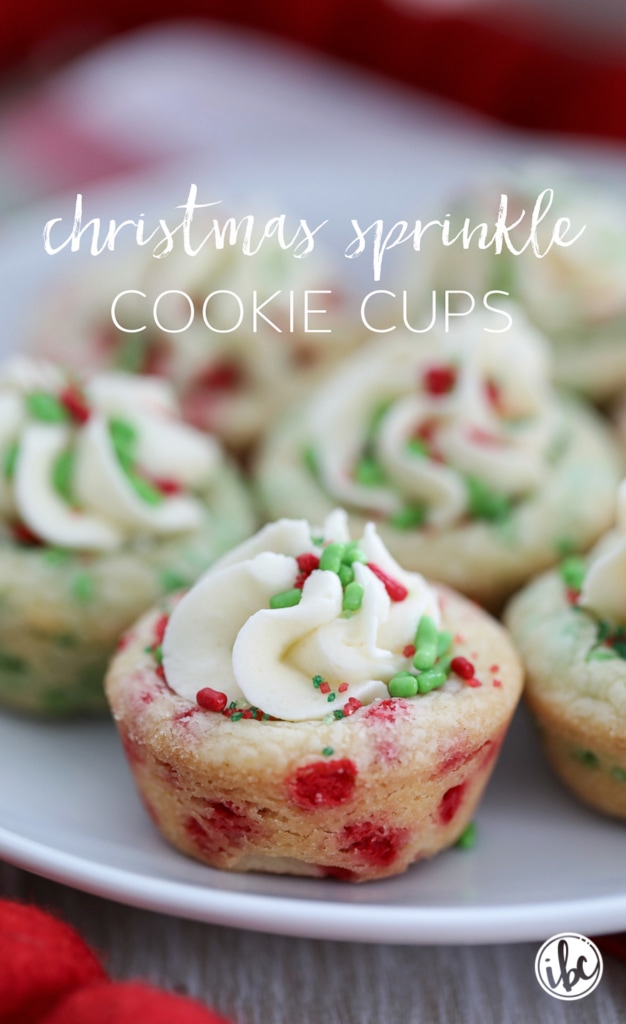
Christmas Sprinkle Cookie Cups
This Post May Contain Affiliate Links. Please Read Our Disclosure Policy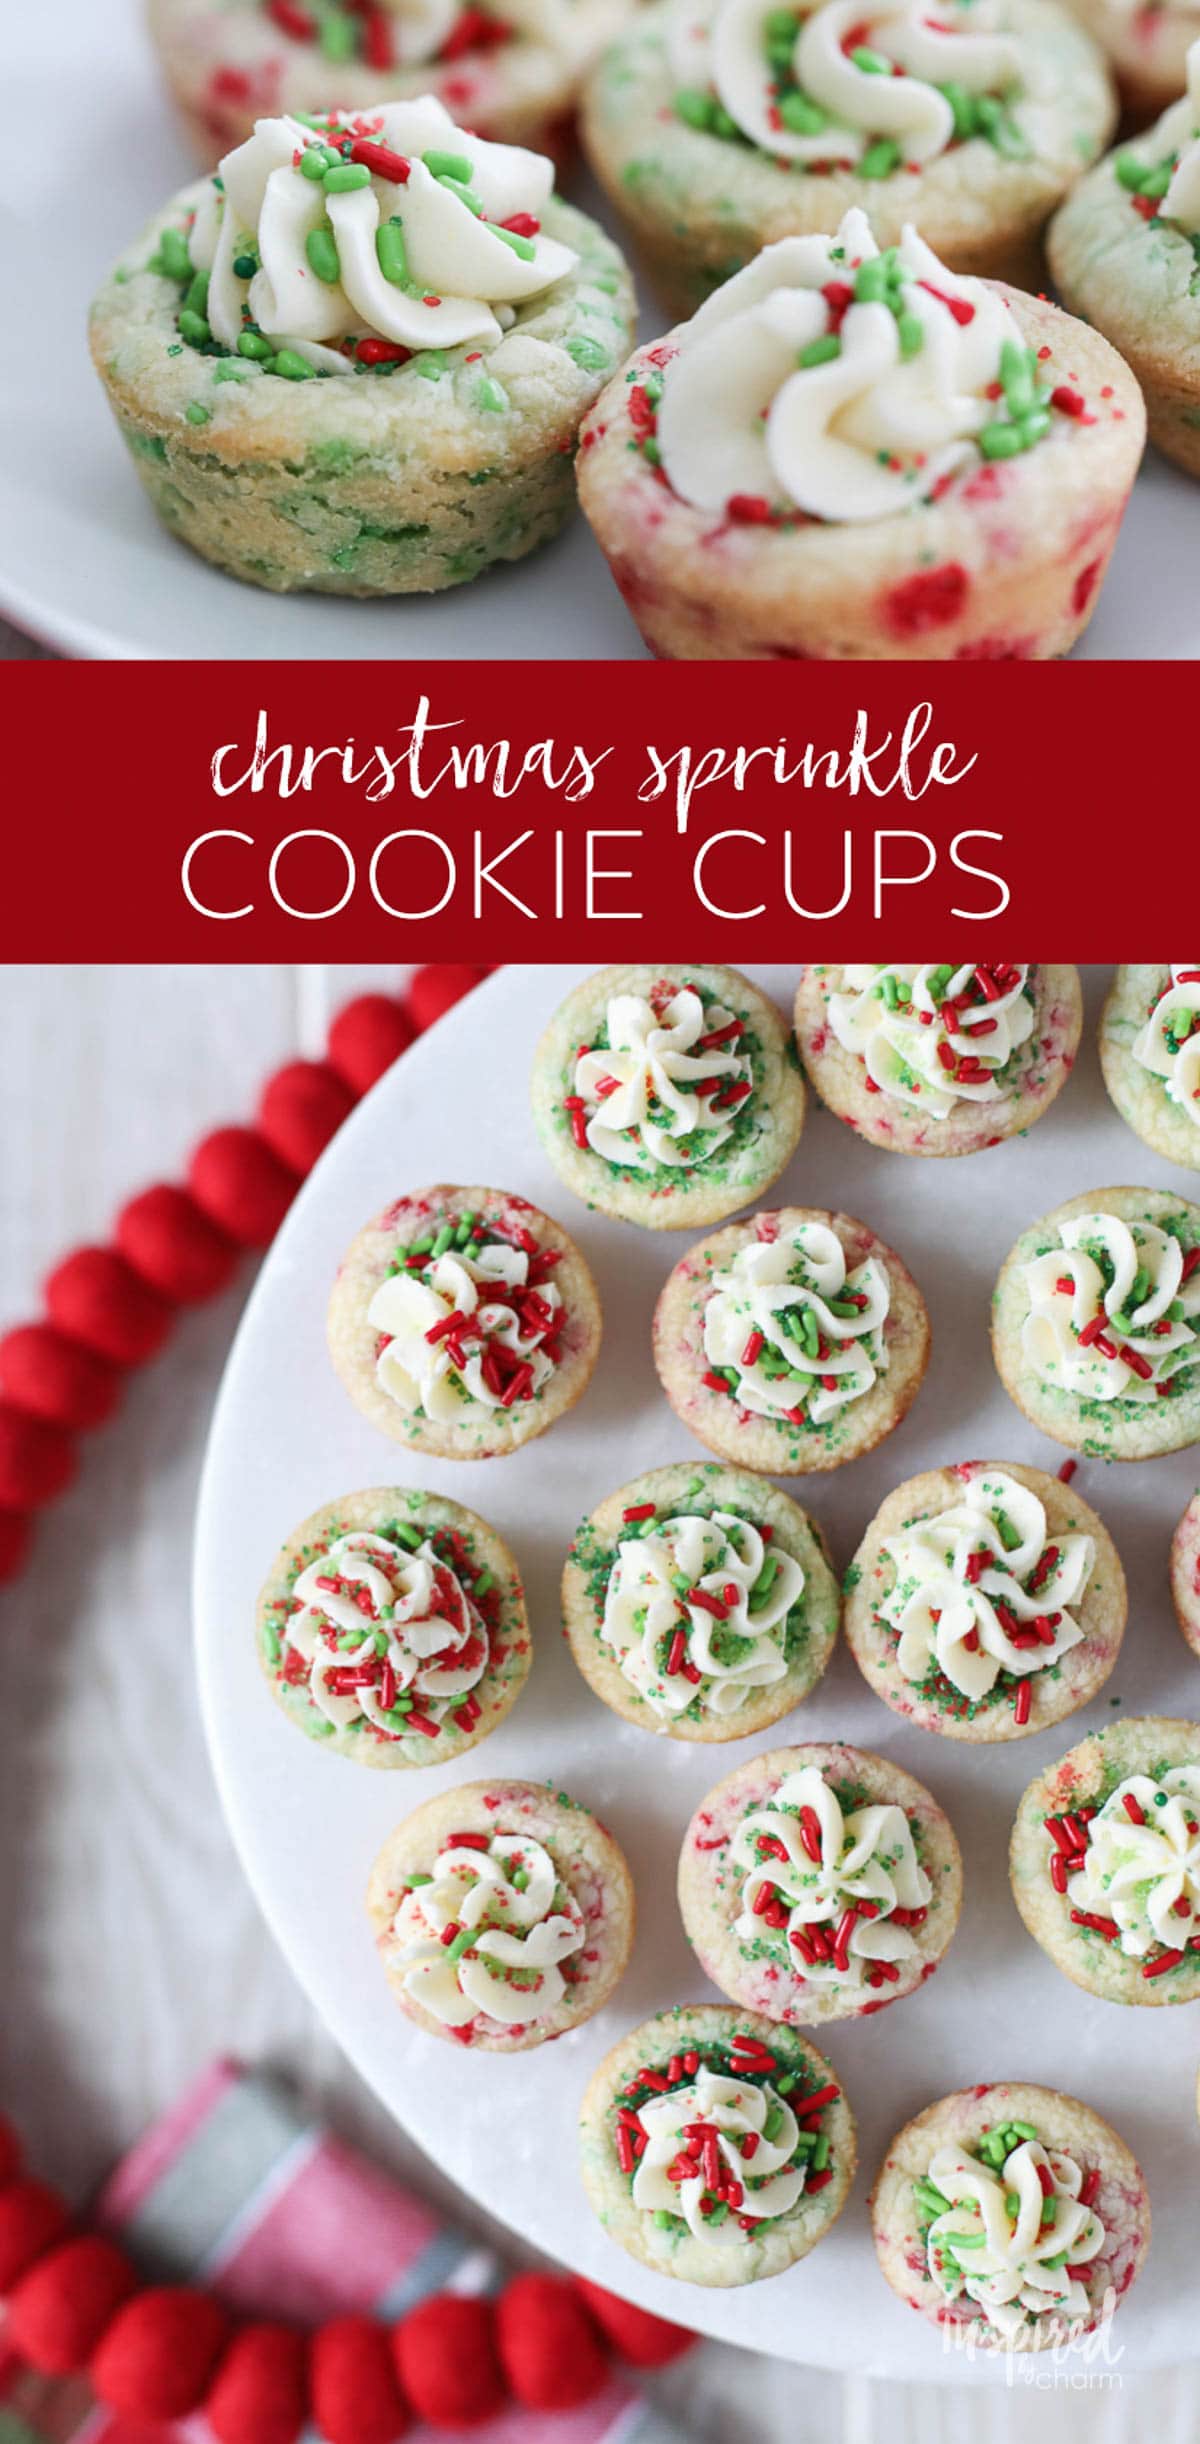
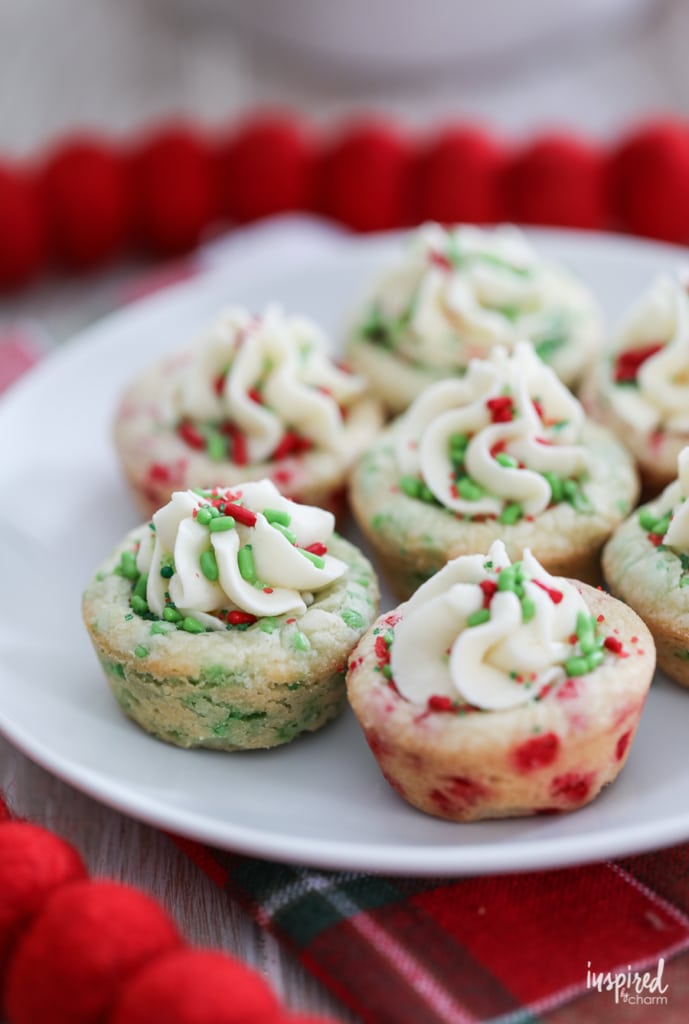
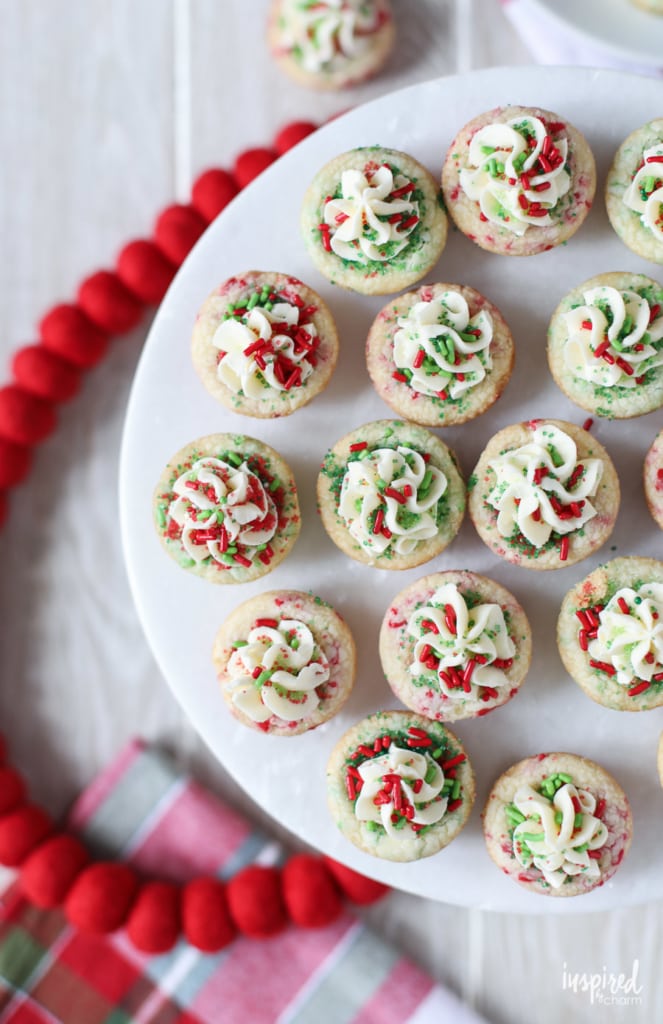
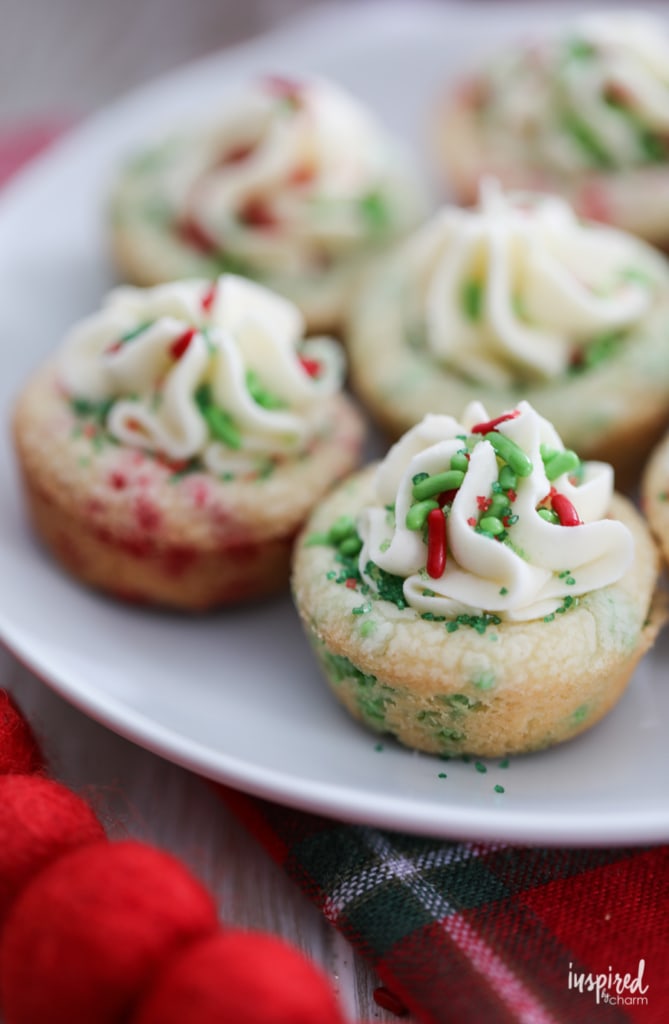
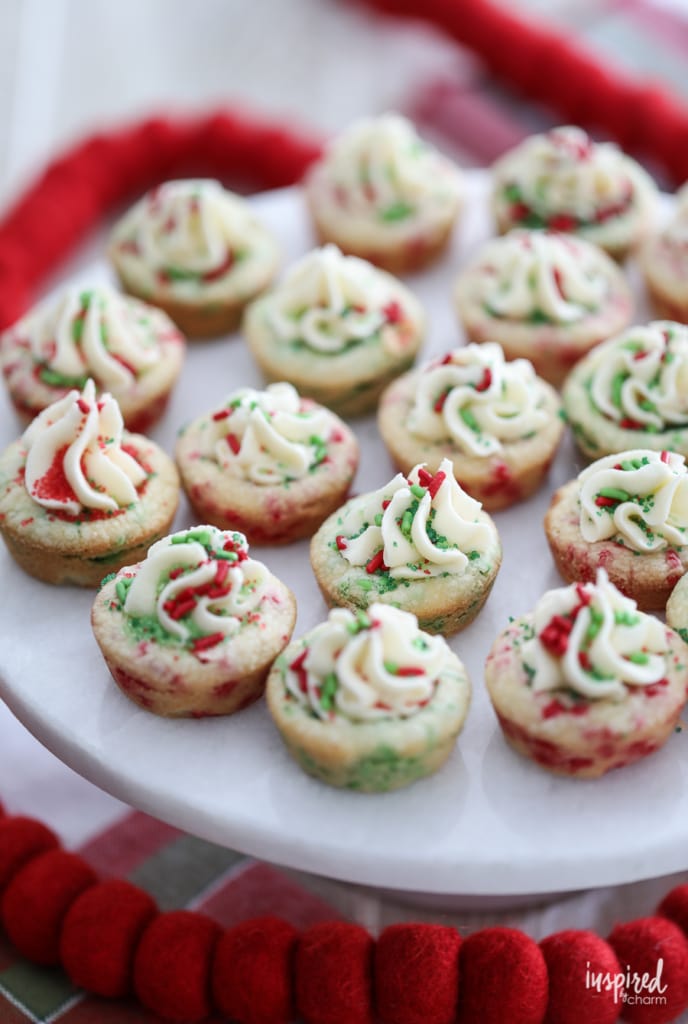
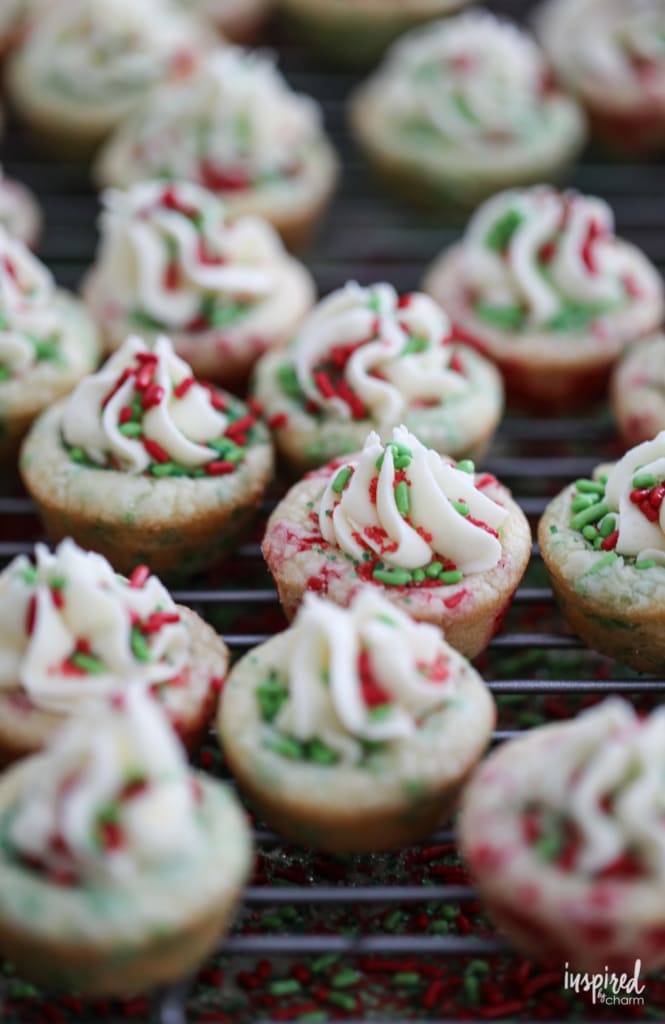
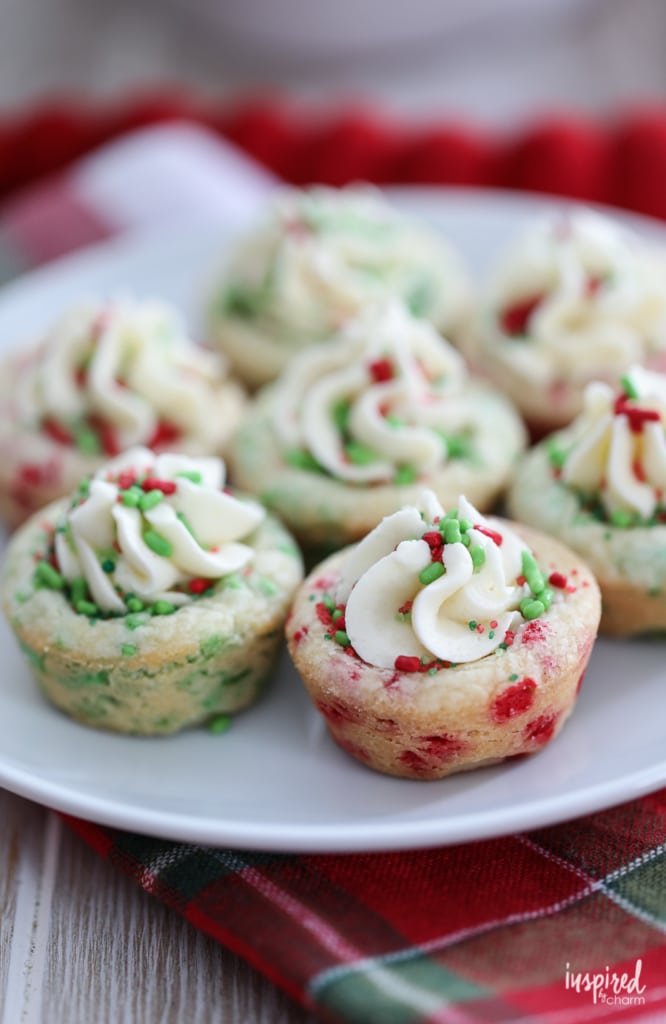
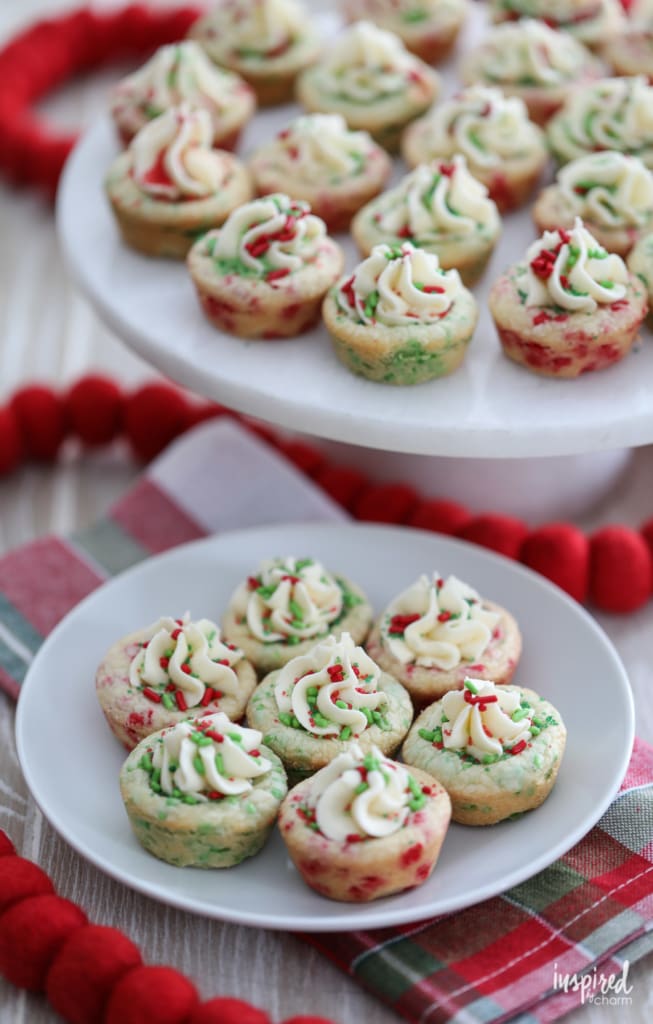
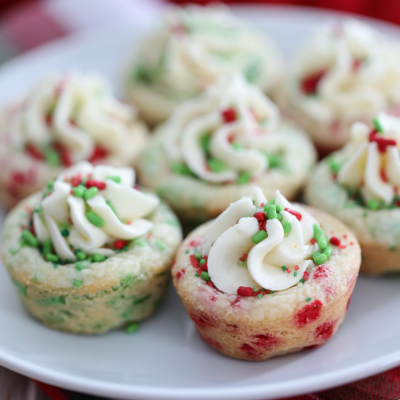
These Christmas Sprinkle Cookie Cups are everything you want in a holiday cookie—easy to make, festive, and full of flavor. With no rolling pin or cookie cutters needed, they’re a stress-free way to create a treat that looks bakery-worthy. The red and green sprinkles give them a merry touch, and the creamy frosting is the perfect finishing detail.

The holidays are the perfect time to bake something that feels festive and fun, and these Christmas Sprinkle Cookie Cups hit all the marks. They’re bright, colorful, and irresistibly delicious, making them a standout addition to any holiday cookie tray. What’s even better? They’re incredibly simple to make.
When it comes to Christmas cookies, all I really need are these cream wafer cookies. For years, they have been (and will probably always be) my absolute favorite. However, that doesn’t stop me from experimenting with a few new cookie recipes every year. (You can find all of my Christmas cookie recipes here.) This year, I’m trying these Christmas Sprinkle Cookie Cups!
I don’t know about you, but when it comes to Christmas cookie baking, I’m usually doing it about a week before the big event. And after an extremely busy time with the blog (Christmas is my craziest season on IBC.) and the stresses that come with holiday preparation, the last thing I want to deal with is complicated cookie recipes.
That’s why I’m always on the hunt for simple recipes that look beautiful and taste great. I promise you these Christmas Sprinkle Cookie Cups are just that.
Why You’ll Love This Recipe
- These cookie cups are as easy as they are adorable. By skipping the rolling pin and cookie cutters, you get the perfect bite-sized treat without the fuss. With just a mini muffin pan and simple ingredients, you’ll have a dessert that looks like it took much more effort than it actually did.
- Festive sprinkles make these cookie cups burst with holiday cheer. The bright red and green colors add a playful and joyful touch to your cookie tray, making them the perfect addition to holiday gatherings or gift boxes.
- The combination of a classic sugar cookie flavor and creamy frosting is simply irresistible. Each bite offers the perfect balance of buttery sweetness and a soft texture that will have everyone reaching for seconds.
Ingredients
You just need some basic ingredients (and a few sprinkles) to make these festive cookies.
- Unsalted Butter: Provides a rich, creamy base for both the cookies and frosting, ensuring a soft texture and perfect flavor.
- Powdered Sugar: Adds sweetness and helps create a smooth, melt-in-your-mouth consistency in the cookies and frosting.
- Baking Powder: Gives the cookies a light lift, ensuring they bake up perfectly in the mini muffin pan.
- Salt: Enhances all the flavors, balancing the sweetness beautifully.
- Egg: Acts as a binder, holding the dough together and adding richness.
- Vanilla Extract: Infuses the cookies and frosting with a warm, classic flavor that complements the sprinkles.
- All-Purpose Flour: The foundation of the cookies, creating structure and stability.
- Red and Green Sprinkles: Add a festive pop of color and crunch, perfect for the holiday season.
- Milk: Used in the frosting to achieve the ideal creamy consistency.
How to Make
- Begin by preheating your oven to 350 degrees F. Spray mini muffin pans with baking spray and set aside.
- In a bowl, add the butter and beat with a mixer for about 1 minute. Then add the powder sugar, baking powder, and salt. Beat until creamy (2-3 minutes), scraping the sides of the bowl as necessary.
- Next, beat in the egg and vanilla. Then beat in the flour until just combined.
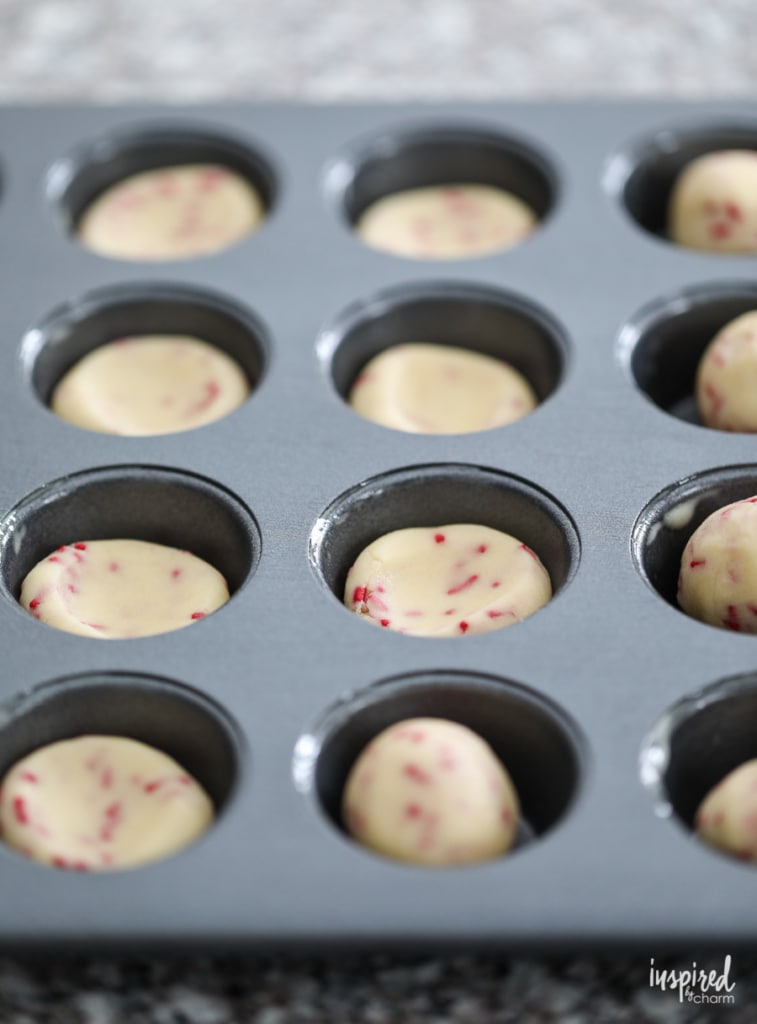
- Divide the dough into two portions. Stir green sprinkles into one half and mix red sprinkles into the other half.
- Shape the dough into 1-inch balls. Then, press the balls into the prepared mini muffin pan. Press each dough ball with your thumb.
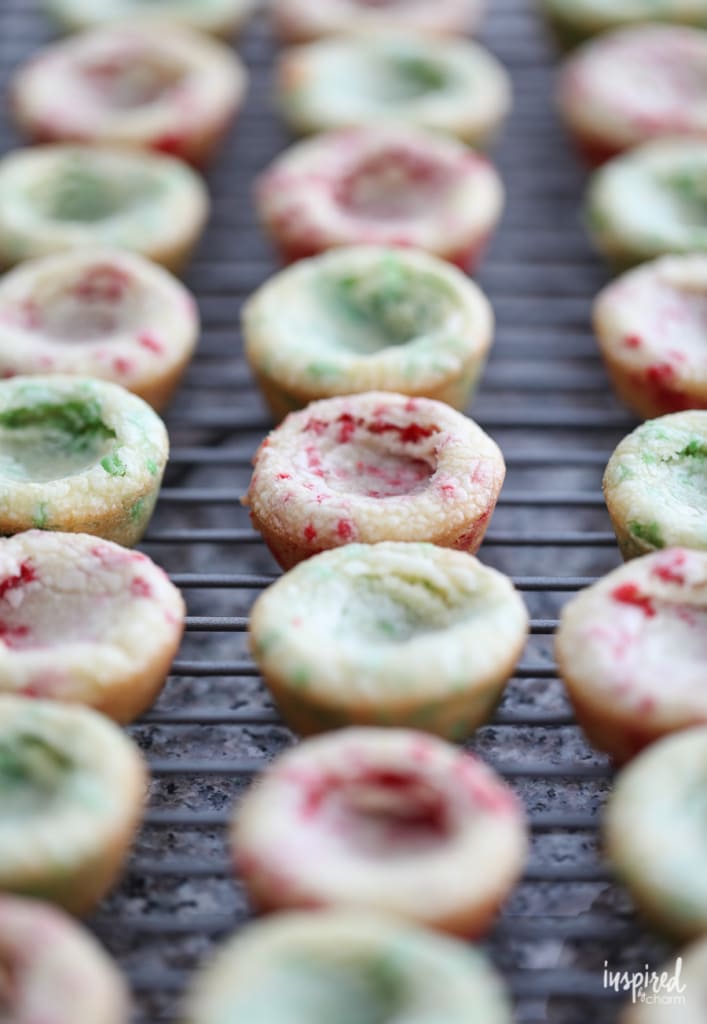
- Bake for 8-10 minutes or until the edges are light brown. Remove from the oven and press the centers with the rounded side of a measuring teaspoon. Cool in pan for 5 minutes. Then remove to finish cooling on a wire rack.
- In the meantime, prepare the frosting by beating together the softened butter, powdered sugar, vanilla, and salt. Add as much milk as needed to create a smooth frosting.
- Use a piping bag with a large star tip to frost the cooled cookies. Top with additional sprinkles. Pack and store in an air-tight container.
💌 SAVE THIS POST / RECIPE!
And just like that, you have several dozen of these Christmas Sprinkle Cookie Cups ready to add color and more deliciousness to your holiday cookie platters.
Delectably doable!
Frequently Asked Questions
Do I need to chill the cookie dough before baking?
No chilling is required for this recipe! The dough is ready to use as soon as it’s mixed, which makes this recipe even quicker and easier to prepare.
What’s the best way to store these cookie cups?
Store the frosted cookie cups in an airtight container at room temperature for up to three days. If you’d like to keep them fresh longer, refrigerate them for up to a week, but allow them to come to room temperature before serving.
What if I don’t have a piping bag for the frosting?
No piping bag? No problem! You can use a zip-top bag with the corner snipped off, or simply spoon the frosting onto the cookie cups for a rustic, homemade look.


More Christmas Cookie Recipes You’ll Love
- The BEST Crock Pot Candy
- White Chocolate Cherry Shortbread Cookies
- Cream Horns (Lady Locks)
- Festive Kitchen Sink Cookies
- Easy Creamy Fudge Recipe
- Christmas Pinwheel Cookies
If you’re looking for something unique to add to your cookie exchange or just want a sweet treat to share with loved ones, these Christmas Sprinkle Cookie Cups are sure to be a hit. If you make them, I’d love to know what you think. Would you please stop back and leave a comment and a 5-star rating below? I’d appreciate it!
Want more from Inspired by Charm? Join the IBC Mailing List for inspiration in your inbox! Follow along on Instagram and TikTok for daily updates and behind-the-scenes looks at my processes. There’s even more inspiration on Facebook and Pinterest!
Christmas Sprinkle Cookies Cups
Ingredients
- 1 1/4 cups unsalted butter softened
- 1 1/2 cups powdered sugar
- 1 teaspoon baking powder
- 1/2 teaspoon salt
- 1 egg
- 1 teaspoon vanilla extract
- 2 1/2 cups flour
- 1/4 cup red sprinkles
- 1/4 cup green sprinkles
Frosting:
- 1/2 cup unsalted butter softened
- 2 1/2 cups powdered sugar
- 1 teaspoon vanilla
- 1/2 teaspoon salt
- 2 – 3 tablespoons milk
- Additional sprinkles for garnish
Instructions
- Begin by preheating your oven to 350 degrees F. Spray mini muffin pans with baking spray and set aside.
- In a bowl, add the butter and beat with a mixer for about 1 minute. Then add the powder sugar, baking powder, and salt. Beat until creamy (2-3 minutes), scraping the sides of the bowl as necessary.
- Next, beat in the egg and vanilla. Then beat in the flour until just combined.
- Divide the dough into two portions. Stir green sprinkles into one half and mix red sprinkles into the other half.
- Shape the dough into 1-inch balls. Then, press the balls into the prepared mini muffin pan. Press each dough ball with your thumb.
- Bake for 8-10 minutes or until the edges are light brown. Remove from the oven and press the centers with the rounded side of a measuring teaspoon. Cool in pan for 5 minutes. Then remove to finish cooling on a wire rack.
- In the meantime, prepare the frosting by beating together the softened butter, powdered sugar, vanilla, and salt. Add as much milk as needed to create a smooth frosting.
- Use a piping bag with a large star tip to frost the cooled cookies. Top with additional sprinkles. Pack and store in an air-tight container.
What is exactly the sprinkles you use. Sold red or green I find are sugar
Hi,
Did you use 2 different kinds of sprinkles? What kind of sprinkles work best?
I know you used 2 colors.
I made these cookie cups last year as a new addition to my cookie plates. Everybody loved them and I have had a specific request this year that these become a regular feature.
So glad to hear that Laurie. Thanks!
xo Michael
Excellent cookies. Made them for an event and everyone commented on how cute and good they were. Very easy!
Thank you! I’m glad you enjoyed them Marsha!
xo Michael
I used mixed red and green sprinkles and then used canned green frosting. Using a giant star tip I made a 2-layer “tree”. Then I decorated each 🎄 with red and green Christmas mini M&M’s. They were super festive and quick for my Red Hat cookie Exchange event.
Hi! Can these be stacked or does the frosting stay soft? I need to be able to transport to a dinner function.
Thanks!
If you use 1/4 cup of butter and 1/4 cup of crisco (instead of 1/2 cup butter) your frosting will crisp up nicely for stacking.
Are these cookie cups able to be frozen, & how long will they be good in the freezer
These were so much fun to make and are delicious! They got oohs and aahs after our Christmas meal. Thank you so much for the recipe! I will definitely be making these next year.
THese are a hit with my kind do, easy and fun to make. I got 48 cookies
love these cookies, another creative and fun recipe from you, thank you, muffin-ish cookies, what a nice tweak with frosting too
These will be perfect for a cookie exchange I’m attending tomorrow. Thanks for a great recipe!
How long will they keep? Can they be made ahead and frozen?
I put mine in the freezer. I haven’t taken them out yet, but I assume it should be okay.
xo Michael
BUT HOW MANY DOES IT YIELD? Prolly gonna make these Thursday for a cookie exchange party!
As it states on the recipe card, it’s 4-5 dozen.
xo
Michael
where does it say that cause I don’t see it
I just made them and I got 37 out of the recipe using 1 tbsp of dough for each cup
Thanks for the info! With 1 inch balls, you get over 48.
Thanks for sharing!
xo Michael
These are so cute! I feel like they would be ideal on a Christmas cookie platter!
These are adorable! I need to try these Michael
These are so perfectly Christmas-y! Love that red and green!