How to Grow a Coleus Topiary
This Post May Contain Affiliate Links. Please Read Our Disclosure Policy
Learn how to make a beautiful and eye-catching Coleus Topiary. I’m walking you through the step-by-step process on how to make this stunning addition for your home and garden.
magine combining your love for gardening with a pinch of creativity to create something that’s both eye-catching and heartwarming. Whether you’re a seasoned green thumb or just dipping your toes into the world of plants, this project is for you. We’re talking about turning the humble coleus, known for its vibrant colors and easy-care nature, into a show-stopping topiary.
So, grab your gardening gloves, and let’s embark on this delightful journey together. You’ll be amazed at what you can create with just a bit of guidance, some patience, and of course, a splash of enthusiasm!
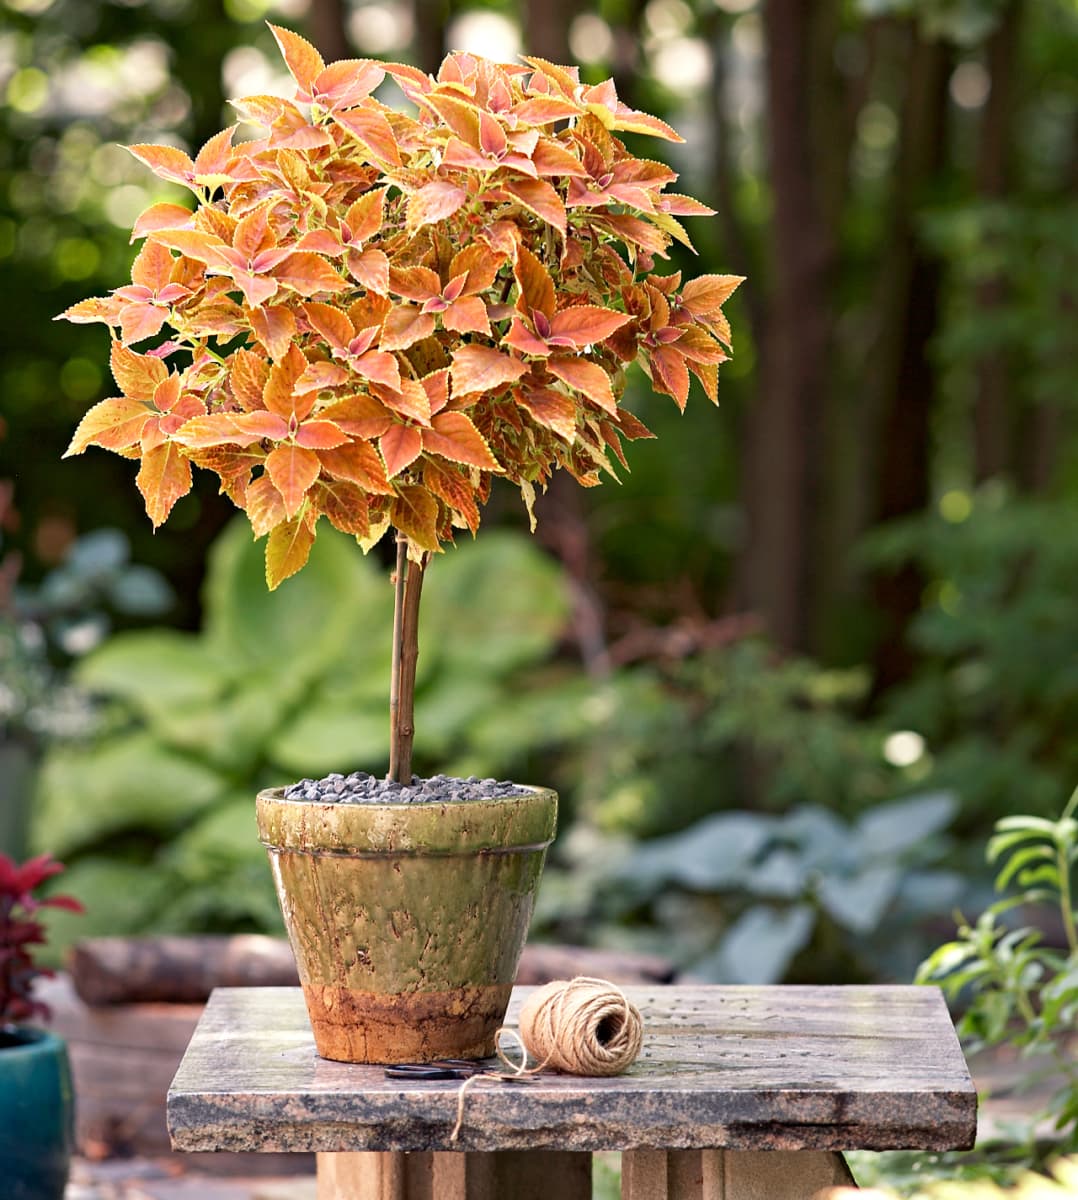
Images Source: Better Home & Gardens
o, grab your gardening gloves, and let’s embark on this delightful journey together. You’ll be amazed at what you can create with just a bit of guidance, some patience, and of course, a splash of enthusiasm!
To give you an idea of how a completed topiary will look, I have included some images of the final result, so you have an idea of where we are headed. I’ve sourced all of the photos to their original creator and hope to eventually replace them with the results of my own coleus topiary journey.
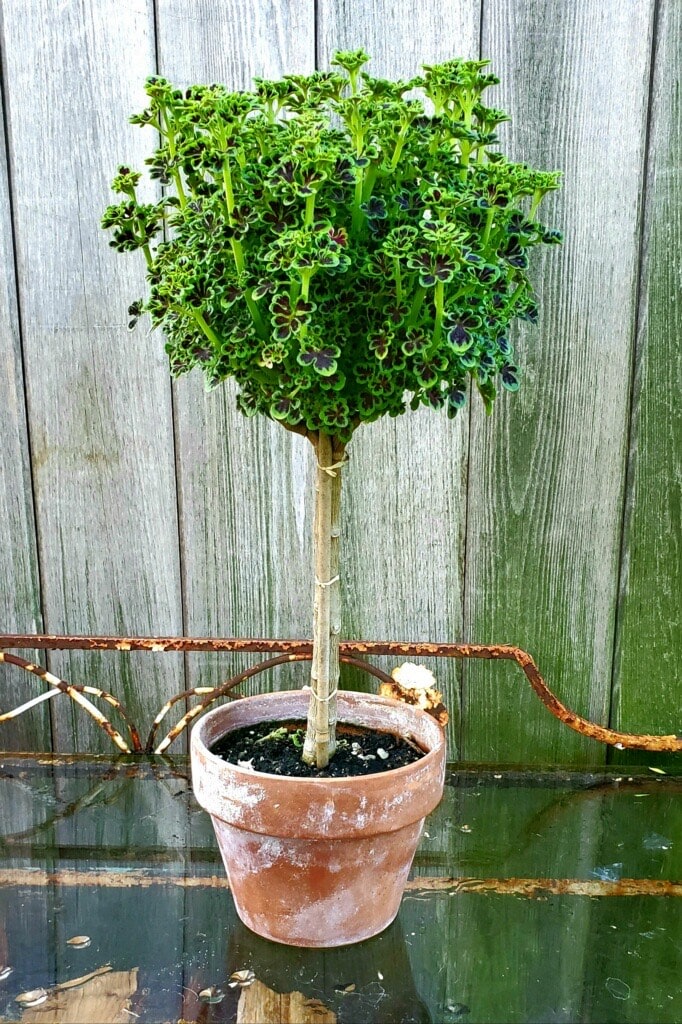
Image Source: NY Topiary
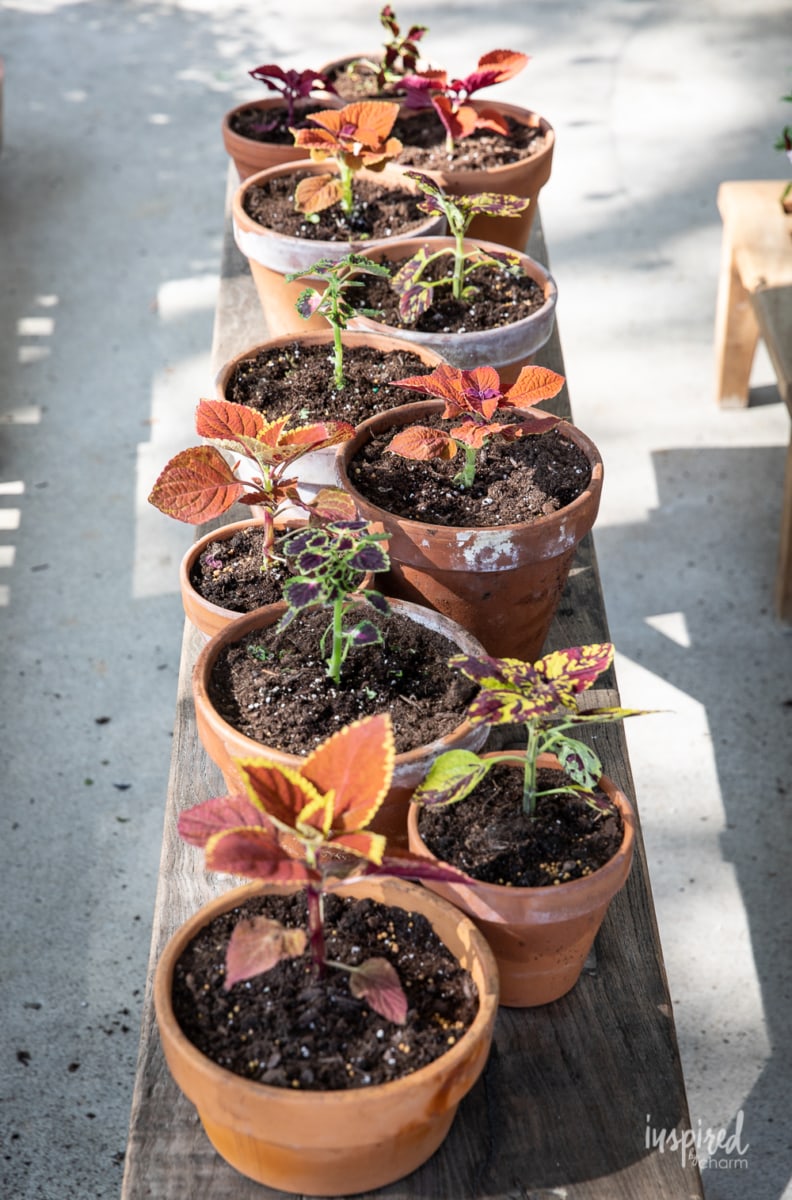
As you can see, the results of this project are truly stunning. I have all of mine set on my side porch. Coleus come in a variety of colors, leaf shapes, textures, etc. While I had originally intended to only grow 2-3 of these Coleus Topiaries, I ended up with 12. I just couldn’t resist all of the beautiful coleus varieties. Plus, I wanted to ensure I had several successful topiaries (so if one or two don’t make it, I’ll be certain to have a few that do).
With all that being said, let’s get into the process. I hope you’ll purchase some coleus plants and come along on this creative adventure with me!
Materials
Here is what you’ll need to create and grow your coleus topiary.
- Pot (Preferably Terra Cotta) with Drainage: A good quality pot with drainage holes is essential. I’m partial to terra cotta pots for their natural look and breathability, which is great for root health.
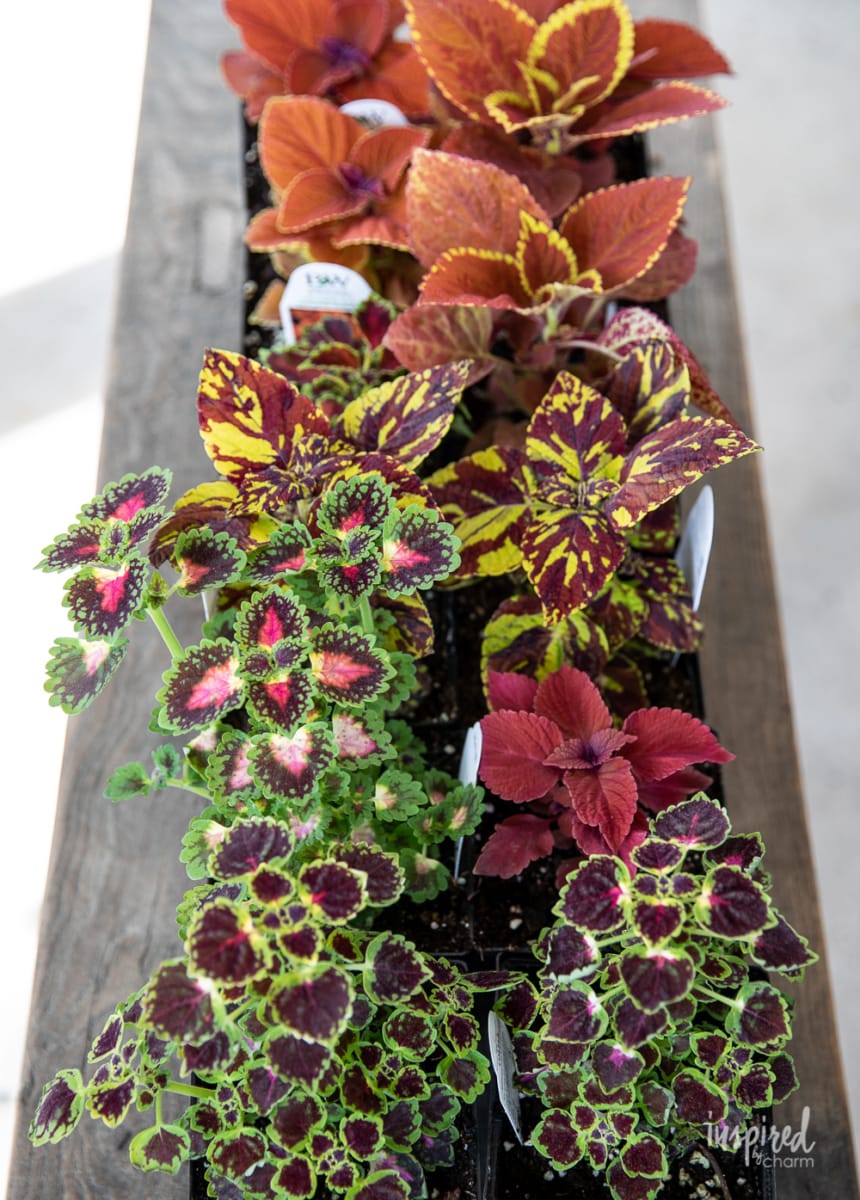
- Coleus Plant (or Seeds): Choose a vibrant coleus plant or start from seeds if you’re up for a bit more of a challenge. Coleus comes in an array of stunning colors and patterns, so pick one that speaks to you!
- Soil: A bag of high-quality potting soil is key to provide your coleus with the right nutrients and drainage. It’s the foundation for your topiary’s growth and health.
- Fertilizer (I Recommend Miracle-Gro): To give your coleus an extra boost, use a trusted fertilizer like Miracle-Gro. It helps in ensuring lush, vibrant growth and supports the overall health of your topiary.
How To Grow
With your materials gathered, you’re ready to get started!
1. Buy A Coleus Plant
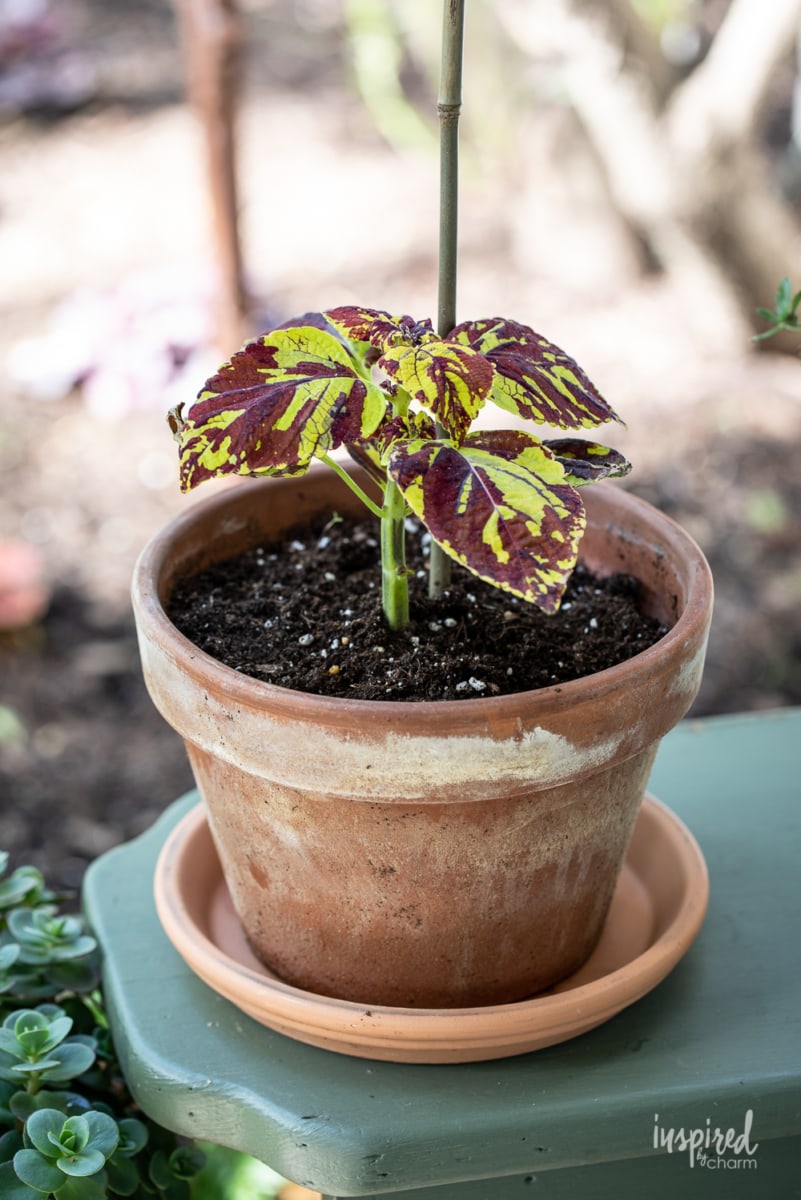
You’ll need a coleus plant to start. If you’re feeling extra ambitious, you’re welcome to start your coleus plant from seed. If not, most garden centers and nurseries sell coleus. It is available in a variety of colors, sizes, leaf styles, etc. This process of creating a topiary should work with any of the coleus varieties, so choose the one you like best.
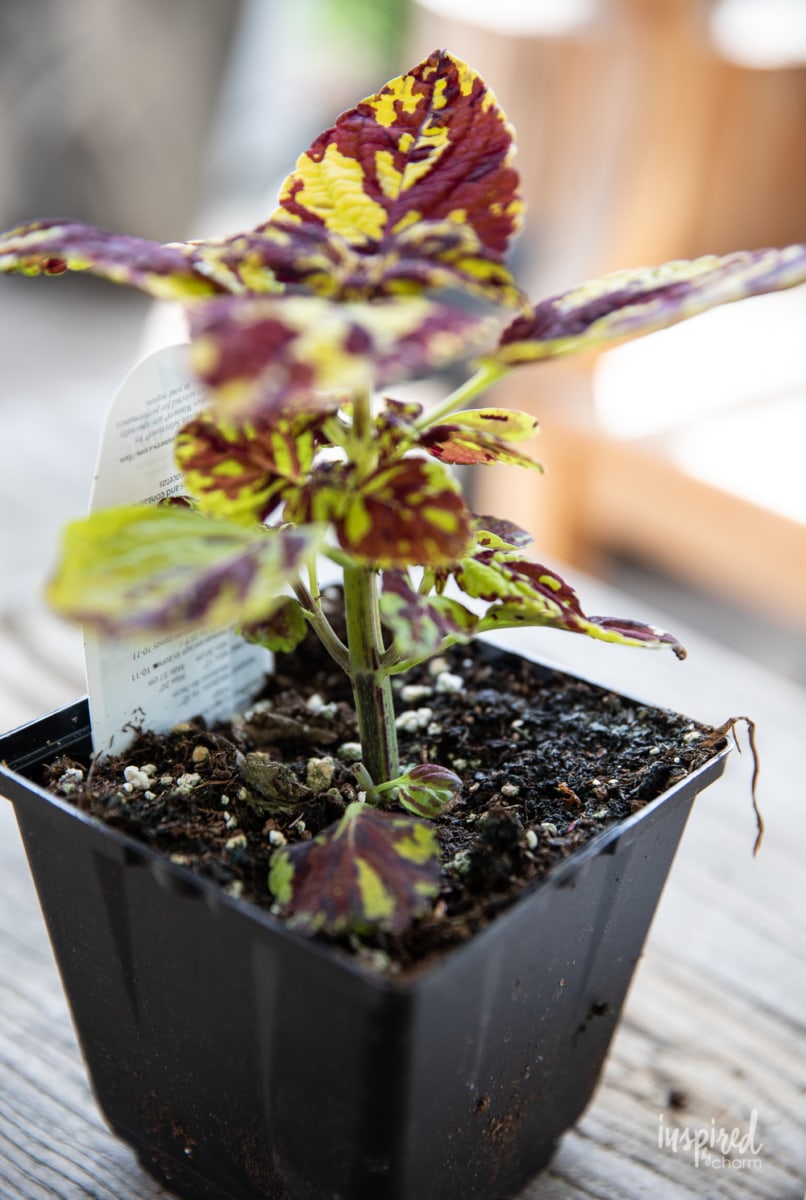
If you want a particular height for your final topiary be sure to check the tag to see the max growth height for the variety you are selecting.
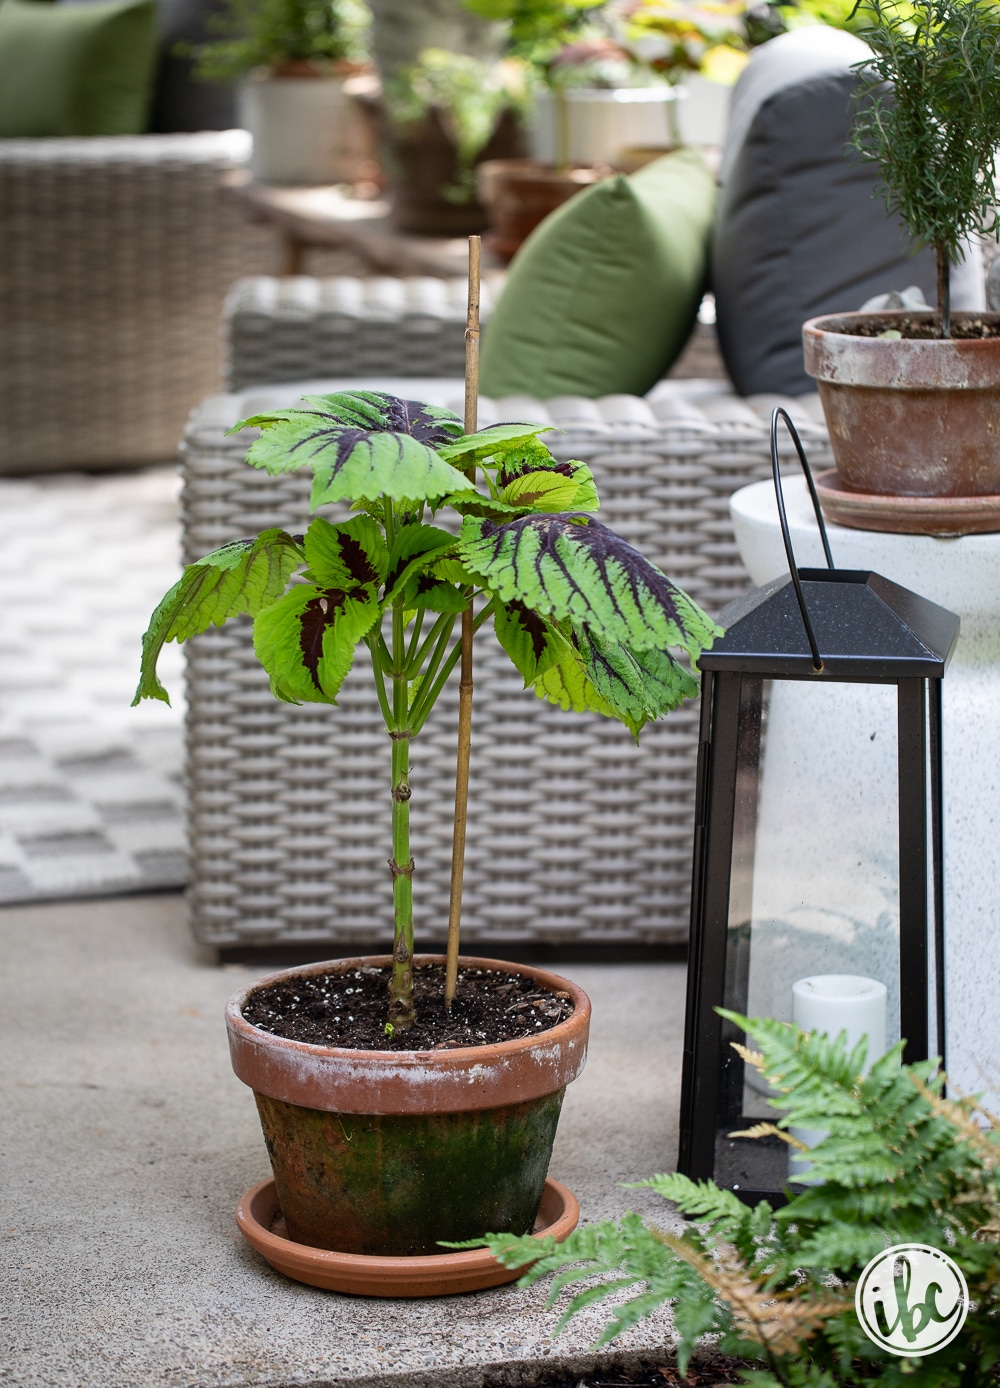
Also, I like to select a plant with an obvious center stem/trunk like the plant pictured above. I found these pretty easy to find, though one of my coleus had several main stems/trunks. This style will work too, but first you will need to eliminate all of the stems but one.
2. Pot Your Coleus
Next, plant your coleus in your chosen pot. I don’t like to go too big to start, but want to make sure the plant’s roots have enough room. Keep in mind that you will likely need to replant your topiary as it grows.
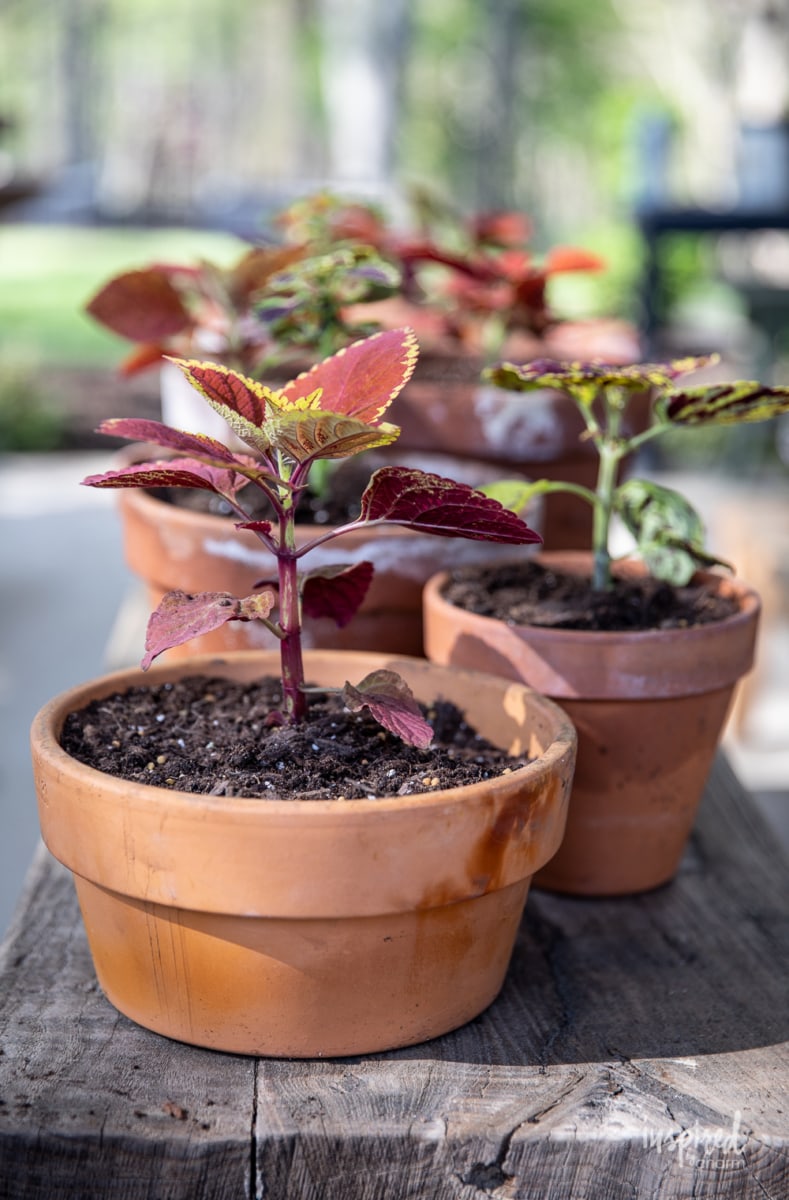
Choose a heavy pot as eventually your plant will be top heavy and the right pot will help to prevent your topiary from falling over.
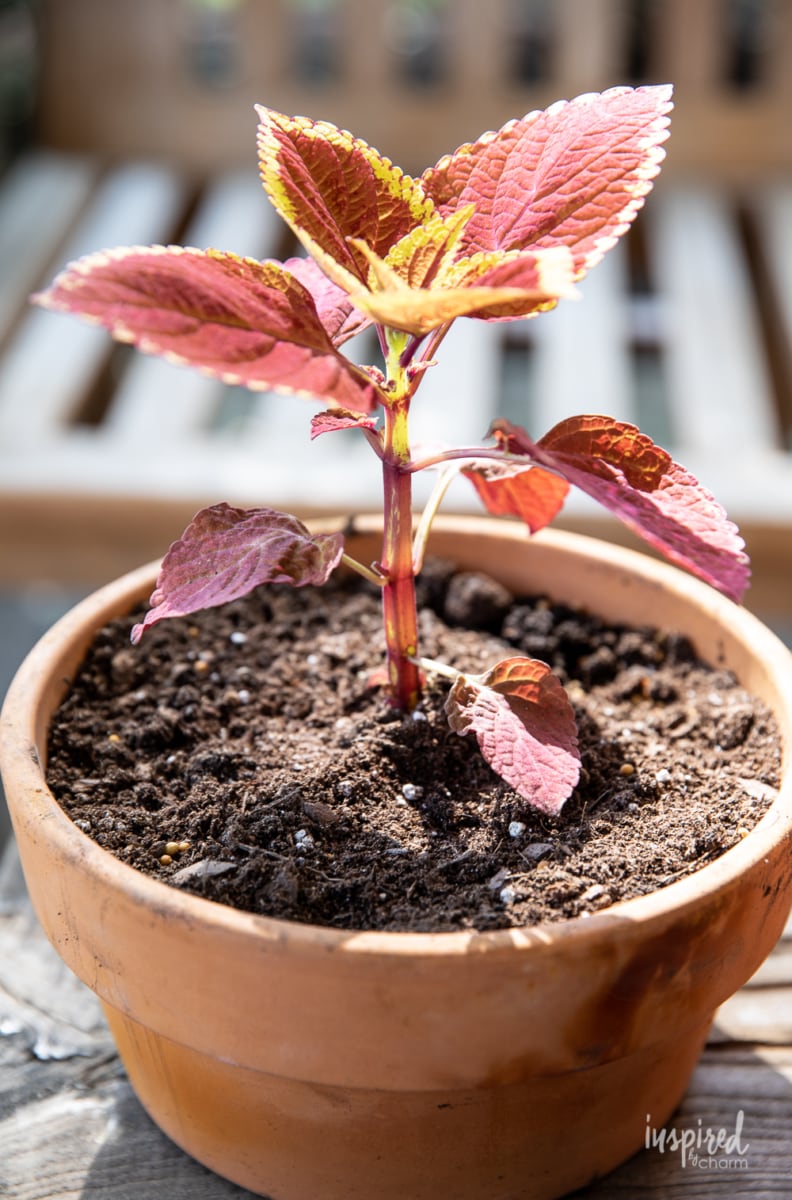
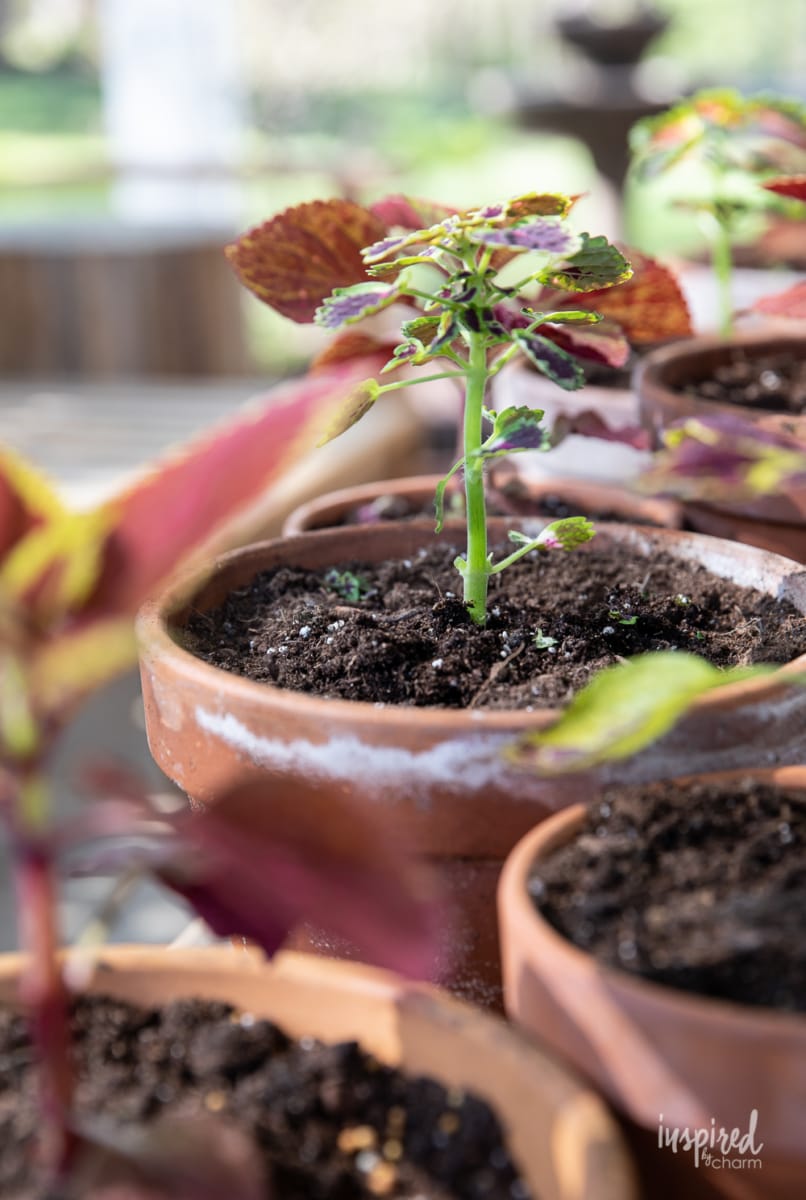
3. Pinch Leaves
Once potted, choose one stem to serve as your trunk. Then, remove all of the other stems with pruning shears. Coleus stems can be very fragile, so take your time and be patient.
If there are single leaves on your main truck you can leave those on the trunk as they will help fuel the plant’s growth. You can remove them later or they may eventually just fall off on their own.
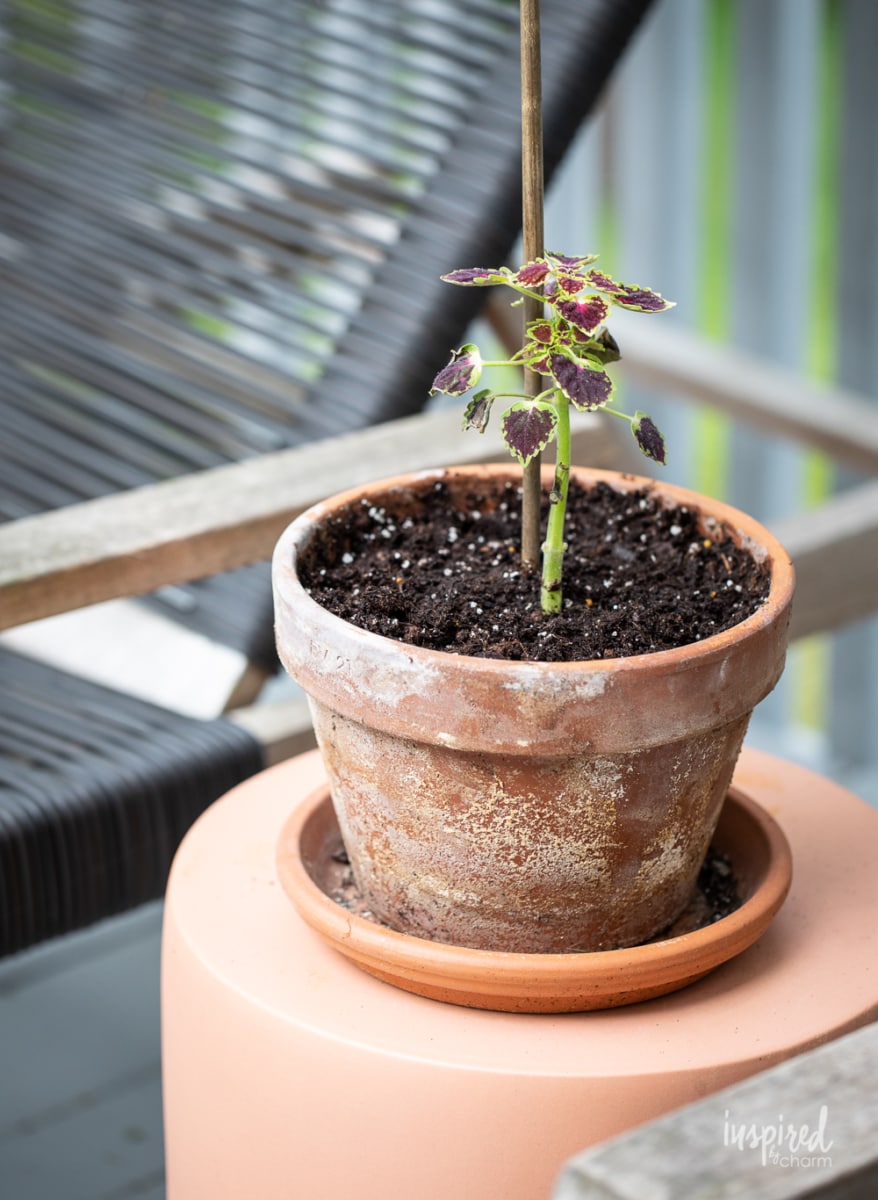
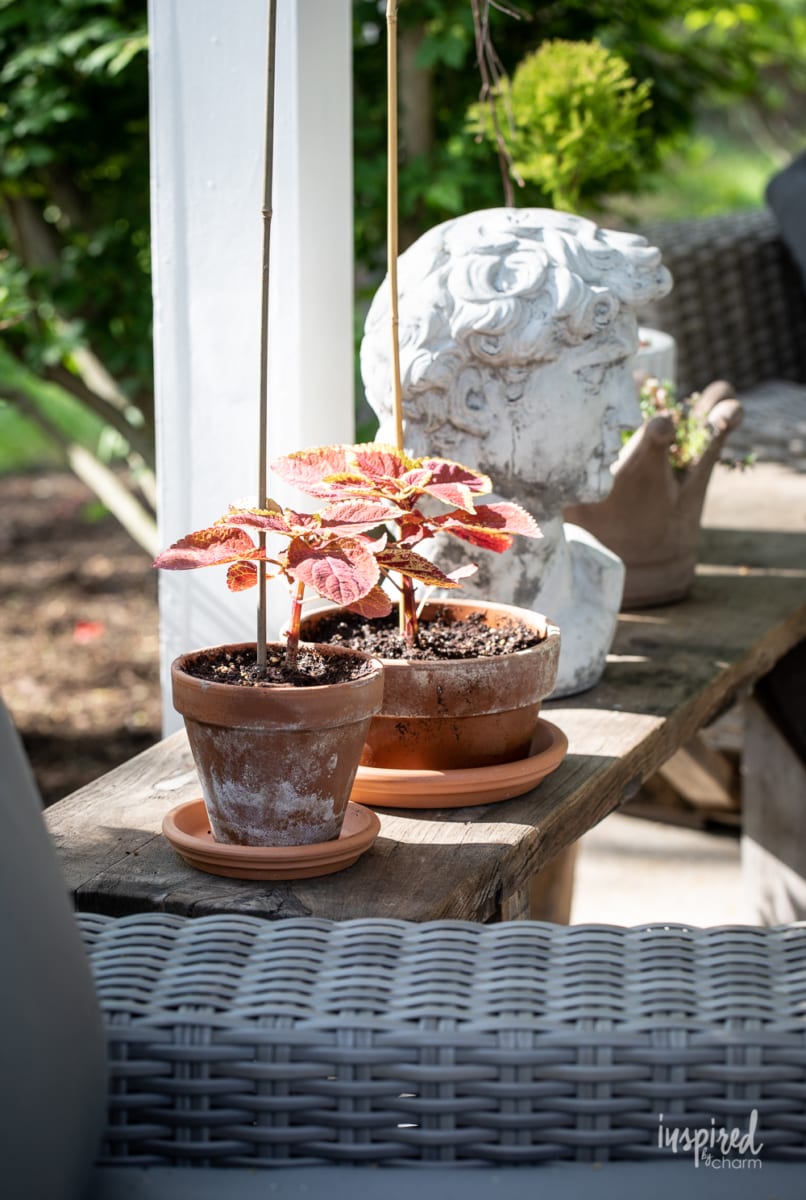
4. Stake Your Coleus
To help support your topiary during it’s growth, insert a stake with a length close to the desired height (around 2-3 feet) in the pot near the trunk. (I’m using these bamboo stakes.) Attach the trunk to the stake with garden ties.
As the plant grows, continue to attach the trunk to your stake. Over time, the main stem will harden and become more of a woody trunk. Even at this stage, the trunk isn’t super sturdy, so the stake will be essential for the life of the plant.
5. Pruning Your Topiary
In addition to continuing to attach the trunk of the coleus to the stake as it grows, you’ll also want to continue pruning off any additional stems that will emerge. You’ll just want a cluster of leaves at the top which will eventually result in a foliage-free trunk.
Once your topiary reaches close to the desired height for your project, pinch off the top. This will stimulate more branching from from the cluster of leaves at the top which will eventually form your topiary.
💌 SAVE THIS POST / RECIPE!
Then, as your topiary ball starts to grow and form, continue to pinch the stem tips at the top of the plant. This will help to create a dense ball of foliage.
You’ll also want to pinch off any flower spikes. You want the plant to put the energy into the foliage; the flowers will will drain the plant of resources.
6. Be Patient and Have Fun
Like any topiary, this process doesn’t happen over night. I’m assuming this will take an entire summer and then some. If you want beautiful results, know that this process will take time.
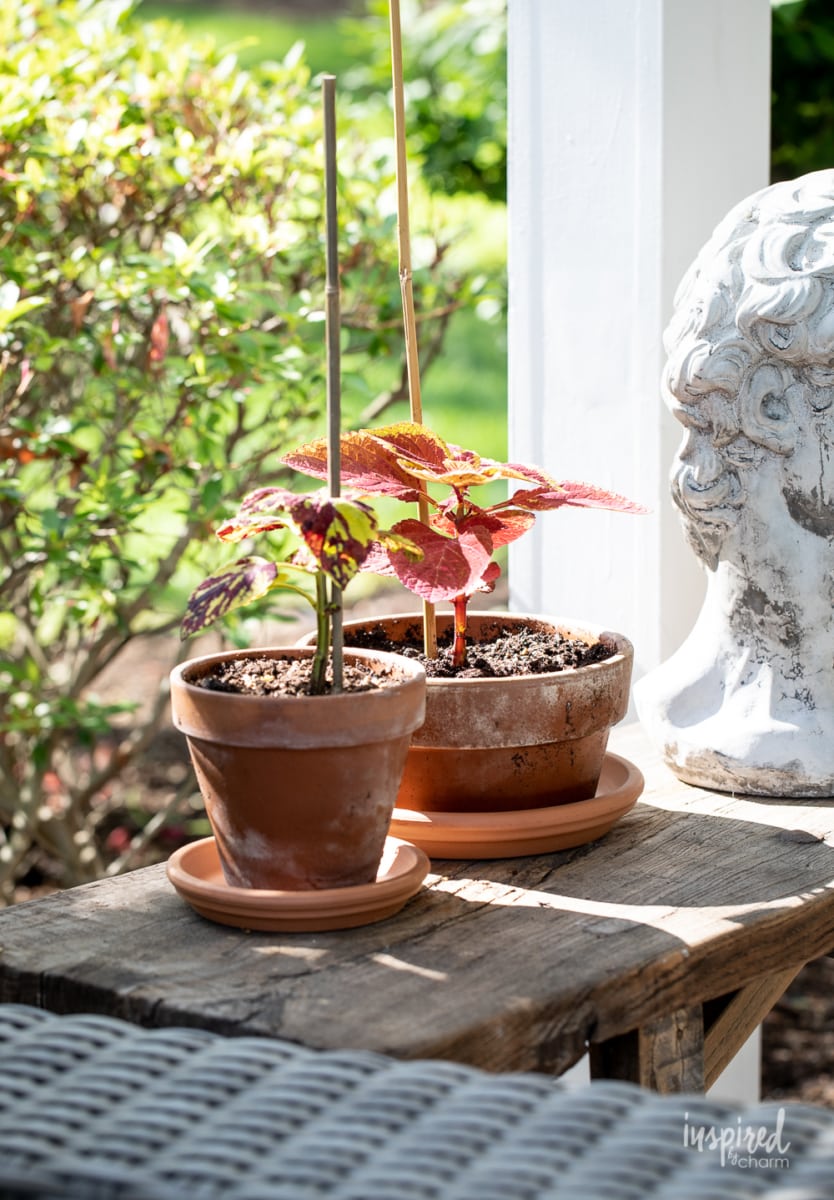
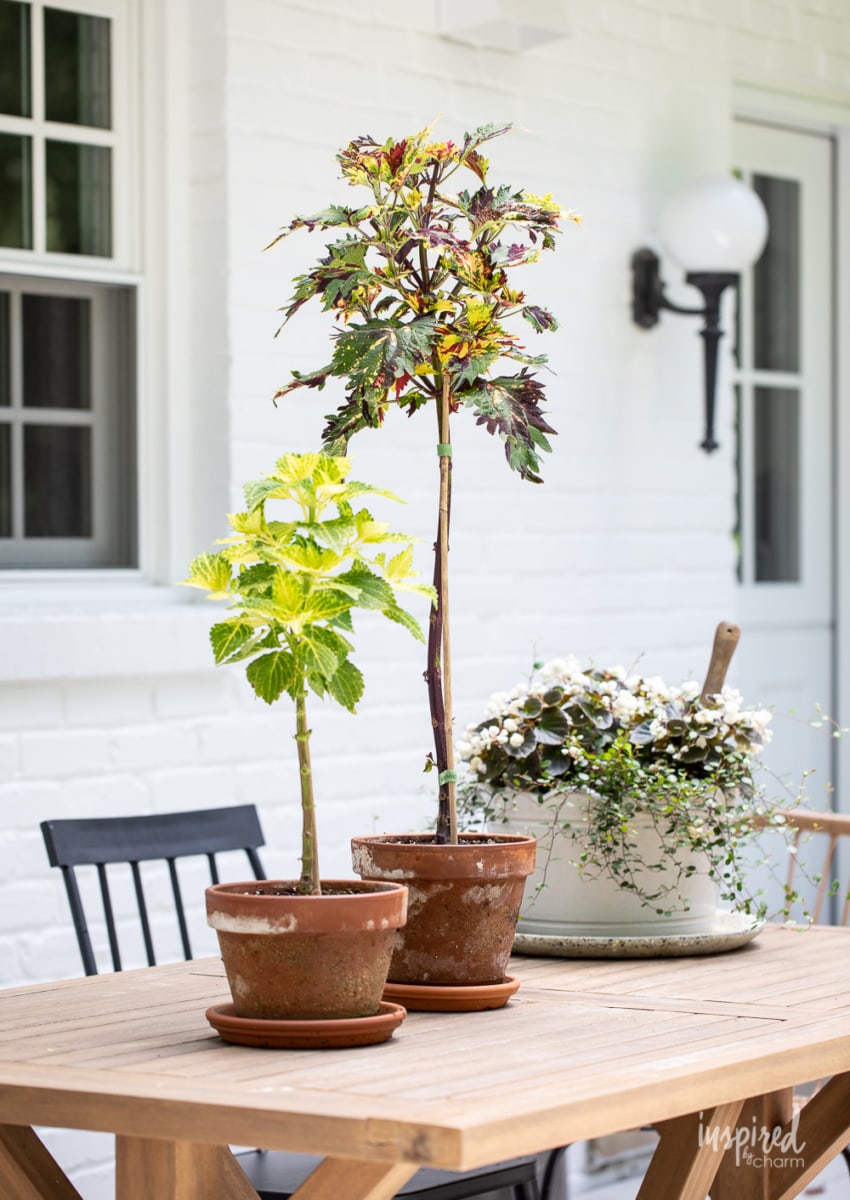
Results
Here’s is a look at how my topiaries were doing about 3/4th of the way through the season. I had intentions of taking more pictures but they were hit by frost and destroyed. I really loved this process and plan to do it again this year.
Helpful Growing Tips
Summer Sunlight:
Your coleus with thrive in moderate light to shade during the summer months.
Winter Sunlight:
Coleus prefers brighter light in the winter with several hours of direct sunlight.
Watering:
Water regularly as coleus tend to be thirsty plants. Do not overwater or allow the coleus to sit in soaking water as this can cause the stem to rot.
Fertilizer:
Use a 10-10-10 water-soluble fertilizer at 1/4 strength every week from March to October.
Outdoor Care:
Avoid strong winds and heavy rain as these can damage your coleus.
Repotting:
As your topiary grows, it’s likely that you’ll need to repot it at least once or twice a year.
Winterize:
I know that coleus grow fairly quickly, but I’m not sure exactly how much progress we’ll make in one summer. The good news: you can bring a coleus inside during the winter months and it will continue to grow and thrive. (Or so I’ve been told.)
And there you have it – your very own Coleus Topiary! Who knew a little plant could bring so much joy and vibrancy to your space? I hope this project has been as enjoyable for you as it has been for me. Remember, gardening is not just about the plants; it’s about the growth, creativity, and joy we experience along the way.
More Garden Projects You’ll Love
- Grow a Dahlia Garden
- Plant my Favorite Hanging Basket for Shade
- Make a Cocktail Garden
- Create a Modern Kitchen Herb Garden
- DIY Succulent Planter
While your coleus topiary will take some patience and care, the end results will be worth it.
I hope you’ll join me in growing a beautiful coleus topiary. If you do, please stop back and share you results with me!
Want more from Inspired by Charm? Join the IBC Mailing List for inspiration in your inbox! Follow along on Instagram and TikTok for daily updates and behind-the-scenes looks at my processes. There’s even more inspiration on Facebook and Pinterest!
What do you use to attach the stem to the bamboo? Thanks. Love this idea!!!!!
When I ‘pinch off the top’ do I just chose a few to pinch off, or the whole top?
I would pinch off just the top leaves at the top.
These are awesome. I love coleuses and I cannot wait to try this. Here is a little tip…coleus are super easy to root. I live in Illinois where a coleus does not survive the winter. It is expensive to buy them every year so I cut a branch off and put it in water and they quickly root. This will work great for the topiary because you only need a single stem.
Happy HAPPY NEW YEAR!!! to you Michael! Take care of yourself. God Bless You 🙂
I love this idea! I love all things topiaries so I will give these a try. Thank you!
I love these so much Michael! Just the bit of spring I needed today. I saw this post last year and I’m glad you emailed it out today cause it’s going on my to do list this year. You are truly a source of inspiration for me – and I thank you for it!
Is it possible to keep these year round? Will they thrive inside give the light needed or do you discard at the end of the season? I’ve never seen Coleuses as indoor plants. Beautiful!!
Yes! You can just bring them inside and they should survive. I’m not sure what the care for them is, but I know it’s possible. I may try to bring one in this year.
xo Michael
Since this is a repost from 9 months ago, show us how your topiaries turned out, please.
Sure! I have one I will add. I wanted to capture them at the end of the season and they got hit by frost.
xo Michael