DIY Tassel Garland
This Post May Contain Affiliate Links. Please Read Our Disclosure Policy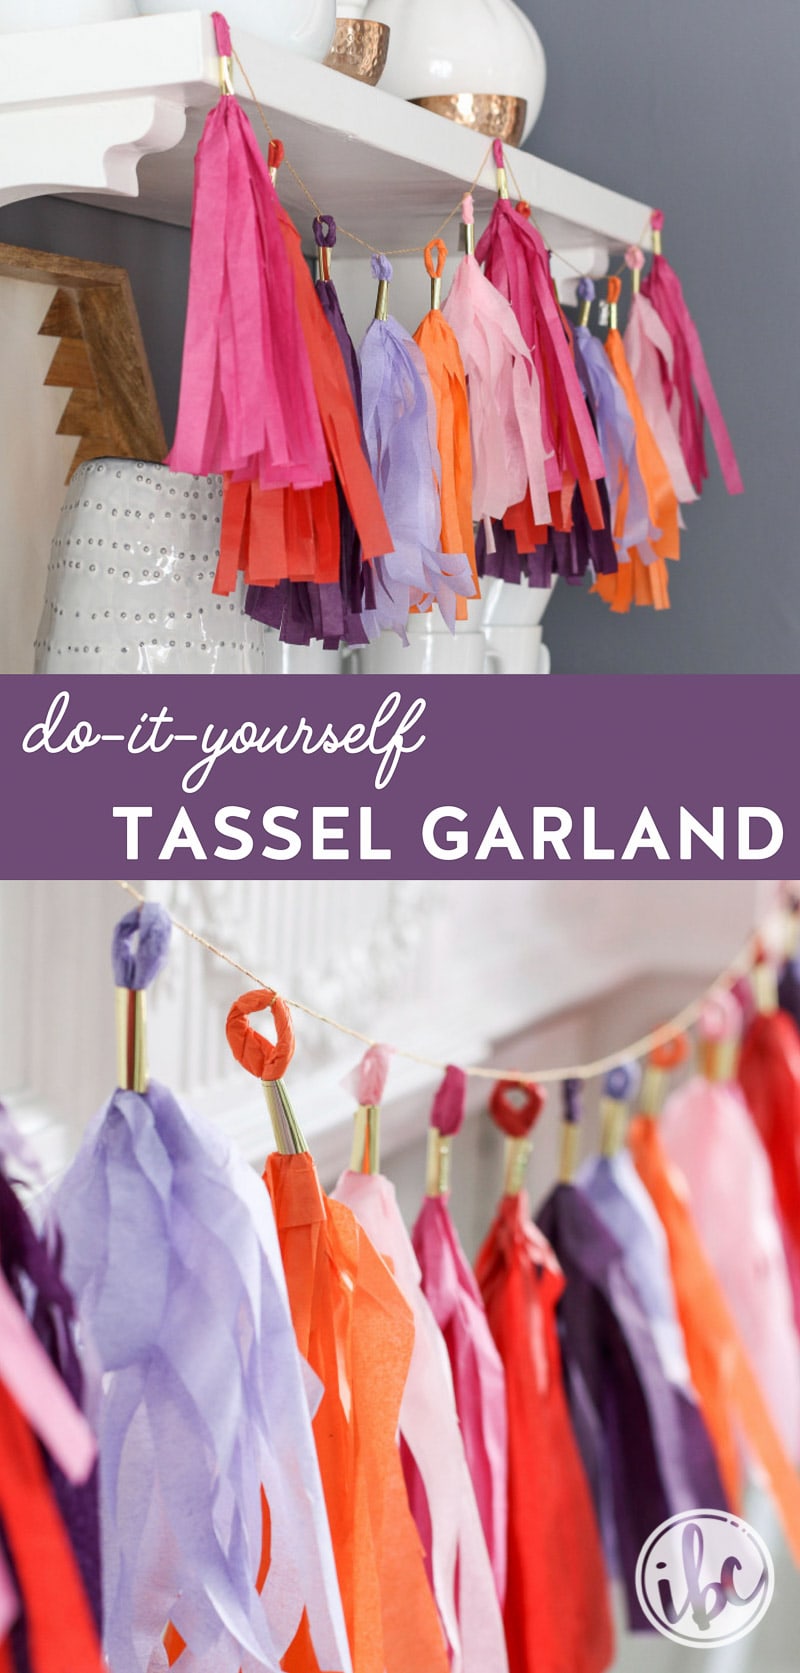
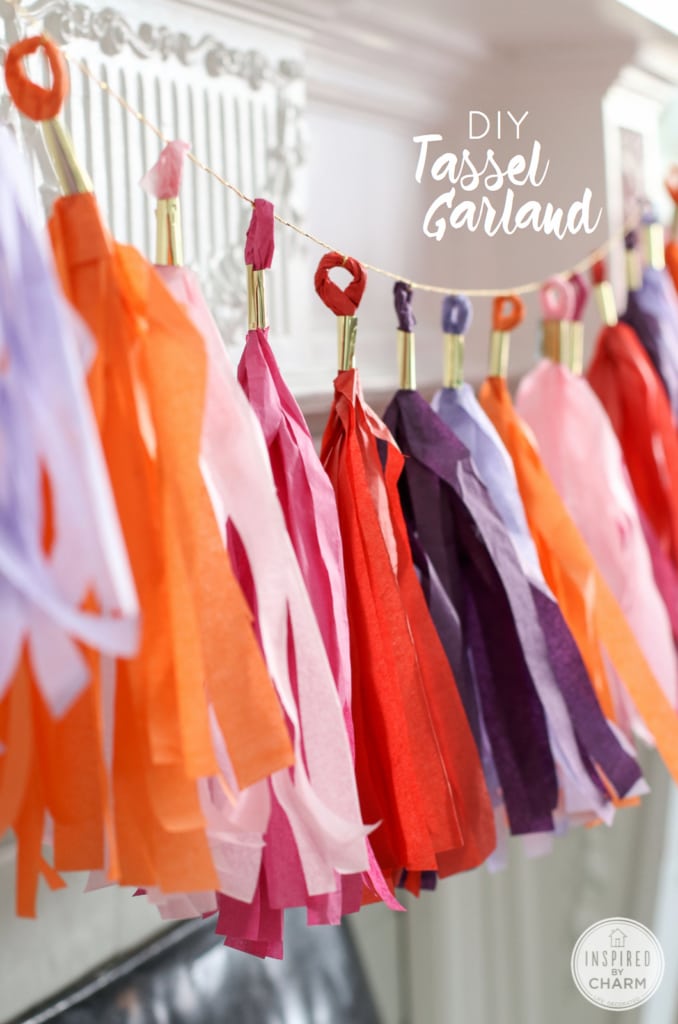
This DIY Tassel Garland is easy to make, inexpensive, and add a fun, colorful, and festive touch to any party or celebration!
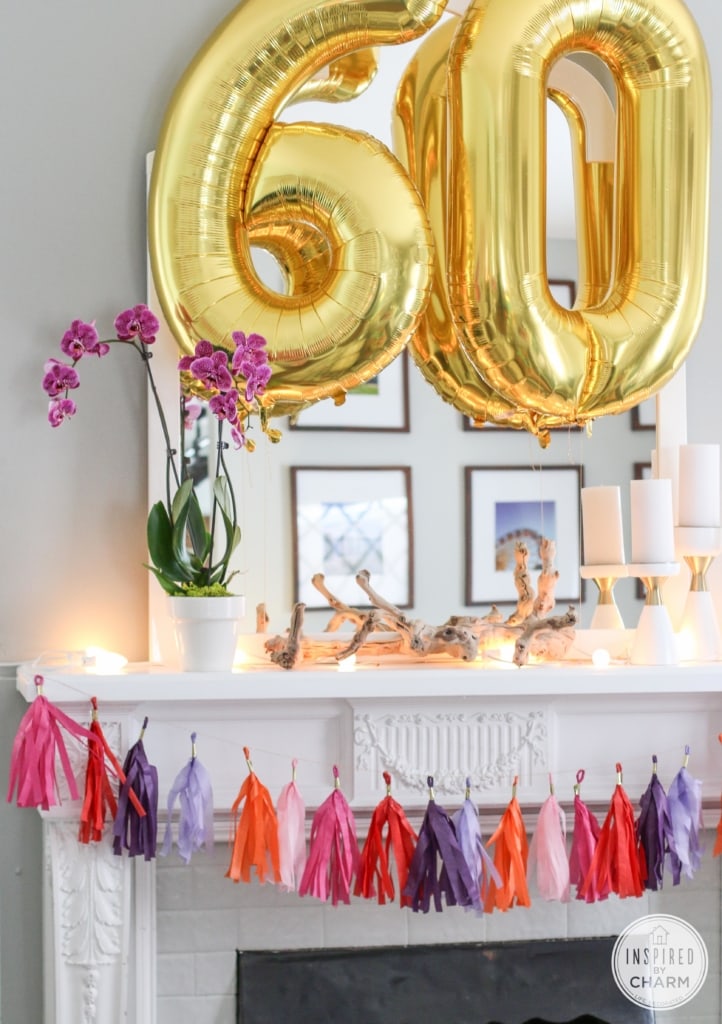
Today I’m going to tell you how I made the DIY Tassel Garland you saw in the photos from my mom’s 60th birthday party this past weekend.
Although this project will take some time, making a DIY tassel garland is very simple and cost effective. Plus, when your guests find out you actually made the garland, their response will be “What!?!” It’s pretty cool.
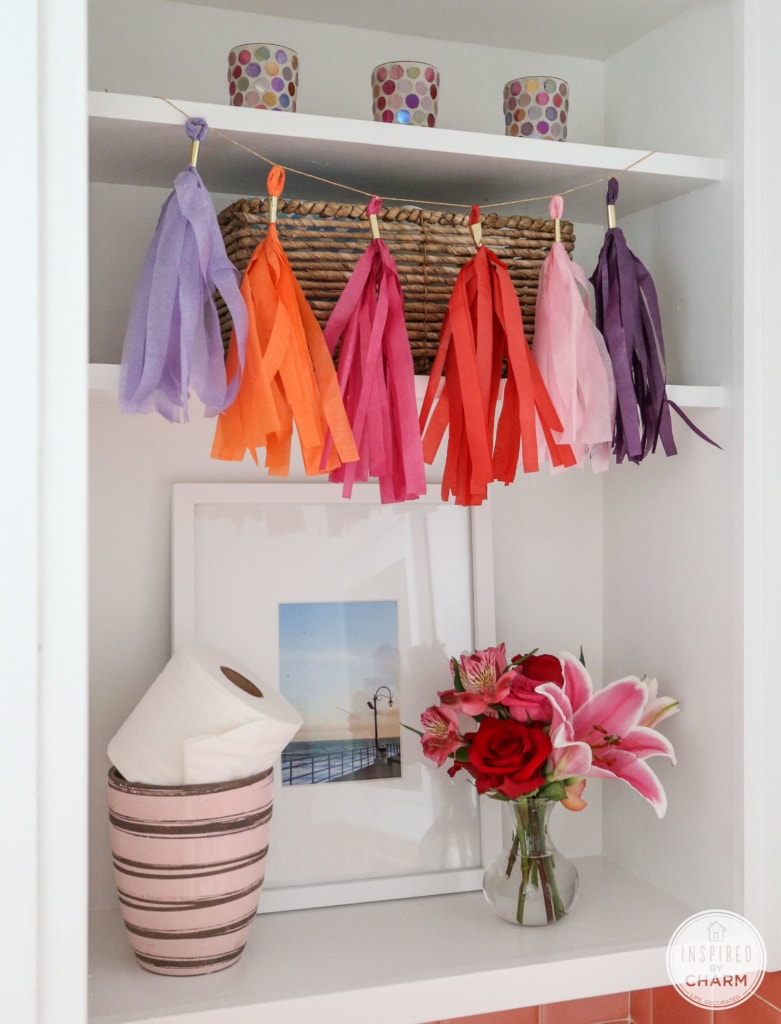
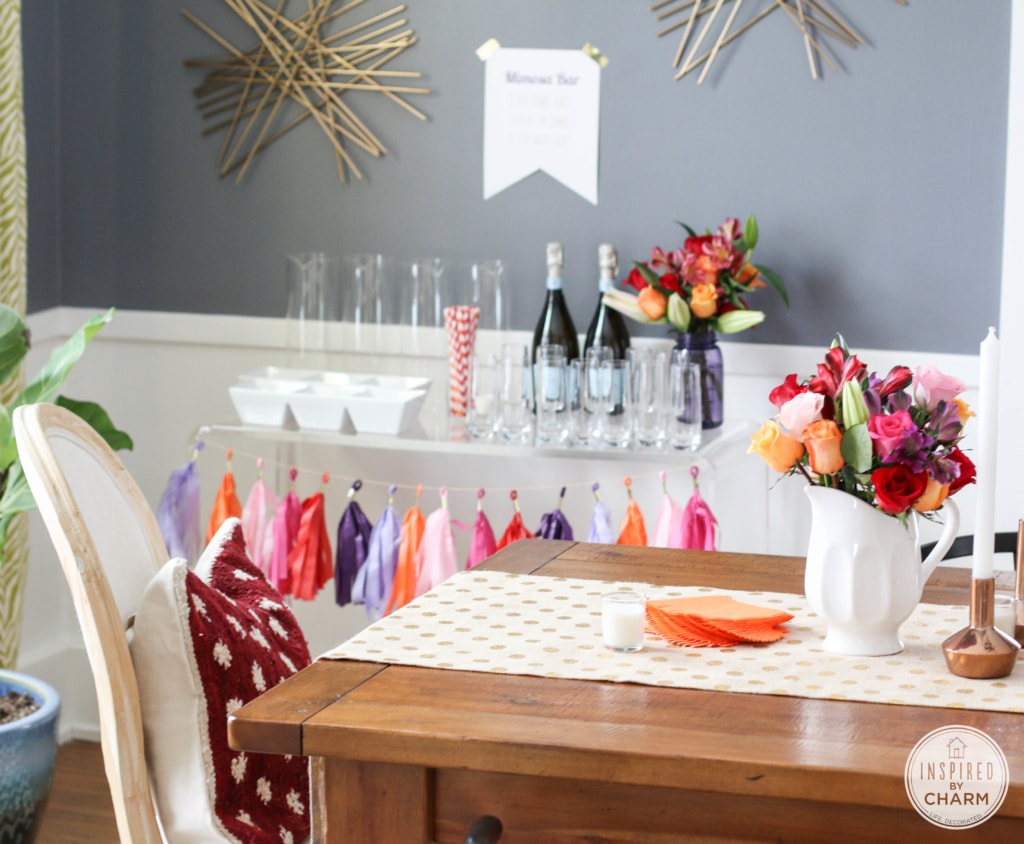
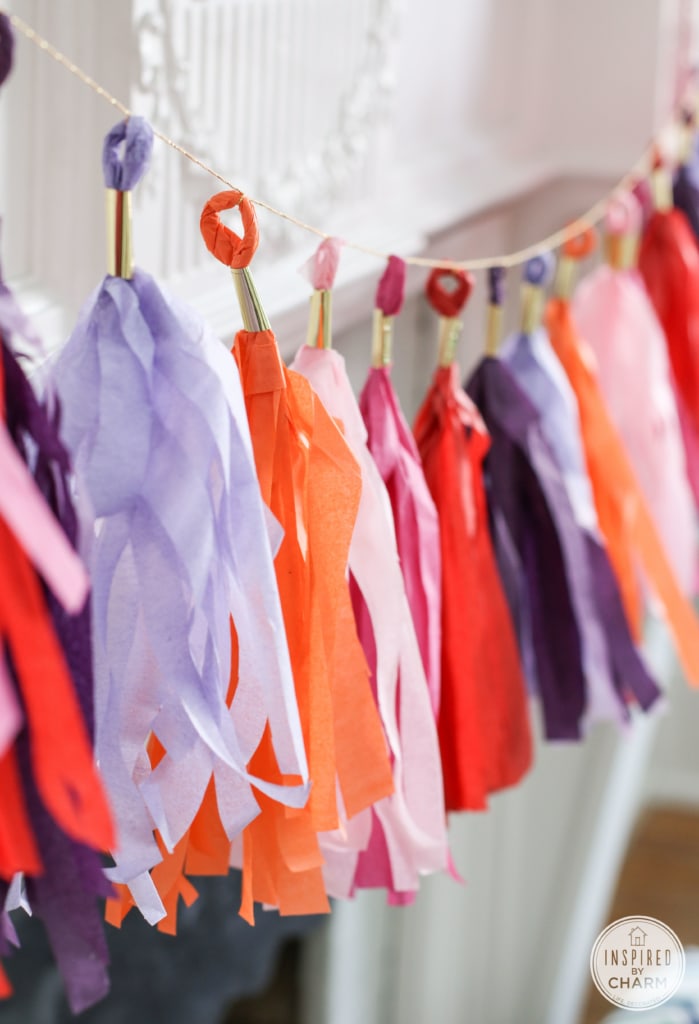
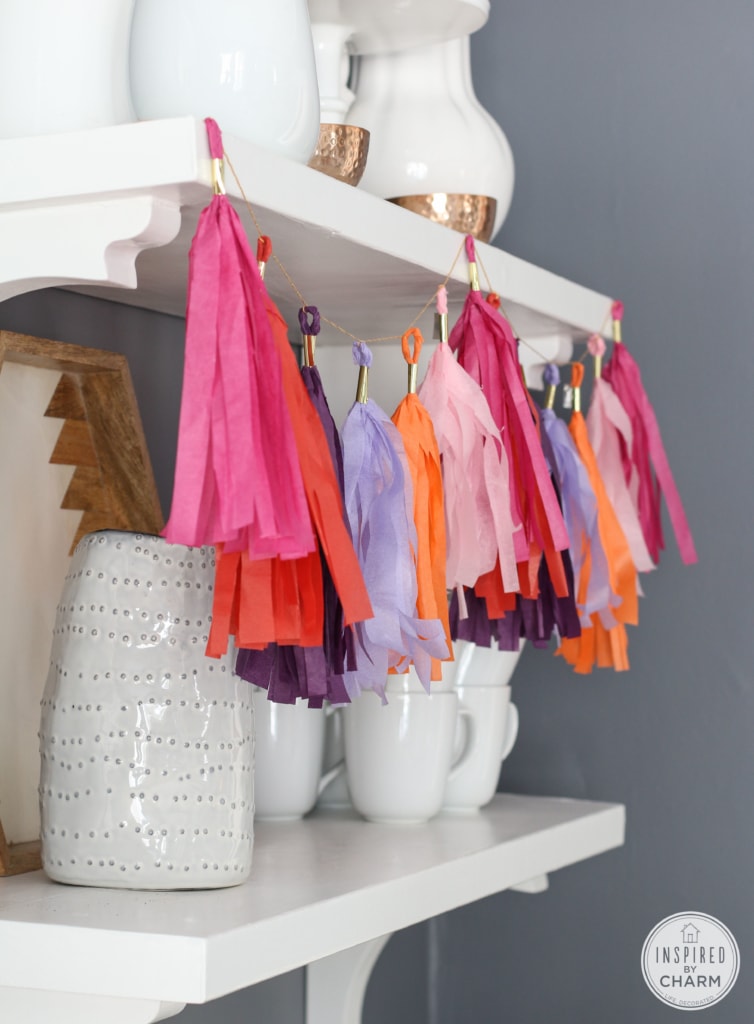
I ended up making four of these garlands and scattering them throughout the house to tie everything together. I even hung a mini one in the bathroom. Don’t forget to decorate the bathroom!
The base of these tassels is tissue paper, so you can do any combination of colors to match your event. I purchased most of my tissue paper on Amazon to get the colors I wanted. Be sure to get quality tissue paper. It will make the process much easier. You can also change up your string (I chose a string with a metallic thread from Jo-Ann Fabrics.) and your tape. This shiny gold tape is from Staples, but any sort of decorative washi-style tape would do the trick.
Also, be aware that there is a certain famous craftsy woman who sells a “fringe-cutter.” It’s kind of like a paper cutter, but it’s supposed to create fringe in tissue paper. I’ll save you some money. It doesn’t work. Stick with scissors.
Okay. Now, let’s get crafting.
How to Make a DIY Tassel Garland:
You will need:
tissue paper
scissors
decorative tape
string or twine
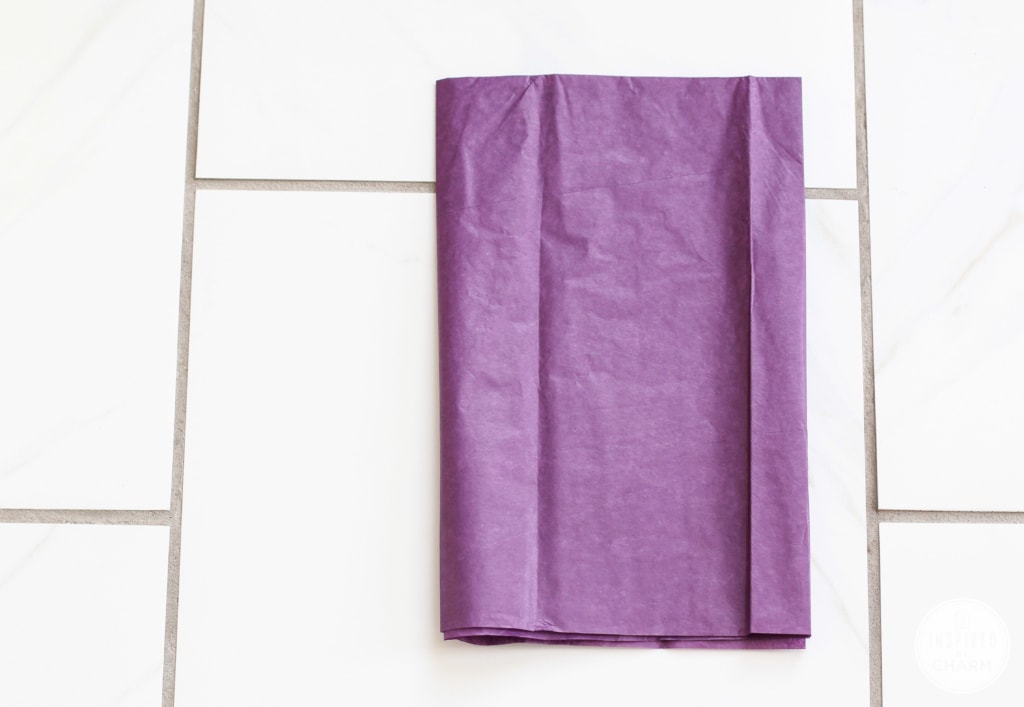
Begin with one piece of tissue paper. (One piece of tissue paper will make four tassels.)
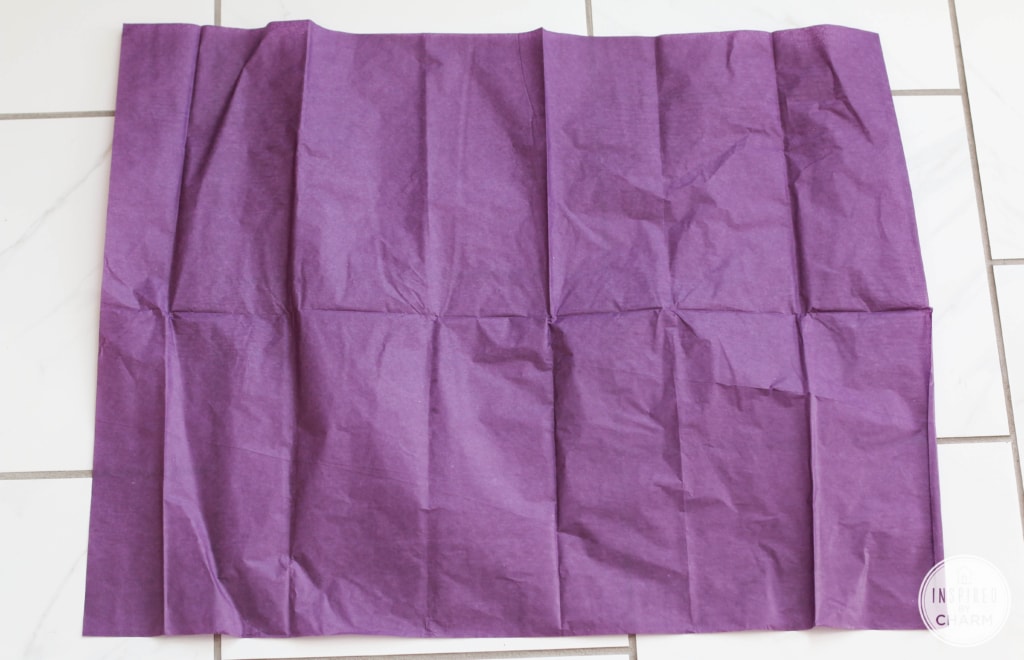
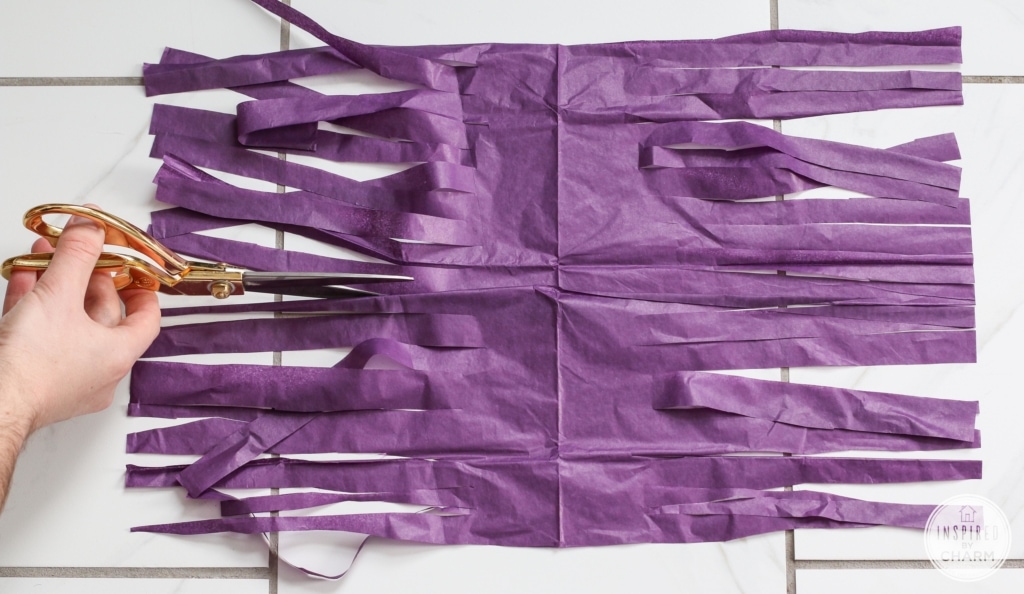
Fold it in half lengthwise.
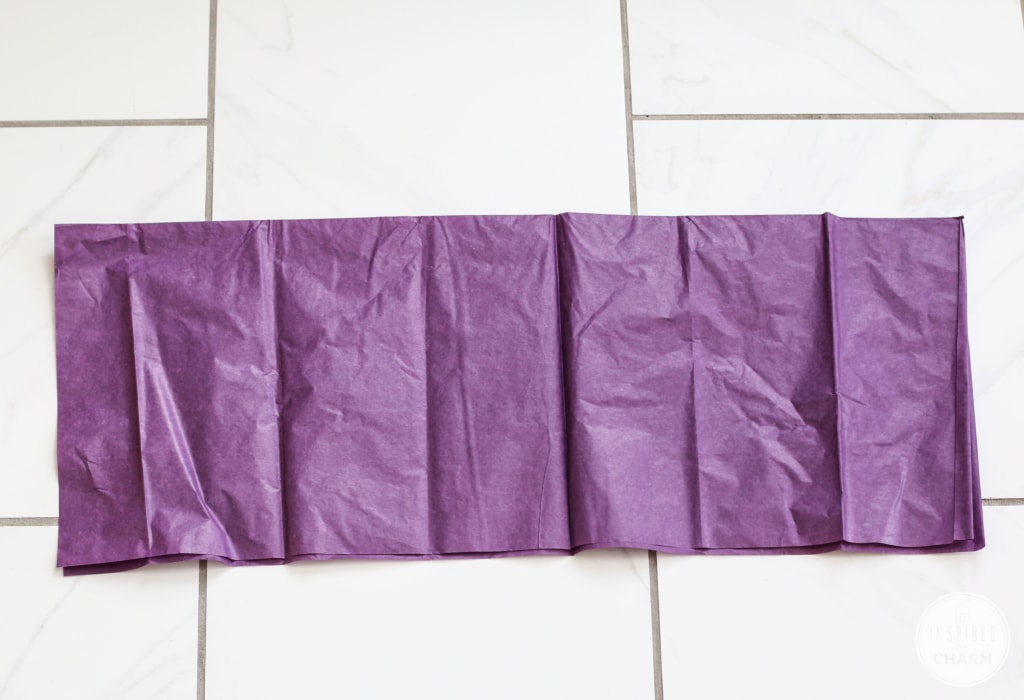
Then, fold in half widthwise.
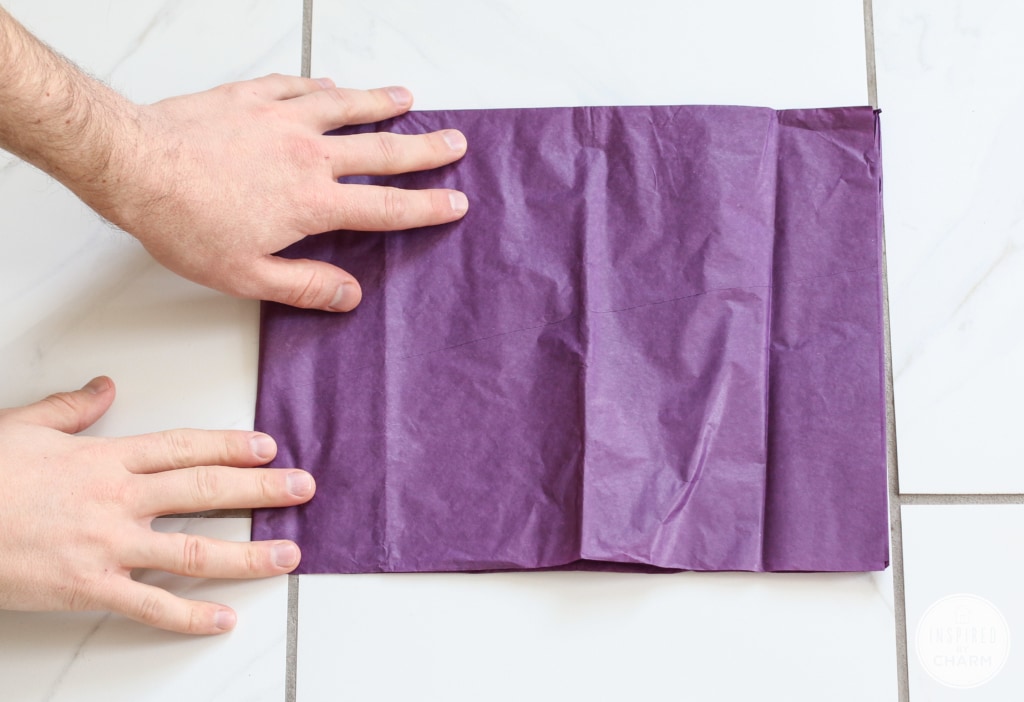
Fold again widthwise.
Next, cut your fringe starting from the bottom, unfolded side. Cut up to the top leaving about a two inch band that is uncut. Your strips can be as thin or as thick as you’d like.
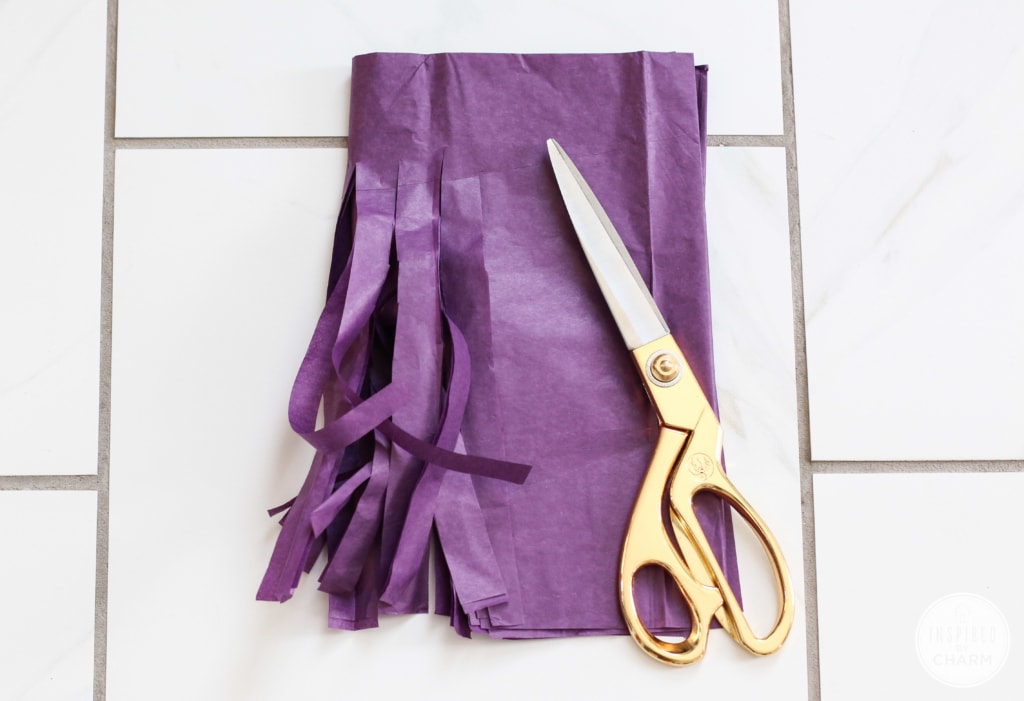
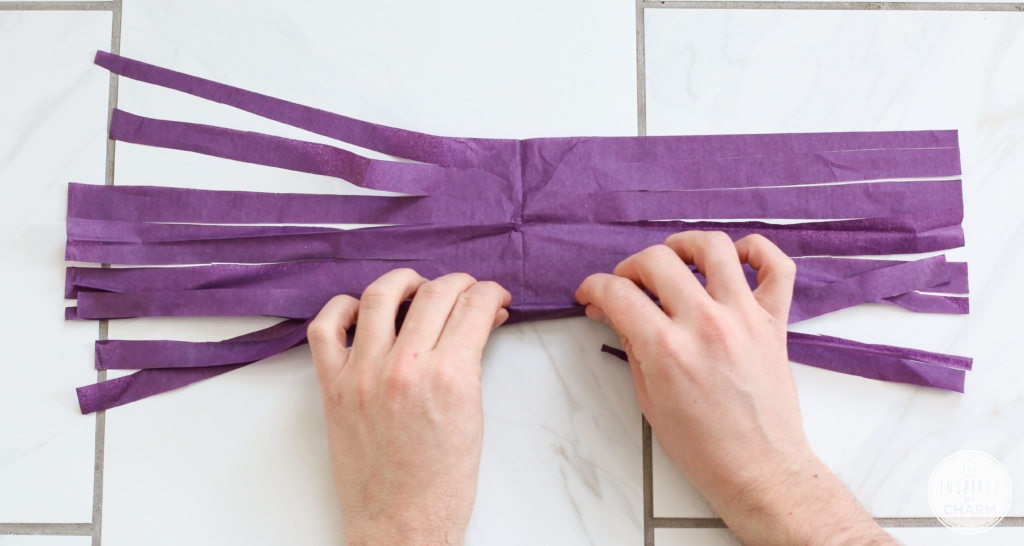
Unfold once and cut in half from the top of the fold to the end of the fringe.
💌 SAVE THIS POST / RECIPE!
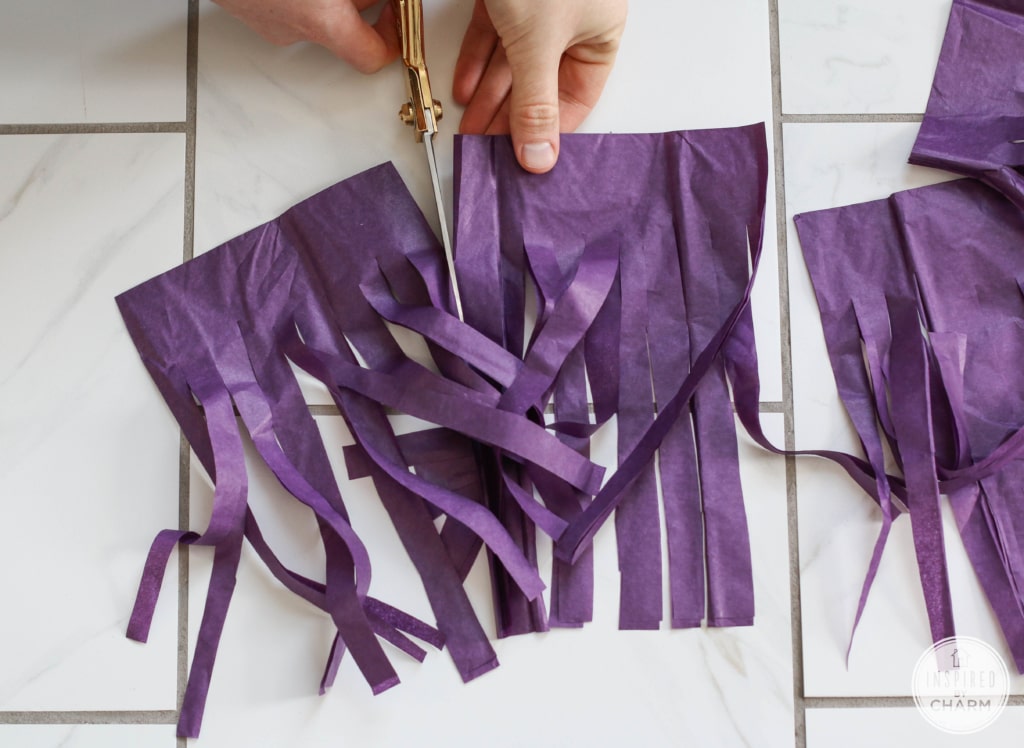
This will give you three pieces. Unfold them. Two will look like this, ready for the next step.
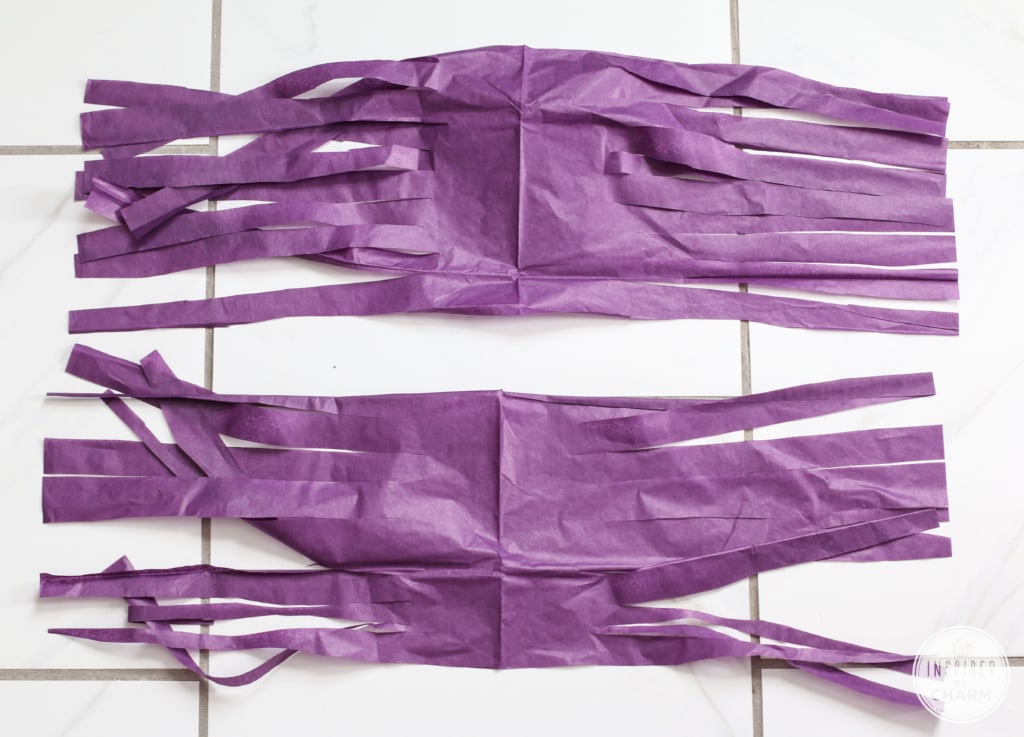
The other piece will be double the size of the two other pieces. Cut this in half lengthwise. You will now have four sections that are the same size.
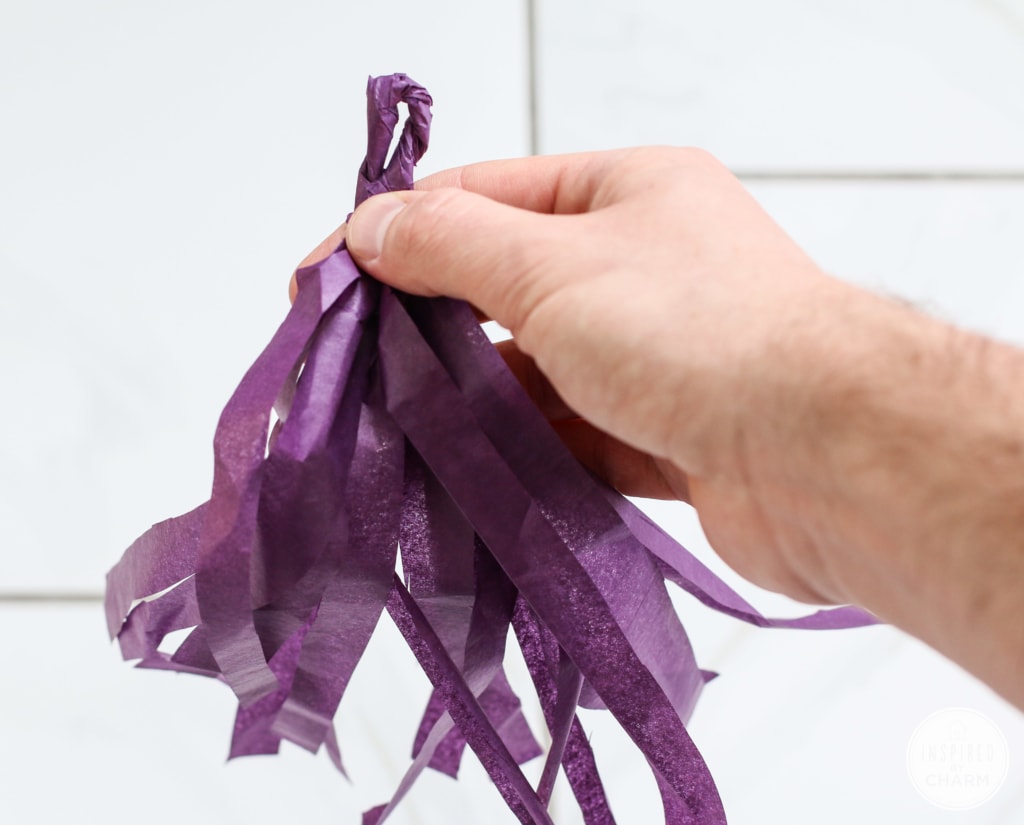
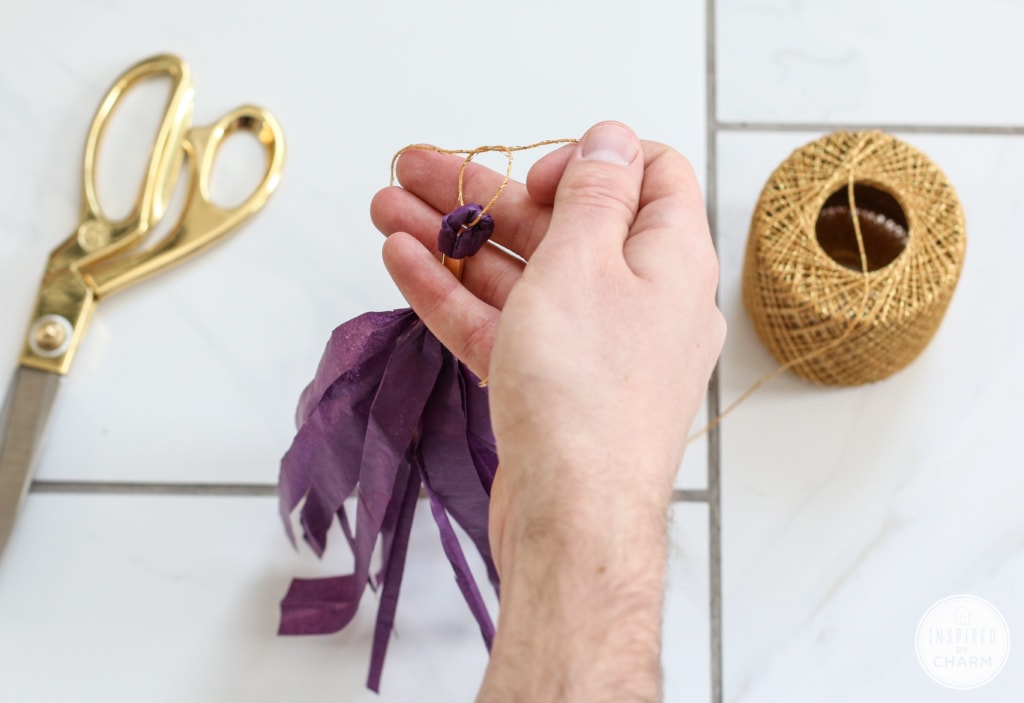
Now take one piece and start to roll the uncut center area lengthwise. As you roll, pay attention to the fringe so it doesn’t get tangled.
Once rolled, start to twist the center area until it’s tight. Then fold it in half twisting the side in opposite directions until it make a little loop at the top.

Next, cut a piece of tape (about 1.5 inches long) and wrap it around this section to secure.
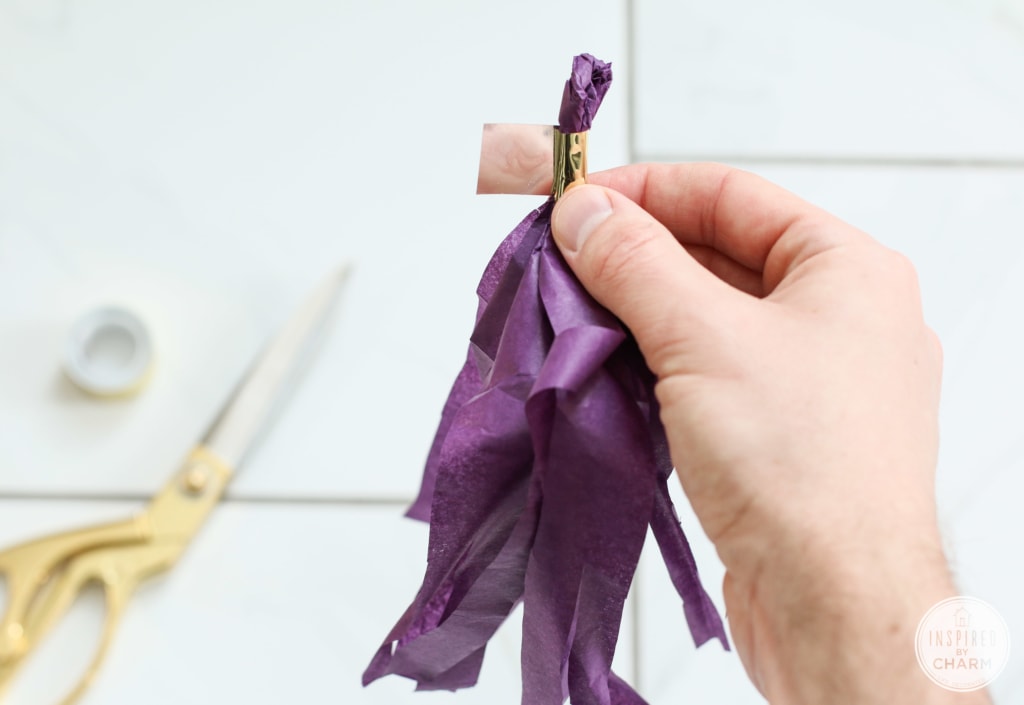
Continue making tassels until you have as many as you will need.
You’re then ready to string them up. Cut the desired length of string. Add one tassel at a time and make a simple knot to attach.
Continue adding tassels and knotting them in place. The distance between each tassel is up to you. I found that 3 inches worked well for the number of tassels I had.

After all of your tassels are attached to the string, you’re ready to hang up the garland!
DIY Tassel Garland
The process is a bit tedious, so give yourself plenty of time. However, once you get the hang of them, they come together easily.
Looking for more party decor ideas? Check out these:
- Tropical Party (Party in Paradise)
- DIY Football Party Ideas
- 60th Birthday Party Ideas
- Cheese Tasting Party
- Easy Dinner Party Ideas
I hope you found this DIY Tassel Garland tutorial helpful. Happy entertaining!
What kind of tape did you use? I’ve tried multiple different gold washi tape variations and they don’t adhere? Very curious to hear what worked for you.
Thanks!
I love this DIY Tassel Garland craft , this one is amazing and unique . Thanks for sharing this one with us , will love to share with others too.
Thanks for sharing this DIY Tassel Garland , Will definitely gonna try this one .
love this “DIY TASSEL GARLAND”, these kind of decoration seems so beautiful, love to make these amazing decorations.
love this decorating stuff, this one seems so unique and beautiful at same , thanks for sharing this one.
Love these “DIY TASSEL GARLAND”, these are amazing decoration, will love to make these. This type of decoration used in our Indian Pahari Culture in Weeding Ceremony.
Thank you! I\m attempting to decorate for a graduation with social distancing in mind, Spring 2020. I’m thinking of trying this with plastic table cloths so I can fancy up our chain link fence and patio area. This way, it shouldn’t matter if it rains after the decorations are put in place.
I live it!! So festive!!!