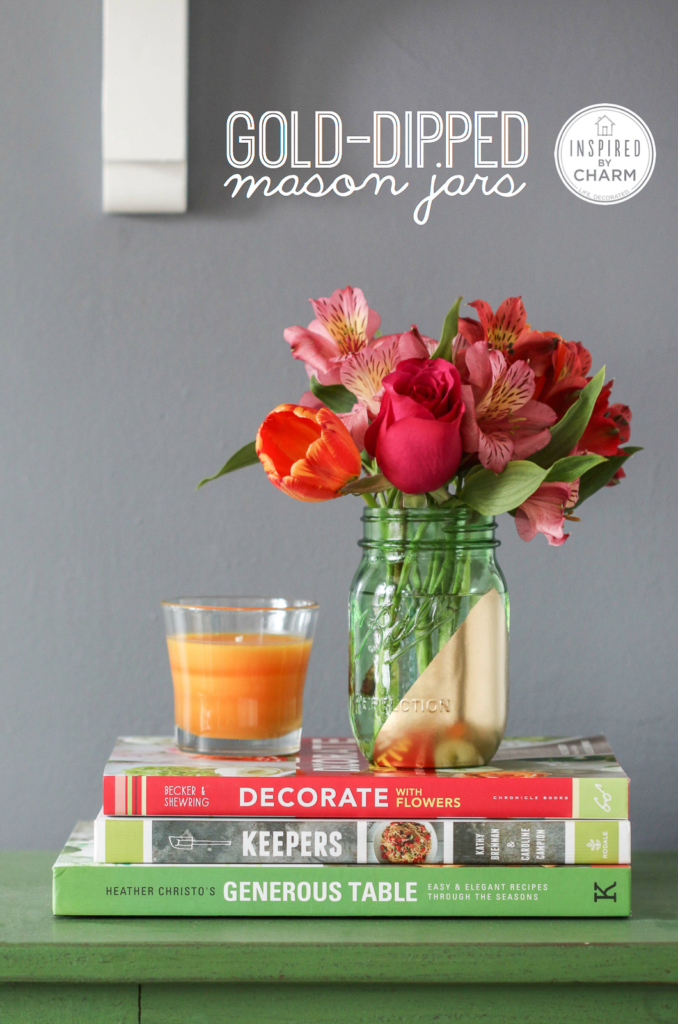
Gold-Dipped Mason Jars
This Post May Contain Affiliate Links. Please Read Our Disclosure PolicyHey there, friends! Today I’m back with another quick and easy, but totally fabulous DIY. For the past couple weeks, my dining room table has become a bit of a catchall. (I think this happens to the best of us at times.) The table was definitely in need of a little refresh. And with so much color blooming outside, I was craving some serious color inside.
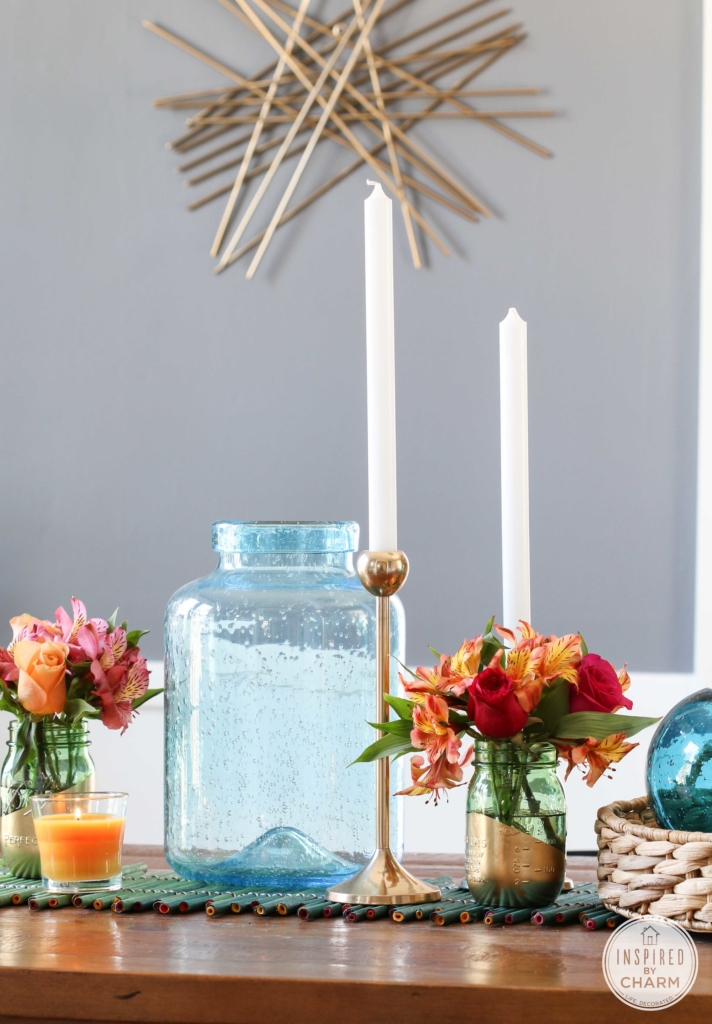

Last week I stumbled across these new green mason jars. Now I know mason jars are a little overplayed these days, but I could not resist having some fun with these green ones. There were just too perfect.
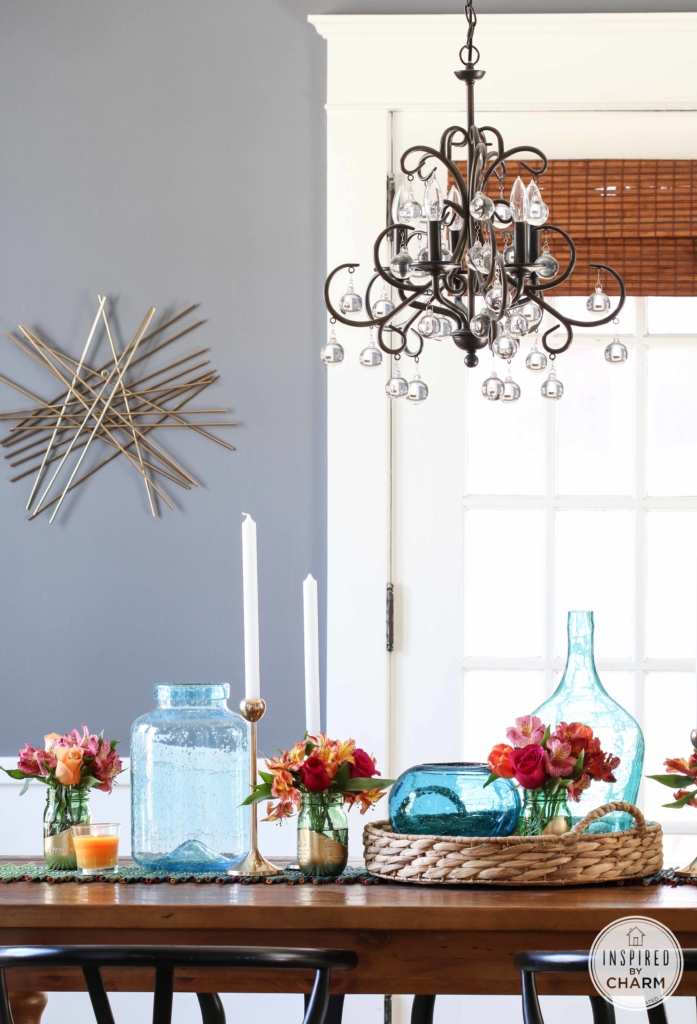
I decided to jazz them up a bit with gold spray paint and then fill them with flowers and scatter them around my table. I am loving the look since it’s no secret that gold and I are BFFs. However, I do want you to know that I tryied to mix it up for all of you. I originally wanted to do the jars in copper, but after finding no copper spray paint at multiple stores, I opted for gold. Maybe I’ll have better luck next time.
Gold-Dipped Mason Jars
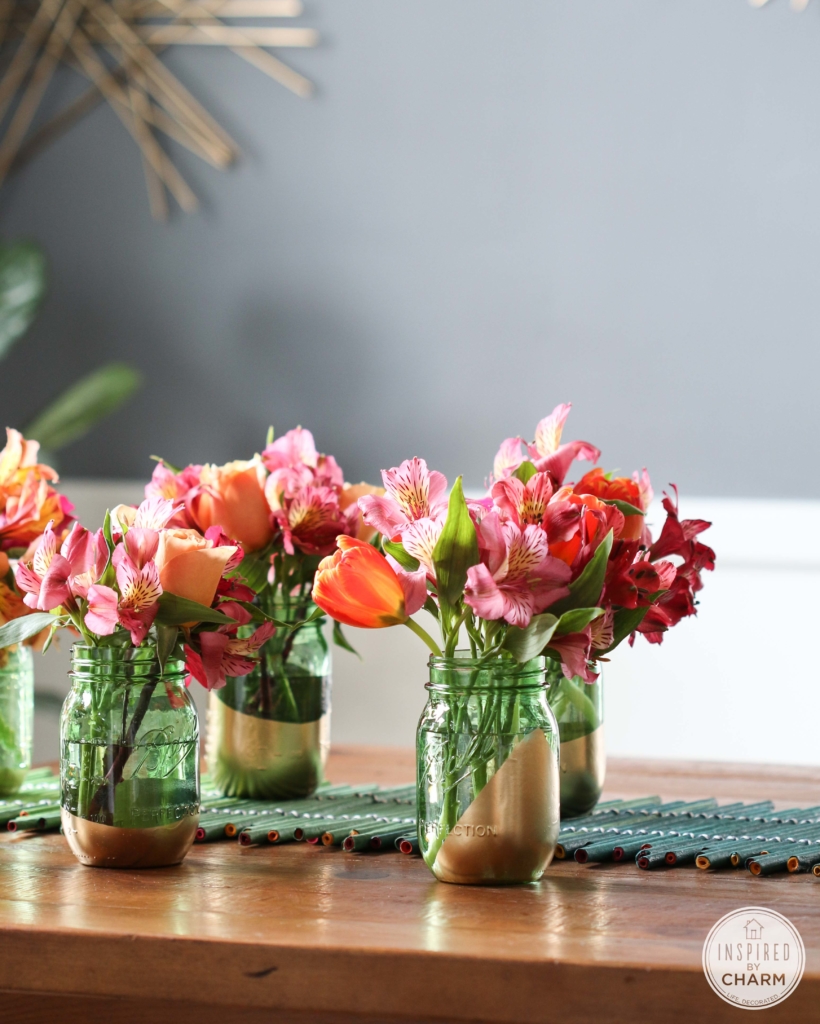
Ok, for this little project, you will need: mason jars, blue painters tape, gold (or any color you’d like) spray paint, and some flowers.
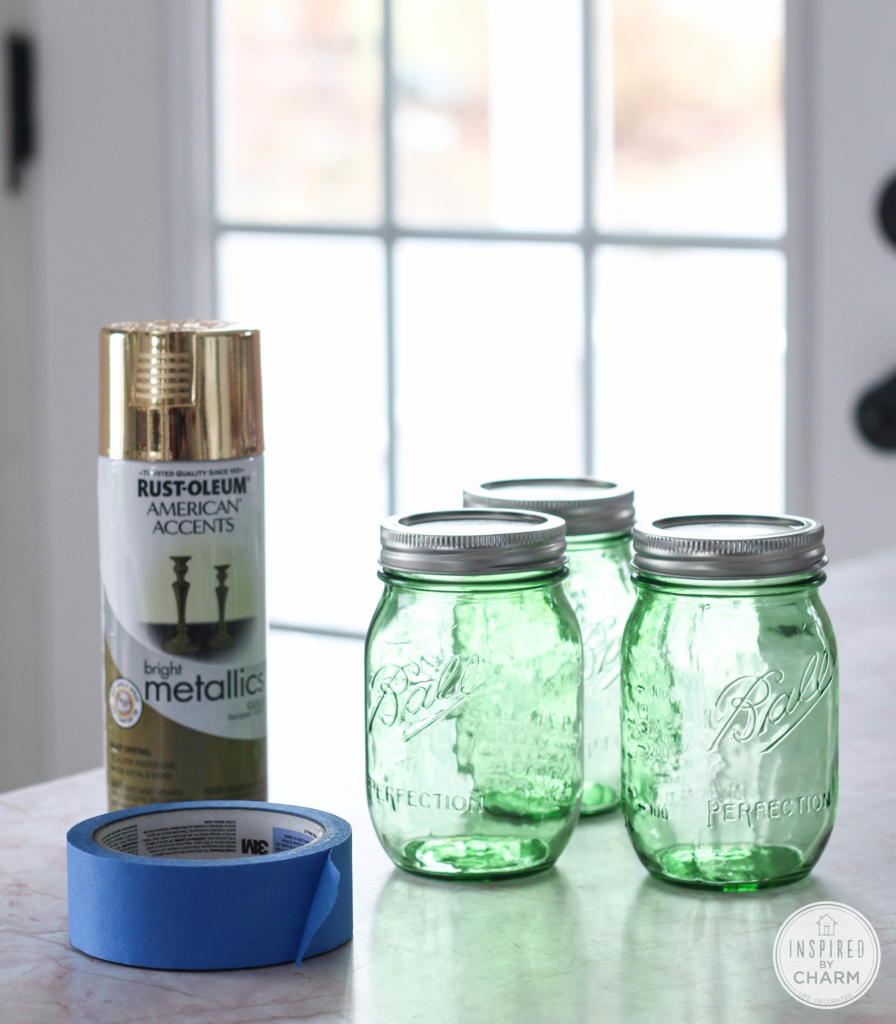
Begin by taping off the mason jars. I wanted to give my jars a paint-dipped look so I went with mostly sharp diagonal lines. Be sure to press on your tape firmly to prevent drips.
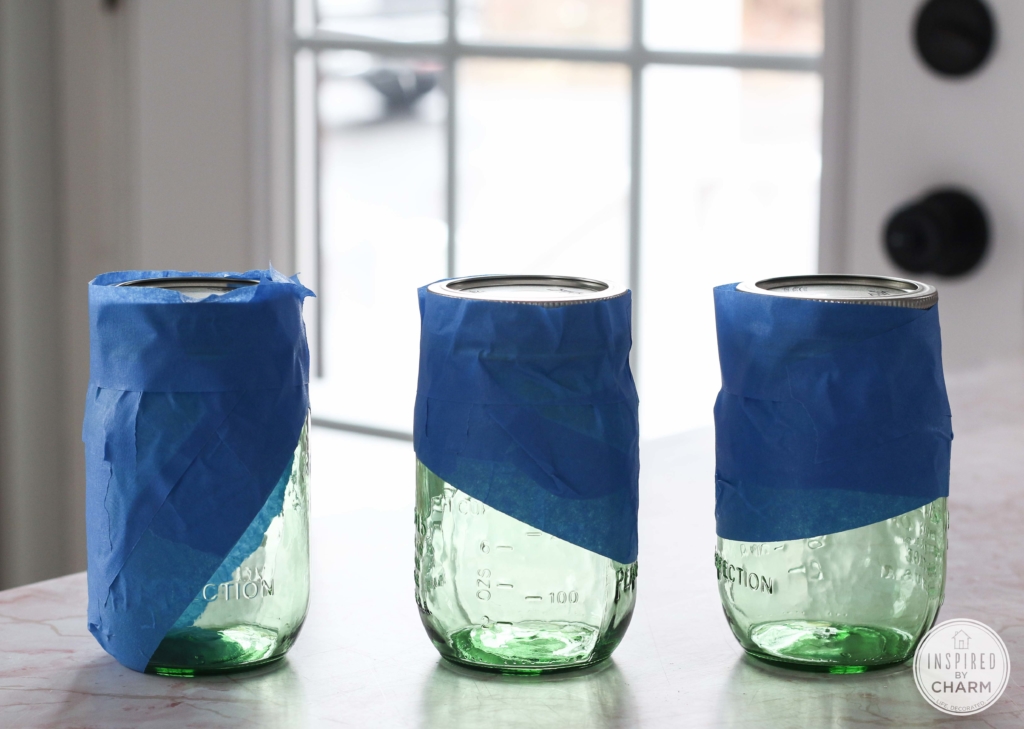
Cover all the areas of the jar that you do not want painted.
Then, give them a quick coat of spray paint. I recommend three very light coats, instead of one heavy coat.
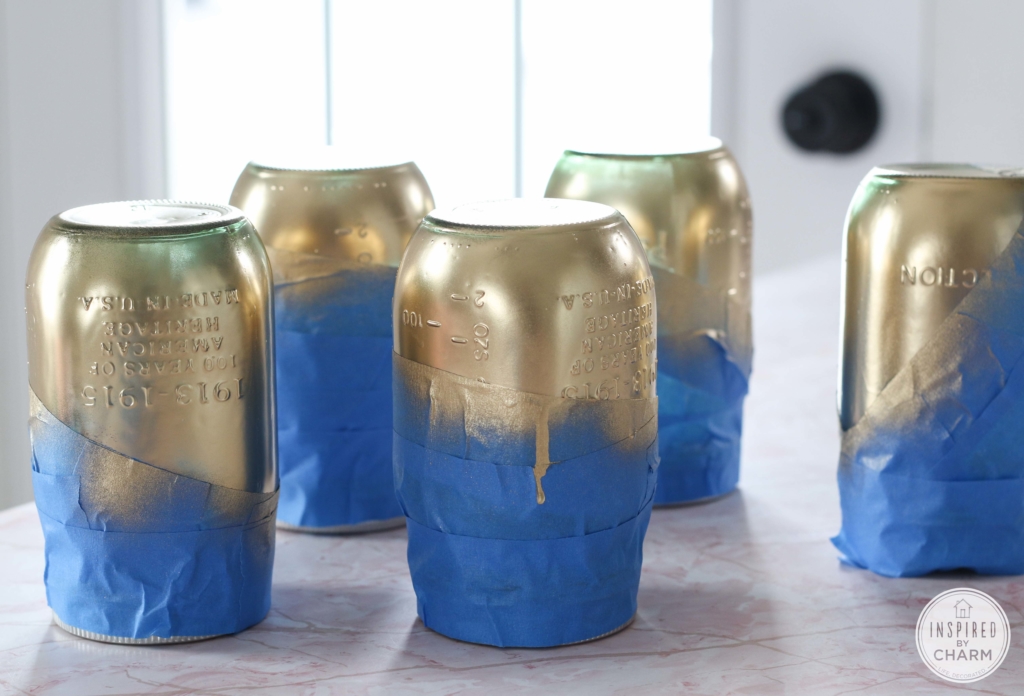
After the paint is dry, simply remove the tape.
It is likely that some paint will have leaked under the tape. Just used a sharp object to scrap it off. It should come off easily.
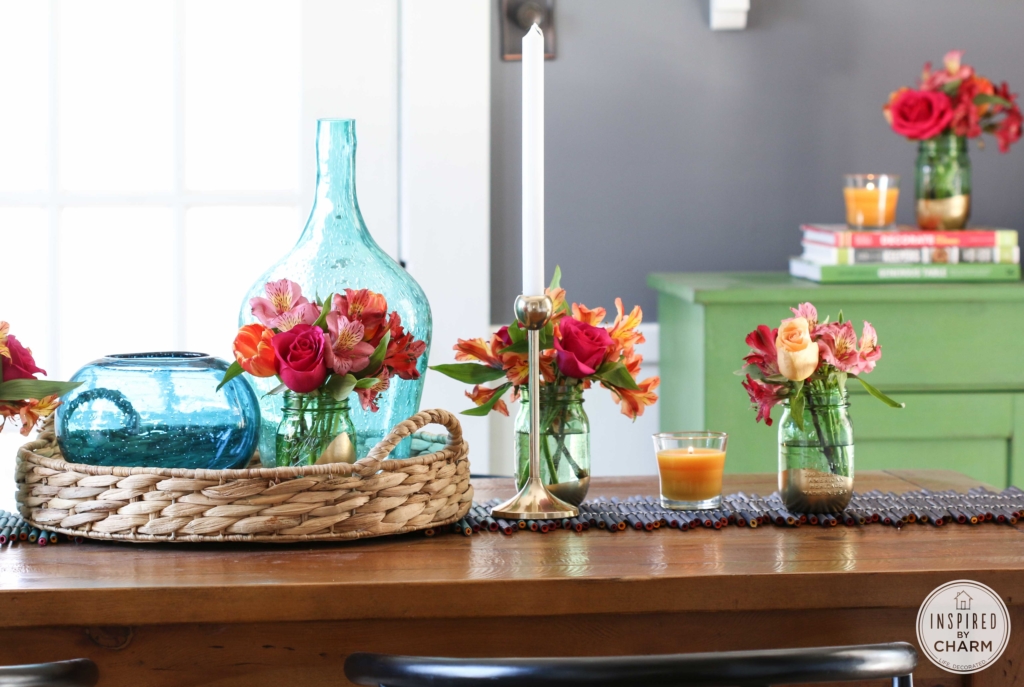
Finally, add water and tuck in flowers. Your Gold-Dipped Mason Jars are complete!
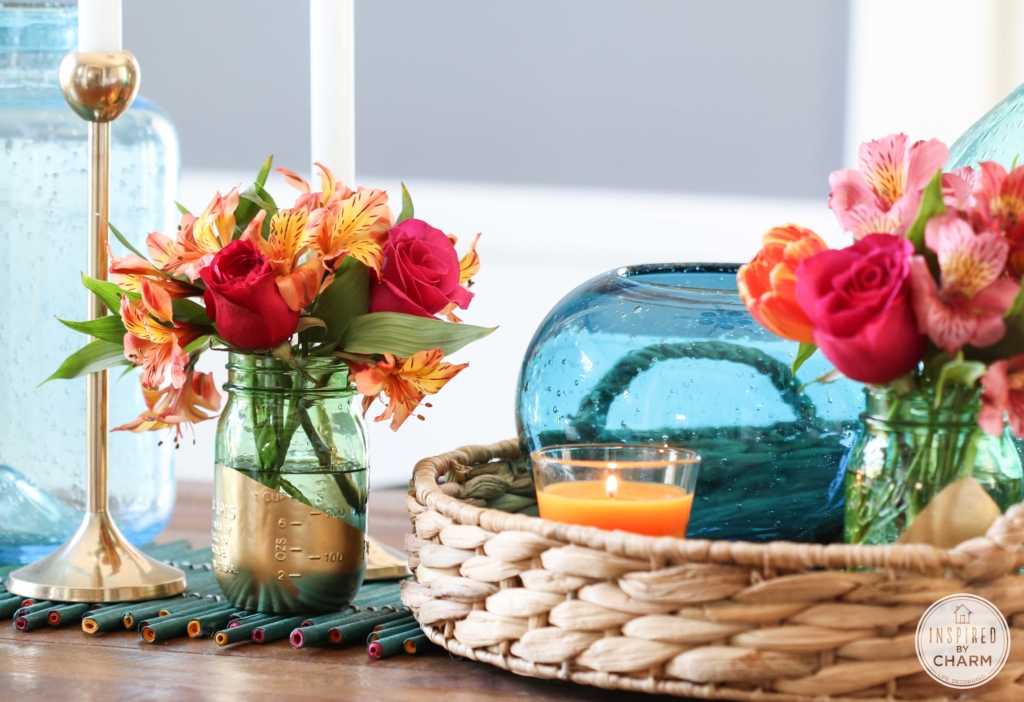
A round basket added texture and big blue vases provided even more sparkle and another burst of bright color. Pretty snazzy, right?
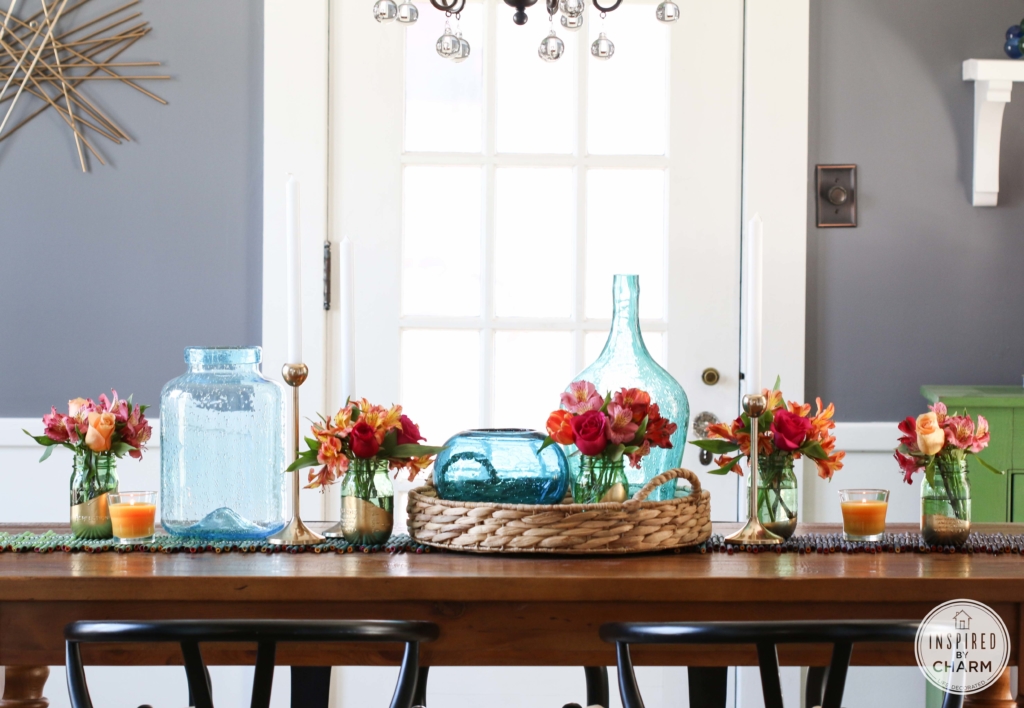
All in all, I’m loving the new look and this little DIY. Hopefully, it will encourage me to keep my table clutter free. What part of your space would you like to freshen up to create the #bestfeelings in the world? Share you thoughts with me and Glade on Facebook and Twitter or leave a comment below.
I’ll meet you back here tomorrow.

What a fabulous project Michael!!! I’ve got a ton of mason jars just waiting for a makeover like this! I am SO excited to share this with my readers in my Friday Finds this week @ http://www.makingitinthemountains.com! Wishing you a lovely weekend!!! xo
Michael: where did you score the fab table runner?
It’s from CB2: http://www.cb2.com/inside-story-runner/s105089
Hope that helps! 🙂
xo Michael
A bare or cluttered dining room table looks as bad as an unmade bed. What an eye catcher you have created with your dining table decor! I’m off to purchase some glade candles — an easy fix until I have the time to try to create these adorable jars. New reader and I am so enjoying reading your posts and viewing your creative ideas along with lots of hard work that results in a beautiful home. Very inspiring!
You’re so sweet Sheila! Thanks so much!
xo Michael
I can’t stand it! Every time I see that chandelier I’m simply mesmerized. It’s just so perfect for your space. Your table looks wonderful. Great DIY, Michael.
Hahaha! It’s pretty perfect. Thanks Maralyn!
xo Michael
Simple and absolutely stunning! Aren’t those new green jars just gorgeous? I love mixing them with the blue ones from last year.
I love these!! I’m looking for cute ways to store small things in a nursery, and this is perfect!
Your table looks gorgeous, and I love the jars! Our kitchen table is definitely a catch-all, too, but I’m getting better about not dropping everything there (and convincing my husband to do the same!). Love this craft!
Where did you get your chandelier? I love it!
Thank you! It’s from Pottery Barn.
xo Michael
Those jars look so pretty for Spring! I really like them. I am still looking for a few brass candlesticks to mix in with my mason jars!