DIY Colorful Wood Christmas Tree Decorations
This Post May Contain Affiliate Links. Please Read Our Disclosure PolicyWelcome back to Day 11 of the 12 Days of Christmas. It’s hard to believe how quickly the days have gone by. (Hope you’re having as much fun as I am.) Today, we are making some Colorful Wood Christmas Tree Decorations
Anyway, I’m back with the DIY project I told you about yesterday. You may recall that I was attempting to cut wood and was having some problems. I would love to tell you I rectified the situation, but I can’t. However, I did manage to finish the project without any major accidents with the saw. Check out these DIY Colorful Wood Christmas Tree Decorations.

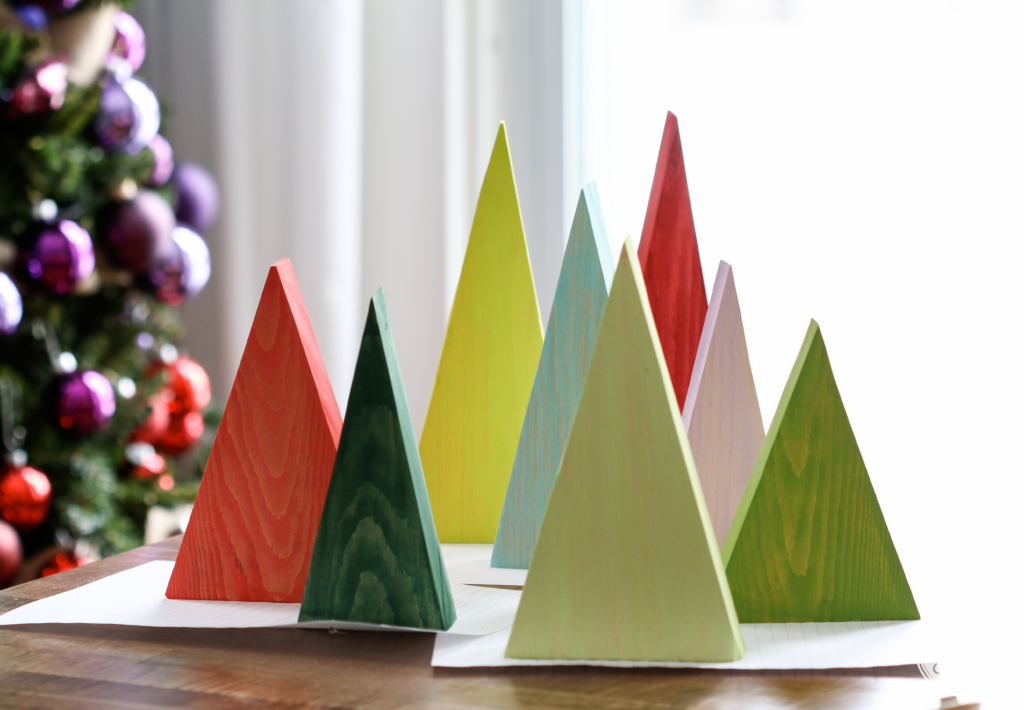
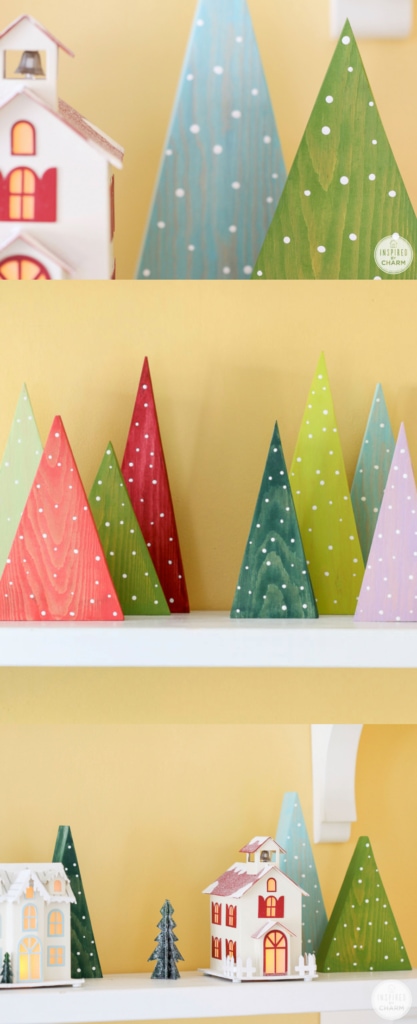
Or, as I like to call them, my colorful little forest.


Totally cute, right? This collection was inspired by a gift I received last week from my Dad’s wife. She gave me a similar tree with a star on top. I loved it so much I decided to create an entire forest.

DIY Colorful Wood Christmas Tree Decorations
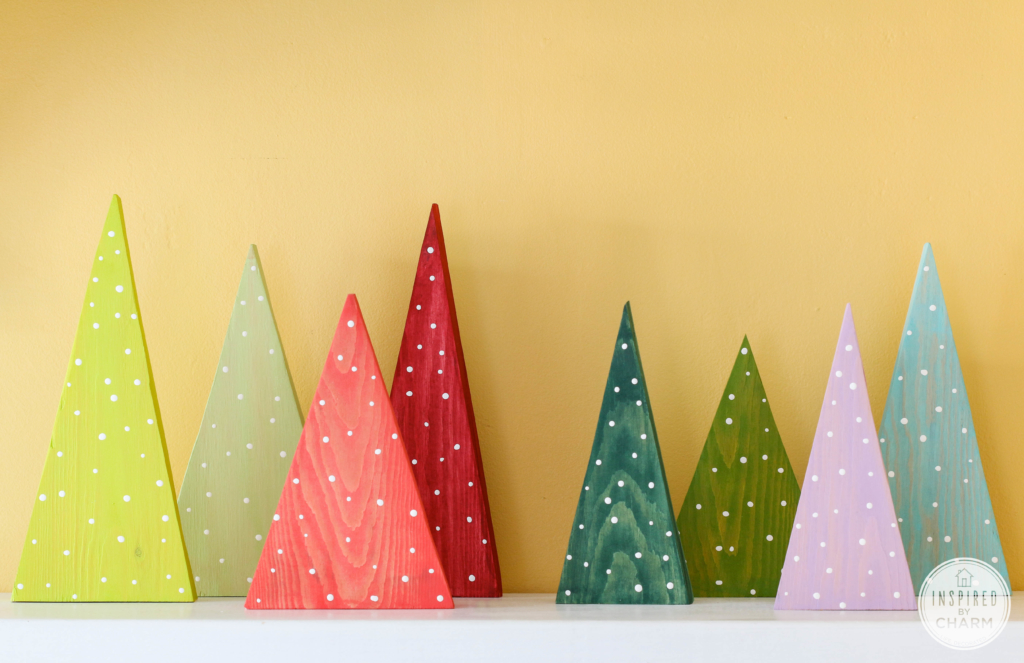
To begin, I started with a 2×6″ board. I measured and cut* the board to create eight triangles (a.k.a. trees).
Side note: I attempted to do this with a miter saw. That was probably not the best choice. It was difficult cutting the diagonal lines because I couldn’t hold on to the trees; almost took a board to the face, etc. It would probably be better to clamp the board onto a sturdy table and use either a jigsaw or circular saw to cut out the triangles. Being a bit of a power tool noob, I didn’t figure this out until after I struggled for hours. If I do make these again, I will update this post with more detailed instructions. Alternatively, you could have someone in your life who is skilled with woodworking do this step for you.

Once your triangles are cut, give them a good sanding.
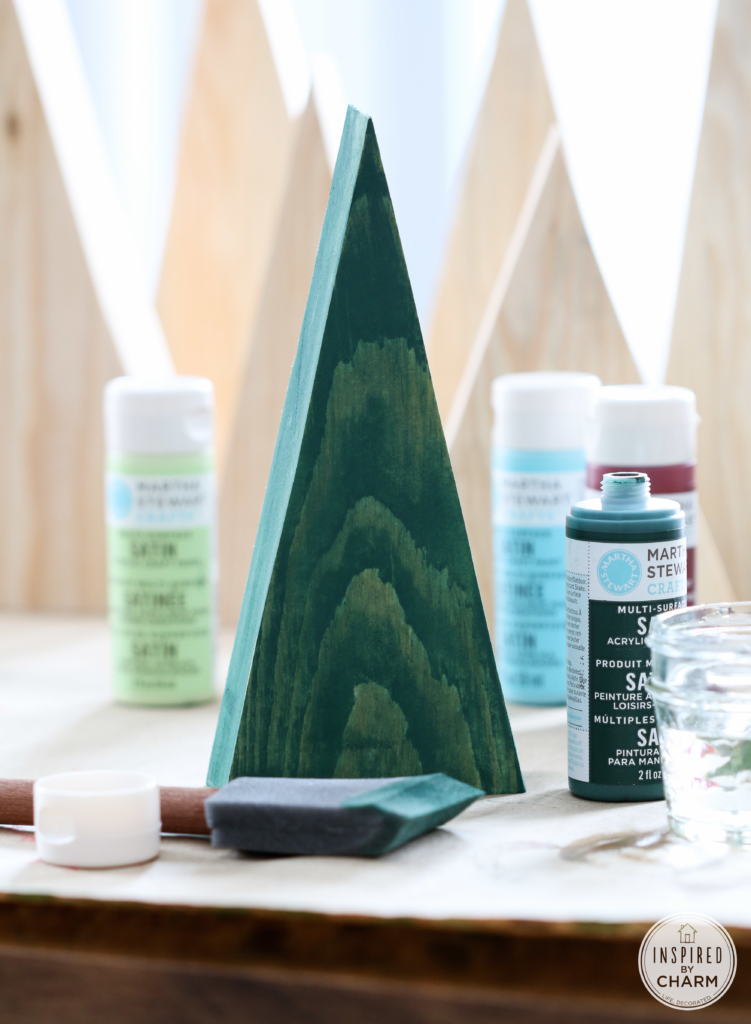
Next comes the paint. I used acrylic craft paint in a satin finish. I cut the paint with a little water so that it would be less opaque and allow the wood grain to show through.
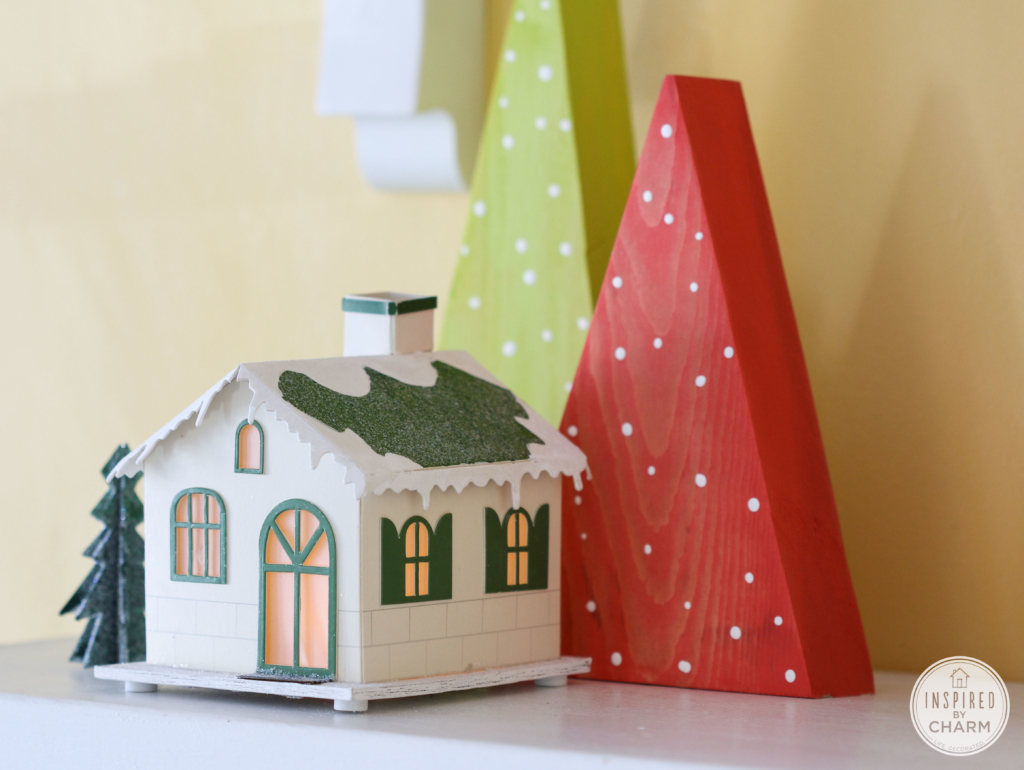
Once all of the trees were painted and dry. I added some snow (or lights, depending on how you see it).
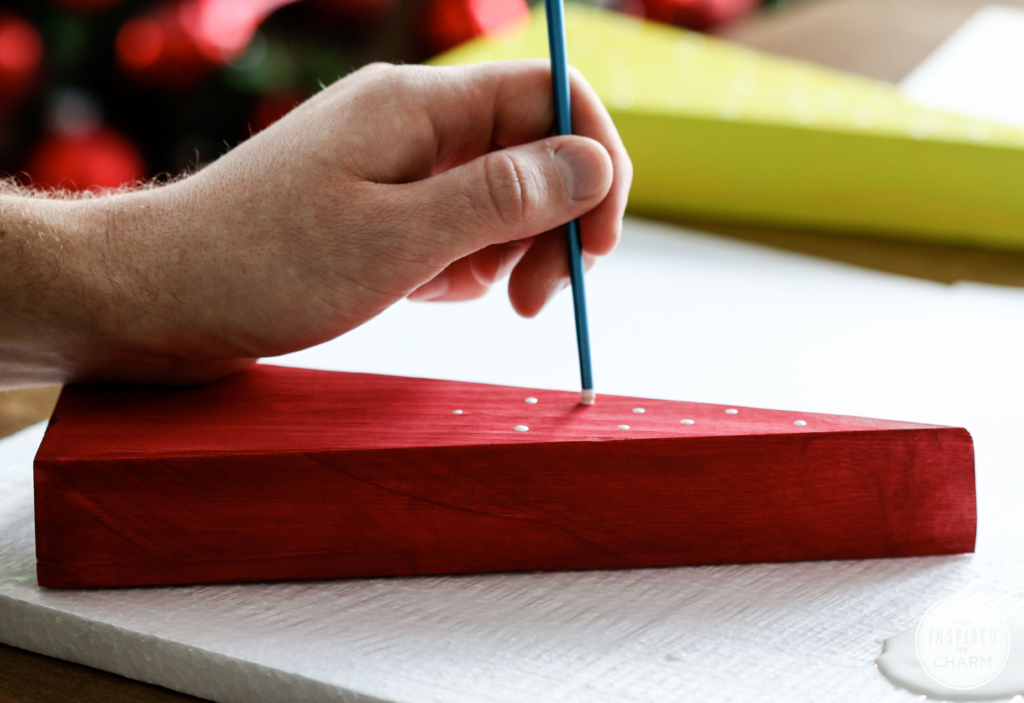
Using the back end of a paint brush, I carefully added white dots to all of the trees.
And with that, my colorful colorful wood Christmas tree decorations were complete.
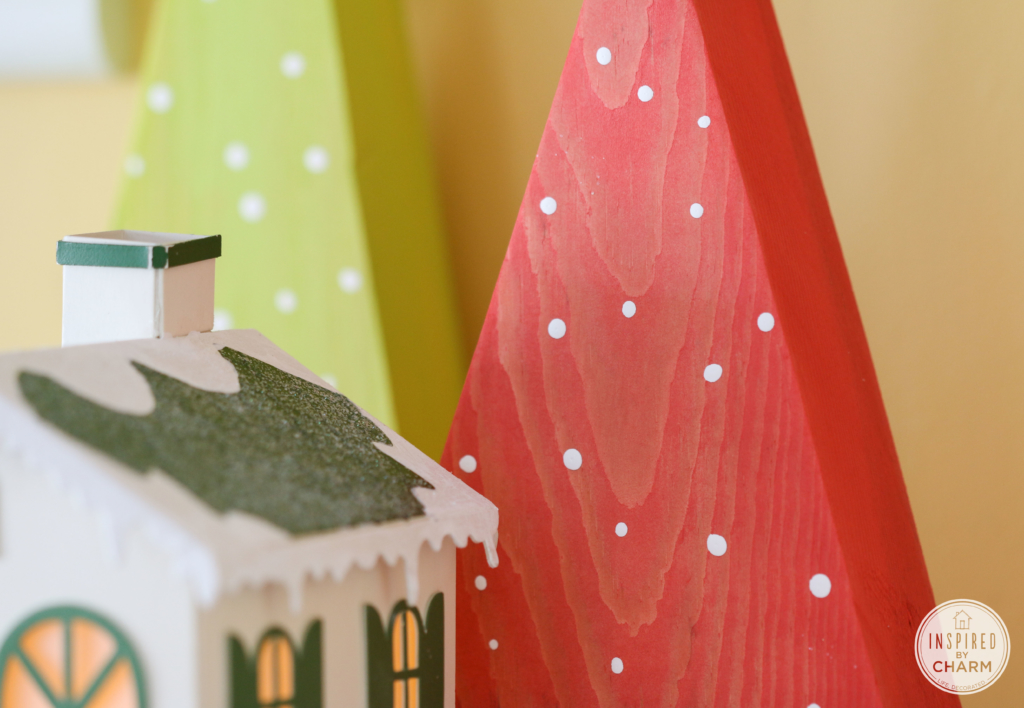

I think the final look is modern, yet still festive and whimsical. I’m not quite sure where these are going to end up in my house, but for now they are on the shelves in my dining room.

As I mentioned before, I’m hoping to wrap up my holiday decorating this week so I’m looking for a permanent home for these colorful cuties. On second thought, they just might stay right here.
Even though I struggled a little bit with these guys, they turned out as I had envisioned! I’m loving the color combination, too.
Frohe Weihnachten! (That’s Merry Christmas in German.)
I made these last year and EVERYbody loved them. I’m planning on making more this year, I will paint stripes on them. Next year, maybe a plaid design.
I’ve had these on my “do someday” list for ages. Now I have a new house, in a new state, and I’m decorating in a more casual country style. I’m going to ask one of the men at church to cut these for me, and then it’s painting time. They’ll look great on my fireplace mantel with other country type items. So excited! 🙂 Thanks for sharing. Love your site.
I can see I am a late comer! Just found you through Funky Junk. LOVE THES TREES!!!! (Sher shared similar trees and she gave you credit!) I am going to make a whole collection for next year. Just subscribed too! Happy to meet you!
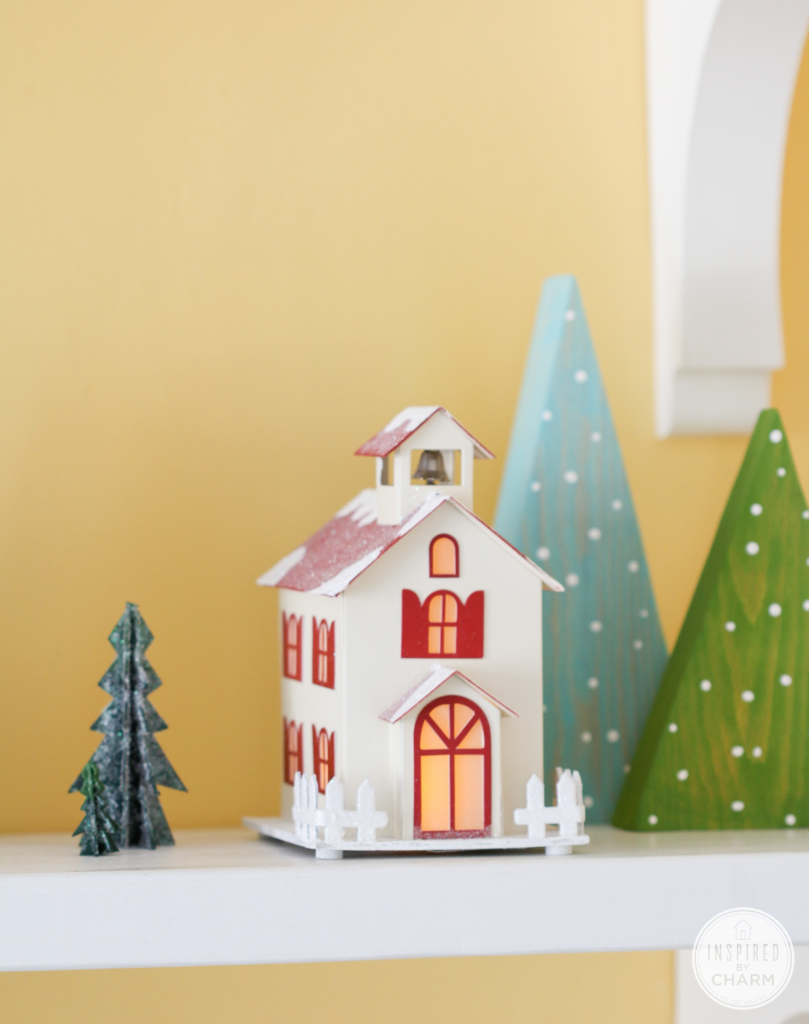
Love! And adore your little houses. May I ask where they’re from?
I wondered the same thing. They’re very cute. Too bad he didn’t answer!
I saw your tweet to JoAnn about these the other day (they stole your idea!) and I figured I would give your blog a visit, it has been a while shame on me, to see this craft. My kids would love it. I am going to have my handy husband cut the wood so our girls and I can paint them. Such a cute Idea. I love different Christmas decorations. I am glad I saw your tweet. I also hope JoAnns rectifies the situation. So not cool of them to steal from you!
These are adorable! I made within a week after seeing this post which is super fast for me! Luckily I had my husband do all the cutting and sanding. Love these!
Love these trees! I’m making some with a group next week! I know this was almost 2 years ago when you first posted this, but do you remember what type of wood you used (the grain is awesome), and also, do you remember how large the bases of the triangles were? Or maybe just the biggest and/or the smallest? I would appreciate any and all help;) they are beautiful trees!
The wood was just basic pine lumber. Nothing fancy. These trees are still packed away, but I want to say the base sizes ranged from 5 1/2 – 2 1/2 inches. I didn’t really measure. Just cut. Haha!
Hope that helps.
xo Michael
Michael, I am getting ready to cut these and I was wondering if you could please tell me how tall these are? I see the varying heights are very appealing. Particularly the 5 1/2 inch wide ones I couldn’t figure out how tall to cut them. Thank you so much! I just love these! I will share my trees with you! I can’t wait!
I honestly didn’t measure them when I cut mine. They range in height from I’d say 4-9inches.
xo Michael
Your website is so addicting – I can’t wait to see what comes next! The polka dot trees are spectacular!
would the guys at Home Depot or Lowes be able to cut this shape
Michael, I just spotted these on Pinterest & followed the link to your site… my first time here. Love the modern trees. Wanted to leave a tip about cutting acute angles on a miter saw: you can easily build an acute-angle jig out of two short pieces of 2×4, and a square of hardboard (Masonite) or particle board as a base, and save your fingers. I used hard board for mine, & drilled a hole in it to hang from a hook on my pegboard. Just search “acute angle jig” for instructions.
wow. I love it! Pinning and sharing on facebook.. 🙂
I appreciate that! Thank you!
xo Michael
Wow. Totally beautiful. Thanks so much for sharing. I can see the kids and I totally getting into this and having the fruits of our labor on display for years to come. Thanks so much for the post!
I just discovered you thru a post on Mark Lipinski’s Fan Page….LOVE the trees!!!! It’s been eons since I’ve played with my paints….this really makes me want to dig out my brushes!!! Thanks for sharing!
I just discovered your site through Remodelaholic and the 12 Days of Christmas. I’ve come back here several times since then. You have such fun ideas, and I’m stealing this idea for the trees for next year. I already marked a weekend in October in my calendar for my husband to start cutting these little things. He laughed at me now, but he won’t be October 18. 🙂 So glad I found this site!
You’re one smart cookie! It’s always a good idea to plan ahead. I’m so glad you found me and happy to have you following along.
xo Michael
These are just darling! Lovely job 🙂
http://cafecraftea.blogspot.com/
LOVE it! I am pinning 🙂
Oh my- I love these sooo much! They would be perfect for the shelf behind my couch. I would love to link to your tutorial if you didn’t mind!
These are perfect! LOVE!! I can’t wait to make some… or have the hub do it! Ha